Paper Bag Turkey Craft (With Advanced and Easy Options)

Thanksgiving is sneaking up on us! If you’re looking for a cute and simple craft to do with the kids, this Paper Bag Turkey Craft is for you! Sometimes crafts involve buying a ton of supplies, and just collecting everything you need to make them can be daunting. This craft, however, is made some basic staples that you probably already have at home. The instructions for this cute Turkey Paper Bag Craft actually include two ways to make it—an advanced option (with instructions on paper folding) and an easy one (with pre-made paper bags)!

What You Need:
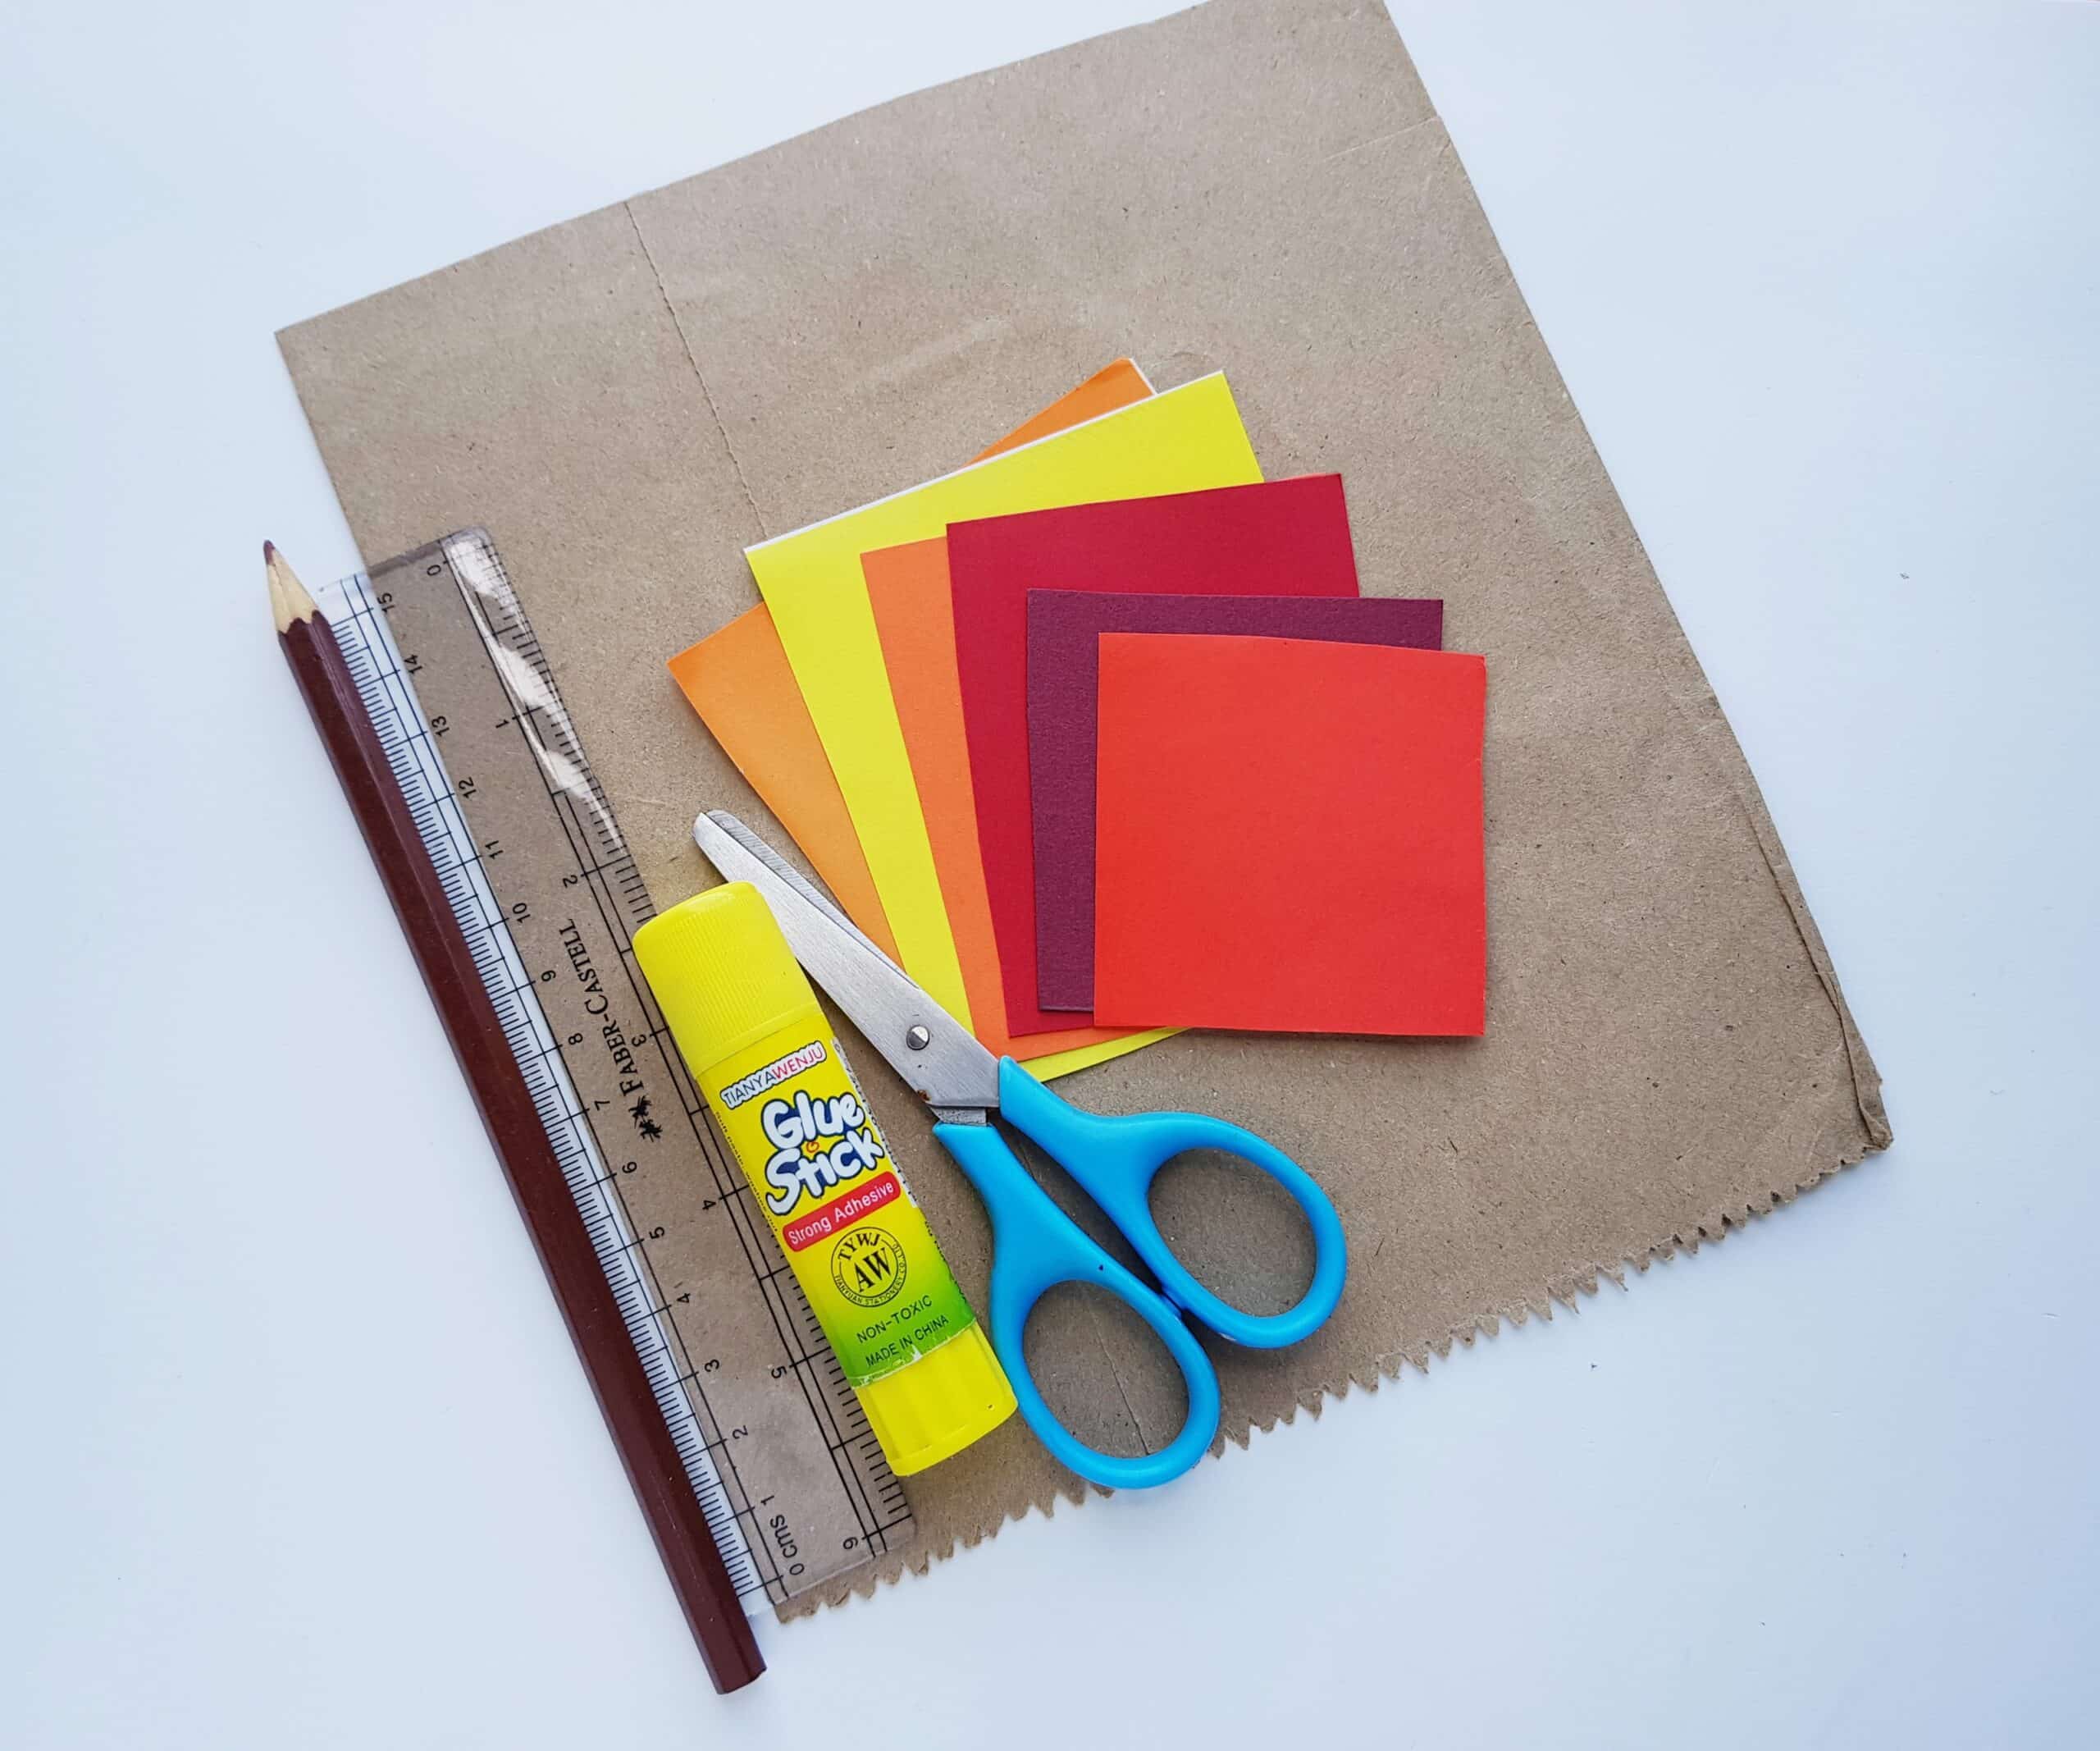
- Brown paper bags or brown craft paper
- Colored craft papers
- Pencil
- Scissors
- Craft glue
- Optional: White gel pen (for eyes) and regular pen
How to Do it
Advanced Option (With paper folding)
The advanced option for this craft involves the art of paper-folding, which can be really fun for older kids! I still remember the hours I spent as a pre-teen making and using paper-folded “fortune tellers” with friends. And most of us probably remember the first time we learned how to fold paper planes! With the advanced option of this paper bag craft, you can teach children how to make their own, functional paper bags!
This is a great fine motor skill activity and something that they might enjoy knowing how to do for future crafts and activities. The other reason to fold your own paper bags is so that you can customize the sizes of the turkeys. For instance, your child might want to create a whole “turkey family” of various sizes by creating differently sized paper bags. If you have younger kids or you just want a really simple version of this craft, scroll on down to: Easy Option (with Pre-Made Paper Bags).
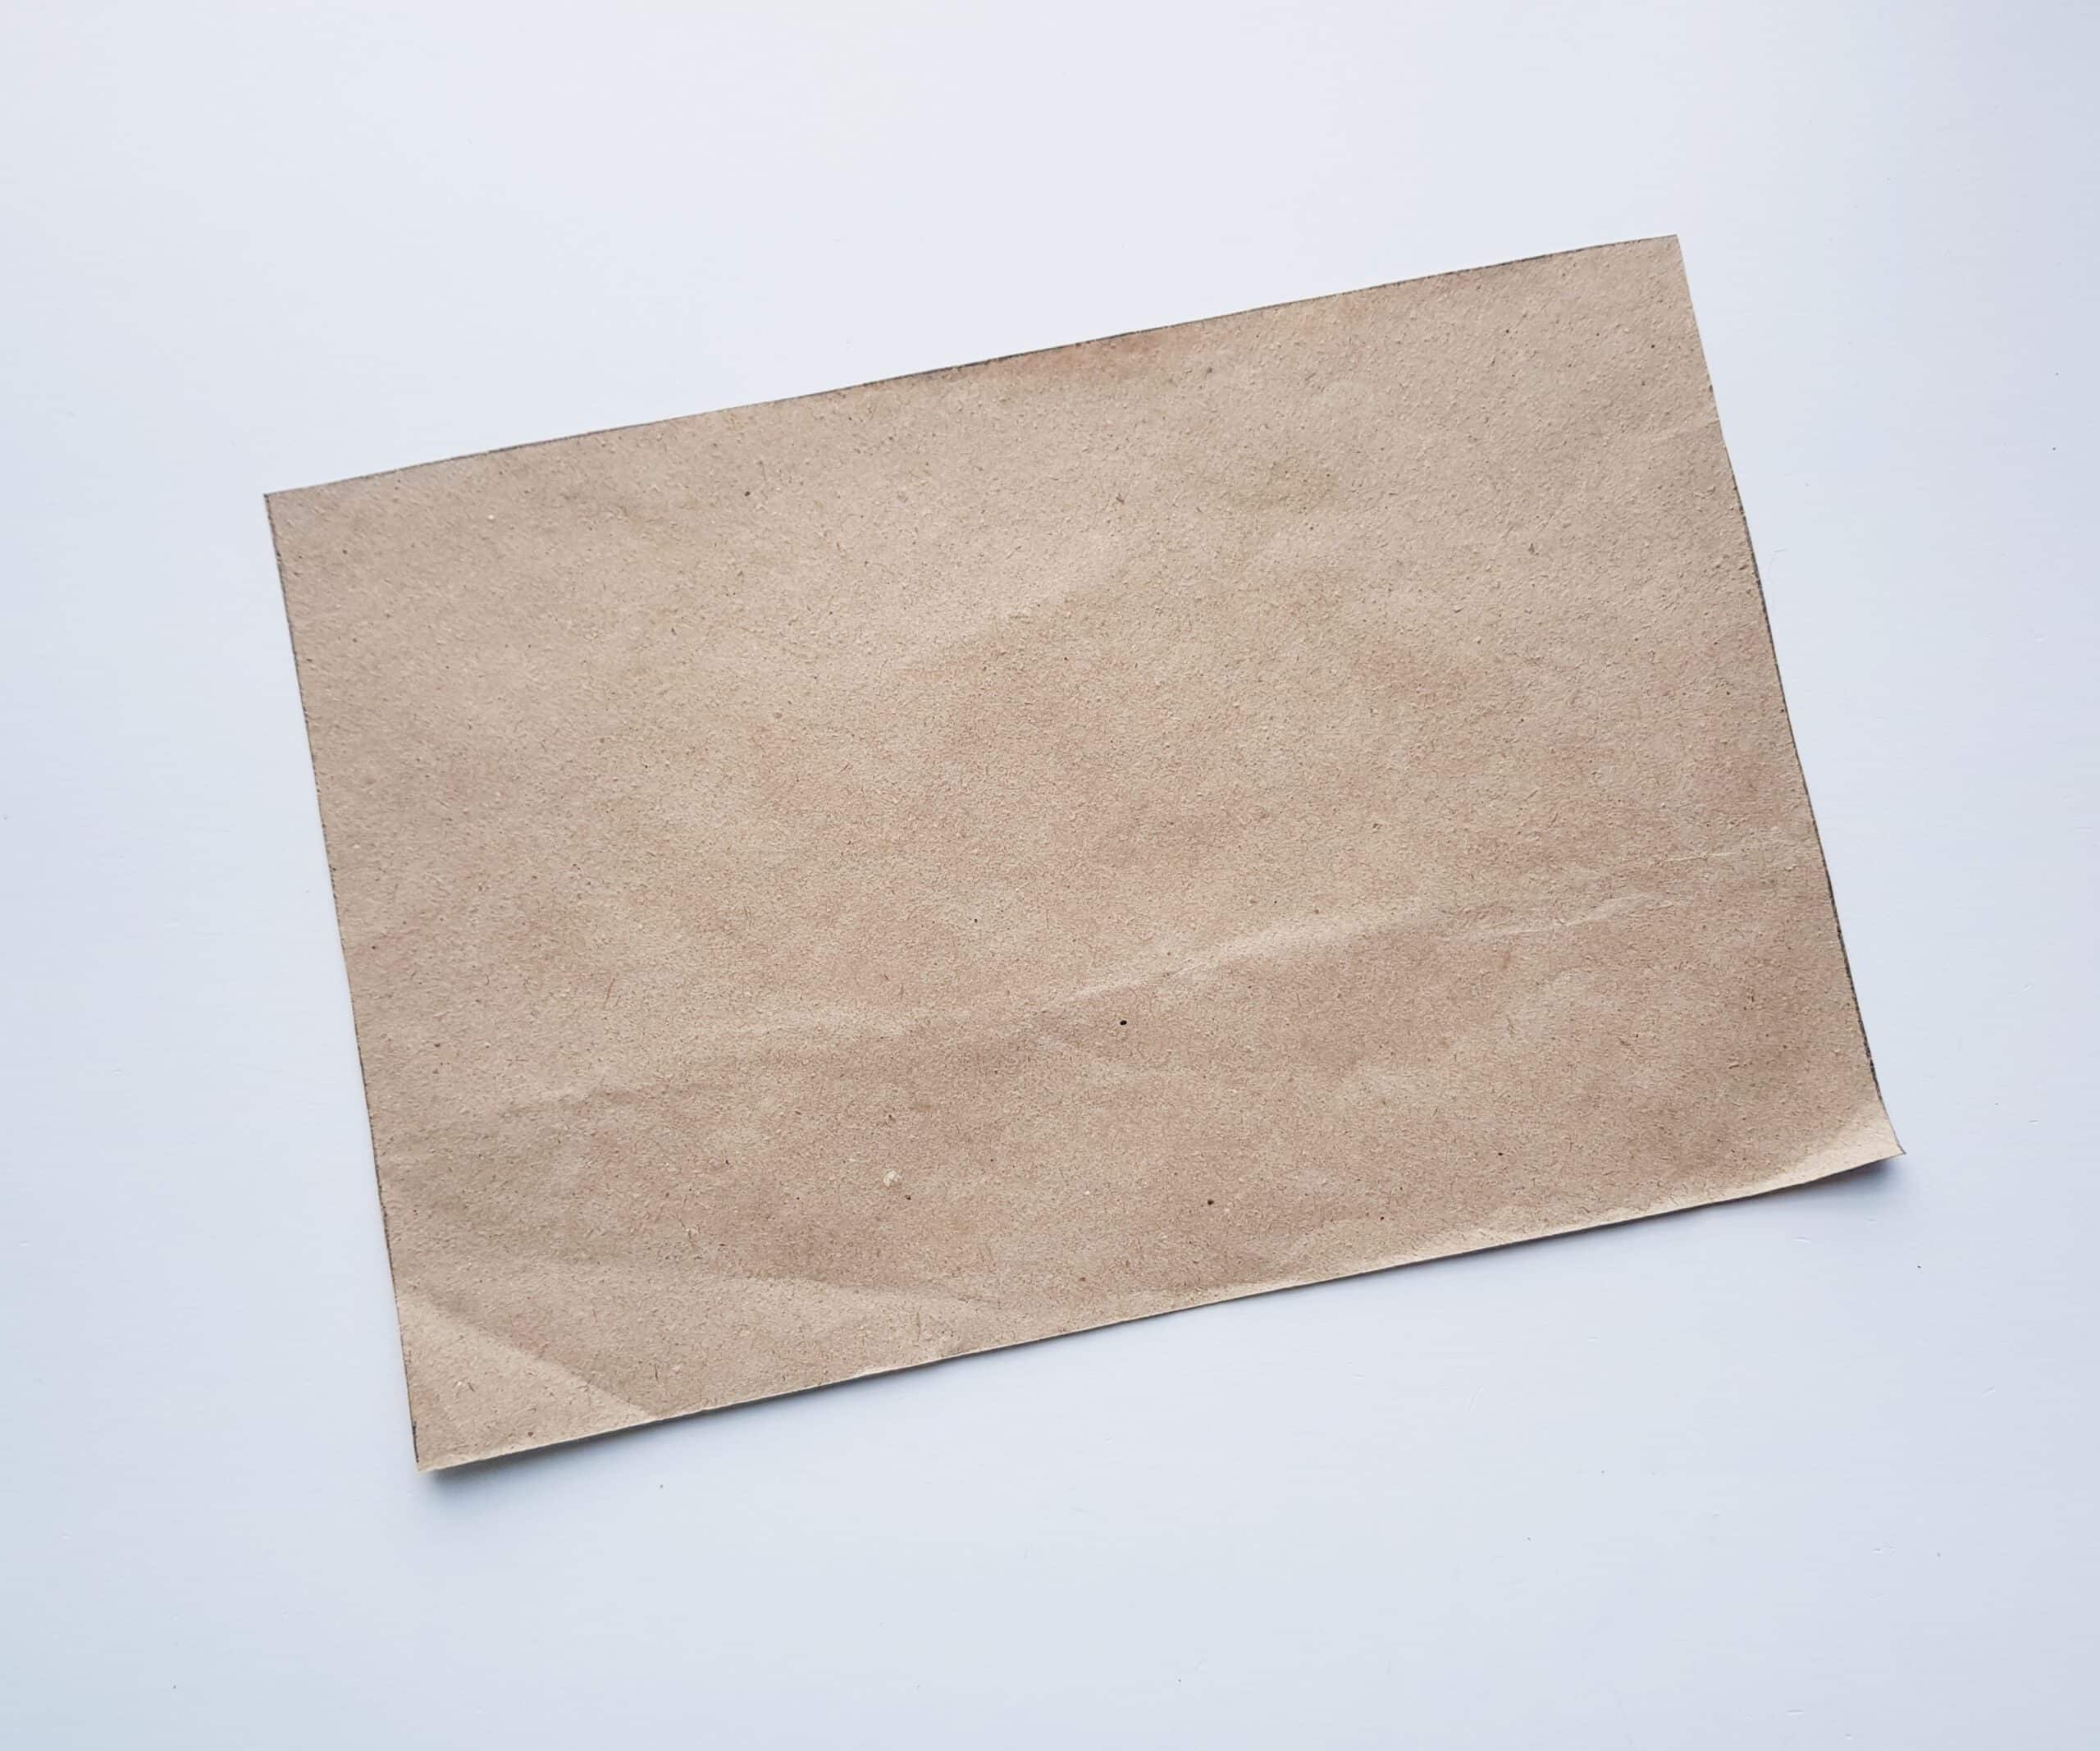
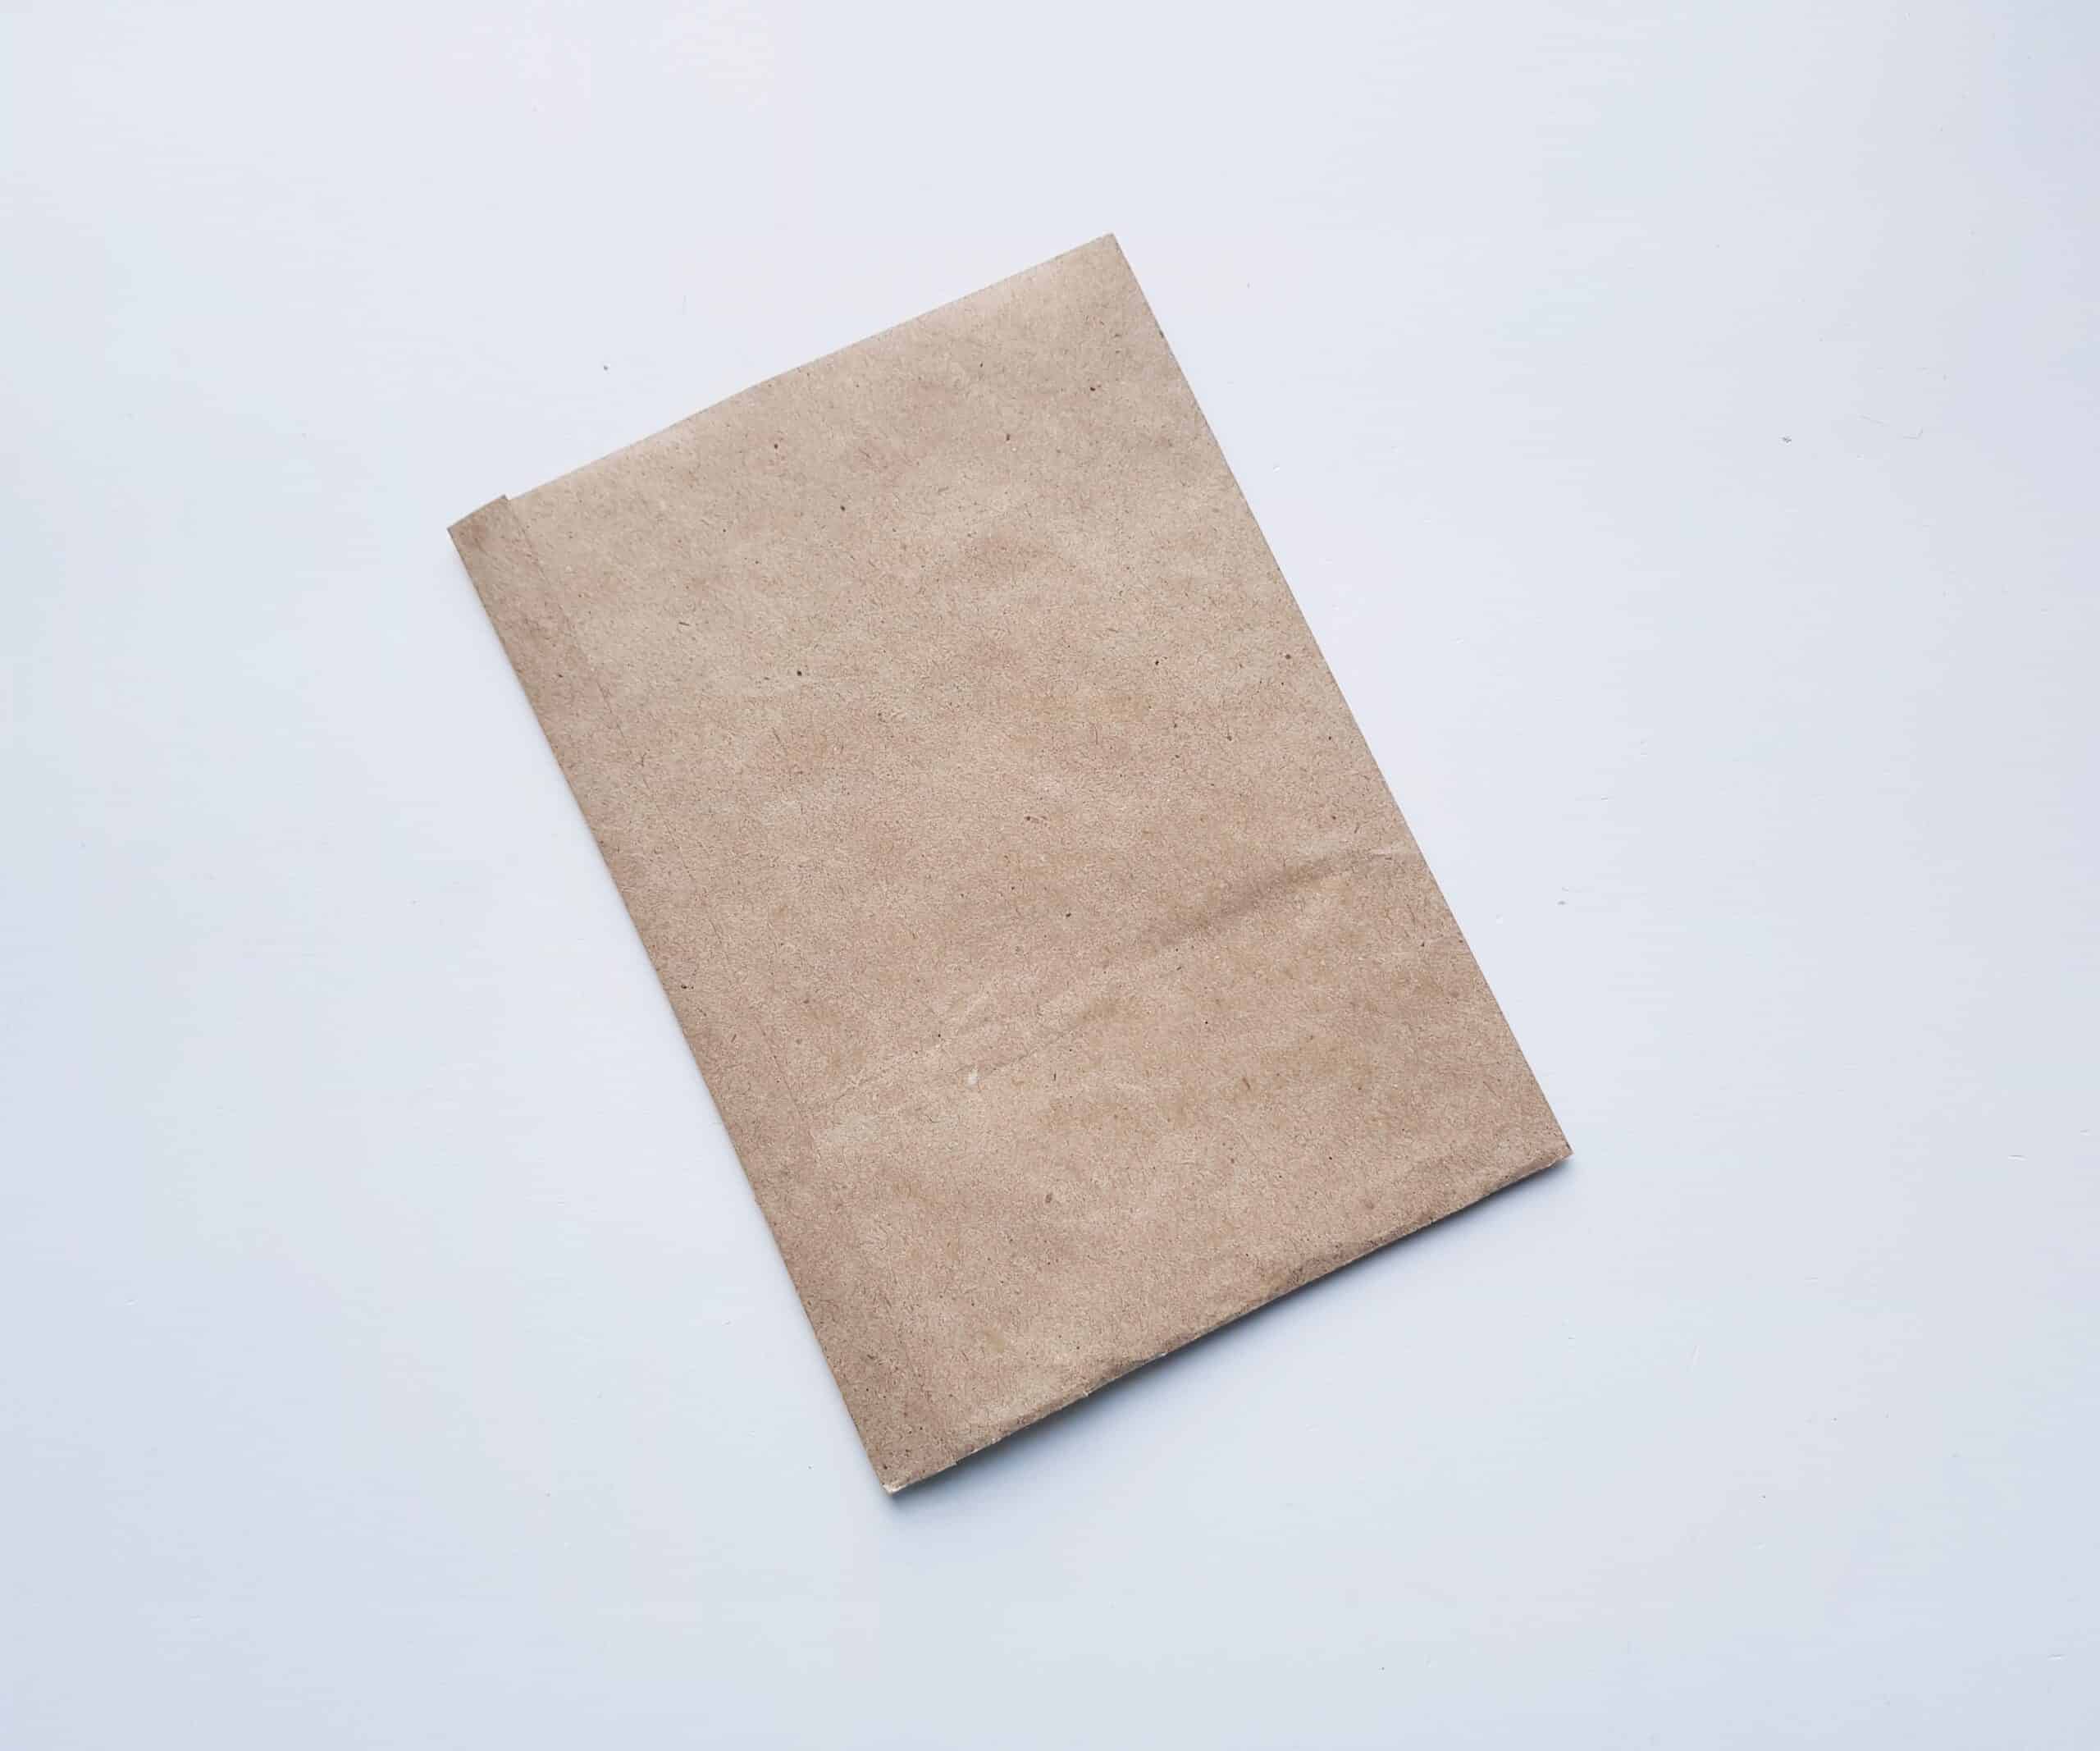
To start making your own paper bag, cut out a rectangular piece of brown paper. In the picture below, I’ve cut mine into 8.5 inches x 6 inches. However, you can make it whatever size you want (so if you plan to do a “turkey family” you can do some large rectangles and some small ones.)
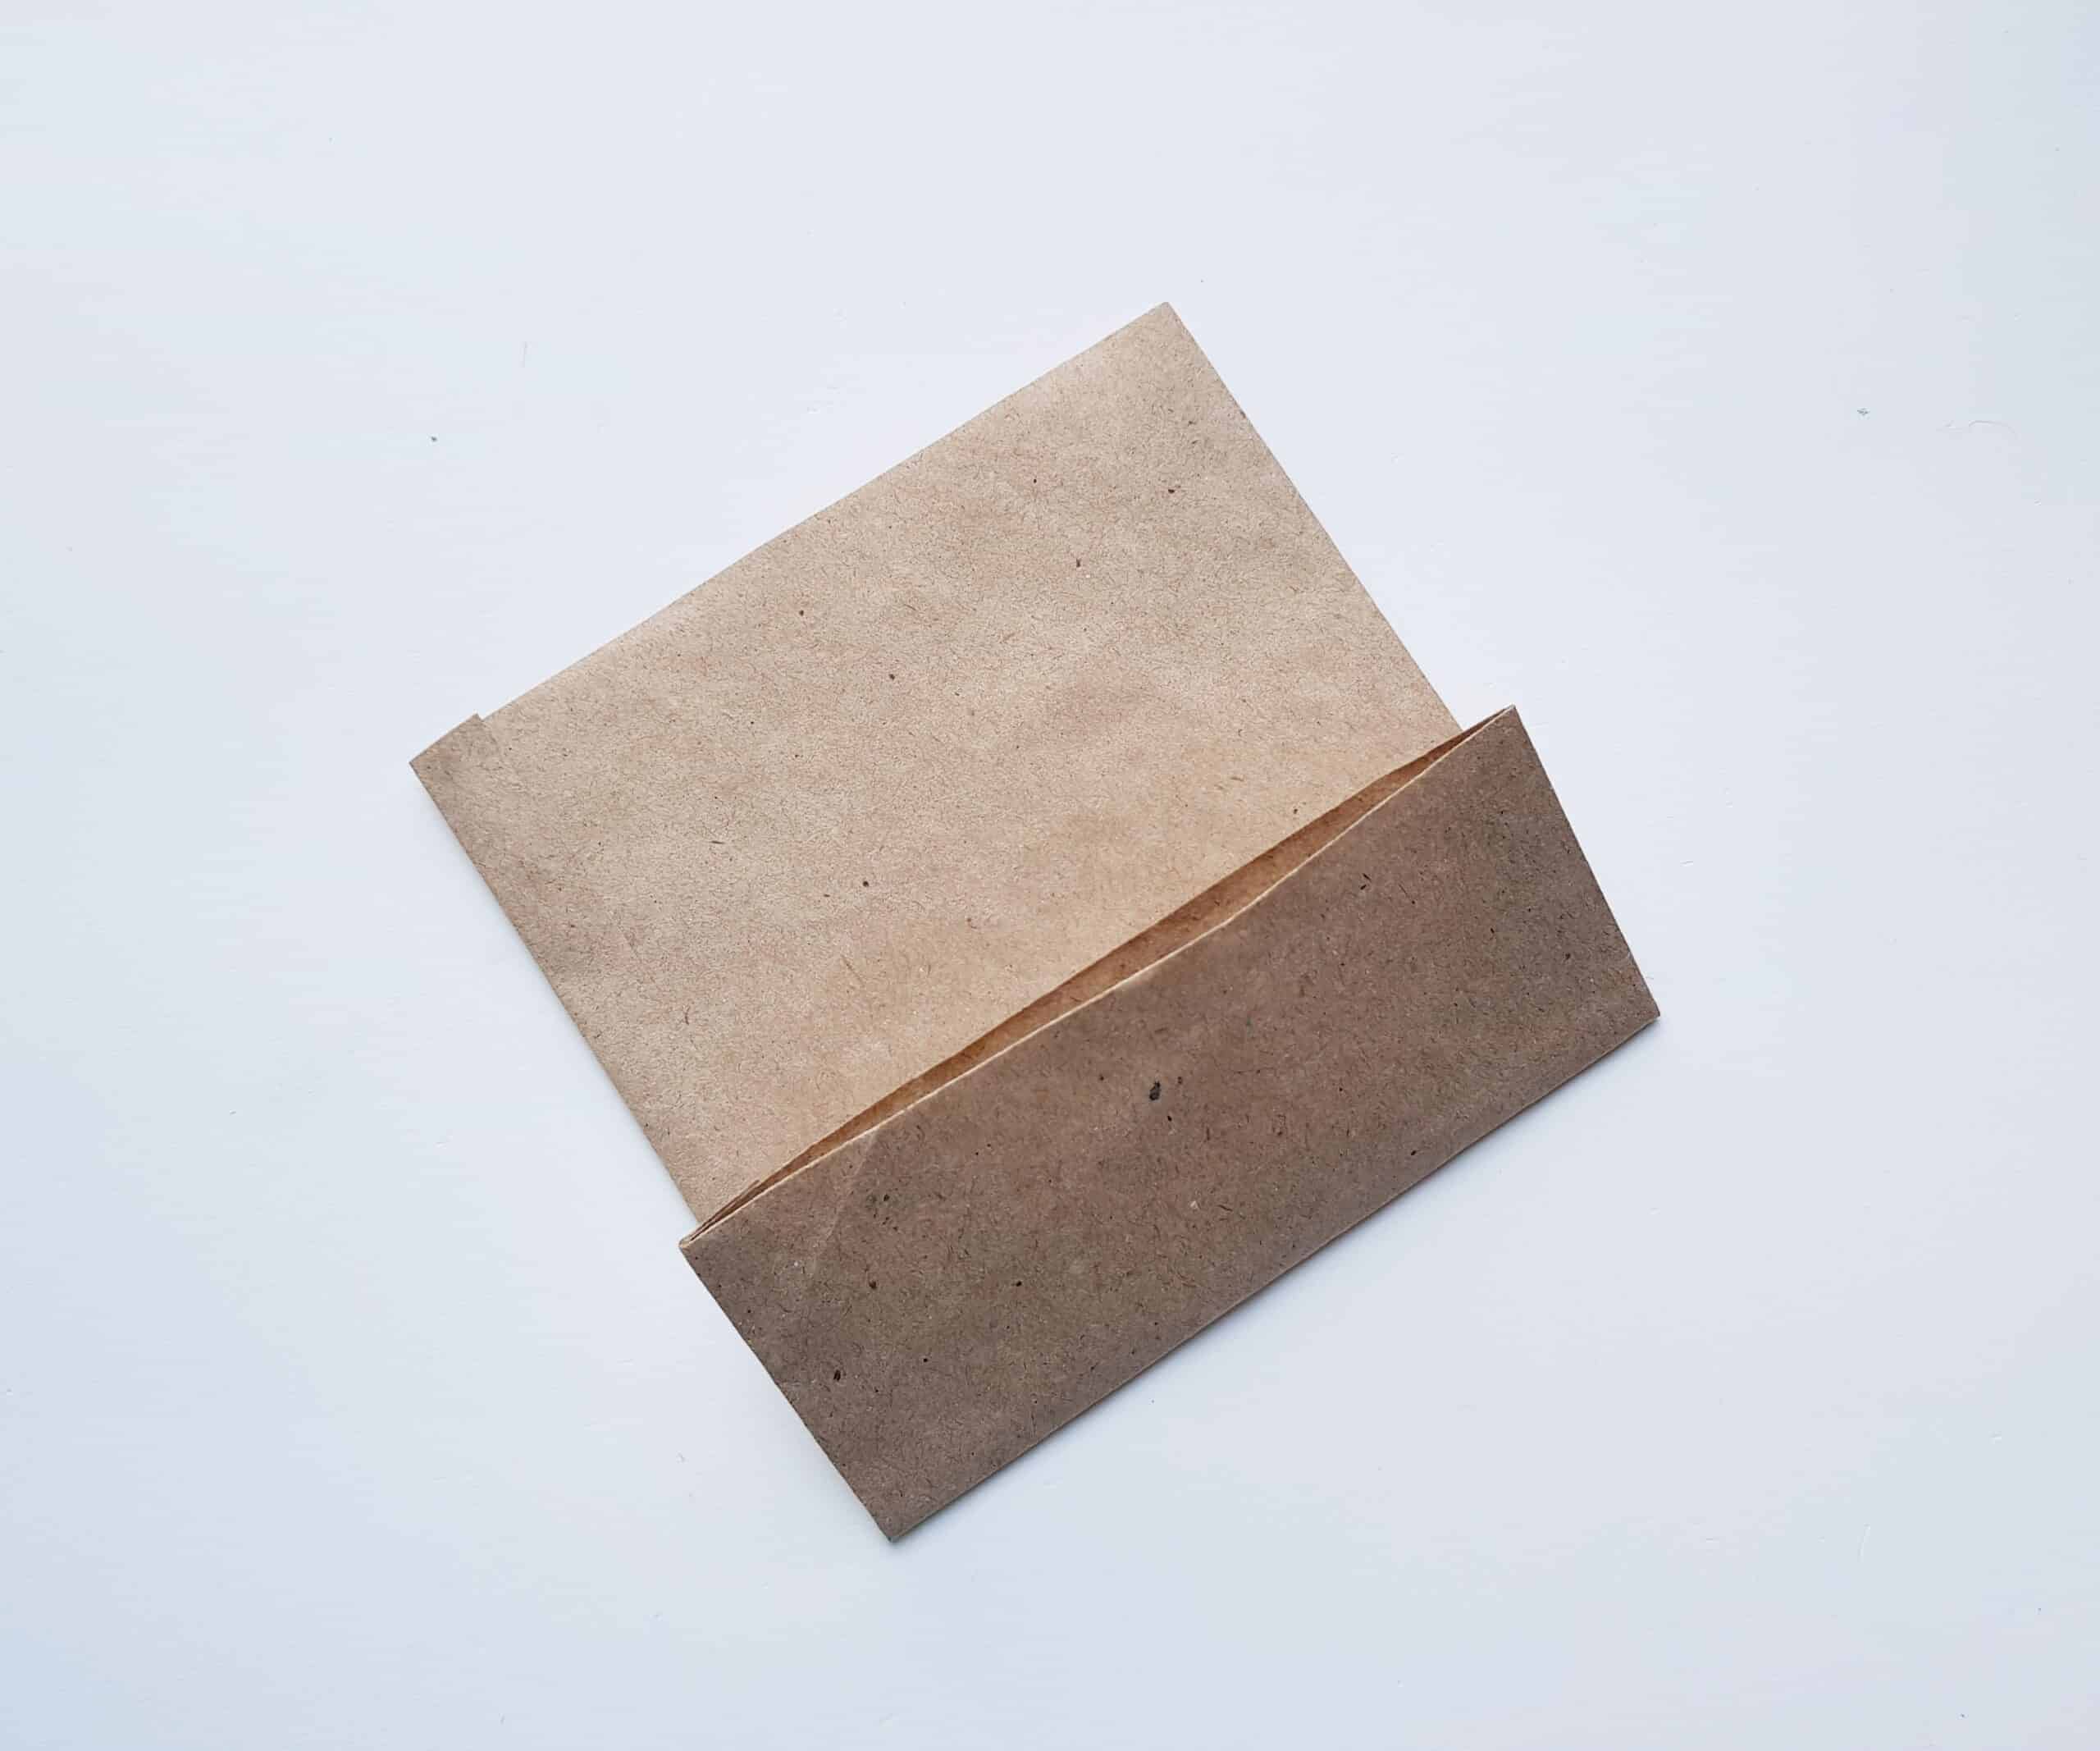
Fold the widest part of the paper in half, leaving a little bit extra sticking out on one side. For example, I folded the 8 inch dimension
in half, with 0.5 inch extra sticking out on one side, (as pictured below.)
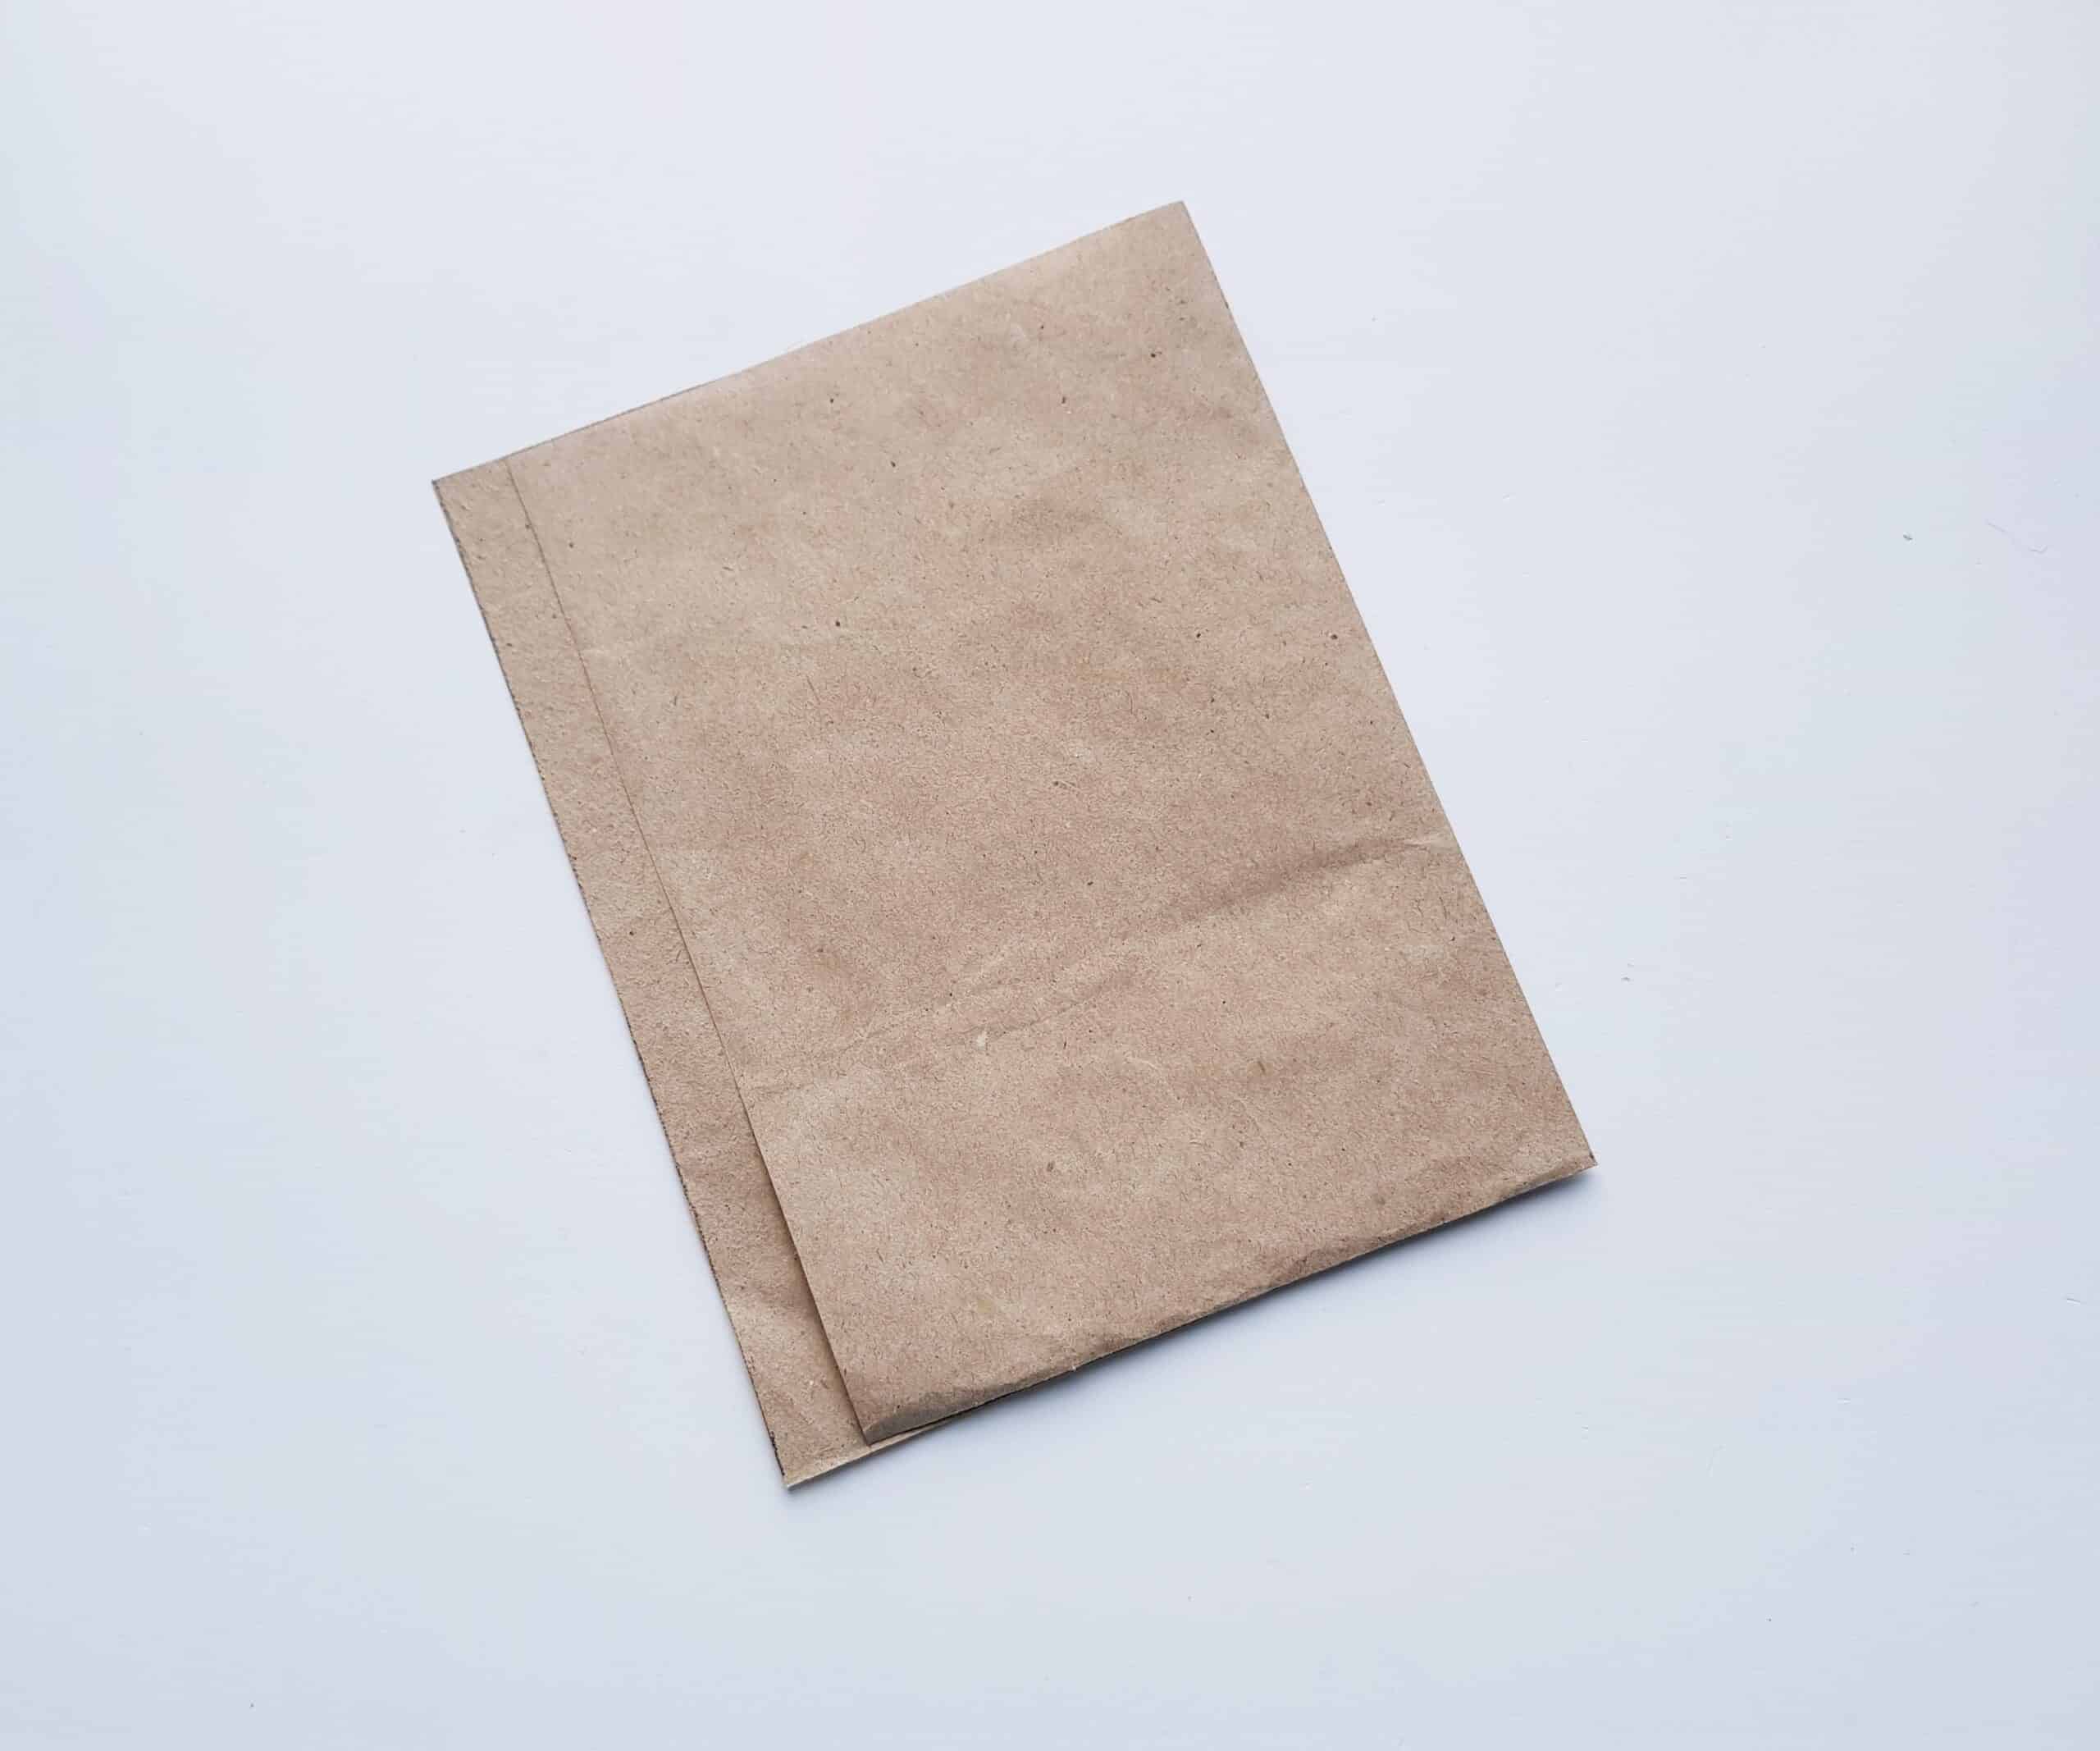
Apply glue along the extra 0.5 inch part and fold it over to create a flap. Press down the flap until it is securely glued to the top side of the paper bag.
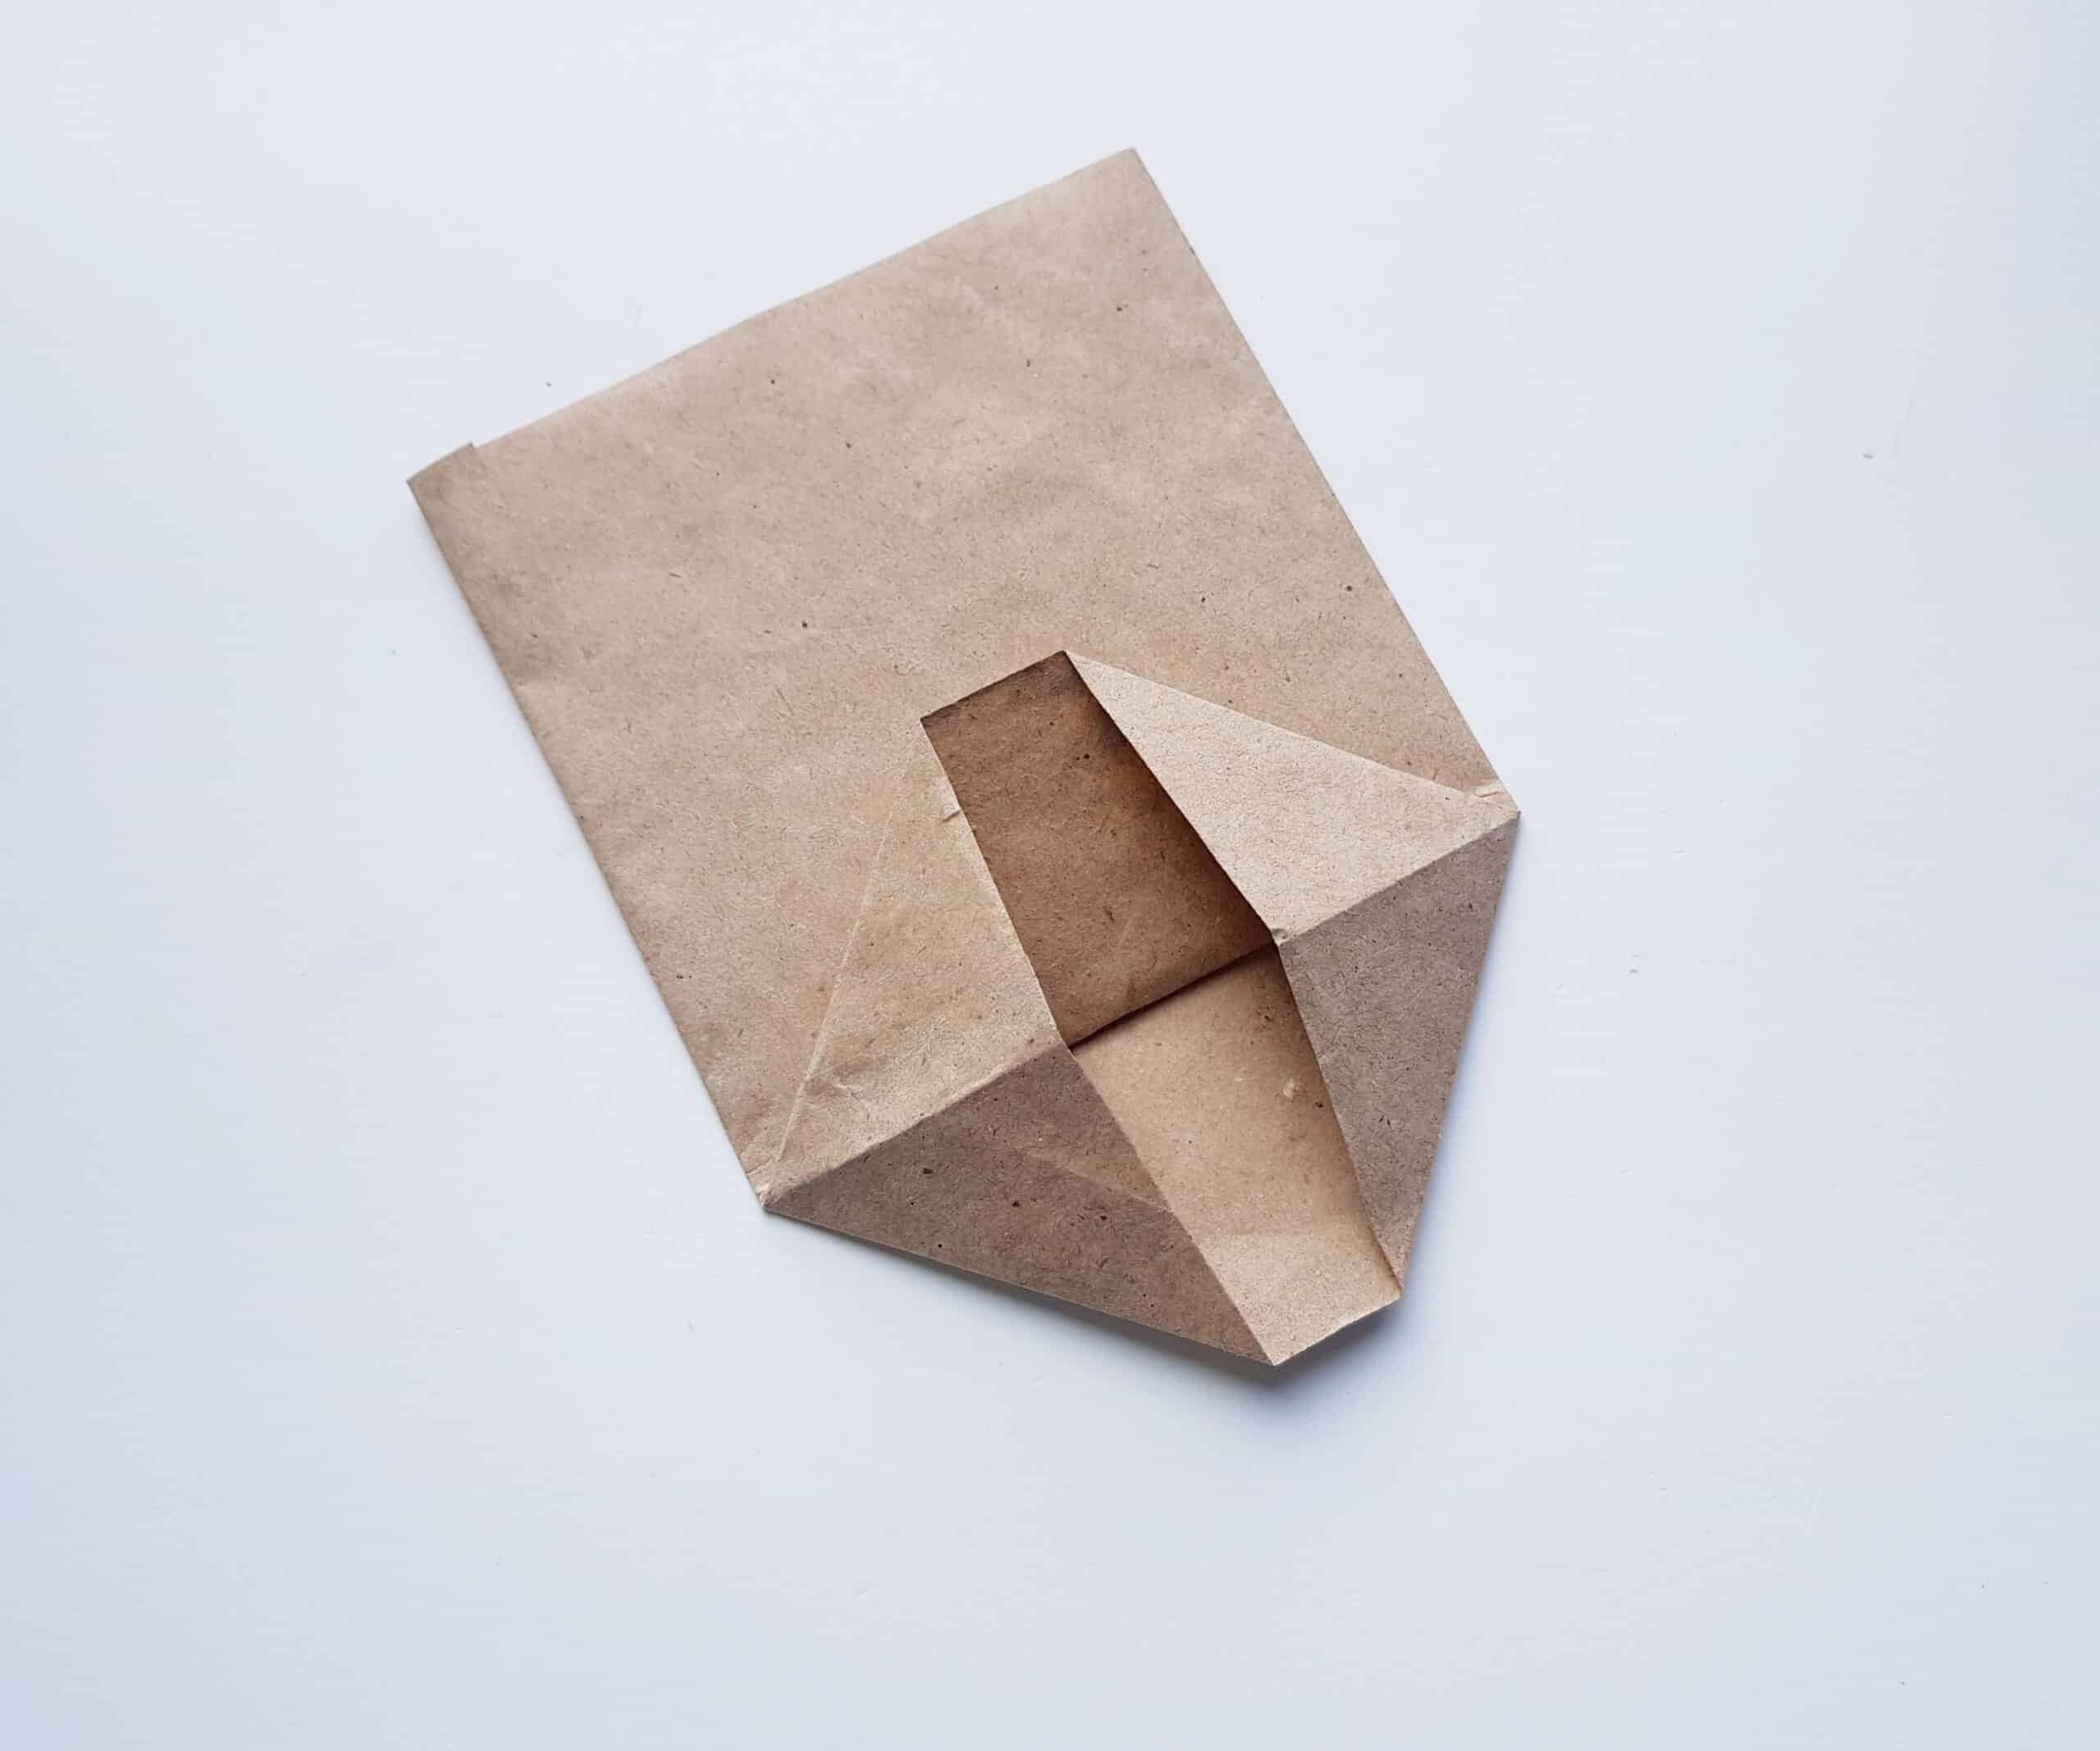
Next, take about two inches of the bottom and fold it upwards, as shown.
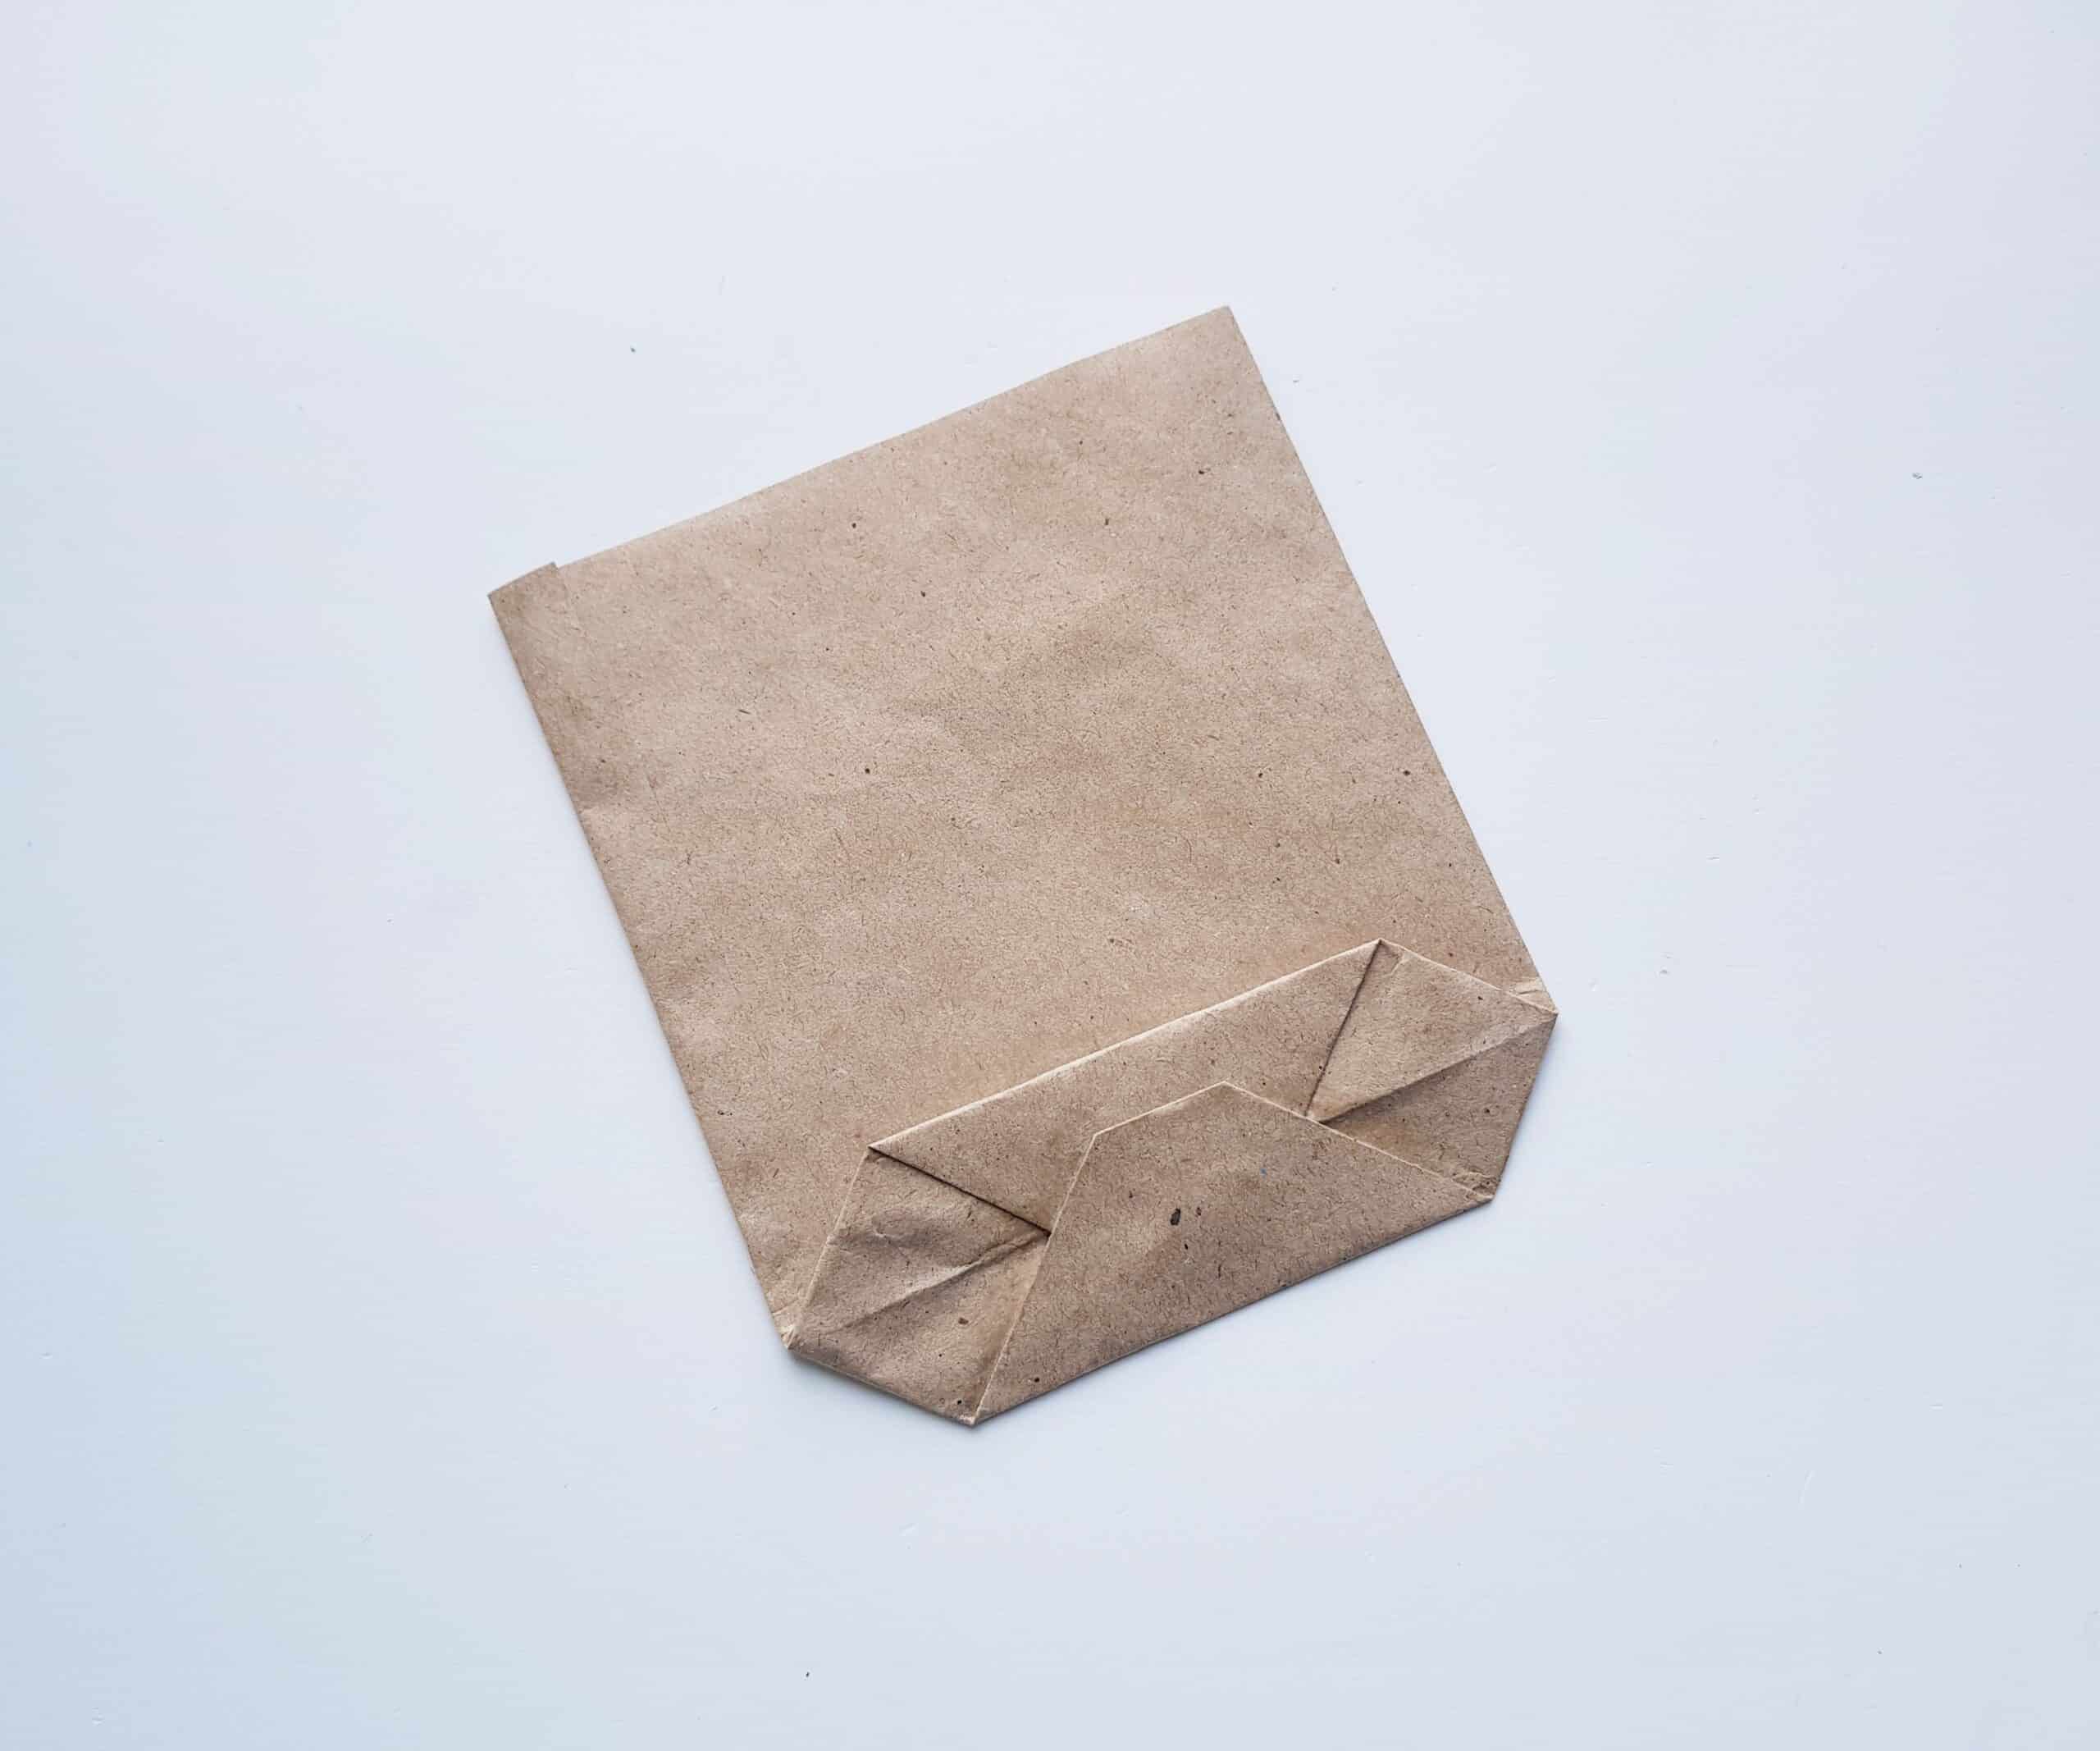
Place the folded paper on a flat surface and push the left and right sides of the flap towards each other. This will create a diamond-shape with a rectangular opening in the middle.
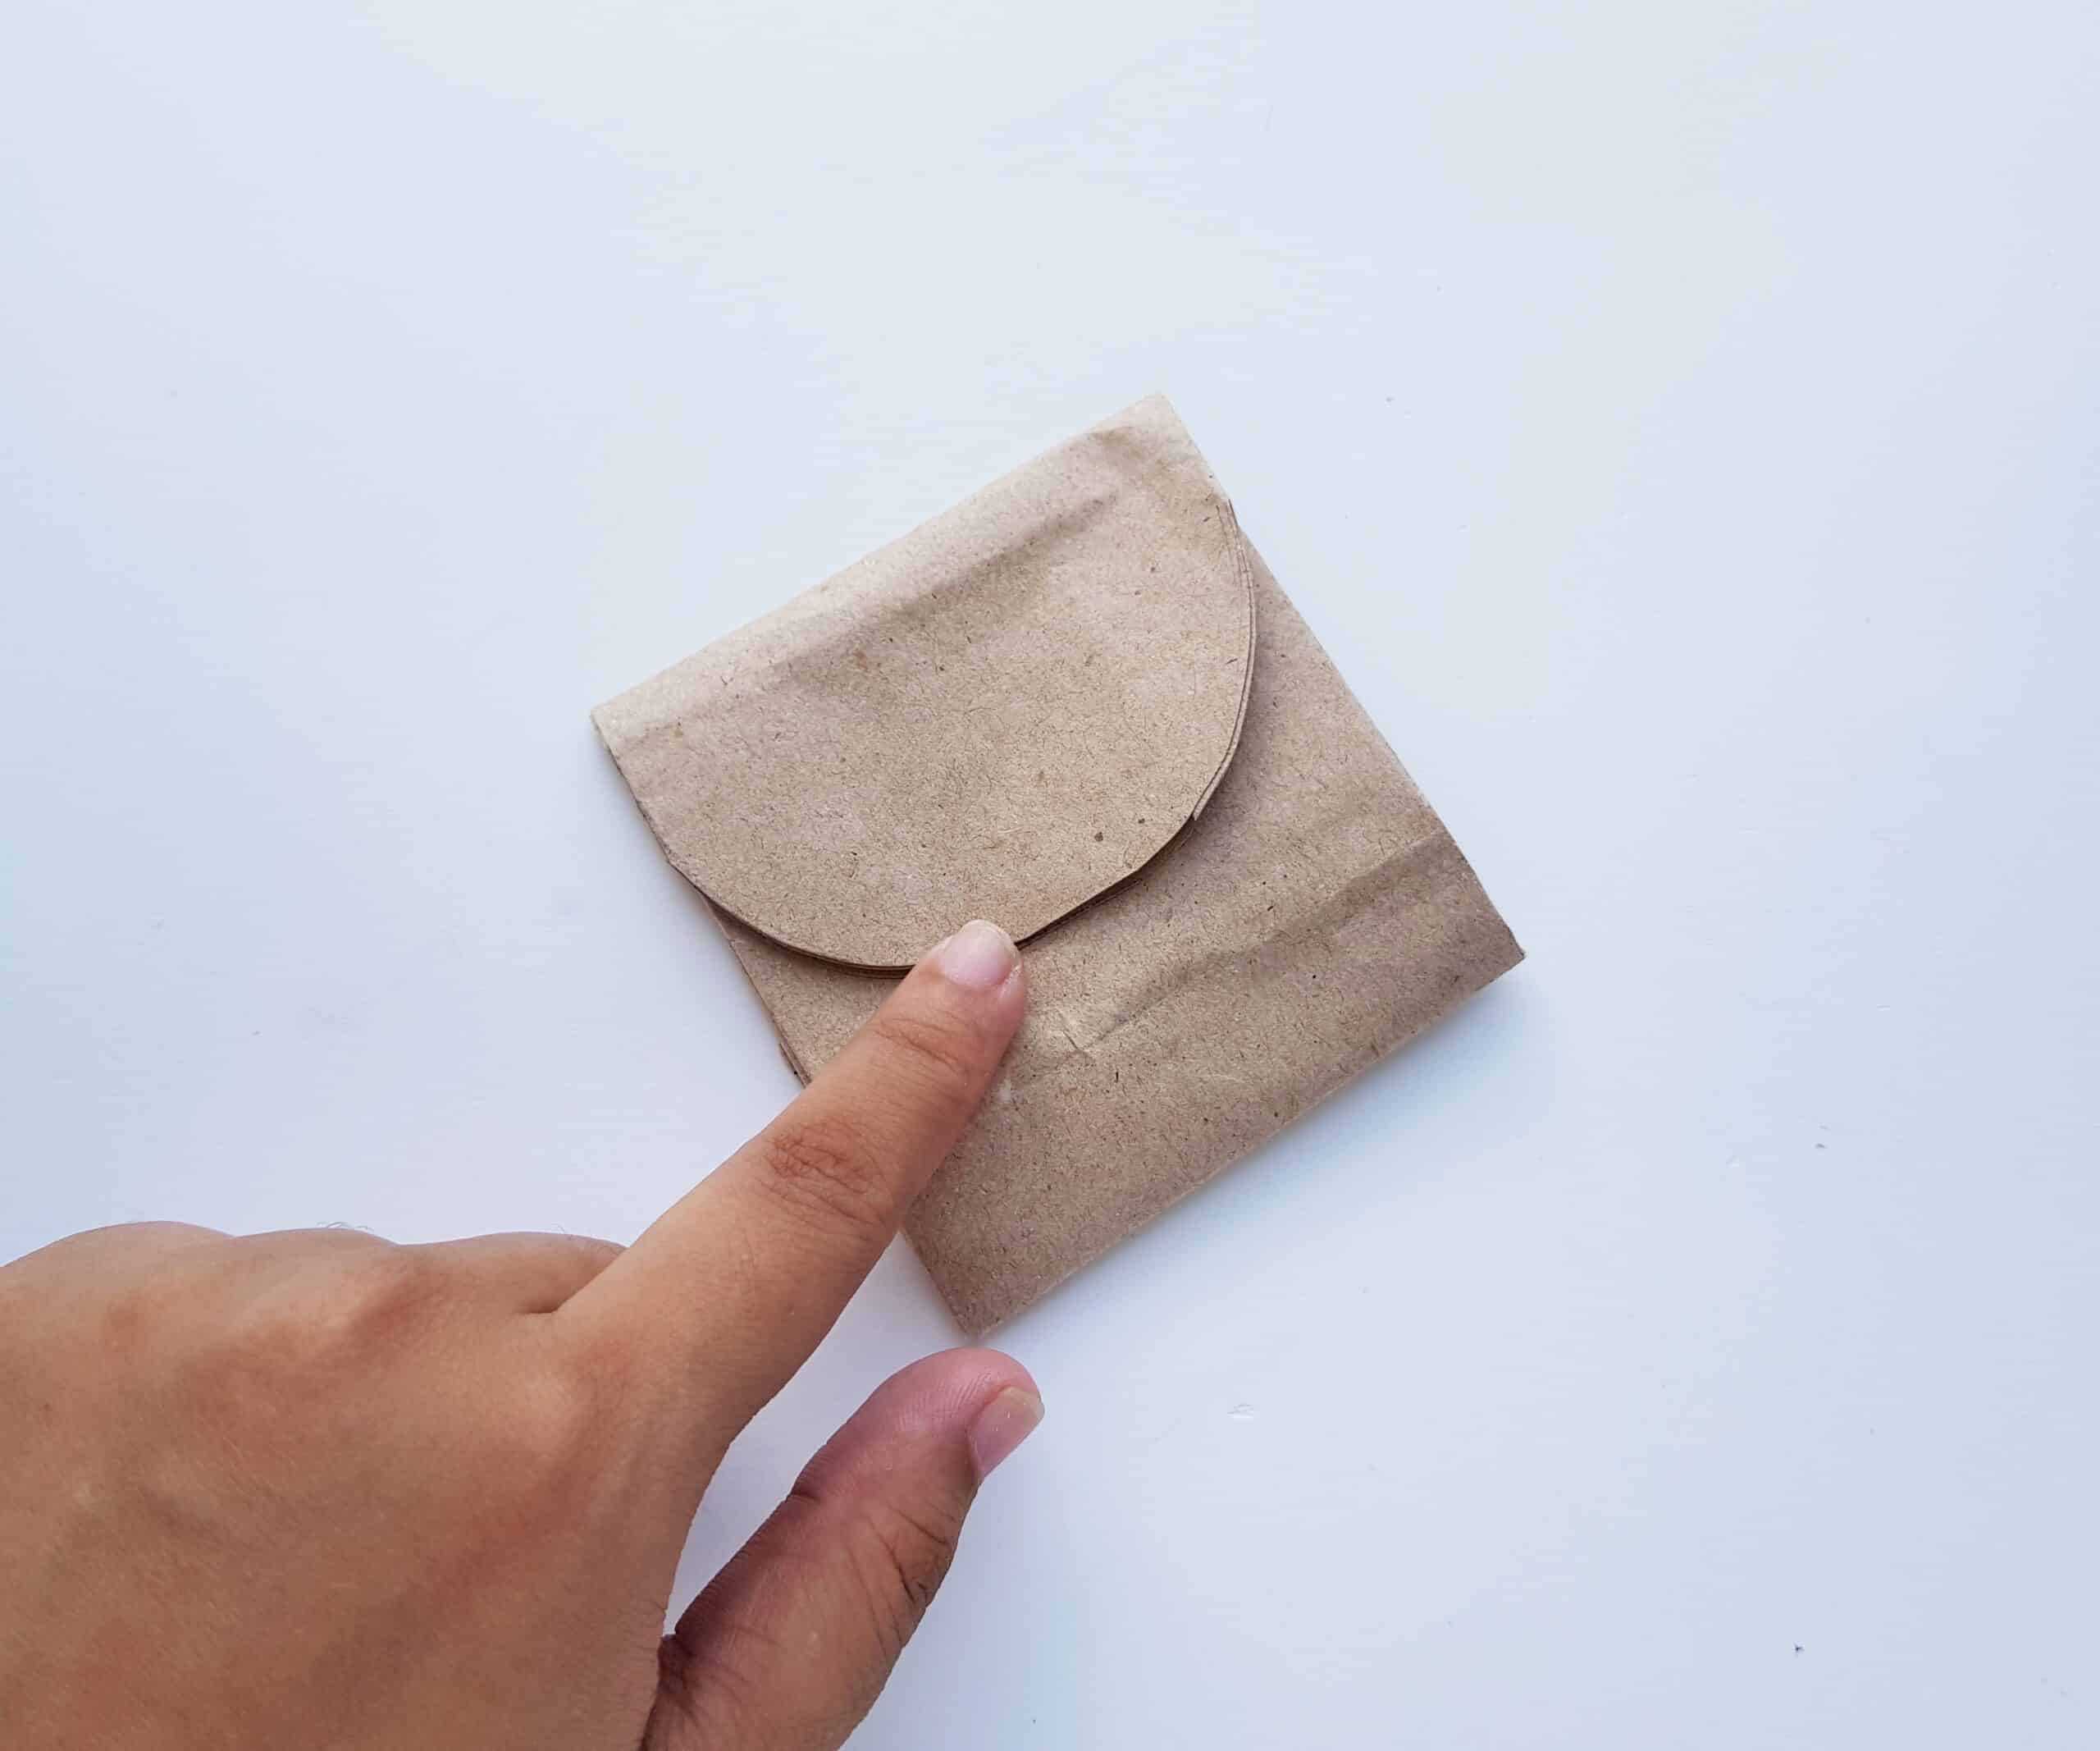
Now, fold half of the top flap down to cover half of the opening.
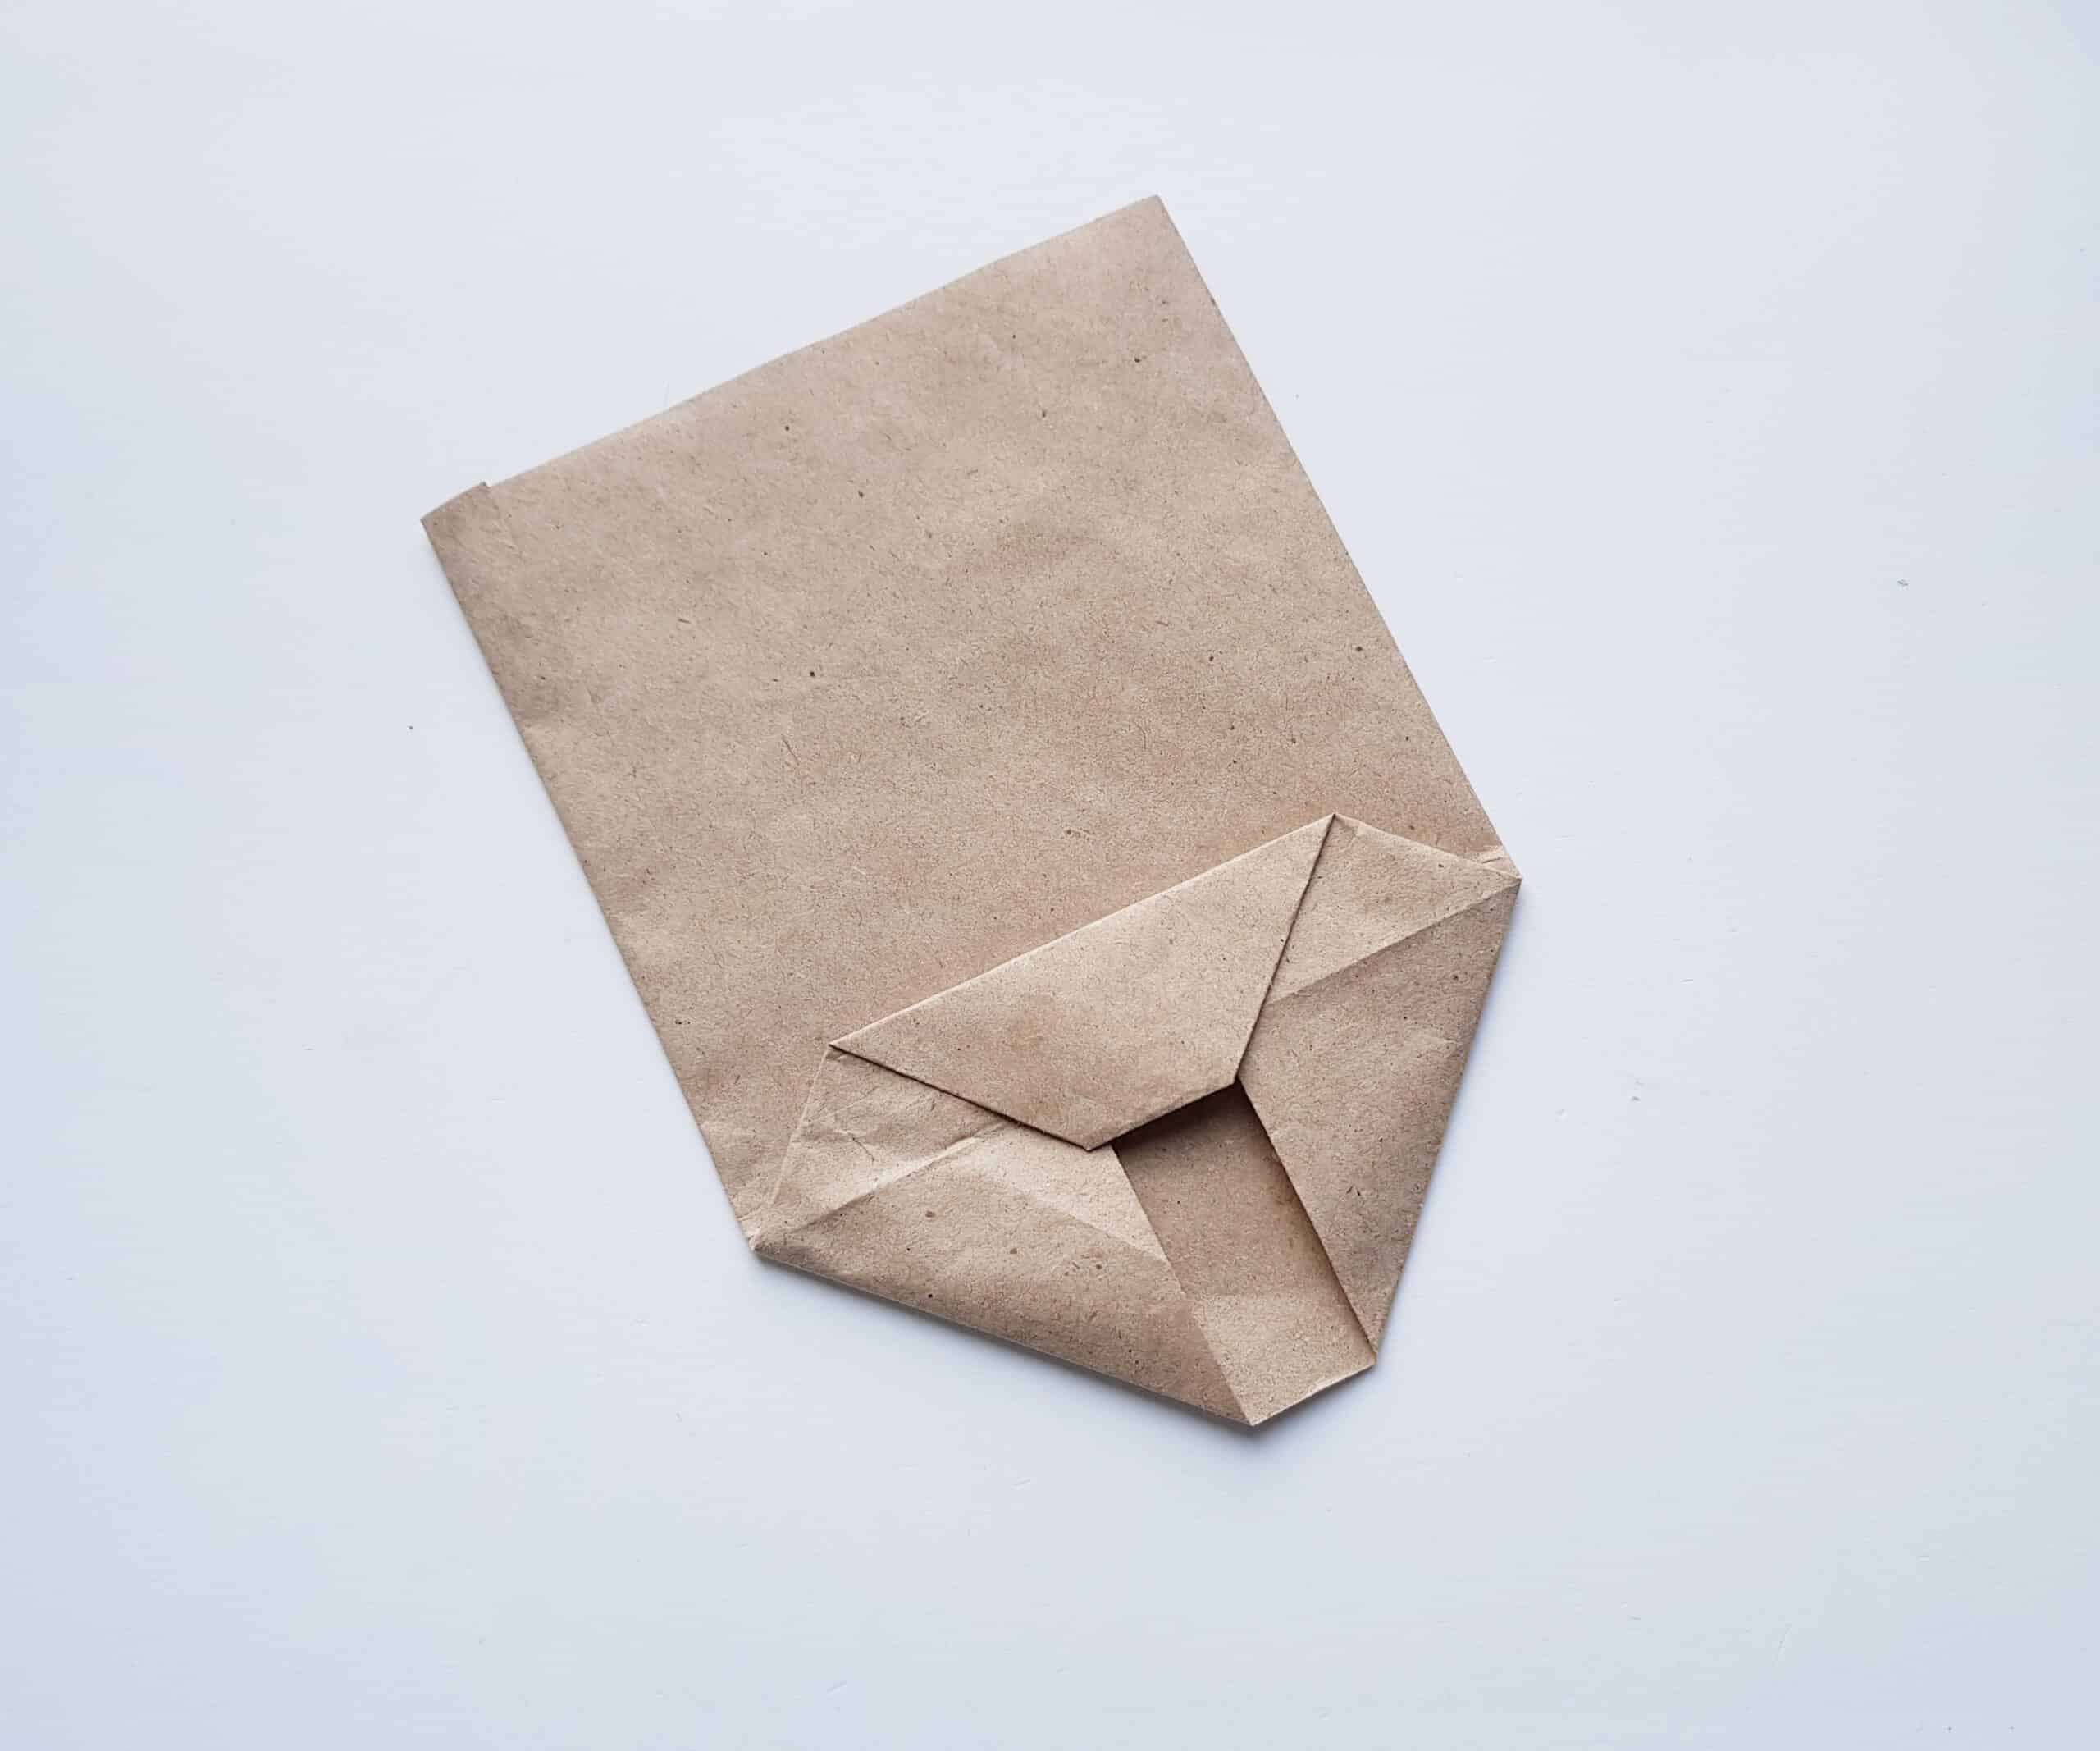
Repeat this same step with the bottom flap, folding half of it upwards to cover the rest of the opening. If you are satisfied with the way everything is folding together, open the flaps up again briefly, apply some glue, and re-fold—pressing to secure them. This creates the bottom part of your paper bag!
Give the glue a few minutes to try. See how there is a little bit of excess on either side of your bag? For the next step, you’ll want to fold the sides in (about an inch on each side). Don’t glue these folds down, though! This step is simply to create a smooth crease on each side that will allow your paper bag to “stand up” more easily when fluffed open.
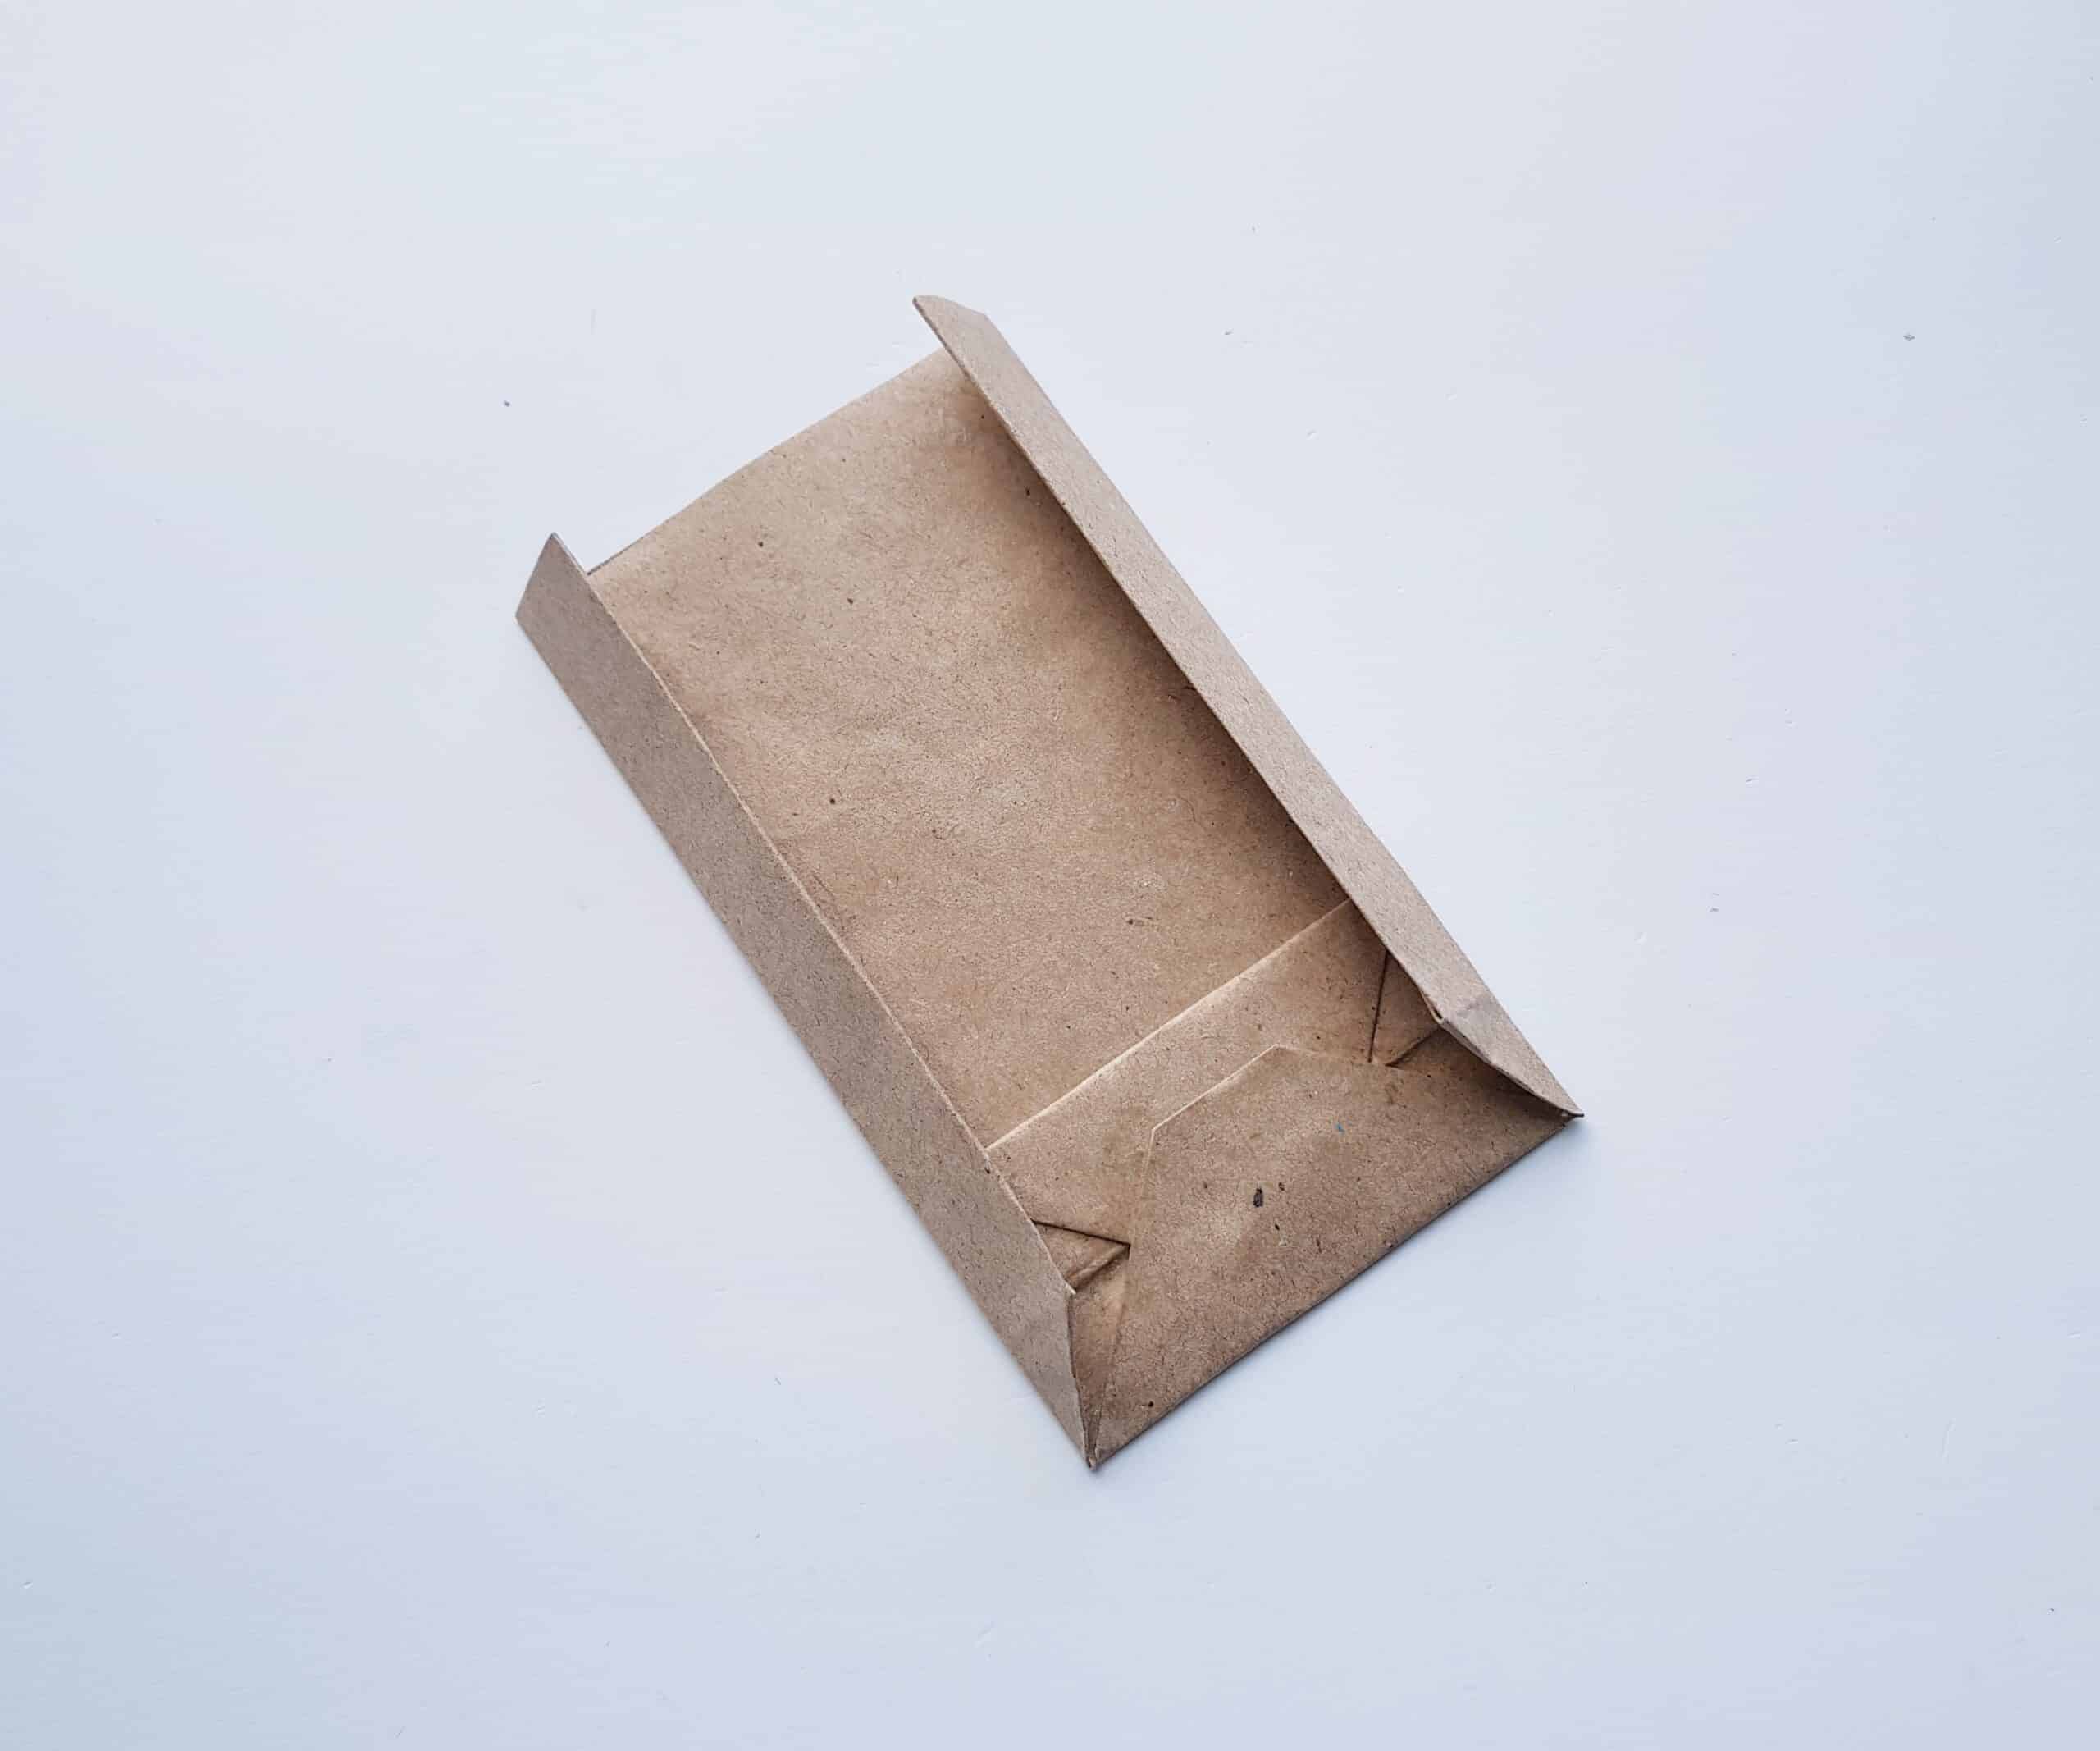
Now, gently open your paper bag, fluffing it out from the inside to make sure it looks nice, full and even.
If you’re happy with the result, re-fold the bottom and sides (folding the creases you created inwards, so that the bag is laying flat). This step will allow you to continue on to the “turkey” portion of this craft with ease!
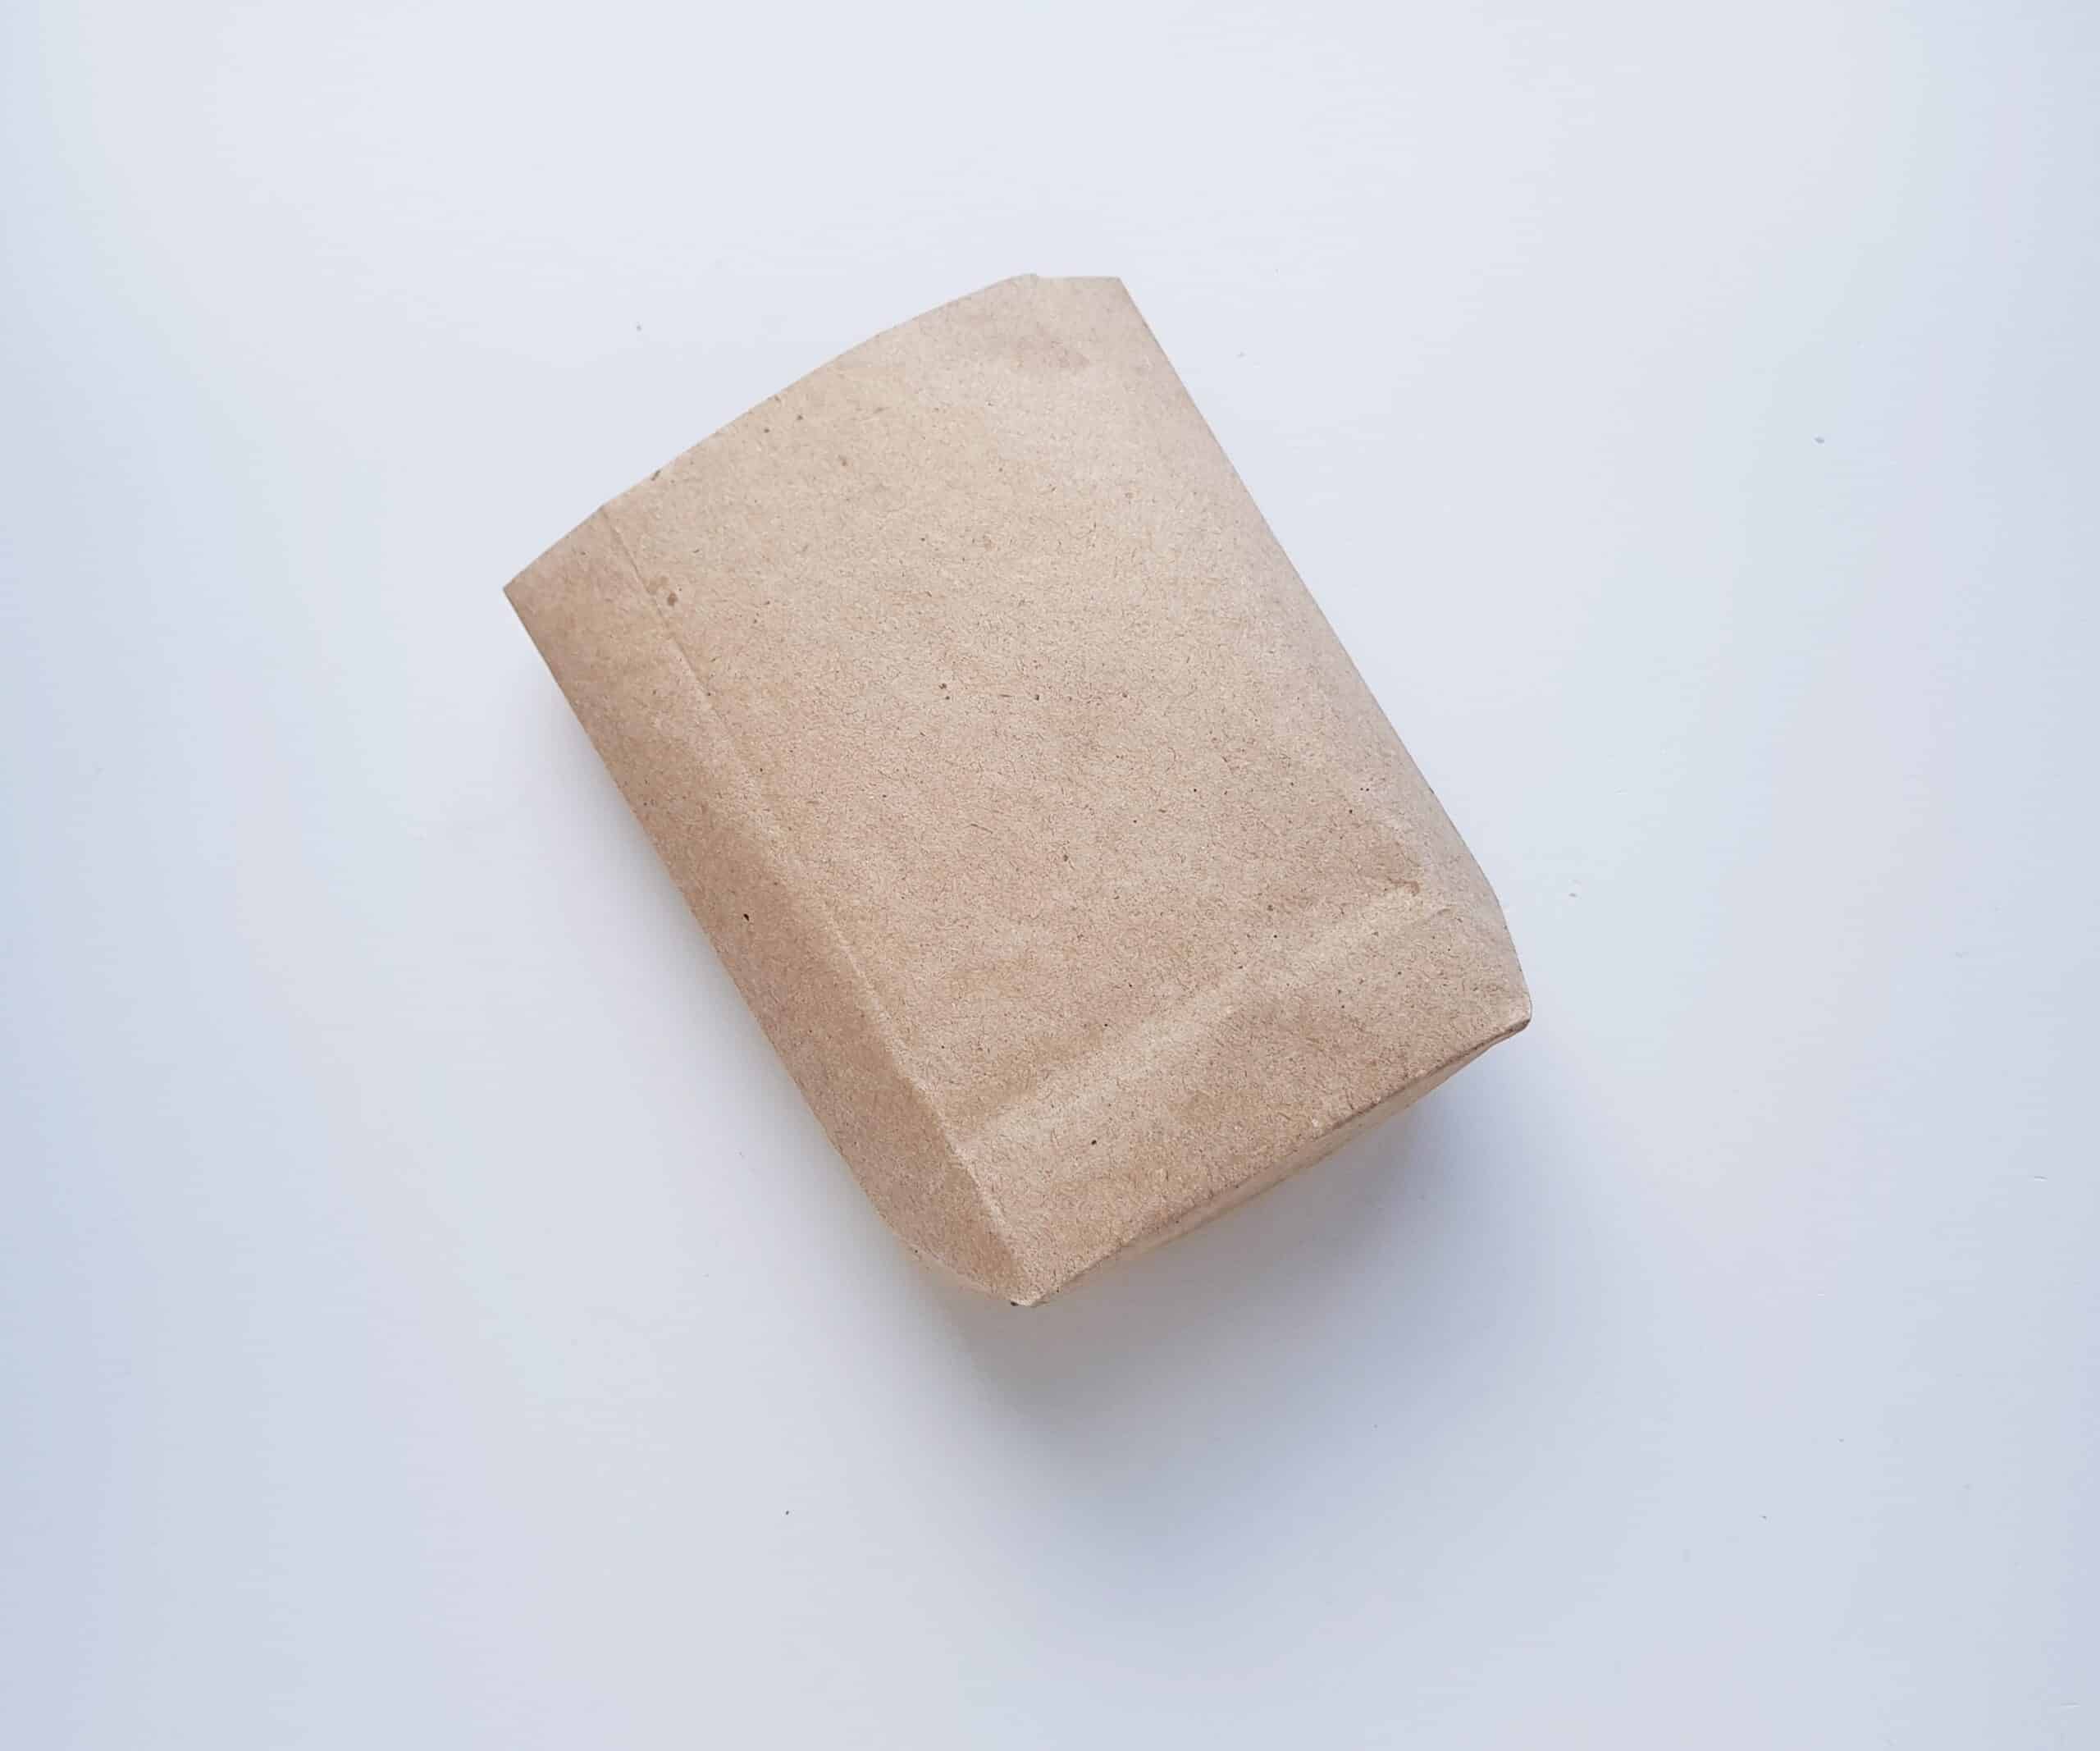
At this point you have now created your own paper bag! Now you will simply follow the remainder of the instructions listed on the Easy Option, below (the rest of the craft will be the same for both Easy and Advanced options).
Easy Option (with Pre-Made Paper Bags)
If you chose this option, you simply need some basic paper bags . We love how versatile paper bags are and frequently use them for crafts! In fact, be sure to check out some of our other paper bag crafts at the end of this article!
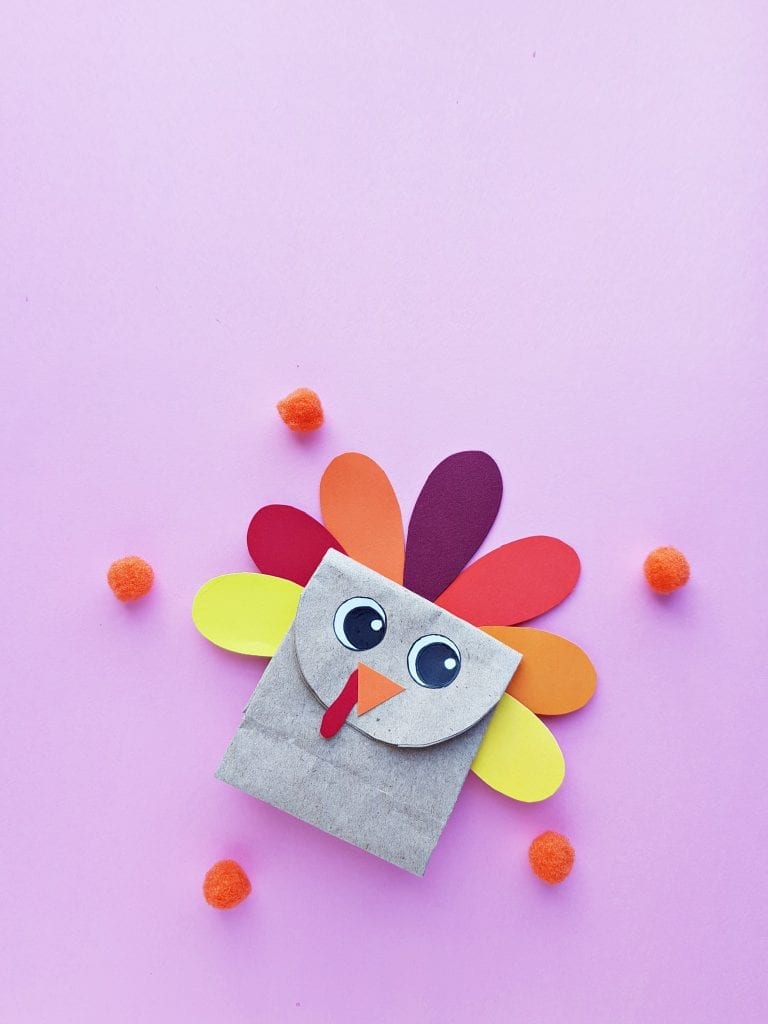
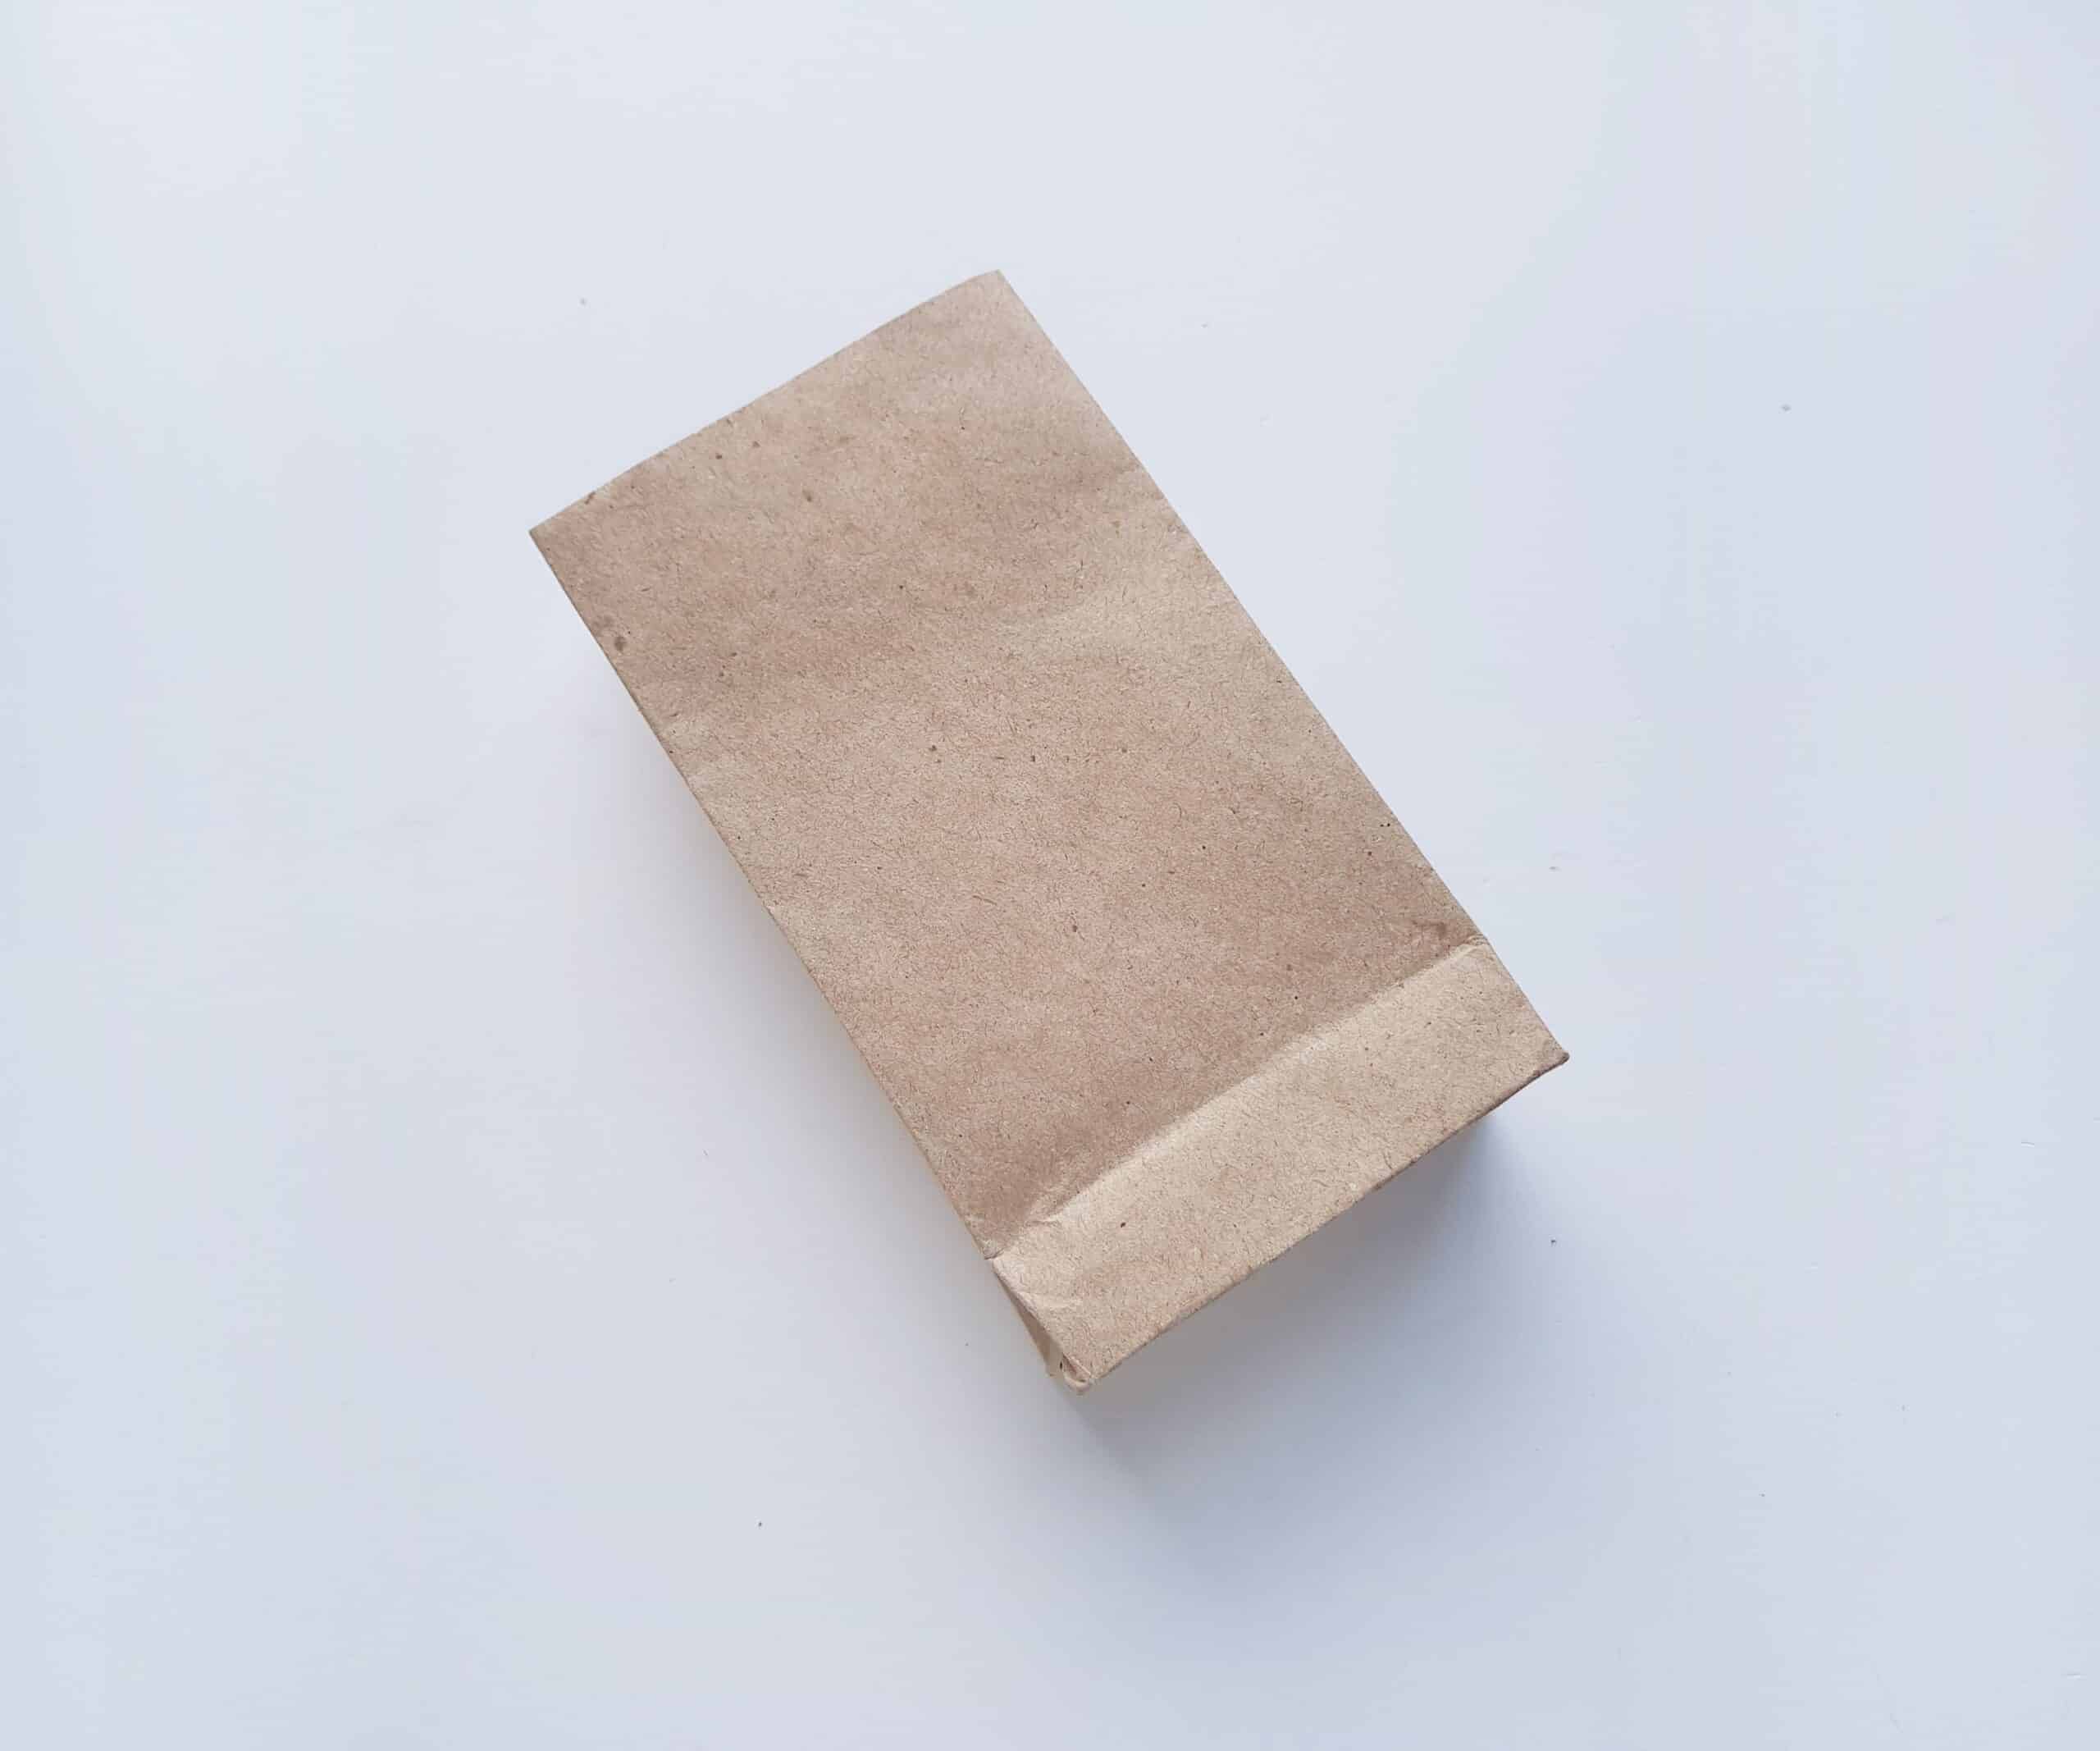
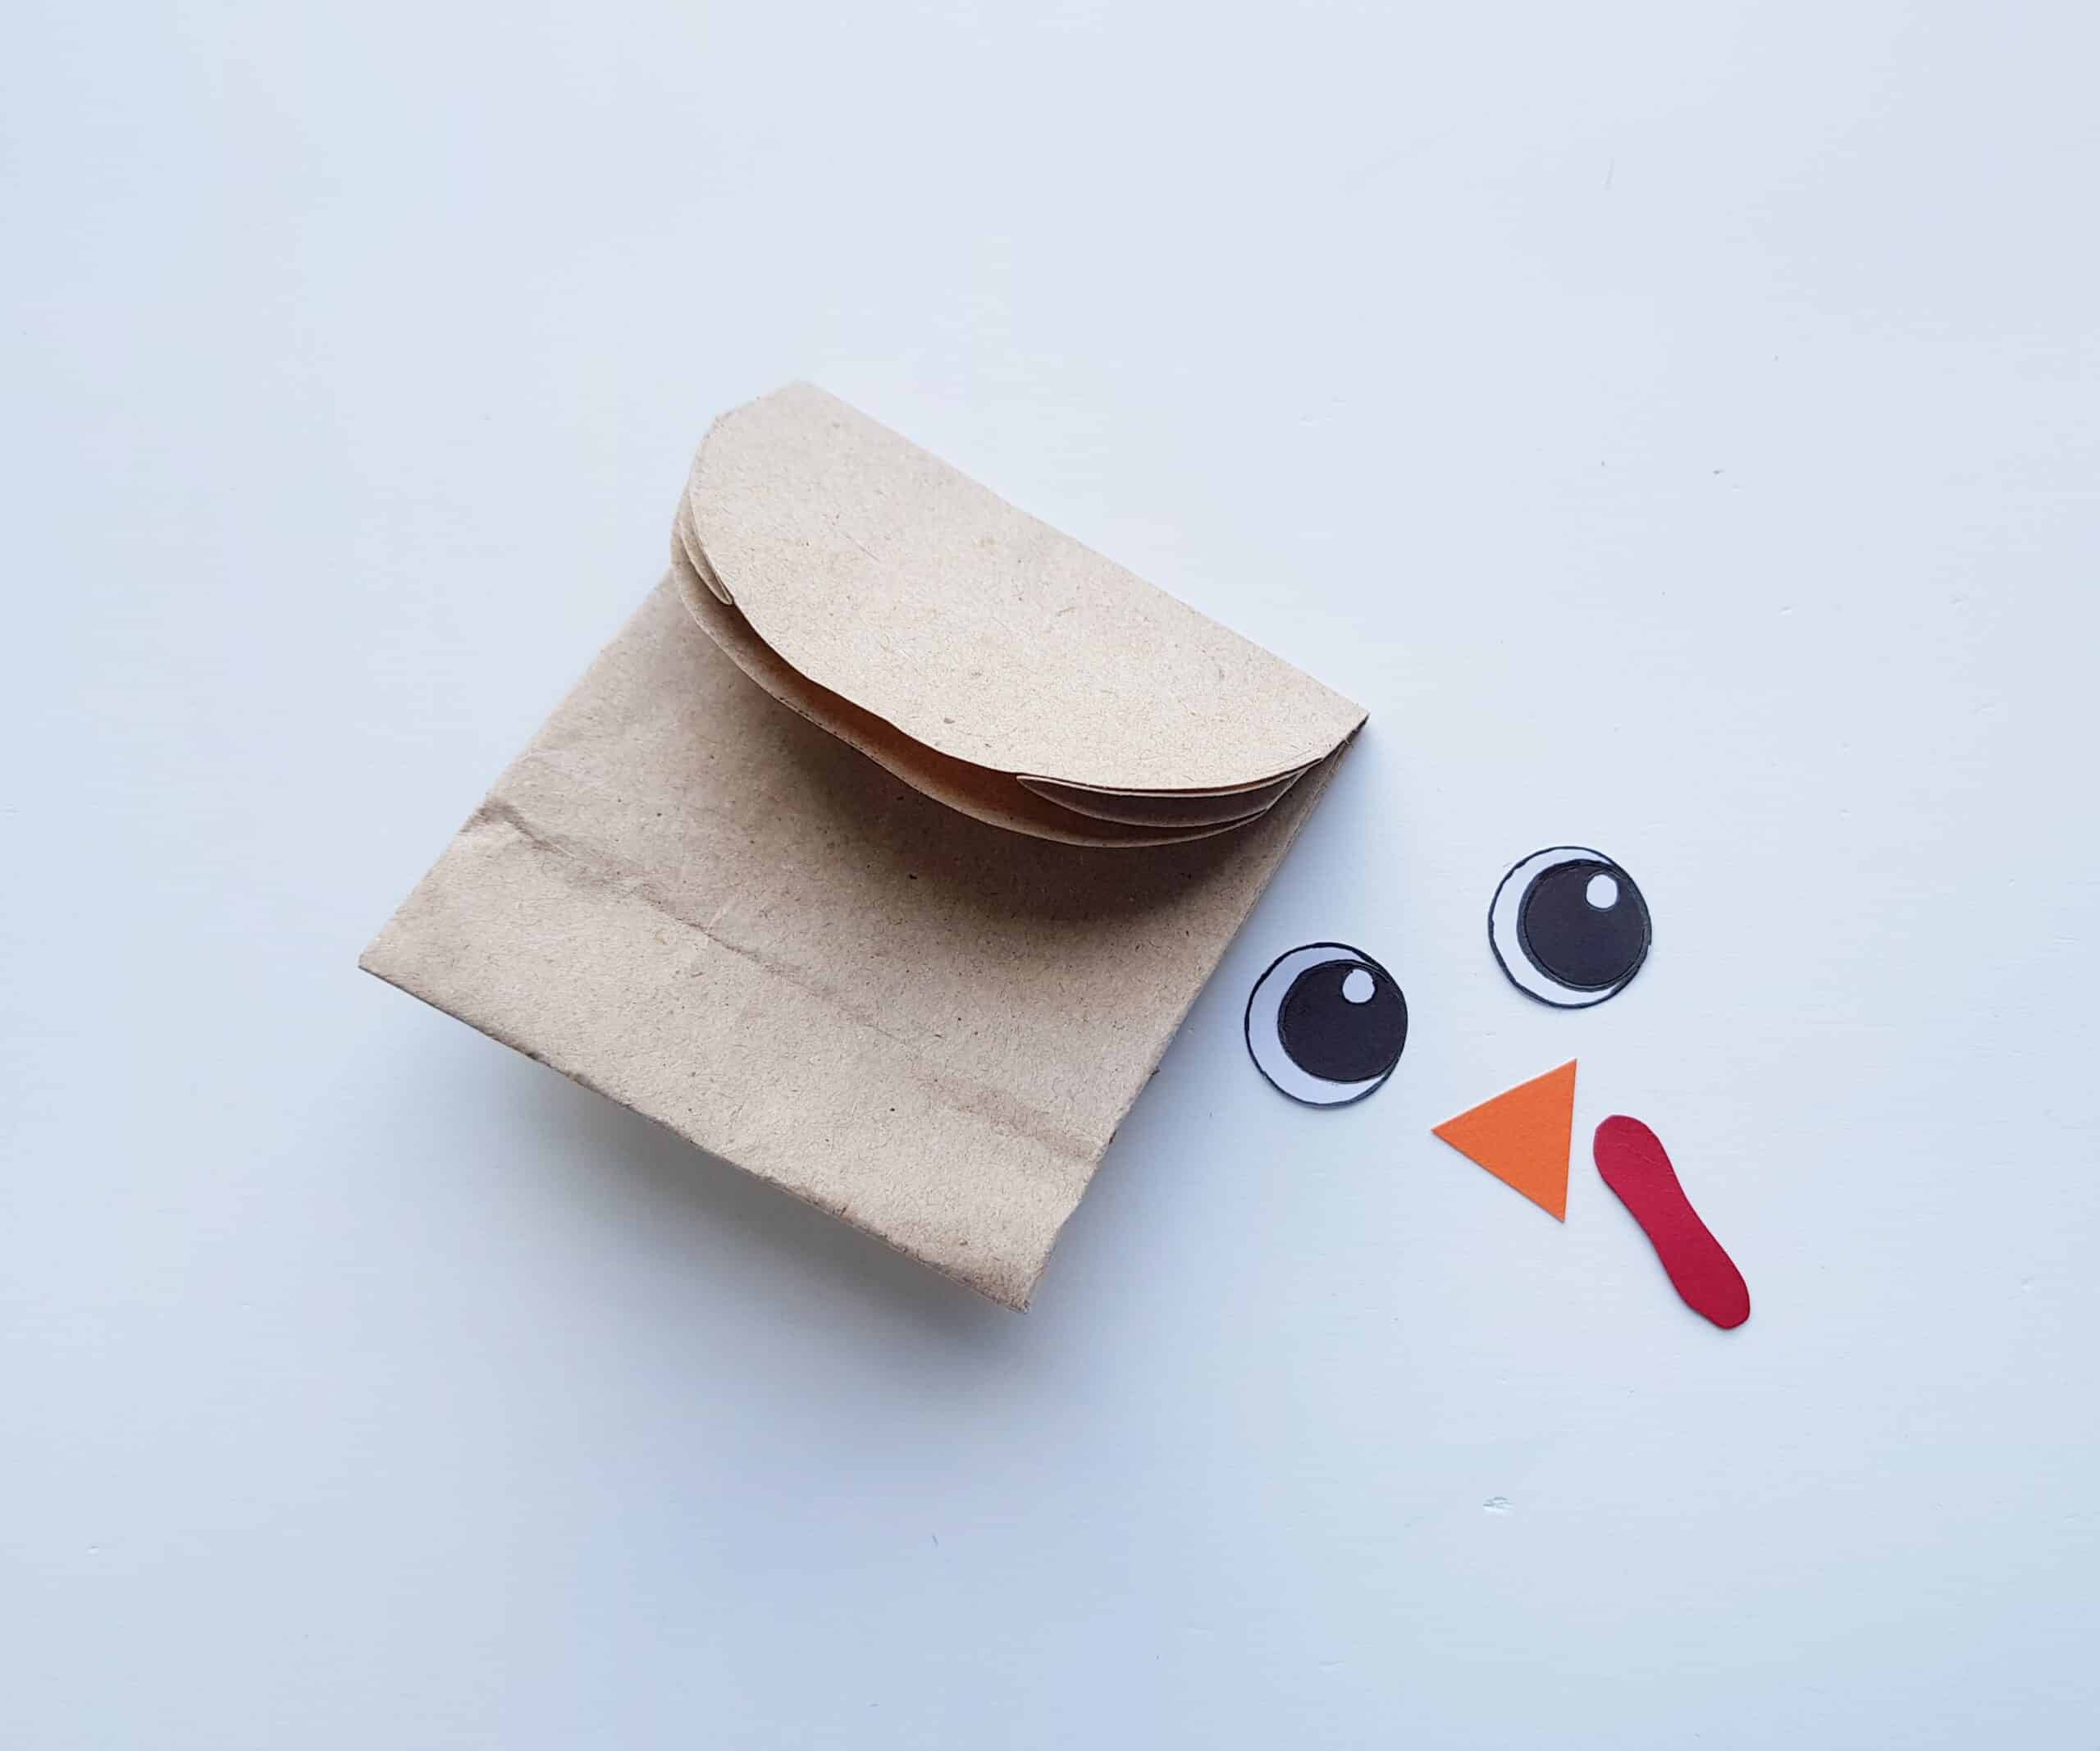
Fold down the top (open) end of your paper bag over to make a large flap. Use scissors to cut this flap into a curve, as shown.
Next, use the colored craft paper to cut out tail feathers, a beak, eyes and a wattle. You can do a very simple “teardrop” shape for the feathers, choosing your favorite fall colors. The eyes are simple circles (cutting these from white paper is simplest, but you can also use a white gel pen to color in the white part). The beak is just a small, orange triangle. An oval or peanut shape works great for the wattle!
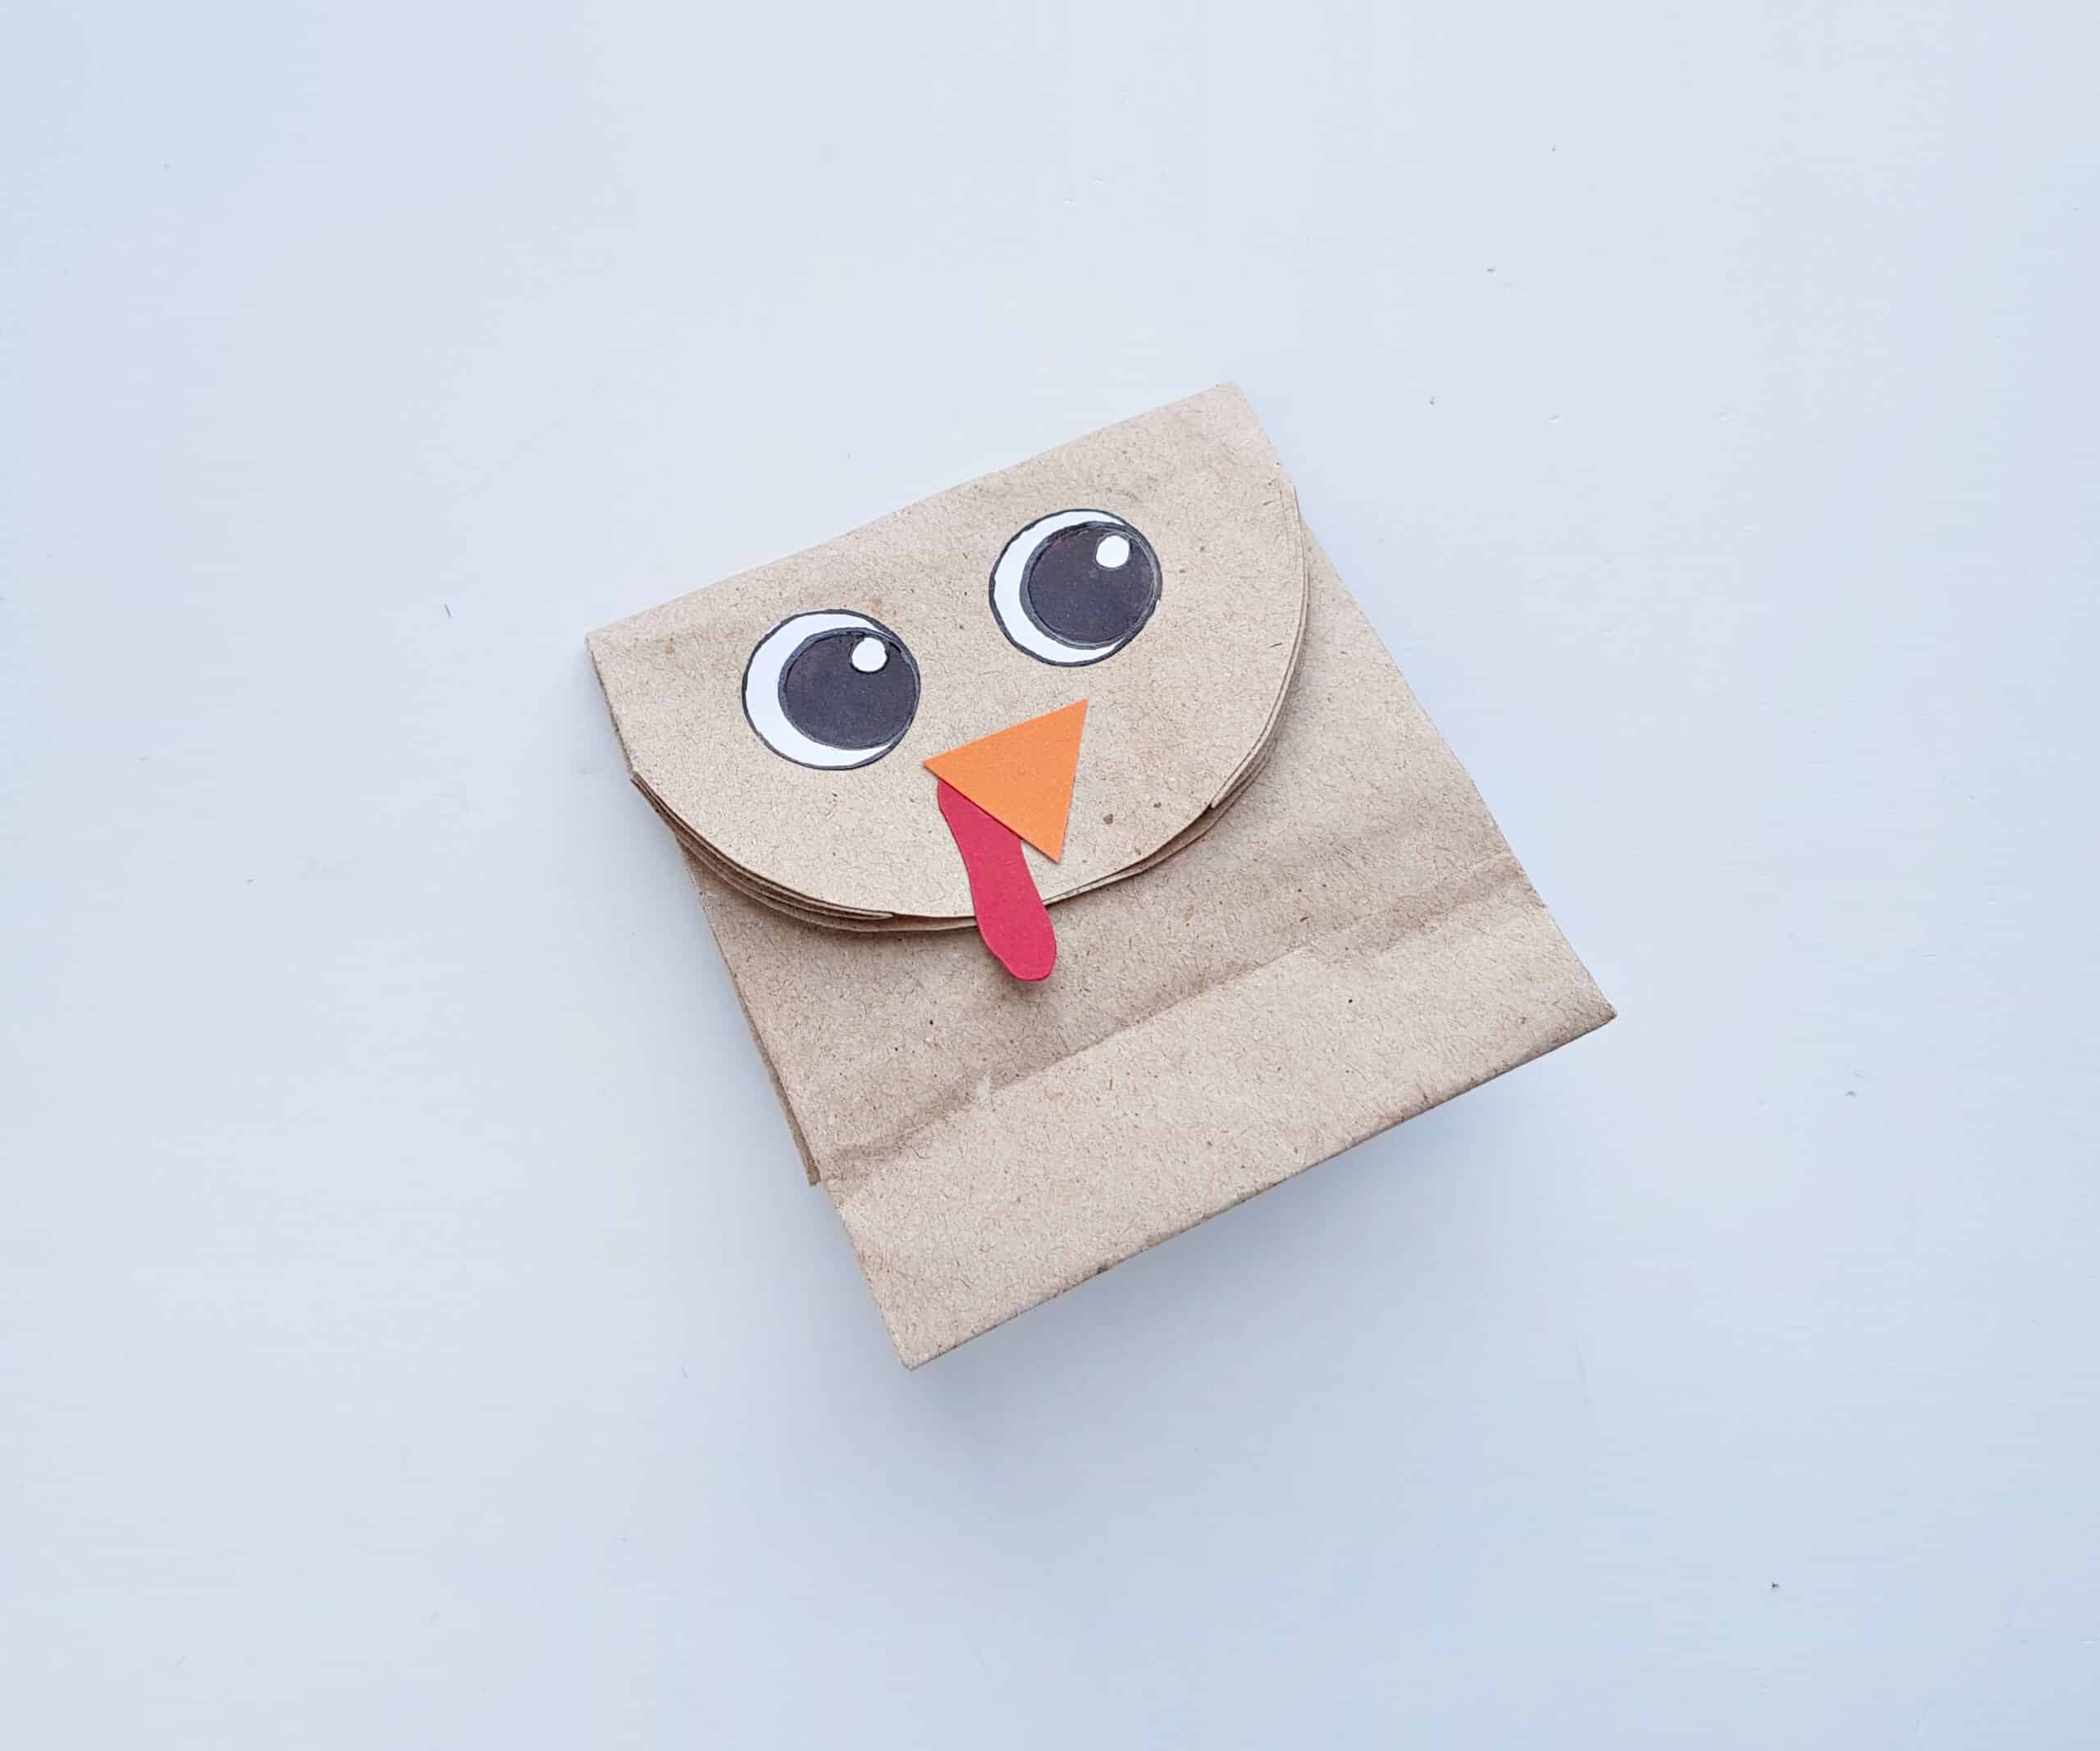
Use craft glue to attach the eyes, beak and wattle on the folded, curved part of the paper bag.
If you haven’t yet, take this opportunity to choose and arrange your tail feather colors!
Note: If you plan to create a decorative “turkey family,” for this craft, it could be fun to choose tail feathers to reflect each family member’s favorite colors!
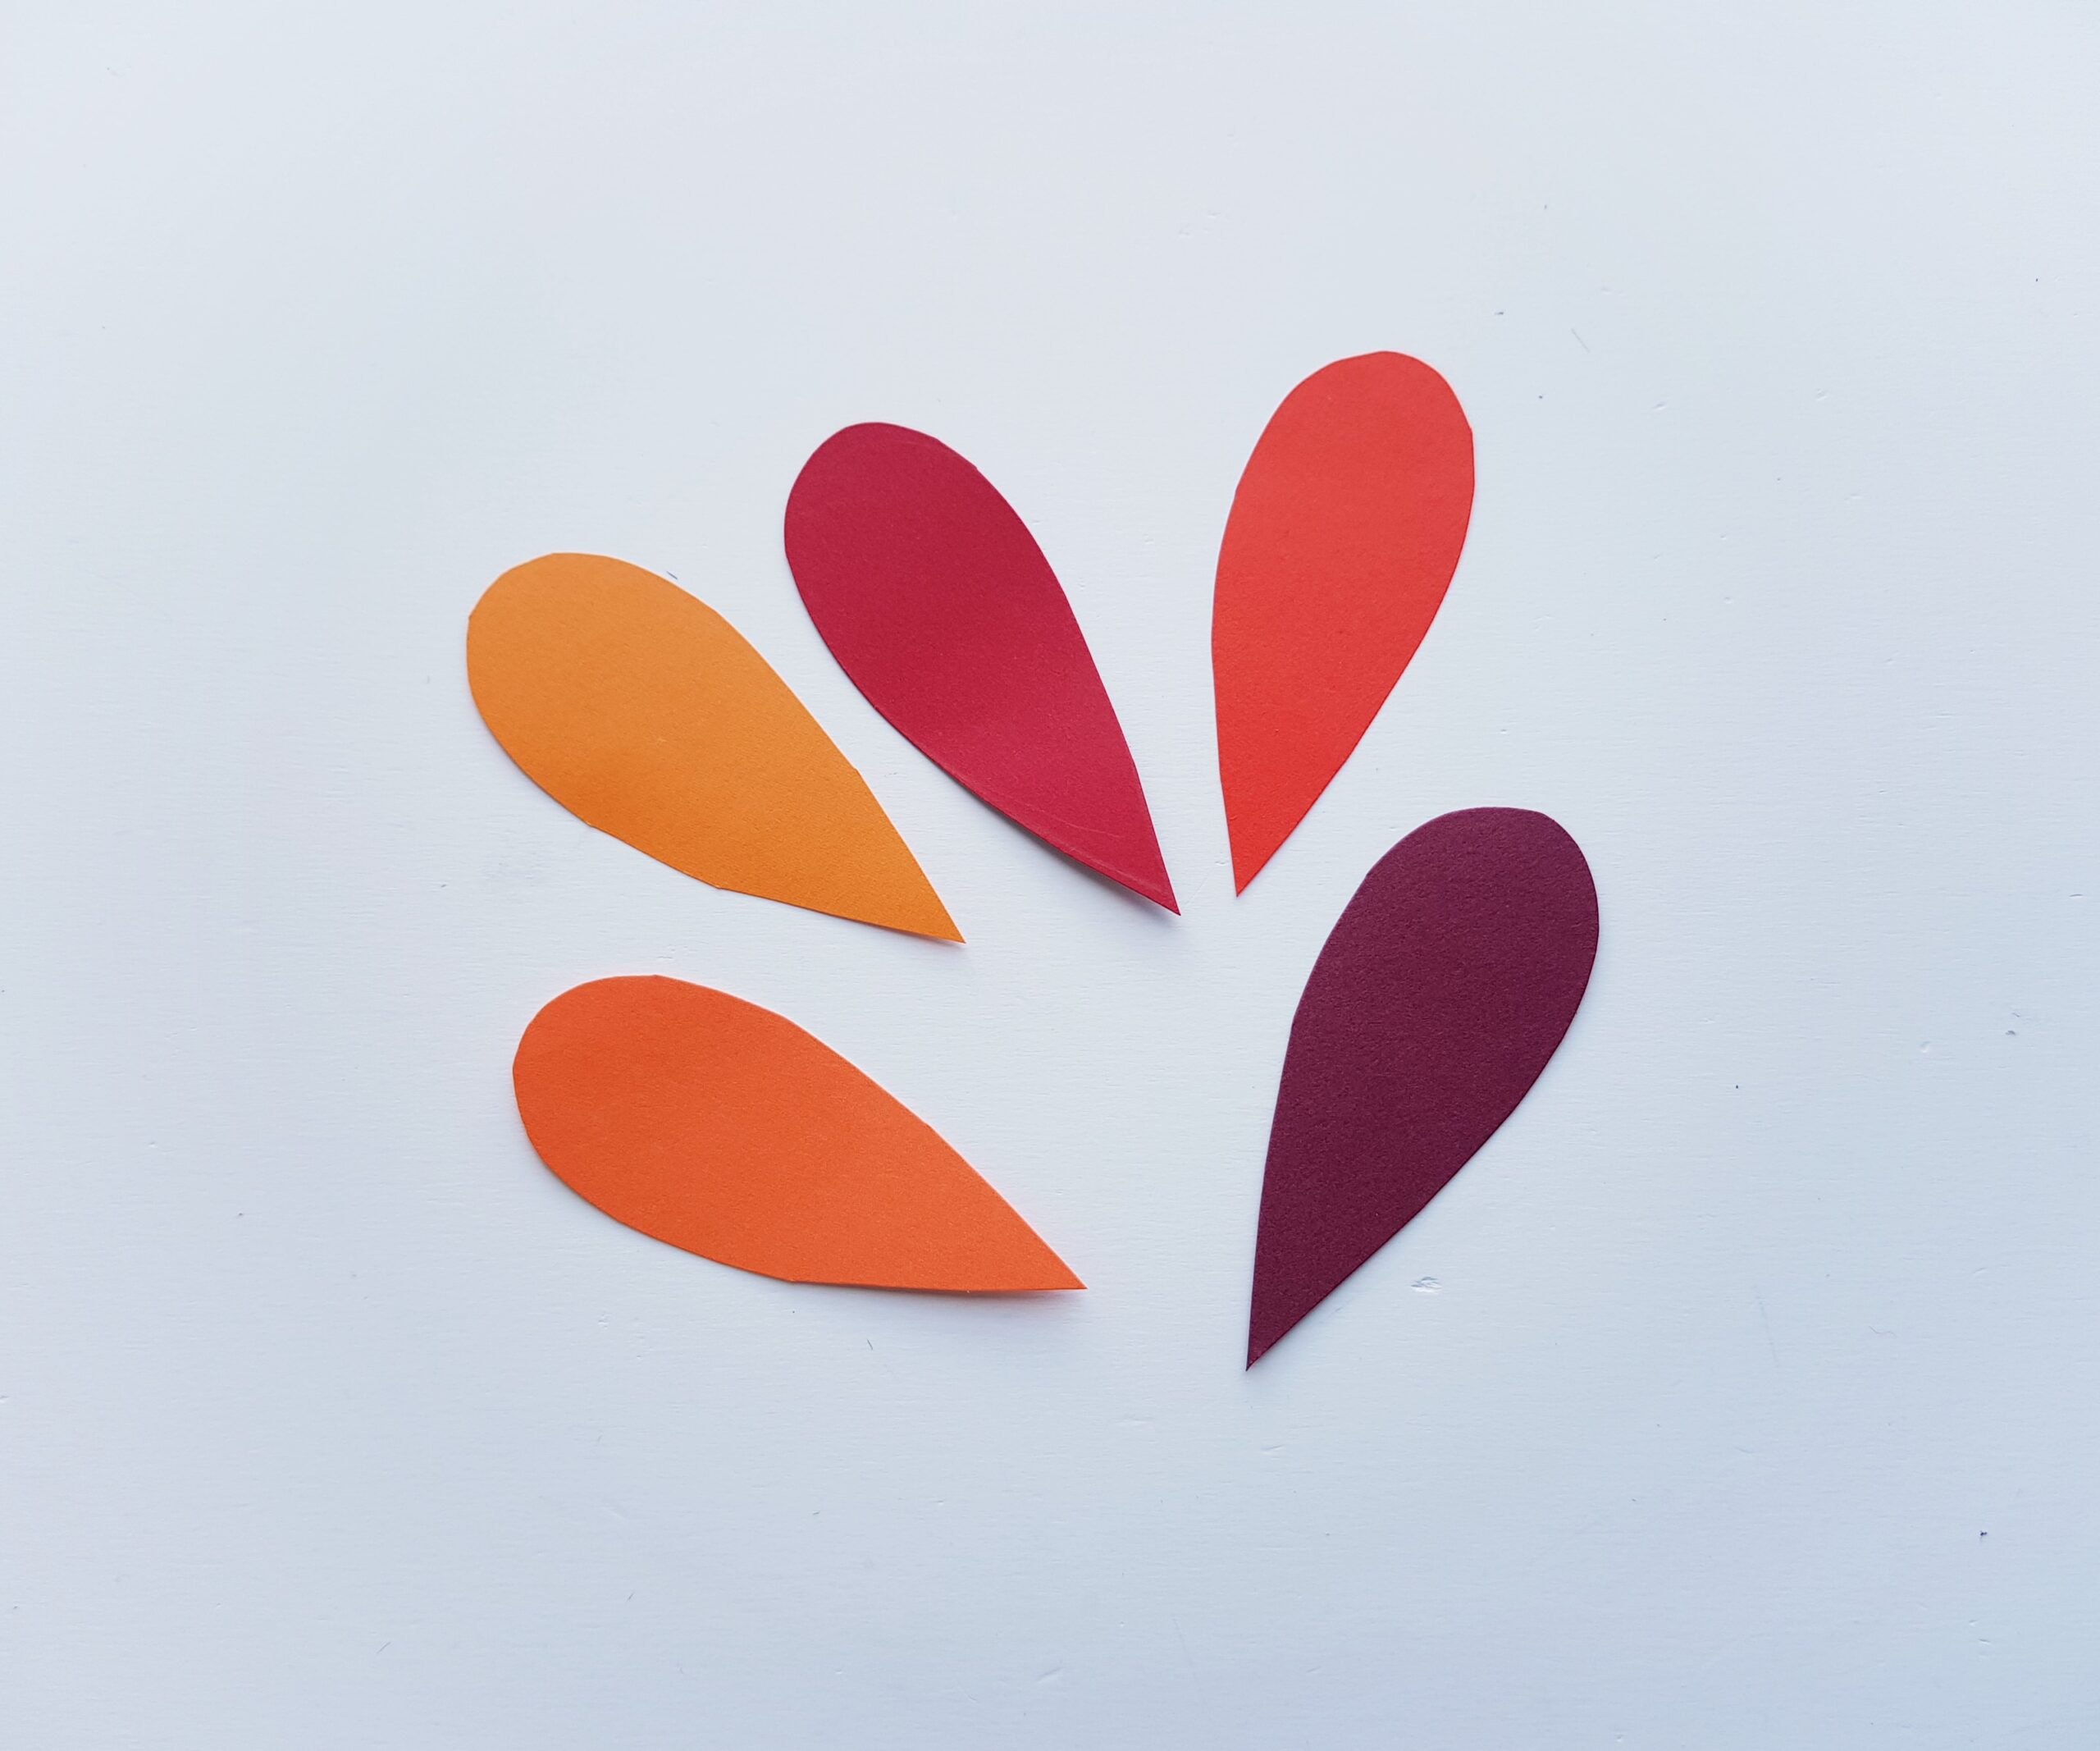
Lastly, glue the tail feathers on the back side of the turkey bag to complete the craft.
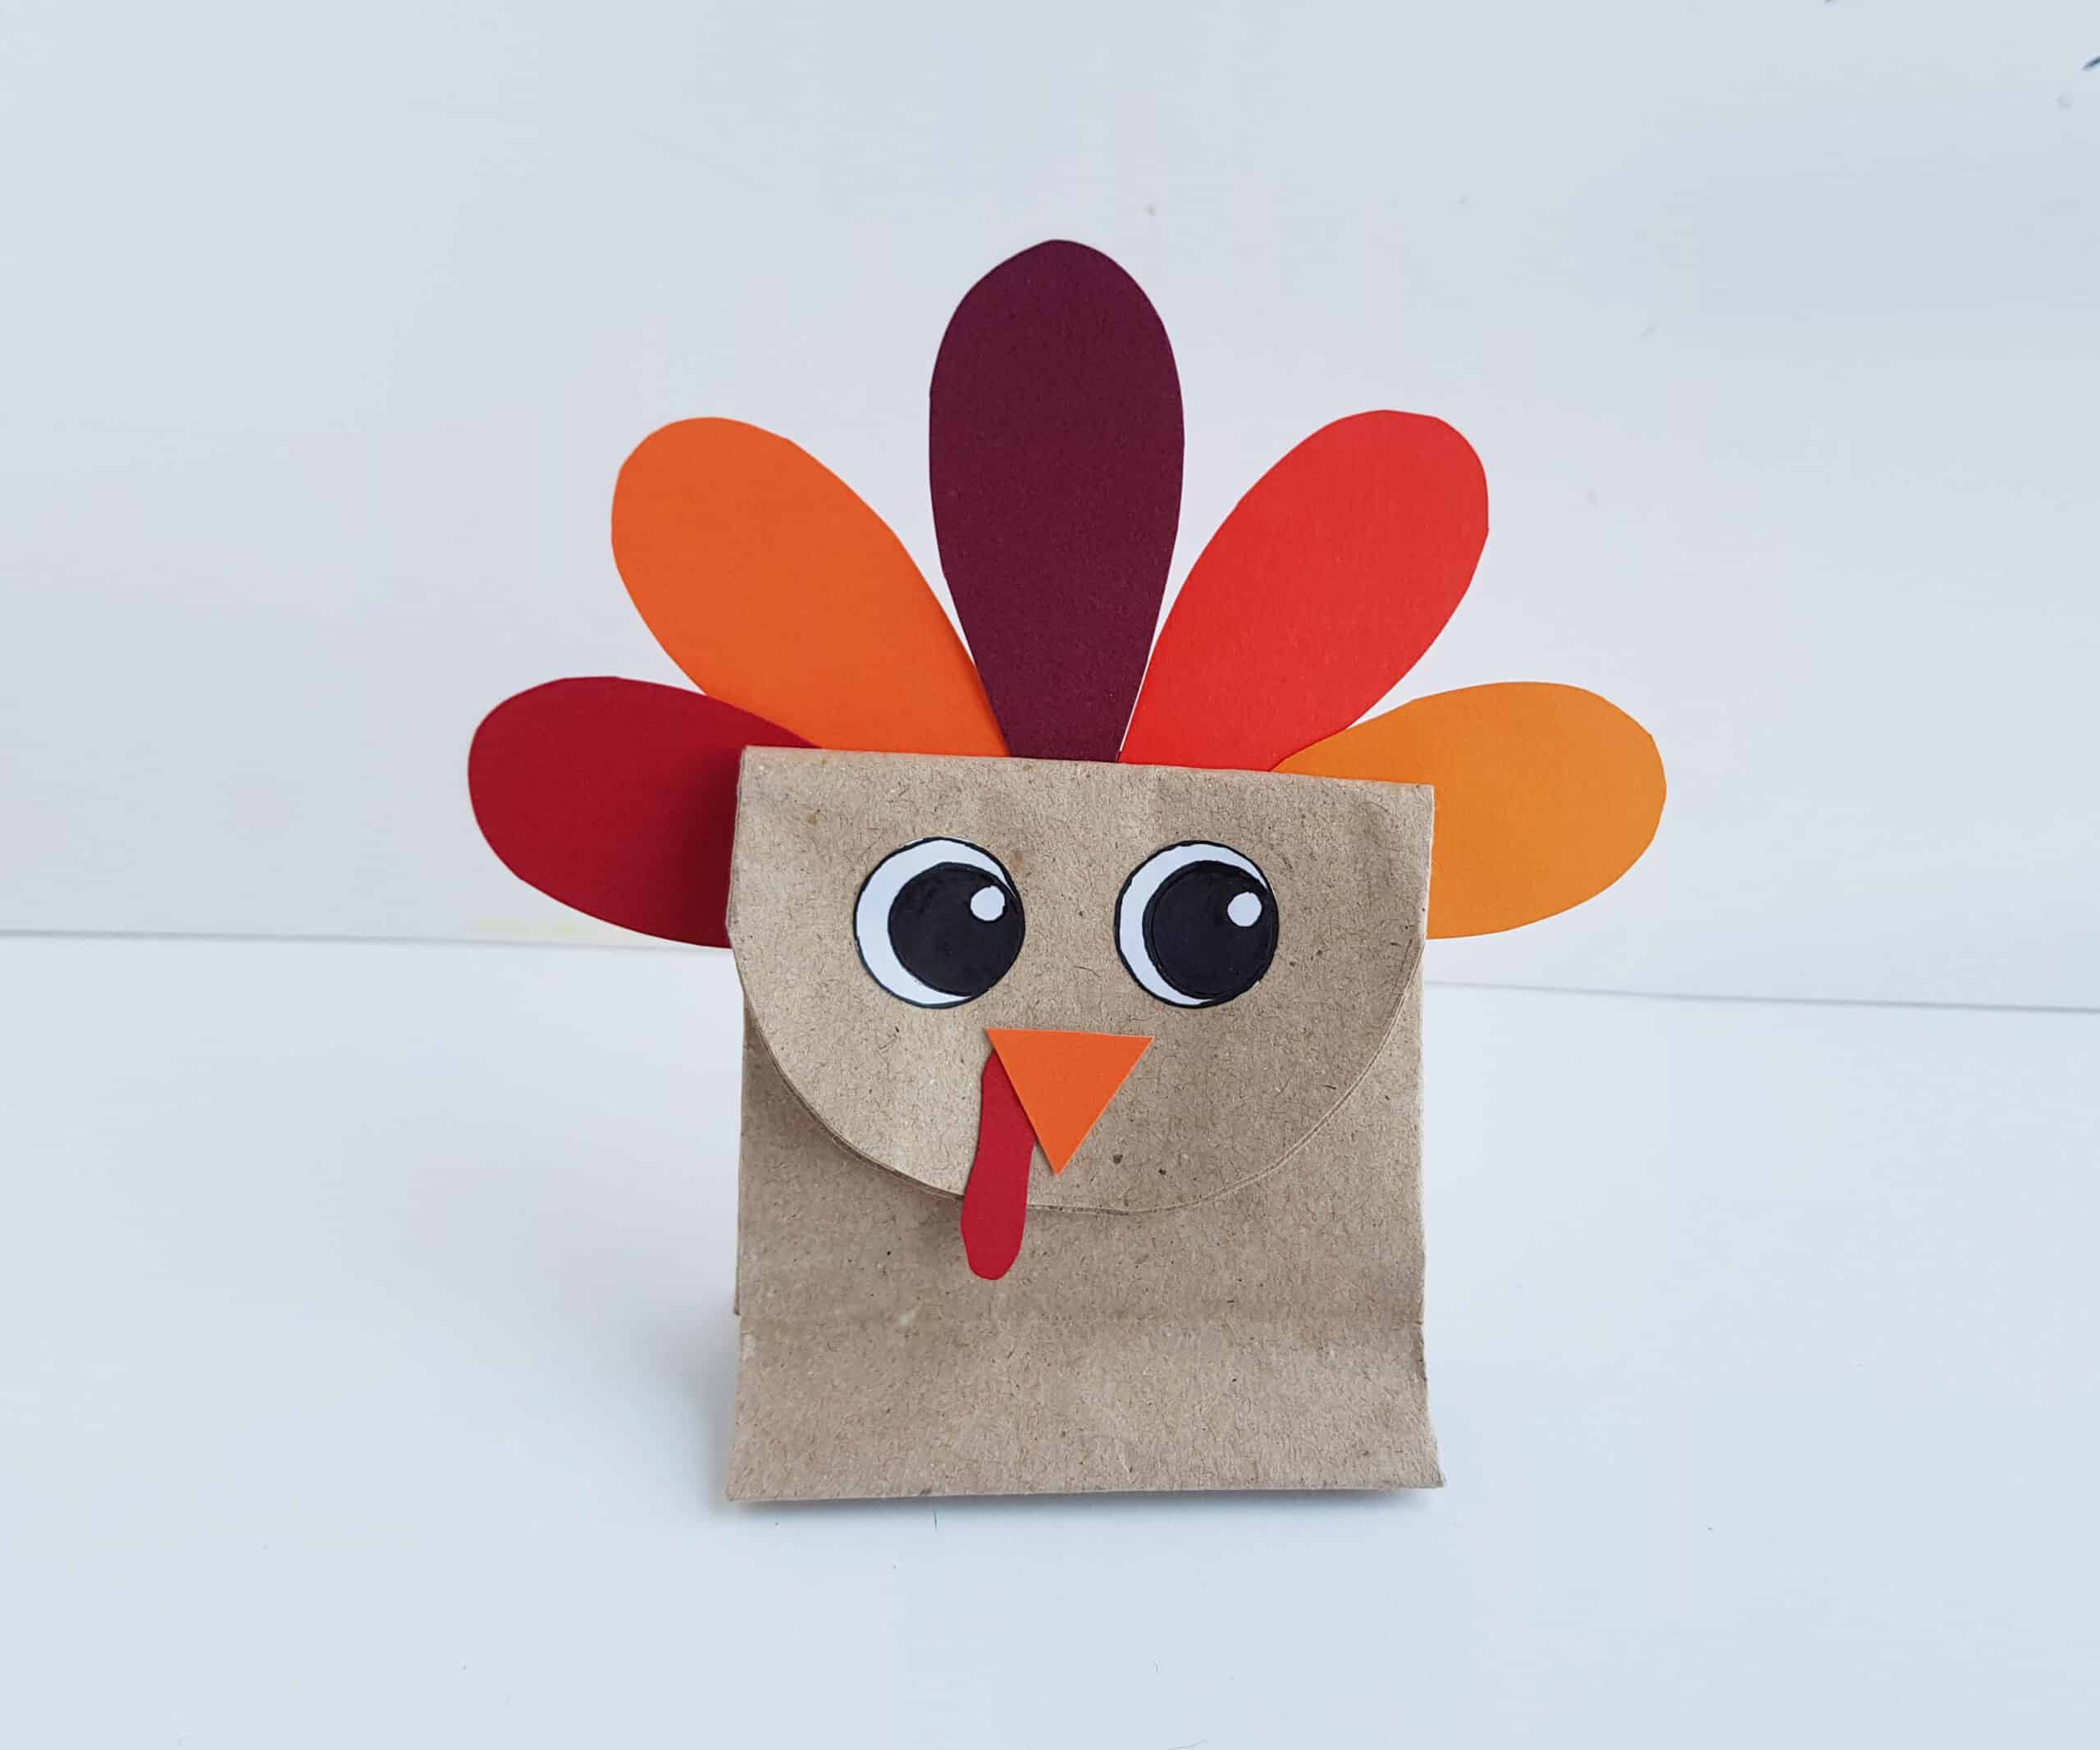
Gobble, gobble! Your cute and simple Paper Bag Craft is now complete! If you’d like some other craft ideas to make out of paper bags, we’ve got you covered. The paper bag crafts below are also simple, decorative and perfect for this time of year!
- Whimsical Autumn Tree Paper Bag Craft
- Easy Apple Paper Bag Craft for All Ages
- Fun Apple Tree Paper Bag Craft
- Easy Decorative Pumpkin Paper Bag Craft
Do you plan to make this craft at home? Will you be trying your hand at paper folding or go the easy route? We’d love to see pictures if anyone makes a turkey family out of paper bags!