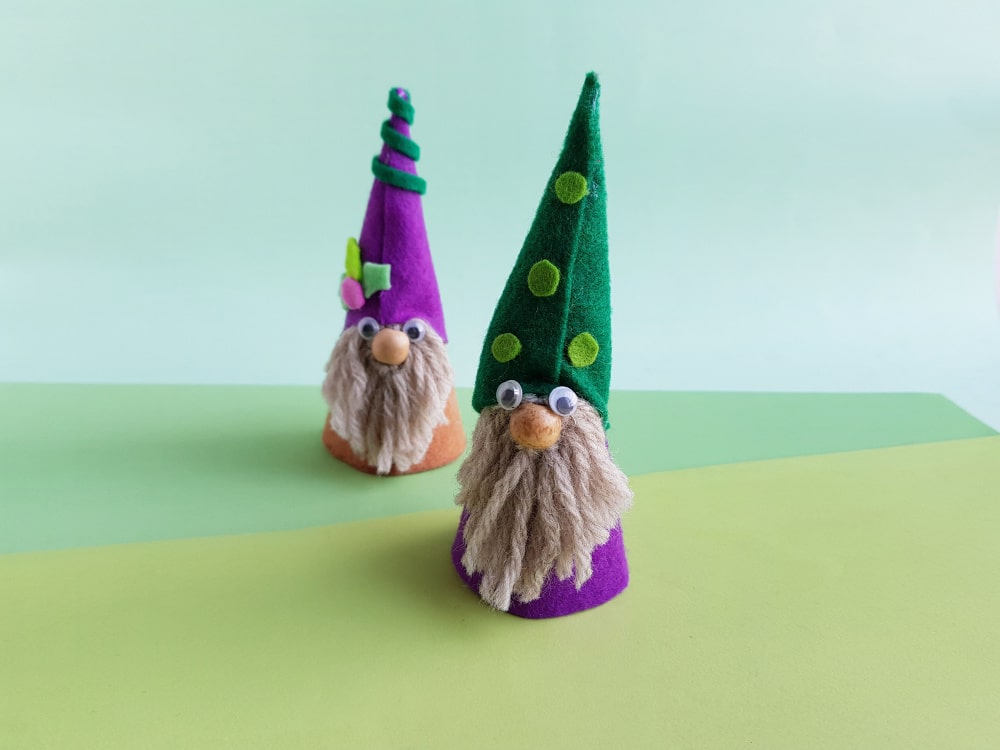
Adorable and Decorative DIY Gnome Doll
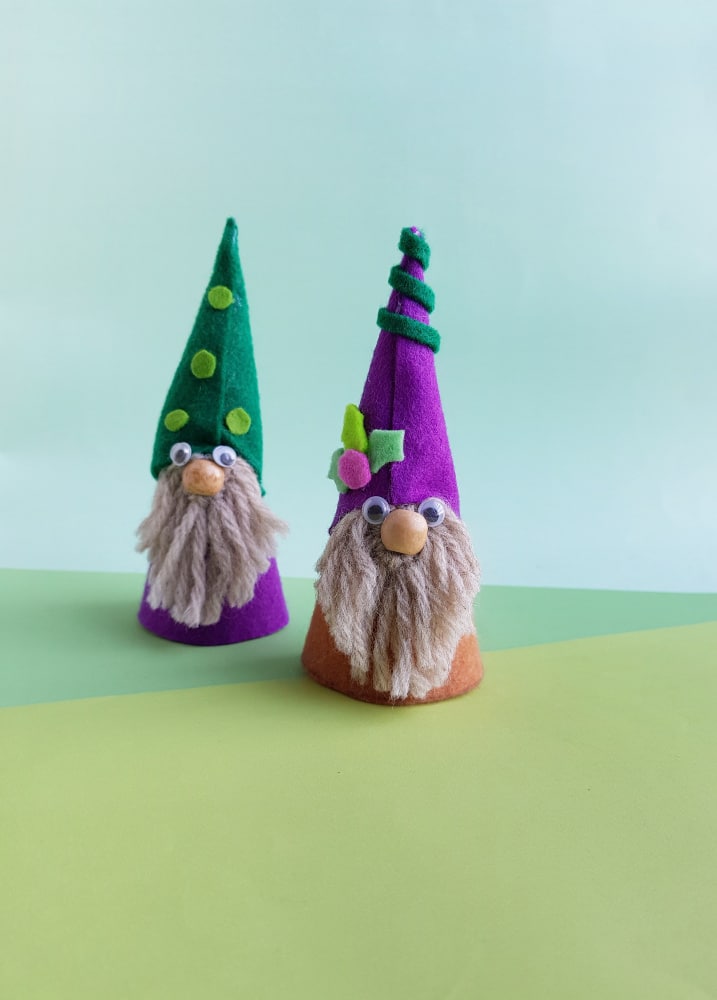
Are you a November 1st Christmas decorator, or do you wait until after all of the Thanksgiving dishes have been cleared away? Whichever you are, we’re bringing you an adorable decorative craft that can brighten up your home from November until January (or longer, if you like!) These Adorable DIY Gnome Dolls are so much fun to make and provide a cheerful autumn/winter aesthetic that will brighten up any home! You can also make these with your children so that they can give them out as gifts throughout the holiday season! Just picture how cute these little gnomes will look on a fireplace mantle or as part of a snow village scene!
(And yet, they also perfectly coordinate with your pumpkins and autumn leaves if you aren’t quite ready for wreaths and snow scenes!)
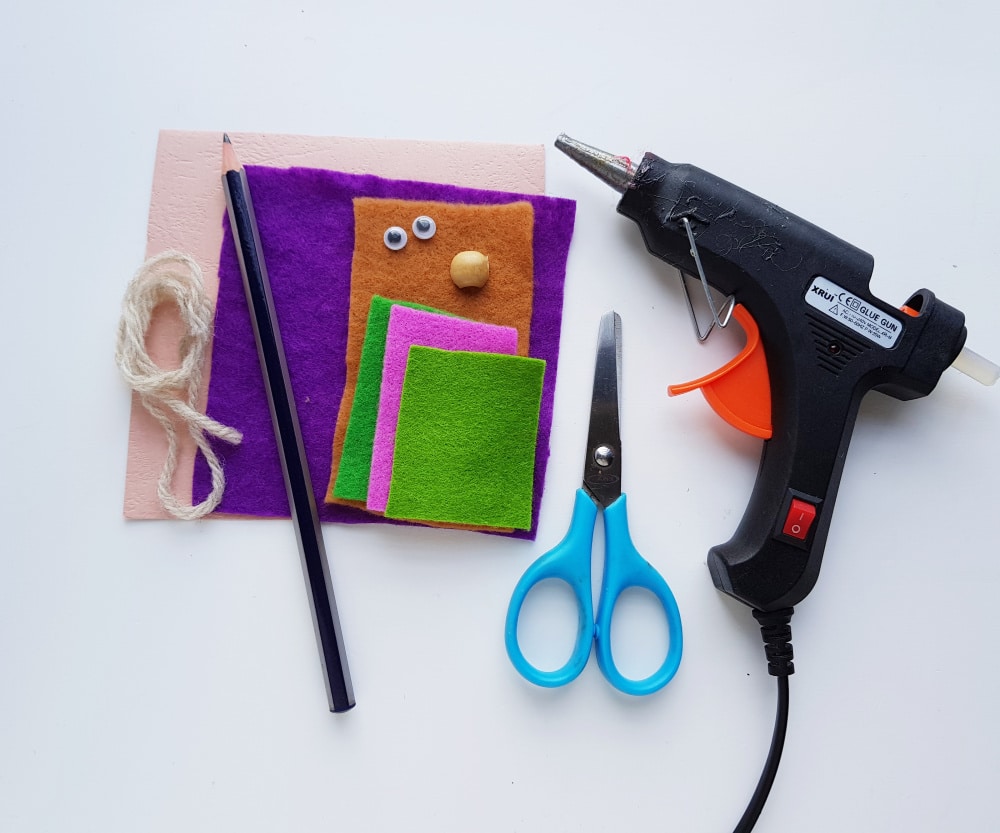
What You Need:
To make these adorable DIY Gnome Dolls, you’re going to need just a few supplies:
2. Felt fabric in various colors
3. Pencil
4. Scissors
5. Hot glue gun
6. Yarn
7. Wooden bead (for the nose)
9. Googly eyes (optional)
How to Make It:
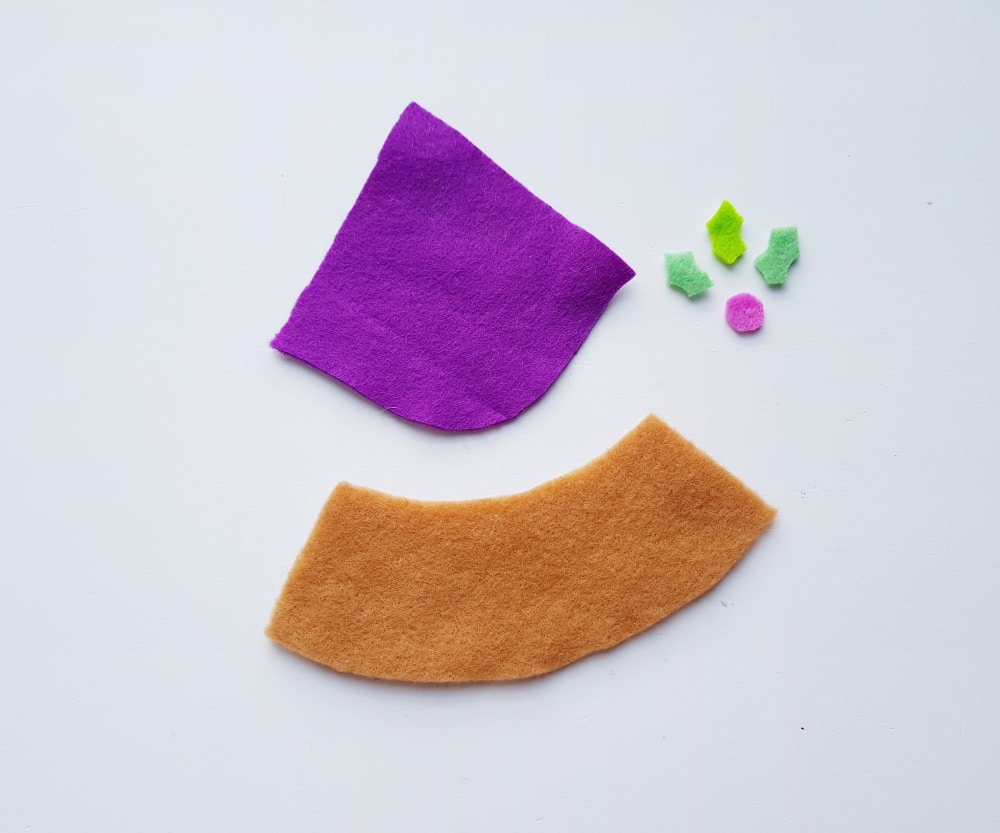
To make your gnome, start out by tracing a quarter-circle onto cardstock paper. Cut it out (it should look something like the picture below).

Next, roll up your quarter-circle to form a nice, neat cone shape. Once you are happy with it, apply some craft glue the overlapping pieces and allow your cone to dry.

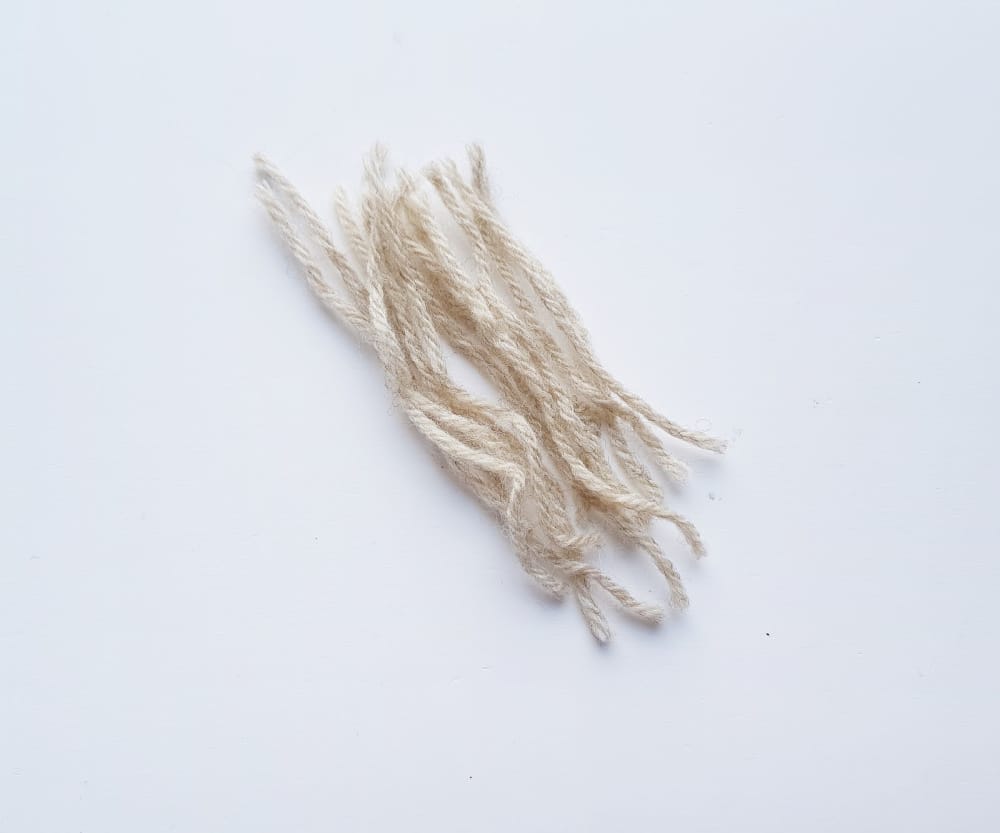
The cone you’ve created will serve as the body of gnome, and now you get to personalize what each, individual one will look like! Select the color of yarn that you would like for your gnome’s beard, and cut out several short pieces in that color.
I decided to cut my yarn pieces at about 3 inches–better to keep the strands long at first, and then you can trim it into better shape, later!
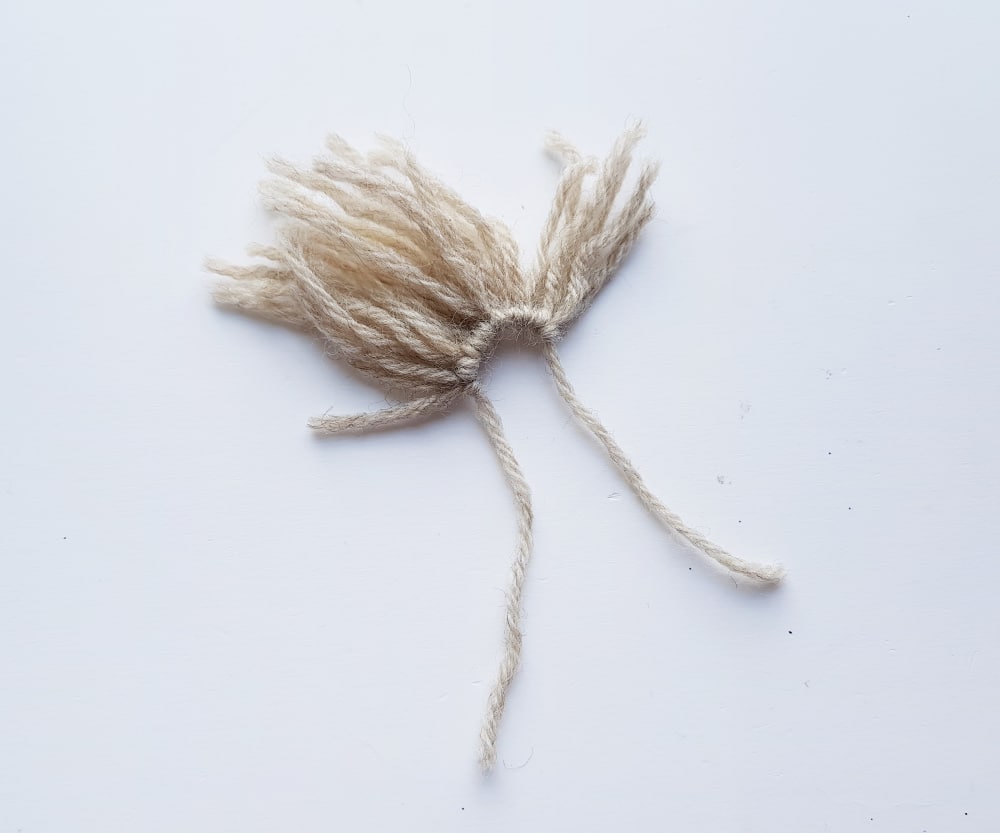
Don’t apply the yarn to the cone just yet, though. First, grab one strand of yarn and lay it on a flat surface. Then, get 2 strands and fold them in half (making a loop). Place the double-yarn loop on top of the single strand, as shown.

Take each of the open ends of the double loop and wrap them back around (and underneath) the the single
strand of yarn. Then pull them back over the single strand. Ultimately, each of the double-loop strands will make a knot around the single strand, as shown below. Makes sure everything is pulled tightly.
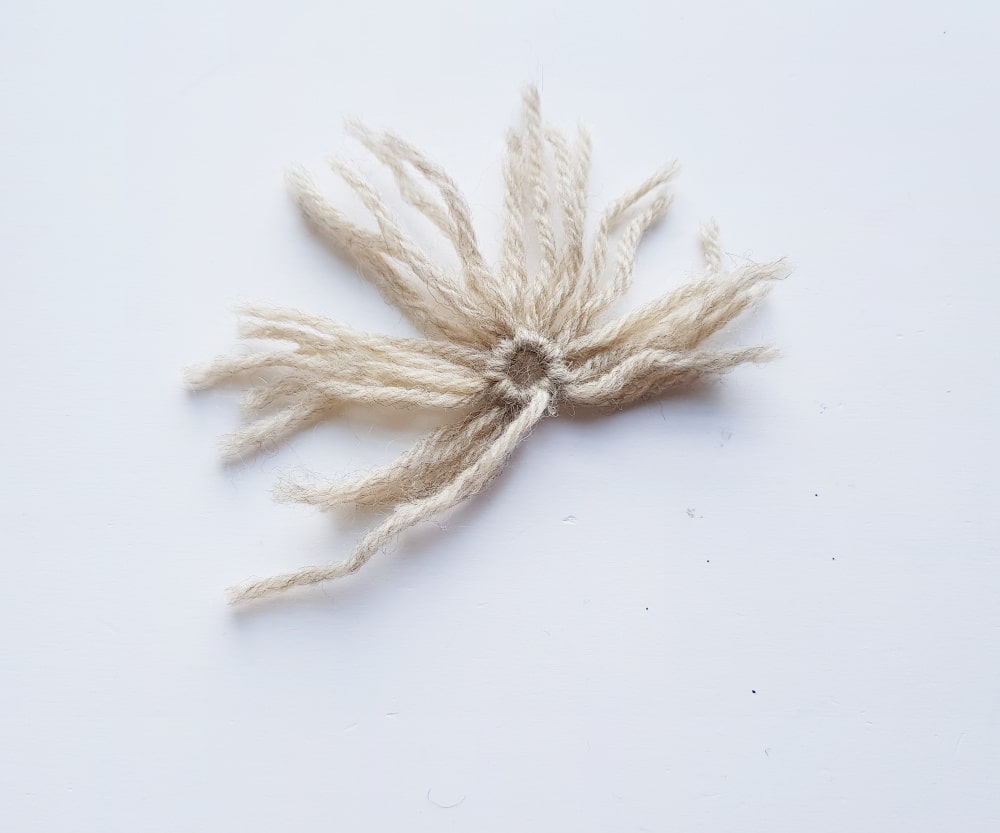
Place more looped strands on top of the single strand and continue this process until your gnome’s beard is as thick as you want it to be!
Next, cut a small, rectangular piece of felt. It should be a similar color to the yarn you’ve chosen for the beard, and about the right size to fit neatly behind it.
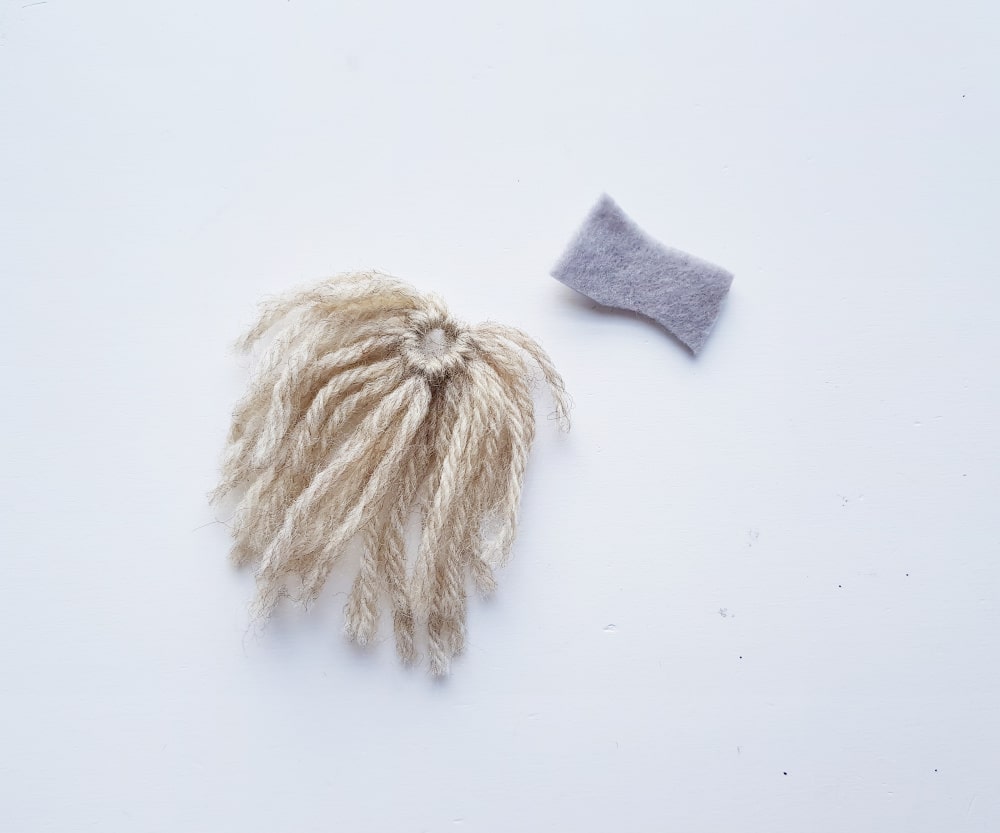
Use hot glue gun to attach the yarn beard onto the felt. This will help the beard hold up longer and allow it to attach more effectively to the card stock cone!

Now you get to design some gnome clothes! If you have kids, they will really enjoy getting creative with this part. While you can feel free to make your own, original designs, this template is here to help you get some ideas about the right shapes and sizes. It includes a traceable pattern for the main outfit, a hat, and a sprig of holly!
After you’ve drawn (or traced) the pattern for your clothes onto the felt pieces, carefully cut them out.
But we’ve got one more thing to do before you glue on those outfits you made!
First, you want to take a wooden bead and use the hot glue to attach it right into that hole in the middle of the yarn beard! Wooden beads make the perfect noses for these little gnomes. While you can use any type of wooden bead, I personally like these wooden beads because they come in a variety of sizes (so you can make each gnome in your collection a little bit unique)!
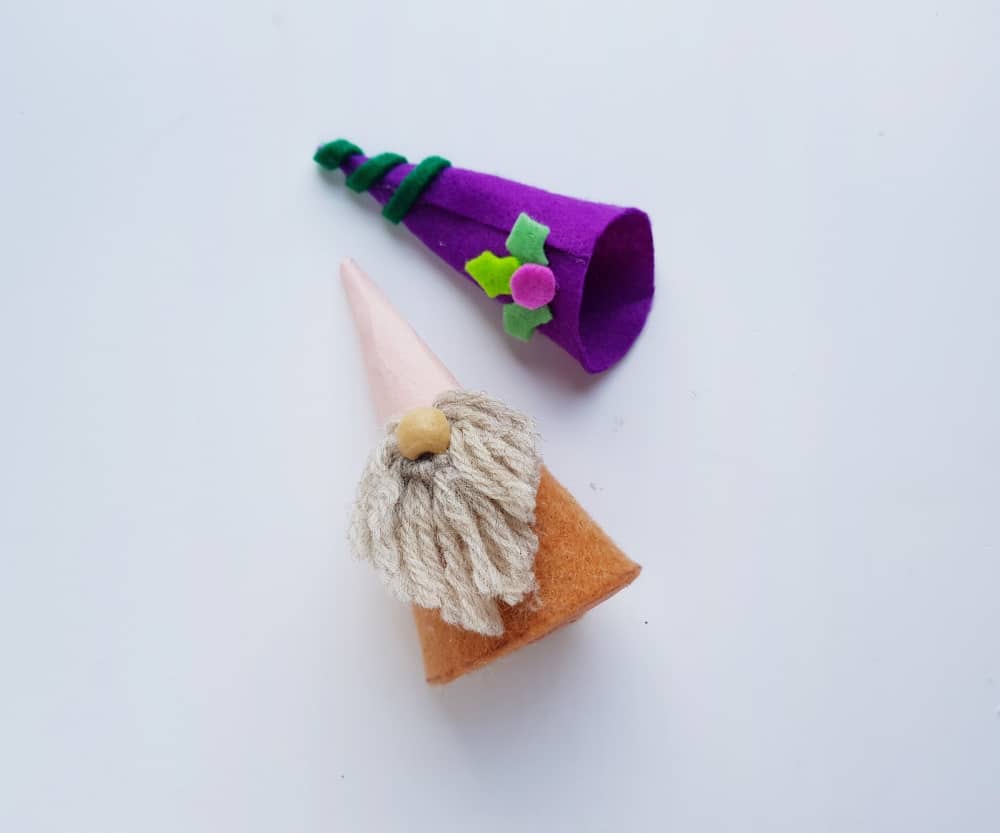
Next, roll the felt cutout for the hat into a cone-shape and glue the overlapping ends together. You will also want to glue on the holly sprig (or whatever other hat decorations you create).
Take the cardstock cone (the body of the gnome) and wrap/glue the other felt cutout around it to create a “robe” effect.

Glue the felt piece with the beard onto the cardstock cone, relatively in the middle part of the cone (above the robe but leaving room for the hat).
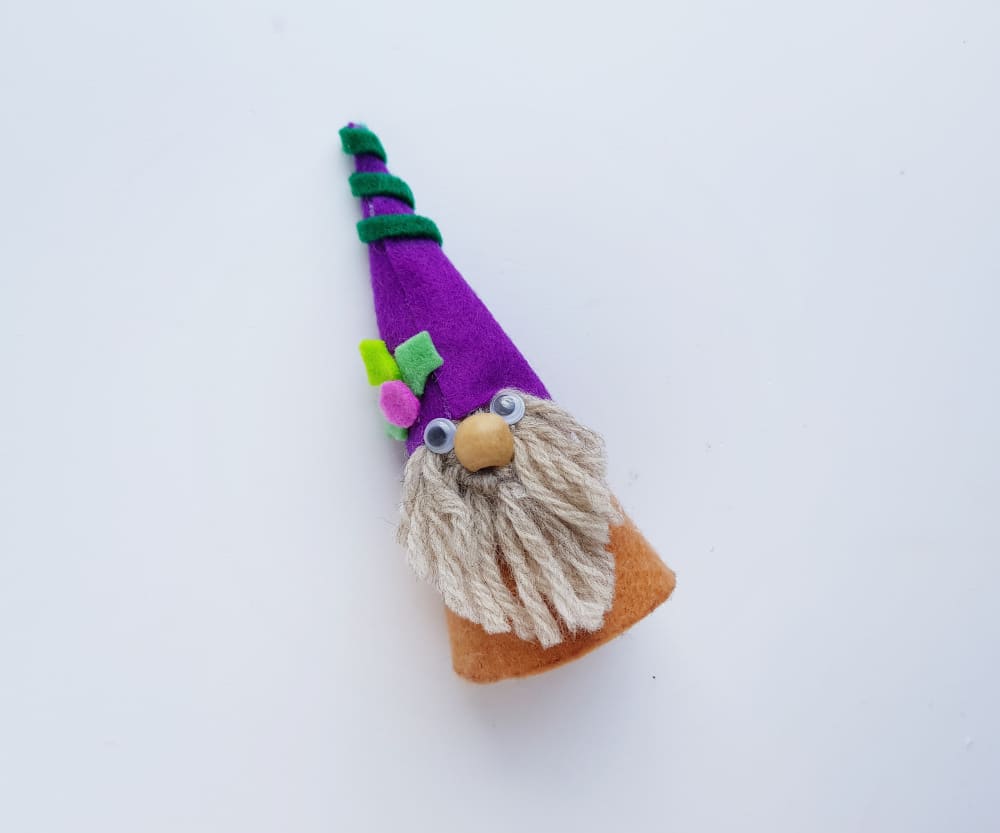
Now you can attach/hot glue the felt hat onto the top of the cardstock cone. You can also trim the beard into a neater shape, if you want to.

At this point, I think they look great and make a whimsical-looking decoration!
However, if you have kids, they will really enjoy adding the googly eyes and seeing how it makes these little gnomes extra fun! Googly eyes or no googly eyes–the choice is yours!
After this step, feel free to add any extra decoration you want! When you are completely happy with how they look, have fun arranging your DIY Gnomes into festive holiday scenes around the house!
Do you plan to make these Adorable DIY Gnome Dolls? If so, how will you use them to decorate your home for the holidays?