Gorgeous 3D Gingerbread House Paper Craft (with Free Templates!)


I’m so excited to share this Gorgeous 3D Gingerbread House Paper Craft with you! Why? Because this craft idea fits so well with a tradition that my daughter and I have had for the past 10 years or so. My daughter’s 17th birthday is today. Years ago (when she was only 6 or 7 years old), we made a gingerbread house on her birthday. We didn’t make it because it was her birthday, but it just so happened that it worked out that way. Because we “accidentally” made a gingerbread house on her birthday, we kept up the tradition! So for about the past 10 years, we always make a gingerbread house on her birthday. It’s become a tradition that we look forward to for weeks ahead of time! And we use the gingerbread house as part of our holiday decorations too, so we get to enjoy it for weeks after we make it. This year, we may add this beautiful paper craft to our tradition!
This lovely paper craft is intricate and involves a bit of instruction-following and sequencing, which makes it perfect for older children, teens, and adults! This holiday season, we hope you’ll make it part of a new family tradition! In fact, you may have to make several of them so you’ll have one to keep and some to give away. (A Hip Homeschool Mom could also enjoy making this beautiful craft by herself–or even as part of a girls’ night!)
Included in this tutorial are all of the (free) printable templates you need to make this craft.

What You’ll Need:
- Colored cardstock paper
- White embossed paper
- Pencil
- Scissors
- Craft glue
- X-ACTO knife
- Ruler
- Craft glue
- Craft foam board
Free Printable Templates:
- Gingerbread House Scene Background and Decorative Items Template
- Gingerbread House Scene 4th and 3rd layer Template
- Gingerbread House Scene 1st and 2nd layer Template
How to Make It:
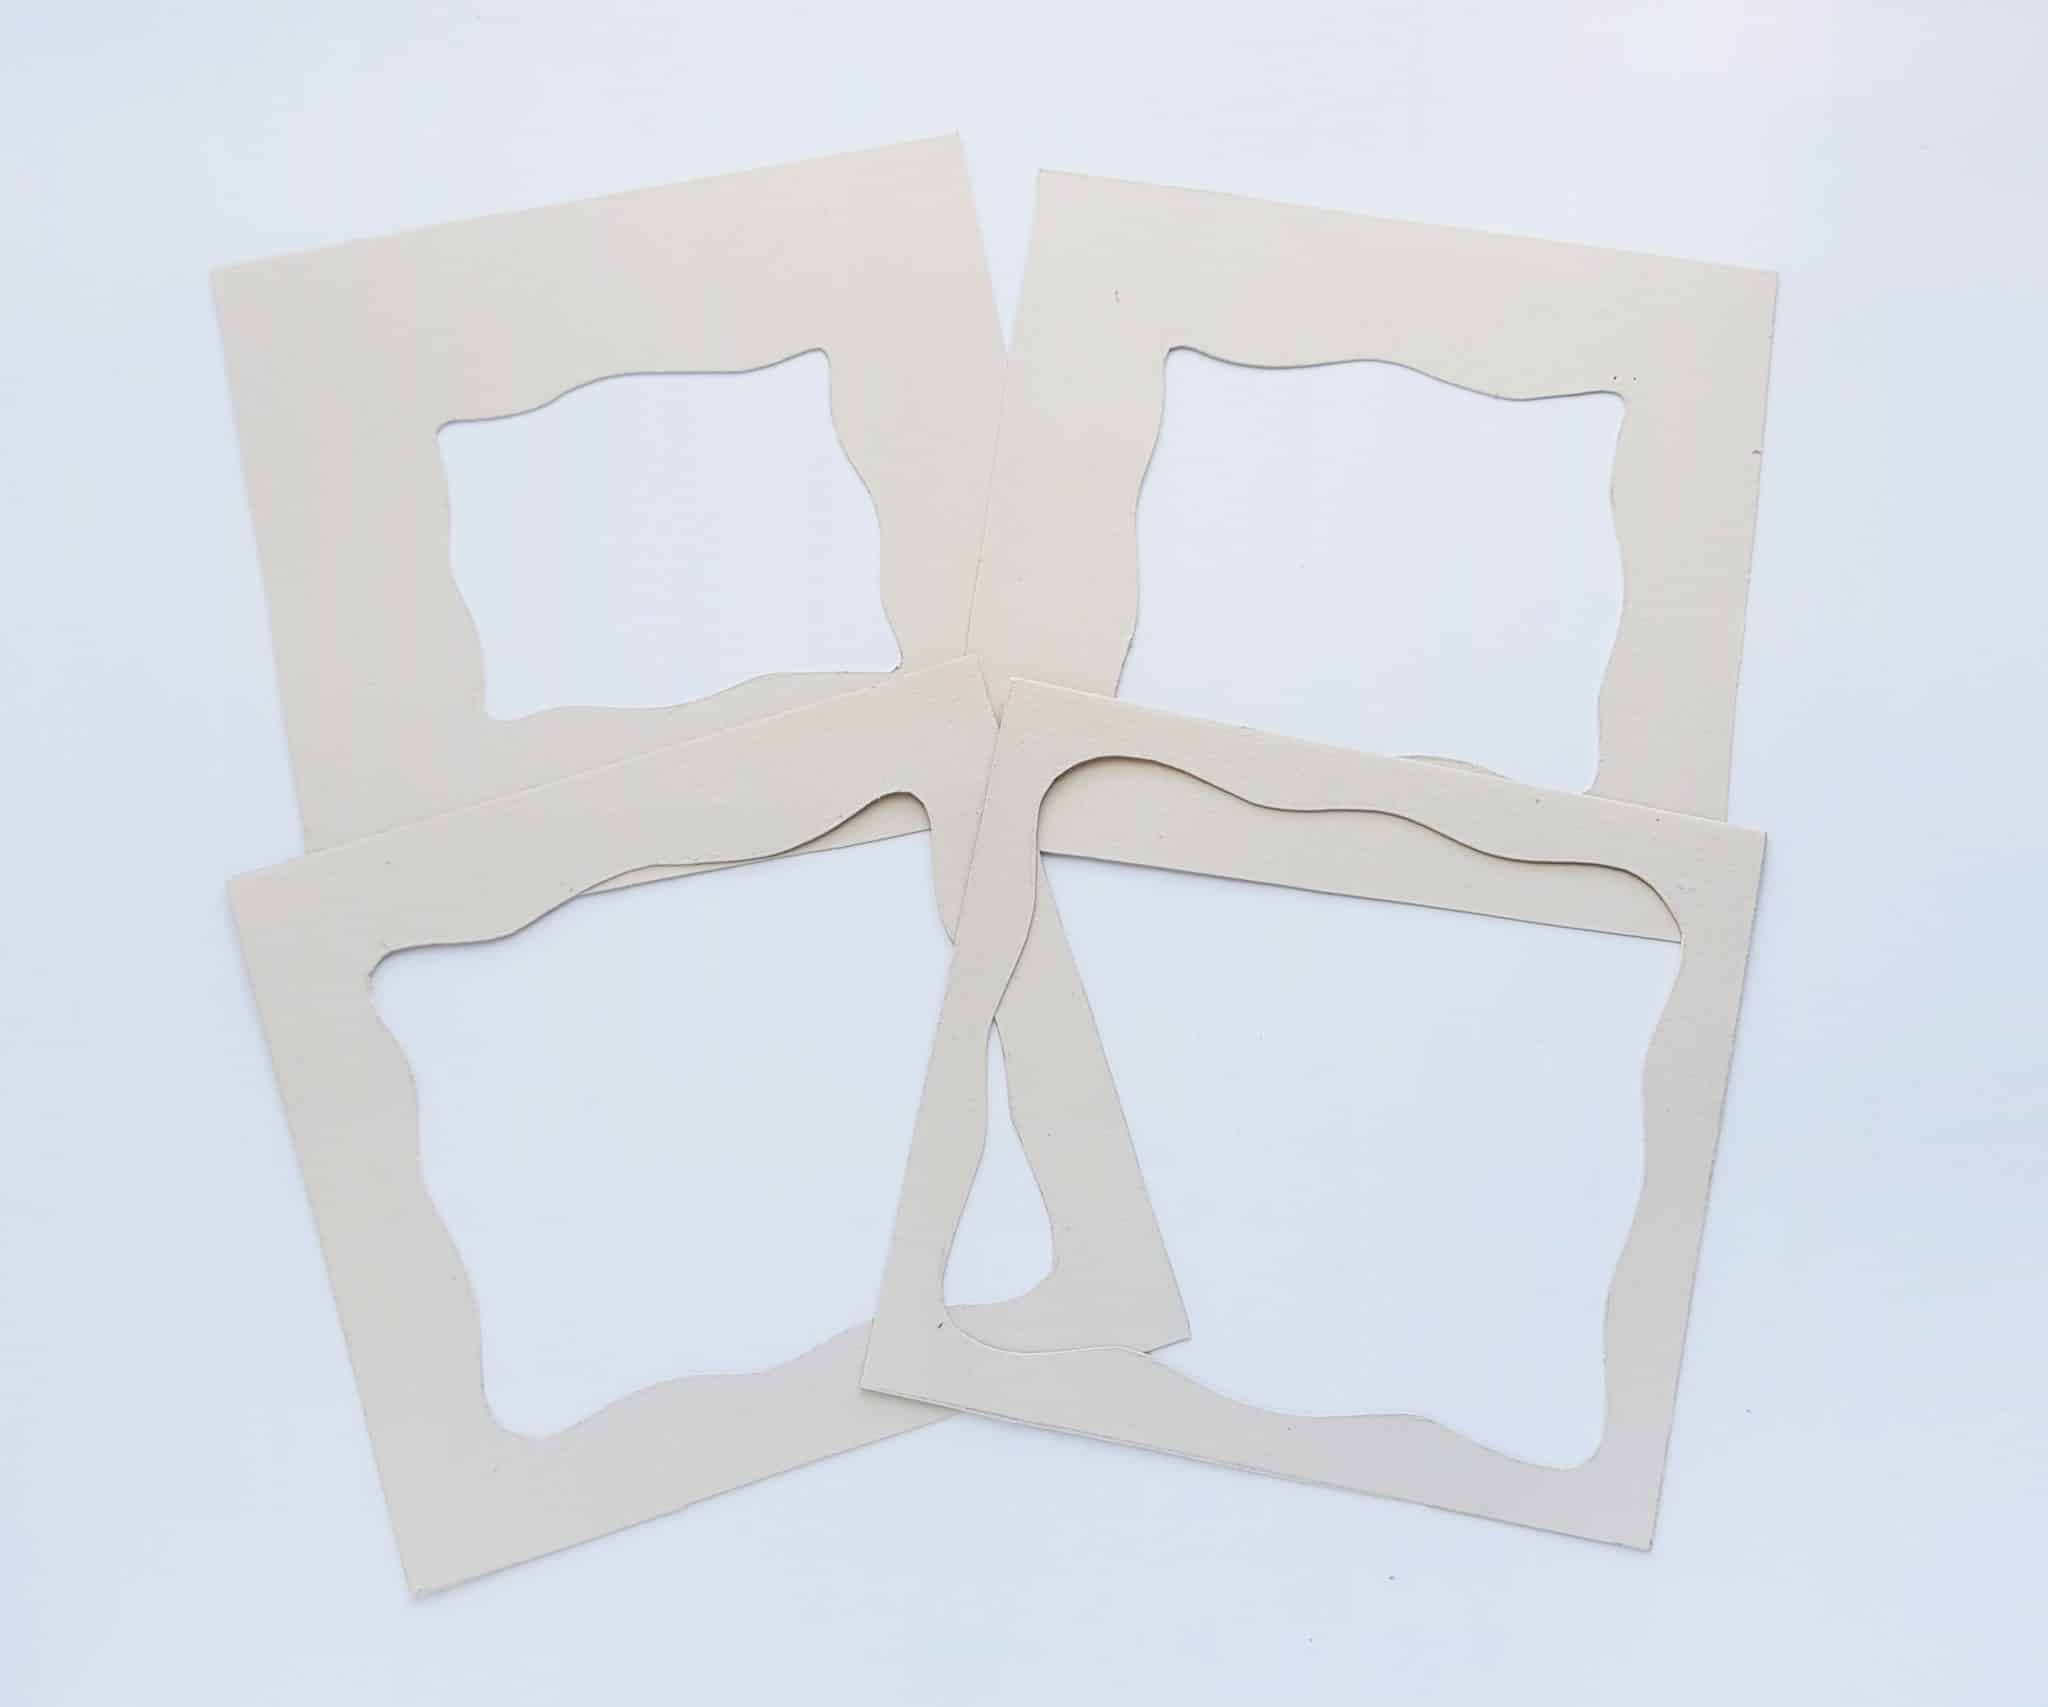
Before you get rolling on this project, make sure you have all the supplies listed above and that you’ve printed out the free templates provided. You can go ahead and cut out the template shapes, too, including the portions inside the “frames.” You’ll notice that this craft contains several layers that all fit into the same square space, and that the inside spaces inside the frames get progressively smaller. Use the templates that you cut out to trace these layers onto cream/white colored card stock. Then, cut these out (using the X-ACTO knife). When you cut out all of the frame shapes, they should look something like this:
Trace the template pattern labeled “background” (just a simple square), onto blue cardstock.
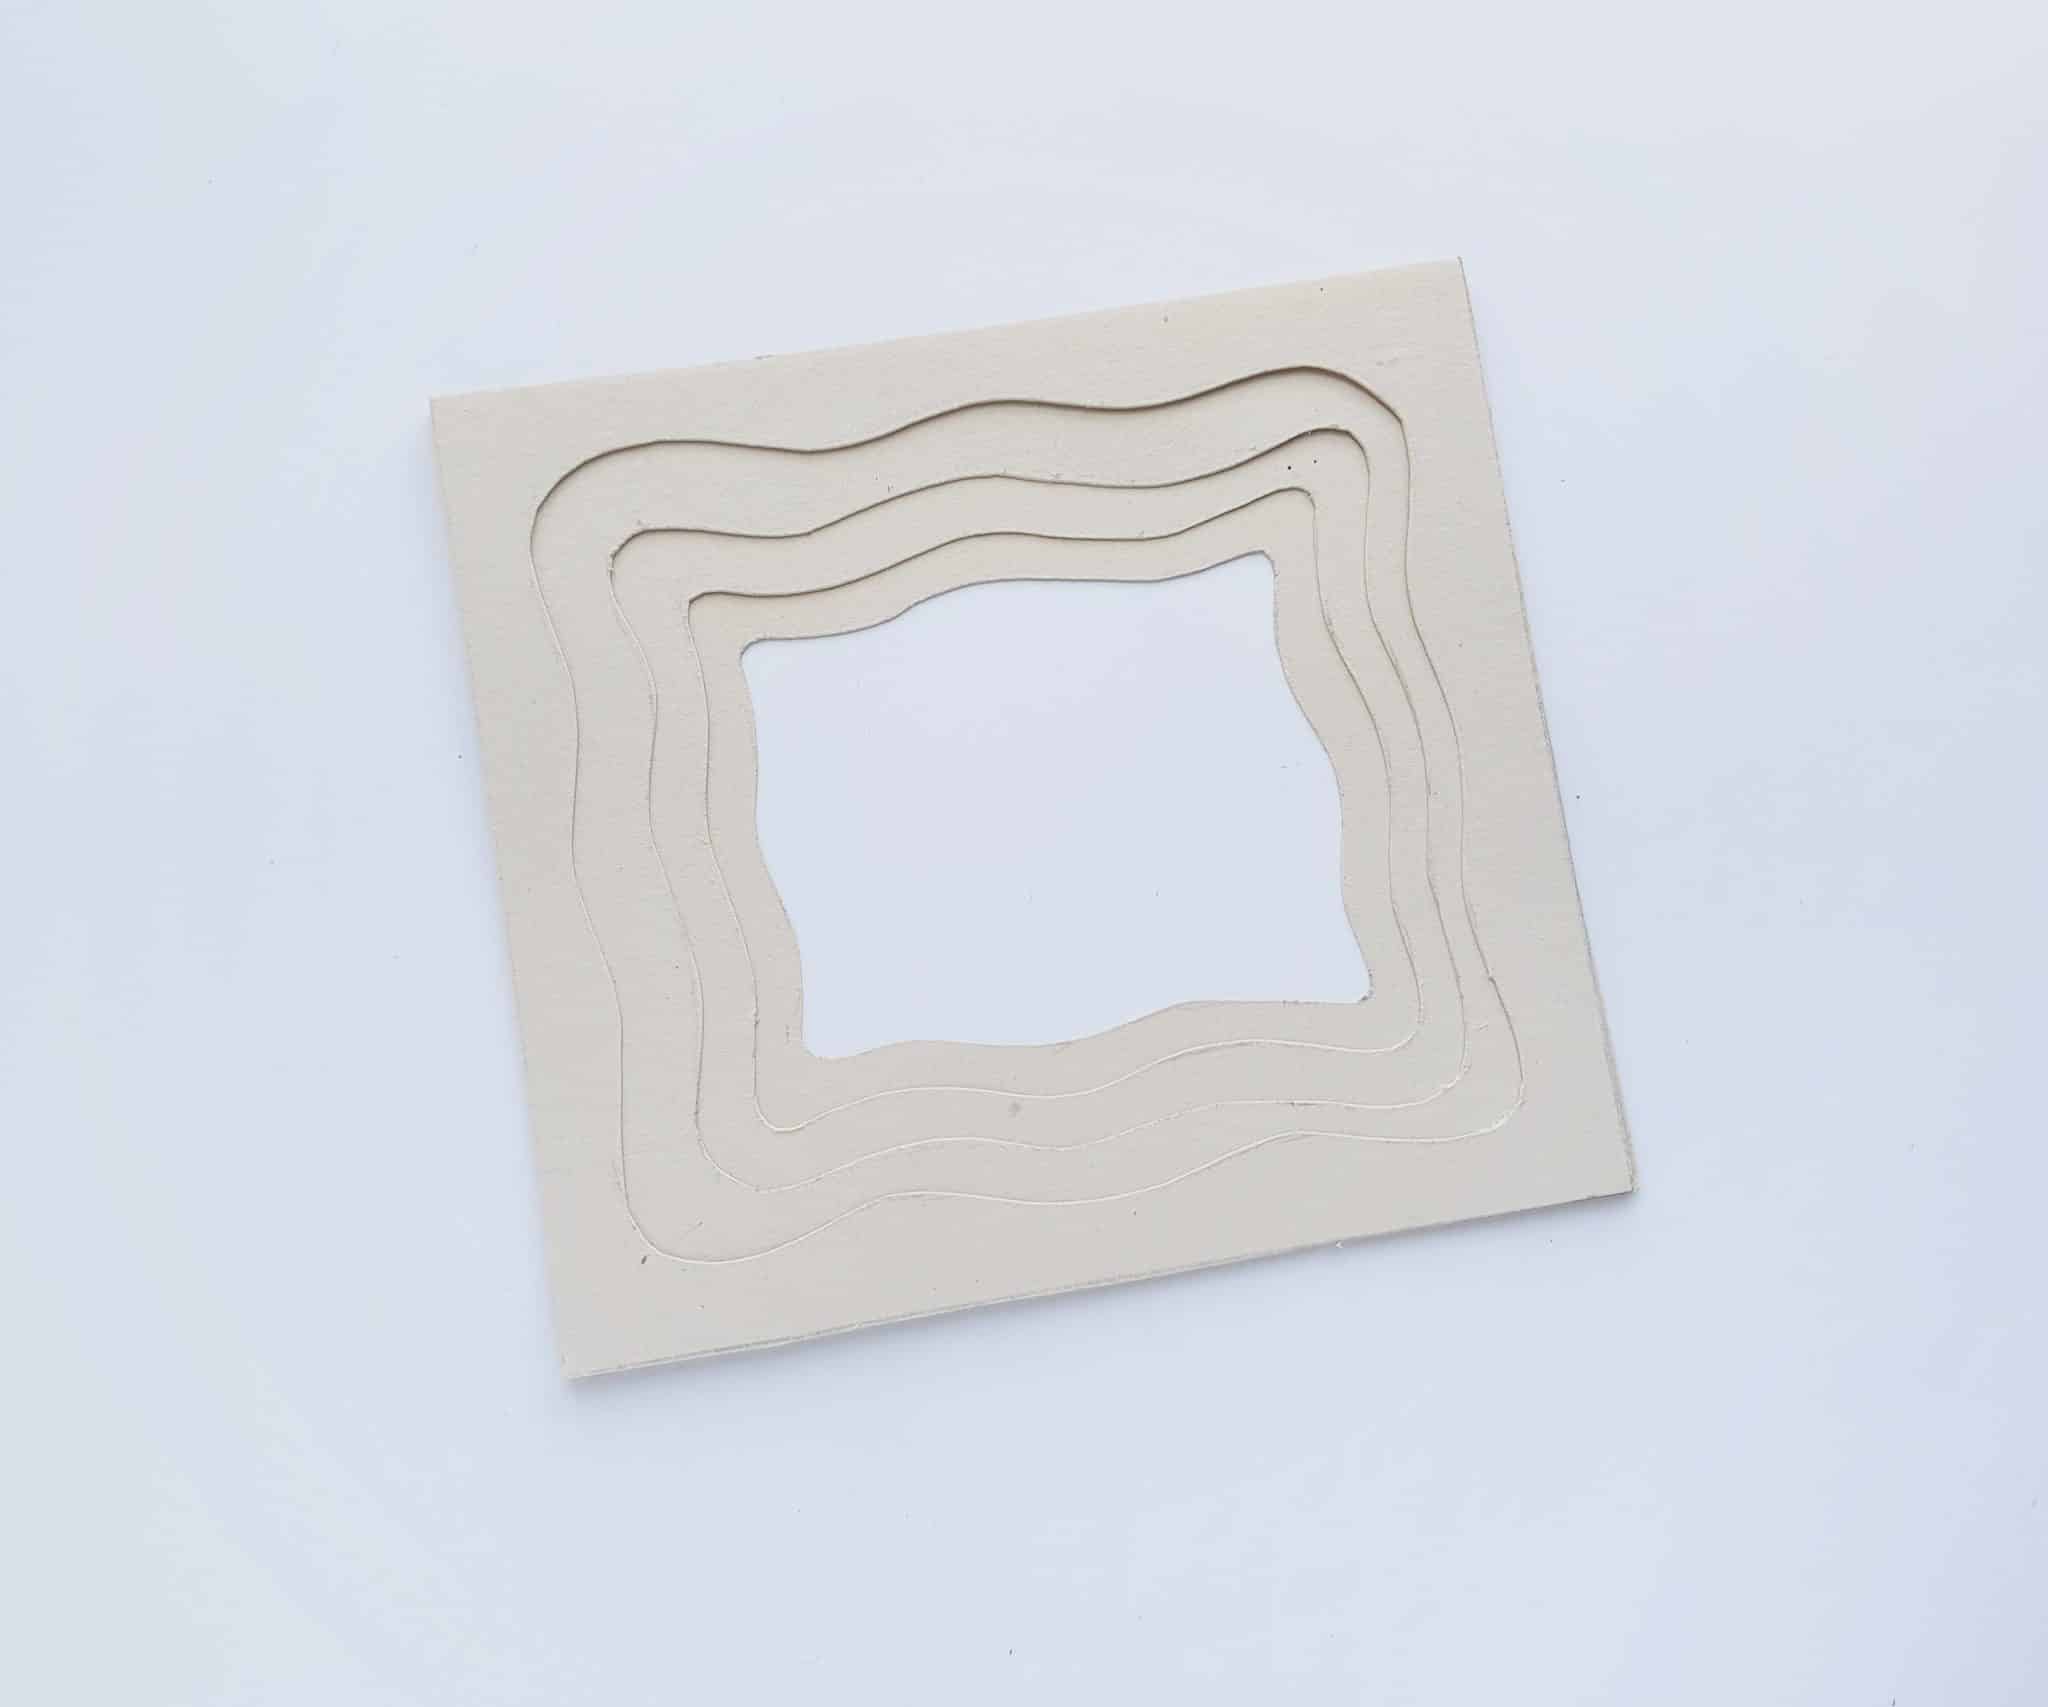
Before you start gluing things down, it’s always a good idea to check and make sure that they line up the way they’re supposed to (and also that you know how you’re supposed to arrange them!) Go ahead and check that situation out at this point. You’ll lay down layers 4 and 3 ( “First and 3” as labeled on the PDF). Place layer 2 on top of this, followed by layer 1. They should smoothly line up on the outside, while having sequentially smaller cut-outs on the inside, as shown. If you want, you can also stick that background layer behind it all so that the blue shows through. Trim anything that’s sticking outside of the square, or that doesn’t look nice on the inside. I know it already looks pretty, but remember: don’t glue it down yet!
Next, you’ll cut out some (about 20) very thin strips from the craft foam sheet. You’ll use these strips between each layer to create the 3D pop that makes this craft look extra amazing.

Start by placing the layer 4 cut-out onto a flat surface. Use craft glue to attach 4 of the thin strips of craft foam to each of the four sides, as shown in the picture below.

Then place a bit of glue on top of the foam strips. Attach layer 3 on top of the strips. You can already see how doing this has given your paper craft a bit of dimension. You’ll continue this process until all of the layers have strips of craft foam between them to lift them up.

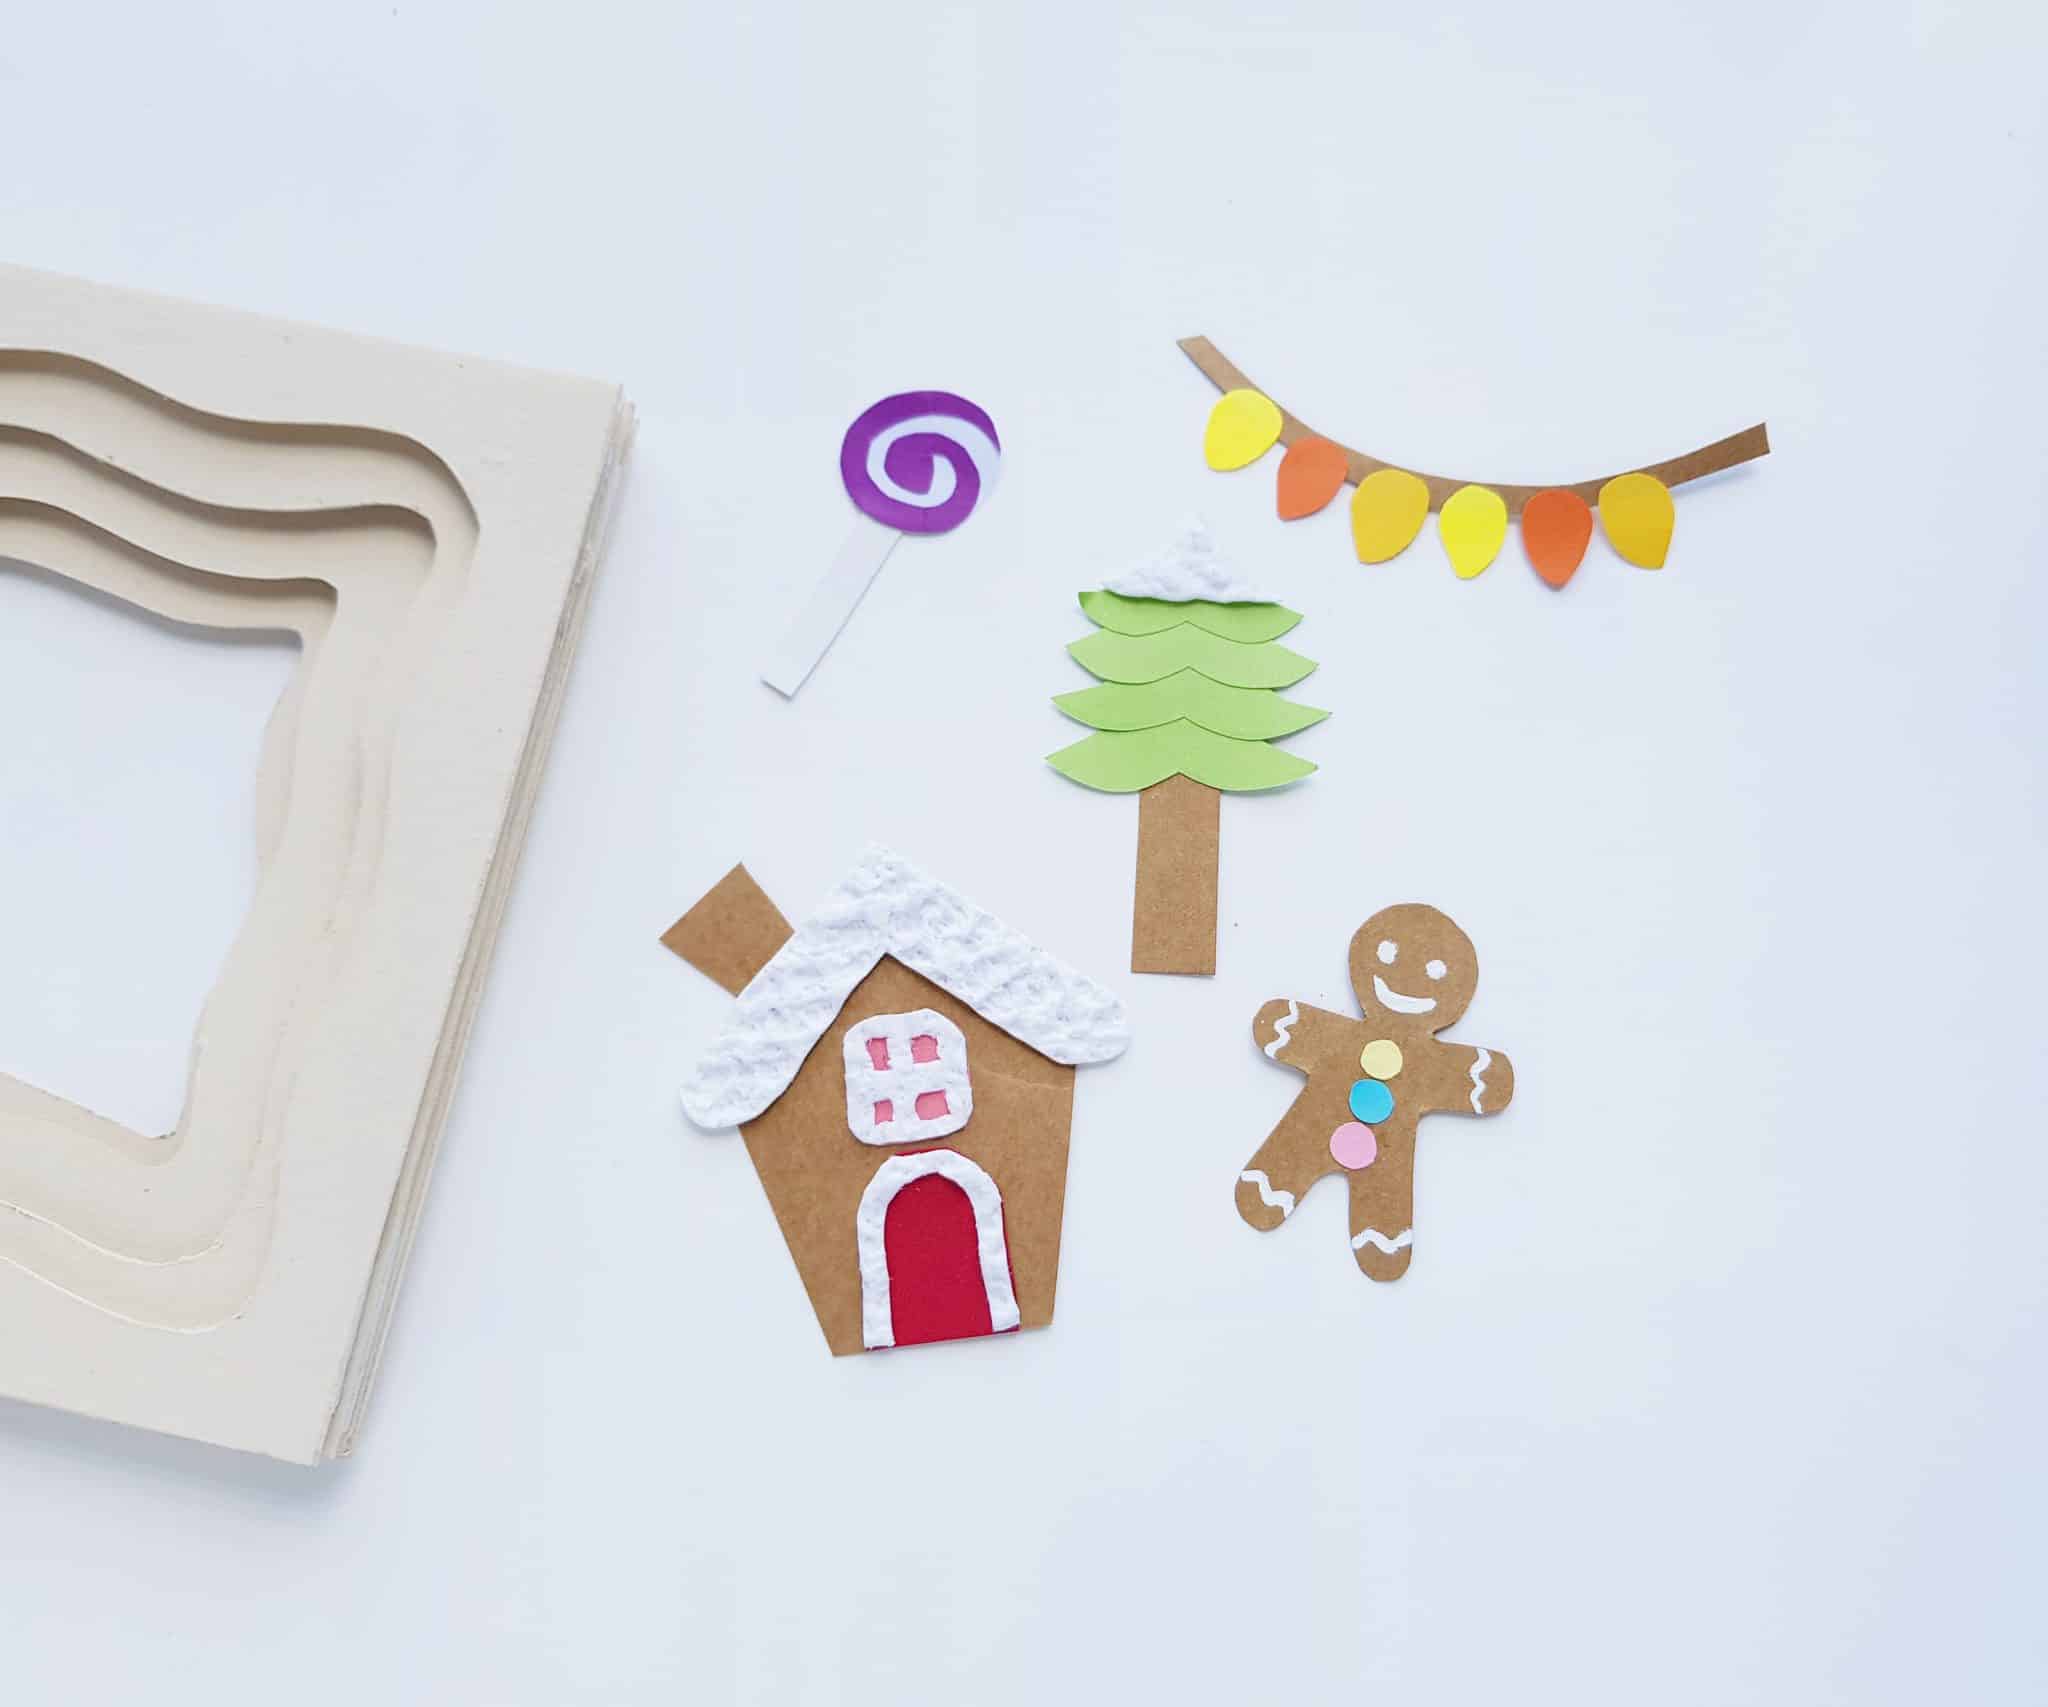
Now you that you have the basic structure for your 3D craft, you can get to the fun stuff: the decorations! The decorations’ template we’re providing includes patterns for: a gingerbread house, a gingerbread man, and a string of lights. As you cut out and trace the patterns, I’d suggest tracing the template for the gingerbread house and gingerbread man onto brown, cardstock paper. White, embossed paper also looks really nice for the snow/frosting on the gingerbread house!

For all of the other decorations, be creative and choose your favorite, festive colors! You can also create some of your own, original holiday decorations to include in this 3D craft. We added a lollipop and a snow-covered Christmas tree to the design pictured below. You might want to make a snowman, Christmas angel, or Santa to go in your gingerbread scene! Alternatively, you can stick to the designs we’ve provided. Either way will look great!
Once all of your decorative items are prepared and looking festive, go ahead and use some glue to attach them to your wintery scene. The trick to making this craft even more 3D is to attach the various items to different layers, so that the different dimensions stand out.
Once everything is arranged to your liking, allow the glue a few minutes to dry. If you haven’t yet, you can go ahead and glue the blue background to the back of your 3D Gingerbread House Paper Craft! Once it’s all the way dry, your craft is ready to display or give to a friend!

We hope you enjoy this Gorgeous 3D Gingerbread Paper craft! Please let us know if you make it and what you think about it!
If you love this 3D craft and are interested in making more, you can re-use your supplies to make some of these other beautiful designs at other times of the year!