
Cute and Easy Hanukkah Craft
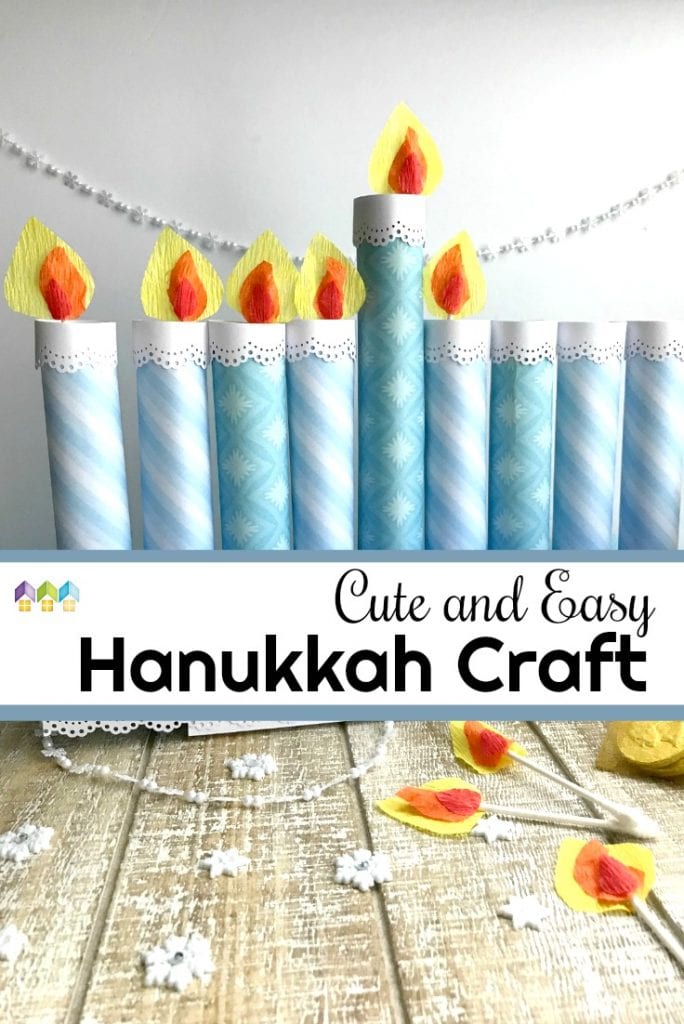
Are you looking for a cute and easy Hanukkah craft? We are Messianic and have been making our hanukkiahs for almost ten years. I thought it would be fun to share one with you to make with your kiddos. It will take very little time but will open the door to talking and teaching about this beautiful Festival of Lights!
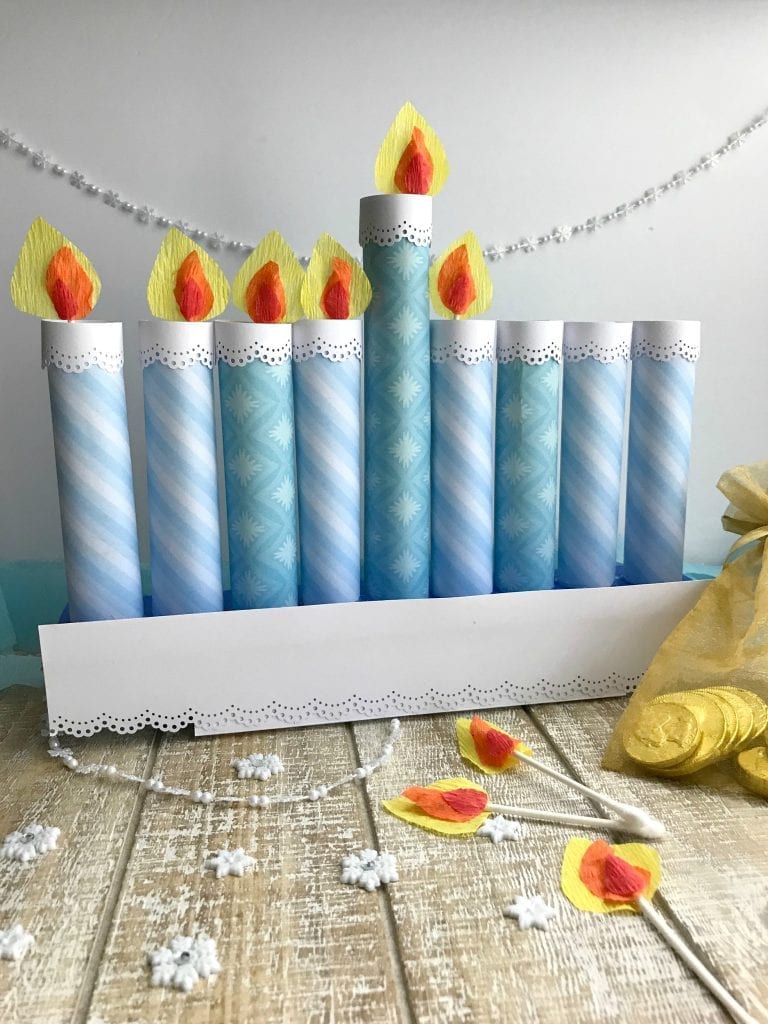
A Hanukkah menorah has eight lights and is often called a Hanukkiah. The center candle is called the shamash. It is lit first and is used to light all the other candles from. It is called the servant candle, and it is set apart from the other candles (often higher). Each night, “light” the center candle first (the Shamash candle) and then, starting on the left, “light” a candle each night until you have all eight candles lit.
If you have older children and would prefer a more challenging project, here is one we made last year. If you want more information about Hanukkah, scroll to the bottom of this article and watch the video.
Below you can see step-by-step instructions for this project. If you’d like your own printable list of materials and instructions, scroll down and click the link near the bottom of this article.
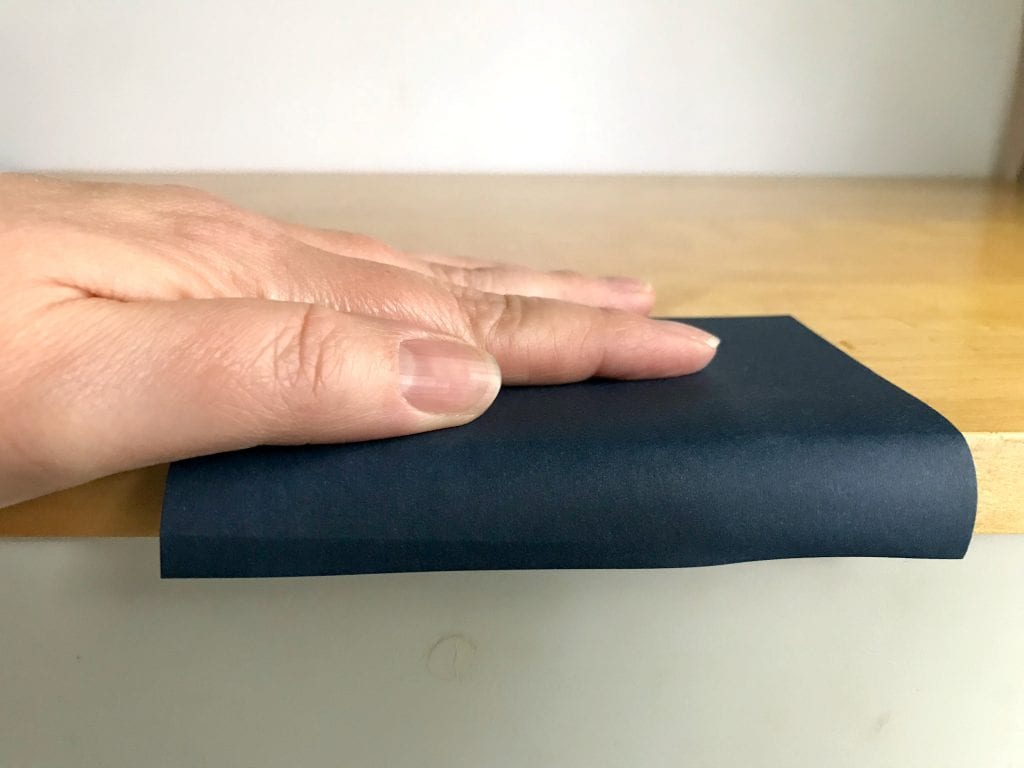
- Cut your scrapbook paper into eight (4″ X 5″) rectangles one (4″ X 7″) rectangle. If the paper is thick, curling the paper into a cylinder (in the next step) can be difficult. Using your hands to run the paper over the edge of a table or desk (as seen in the photo above) will help shape a curl.
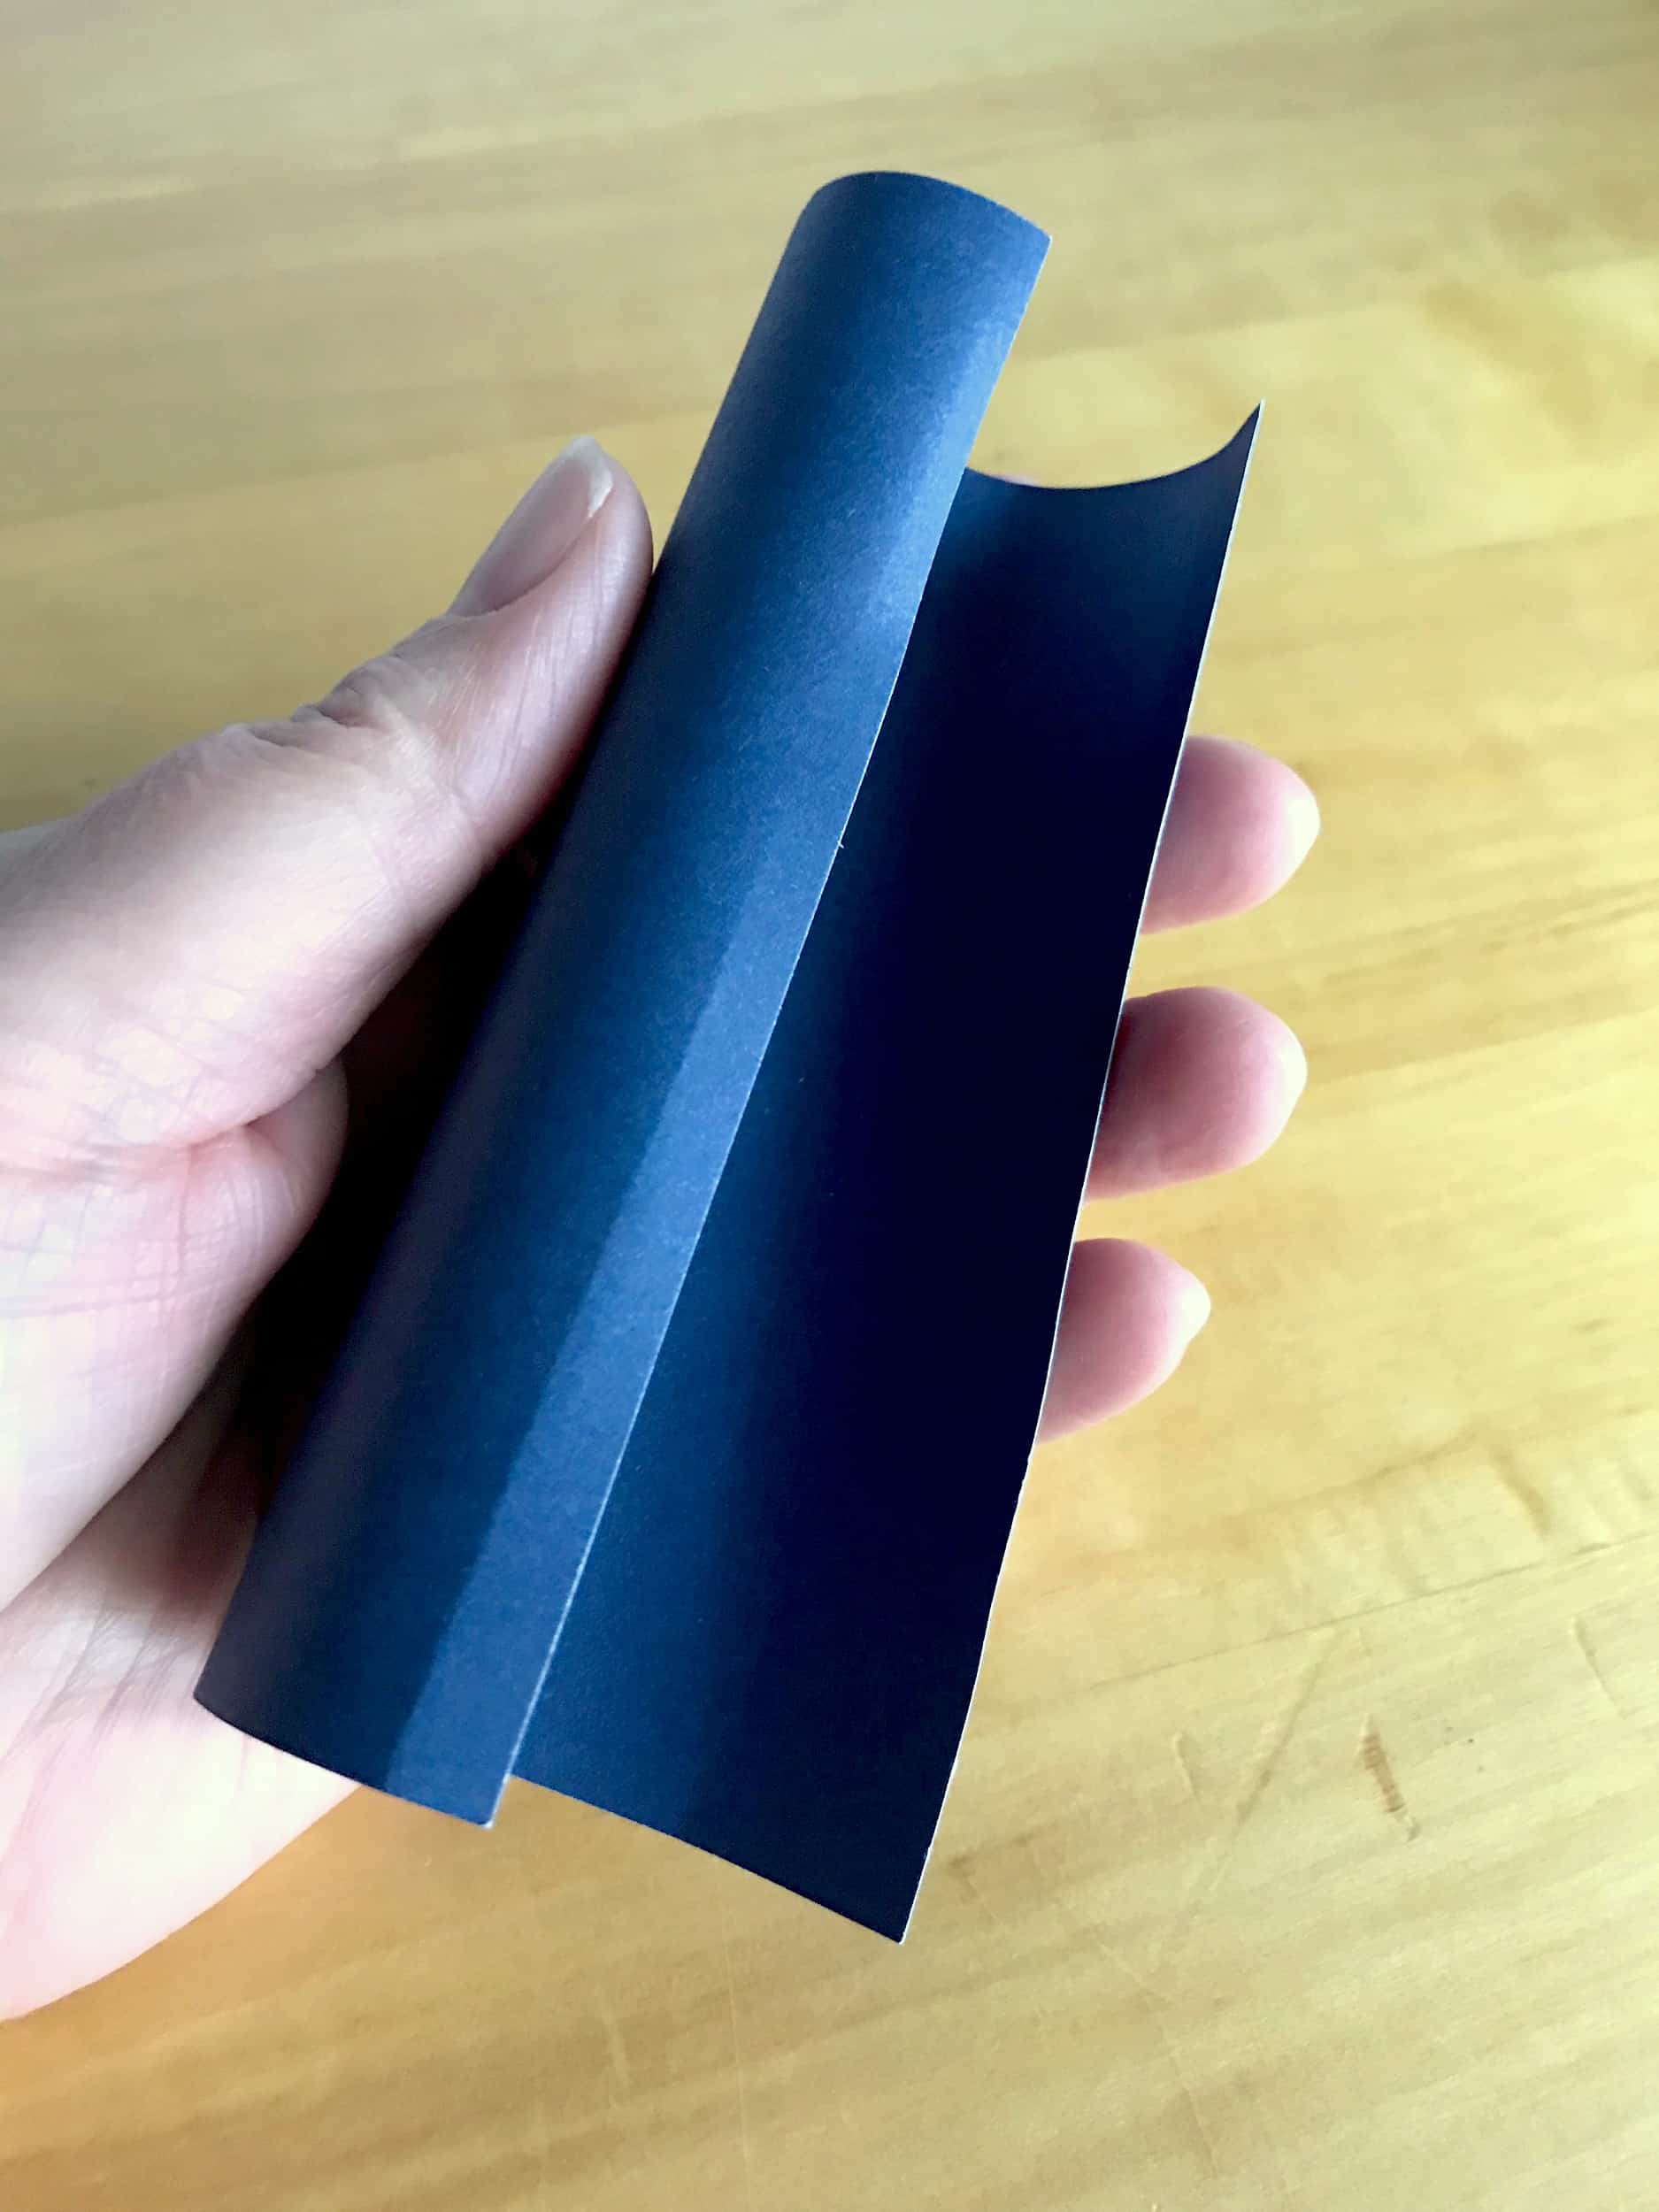
2. Curl each rectangle into a cylinder.
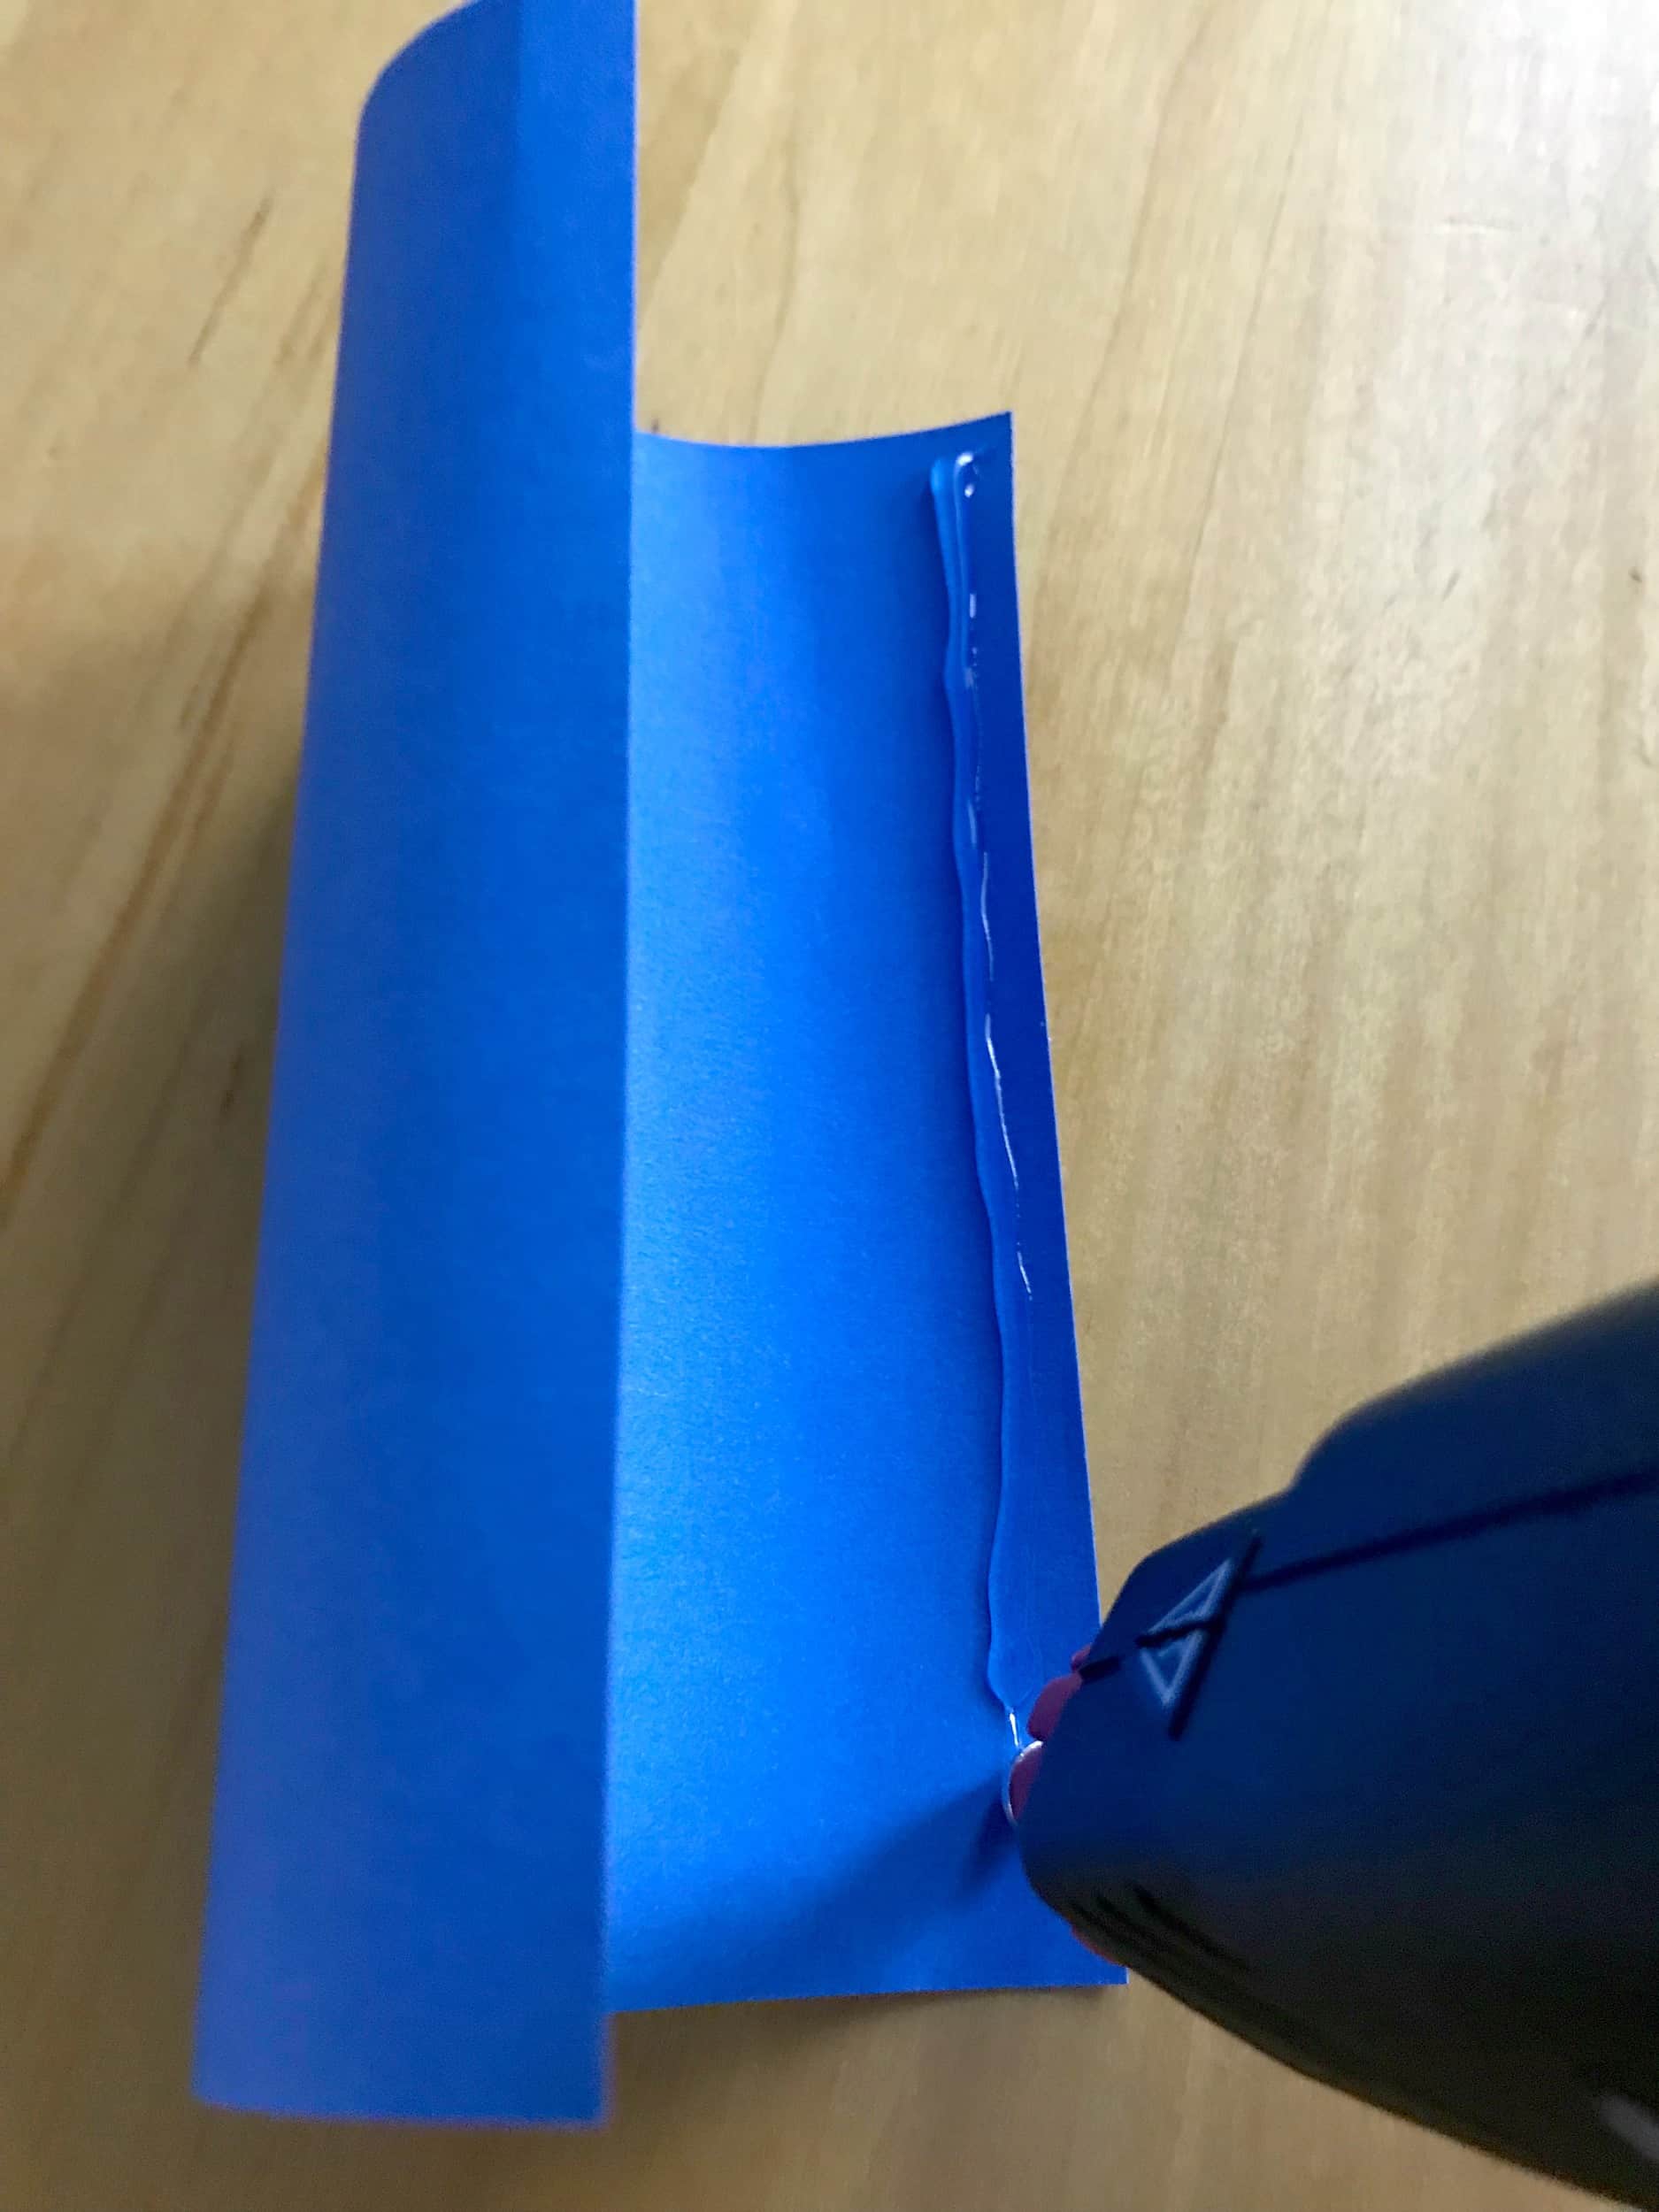
3. Run a line of hot glue down one long side of each cylinder.
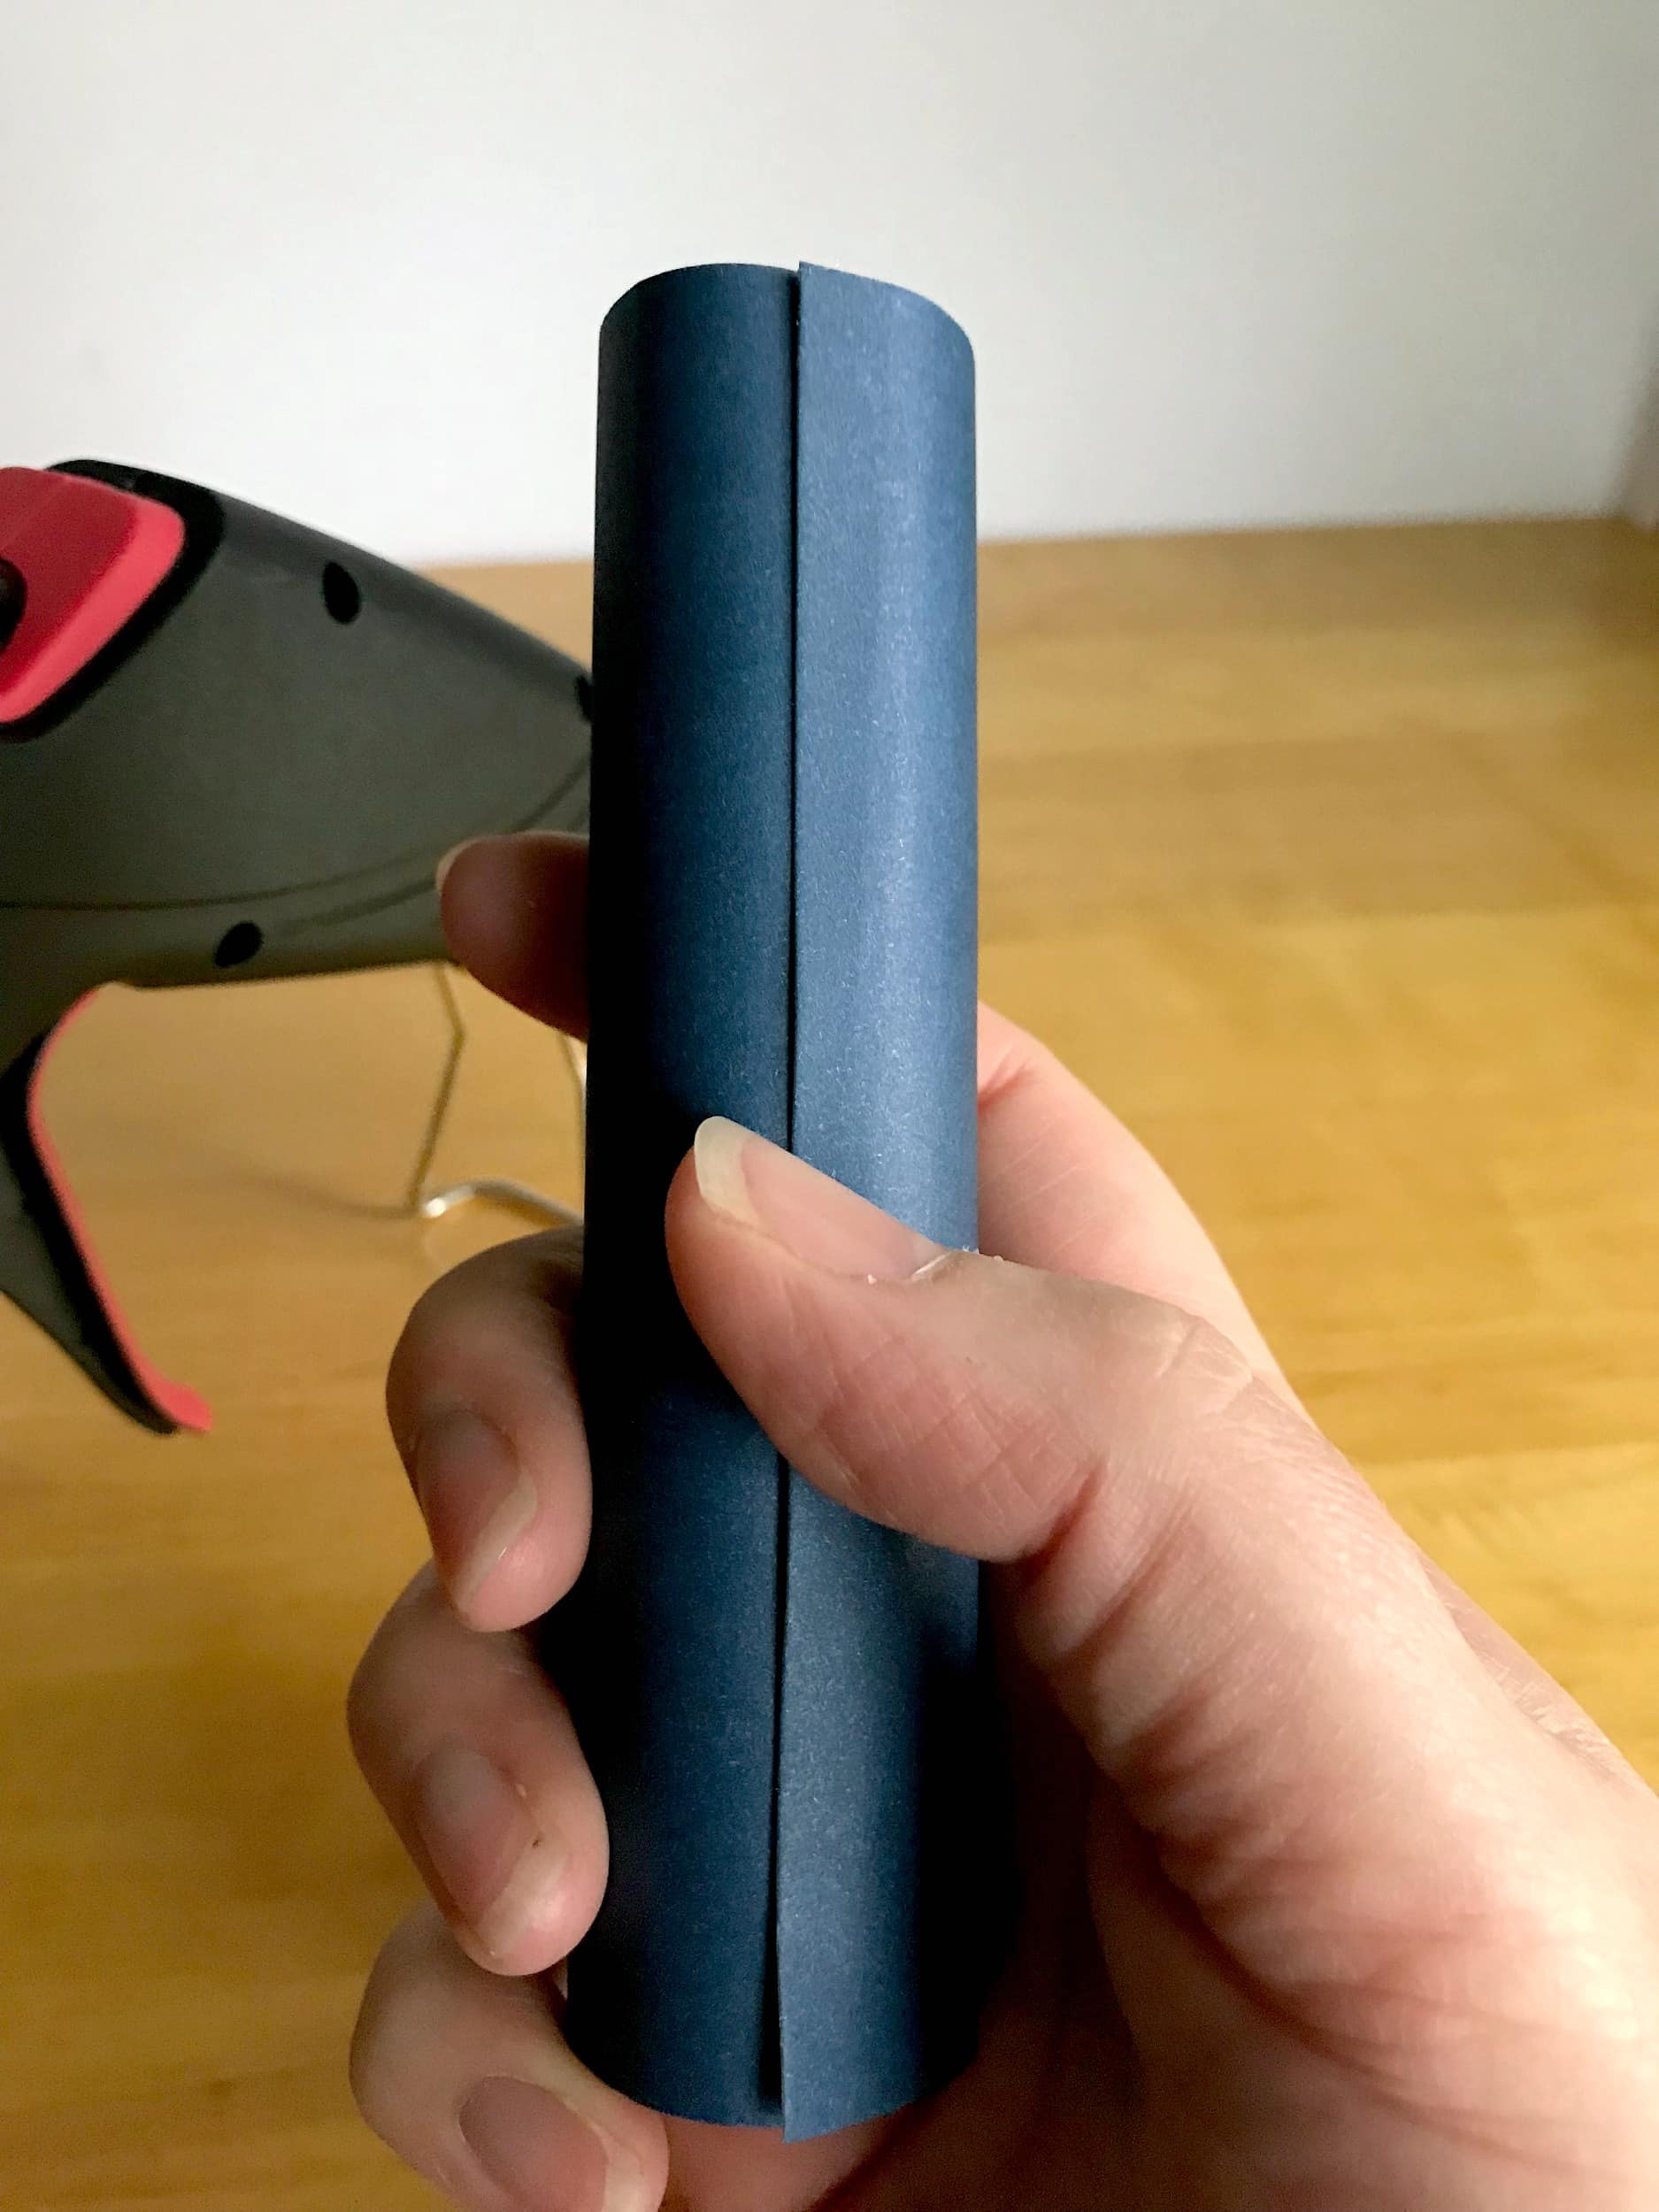
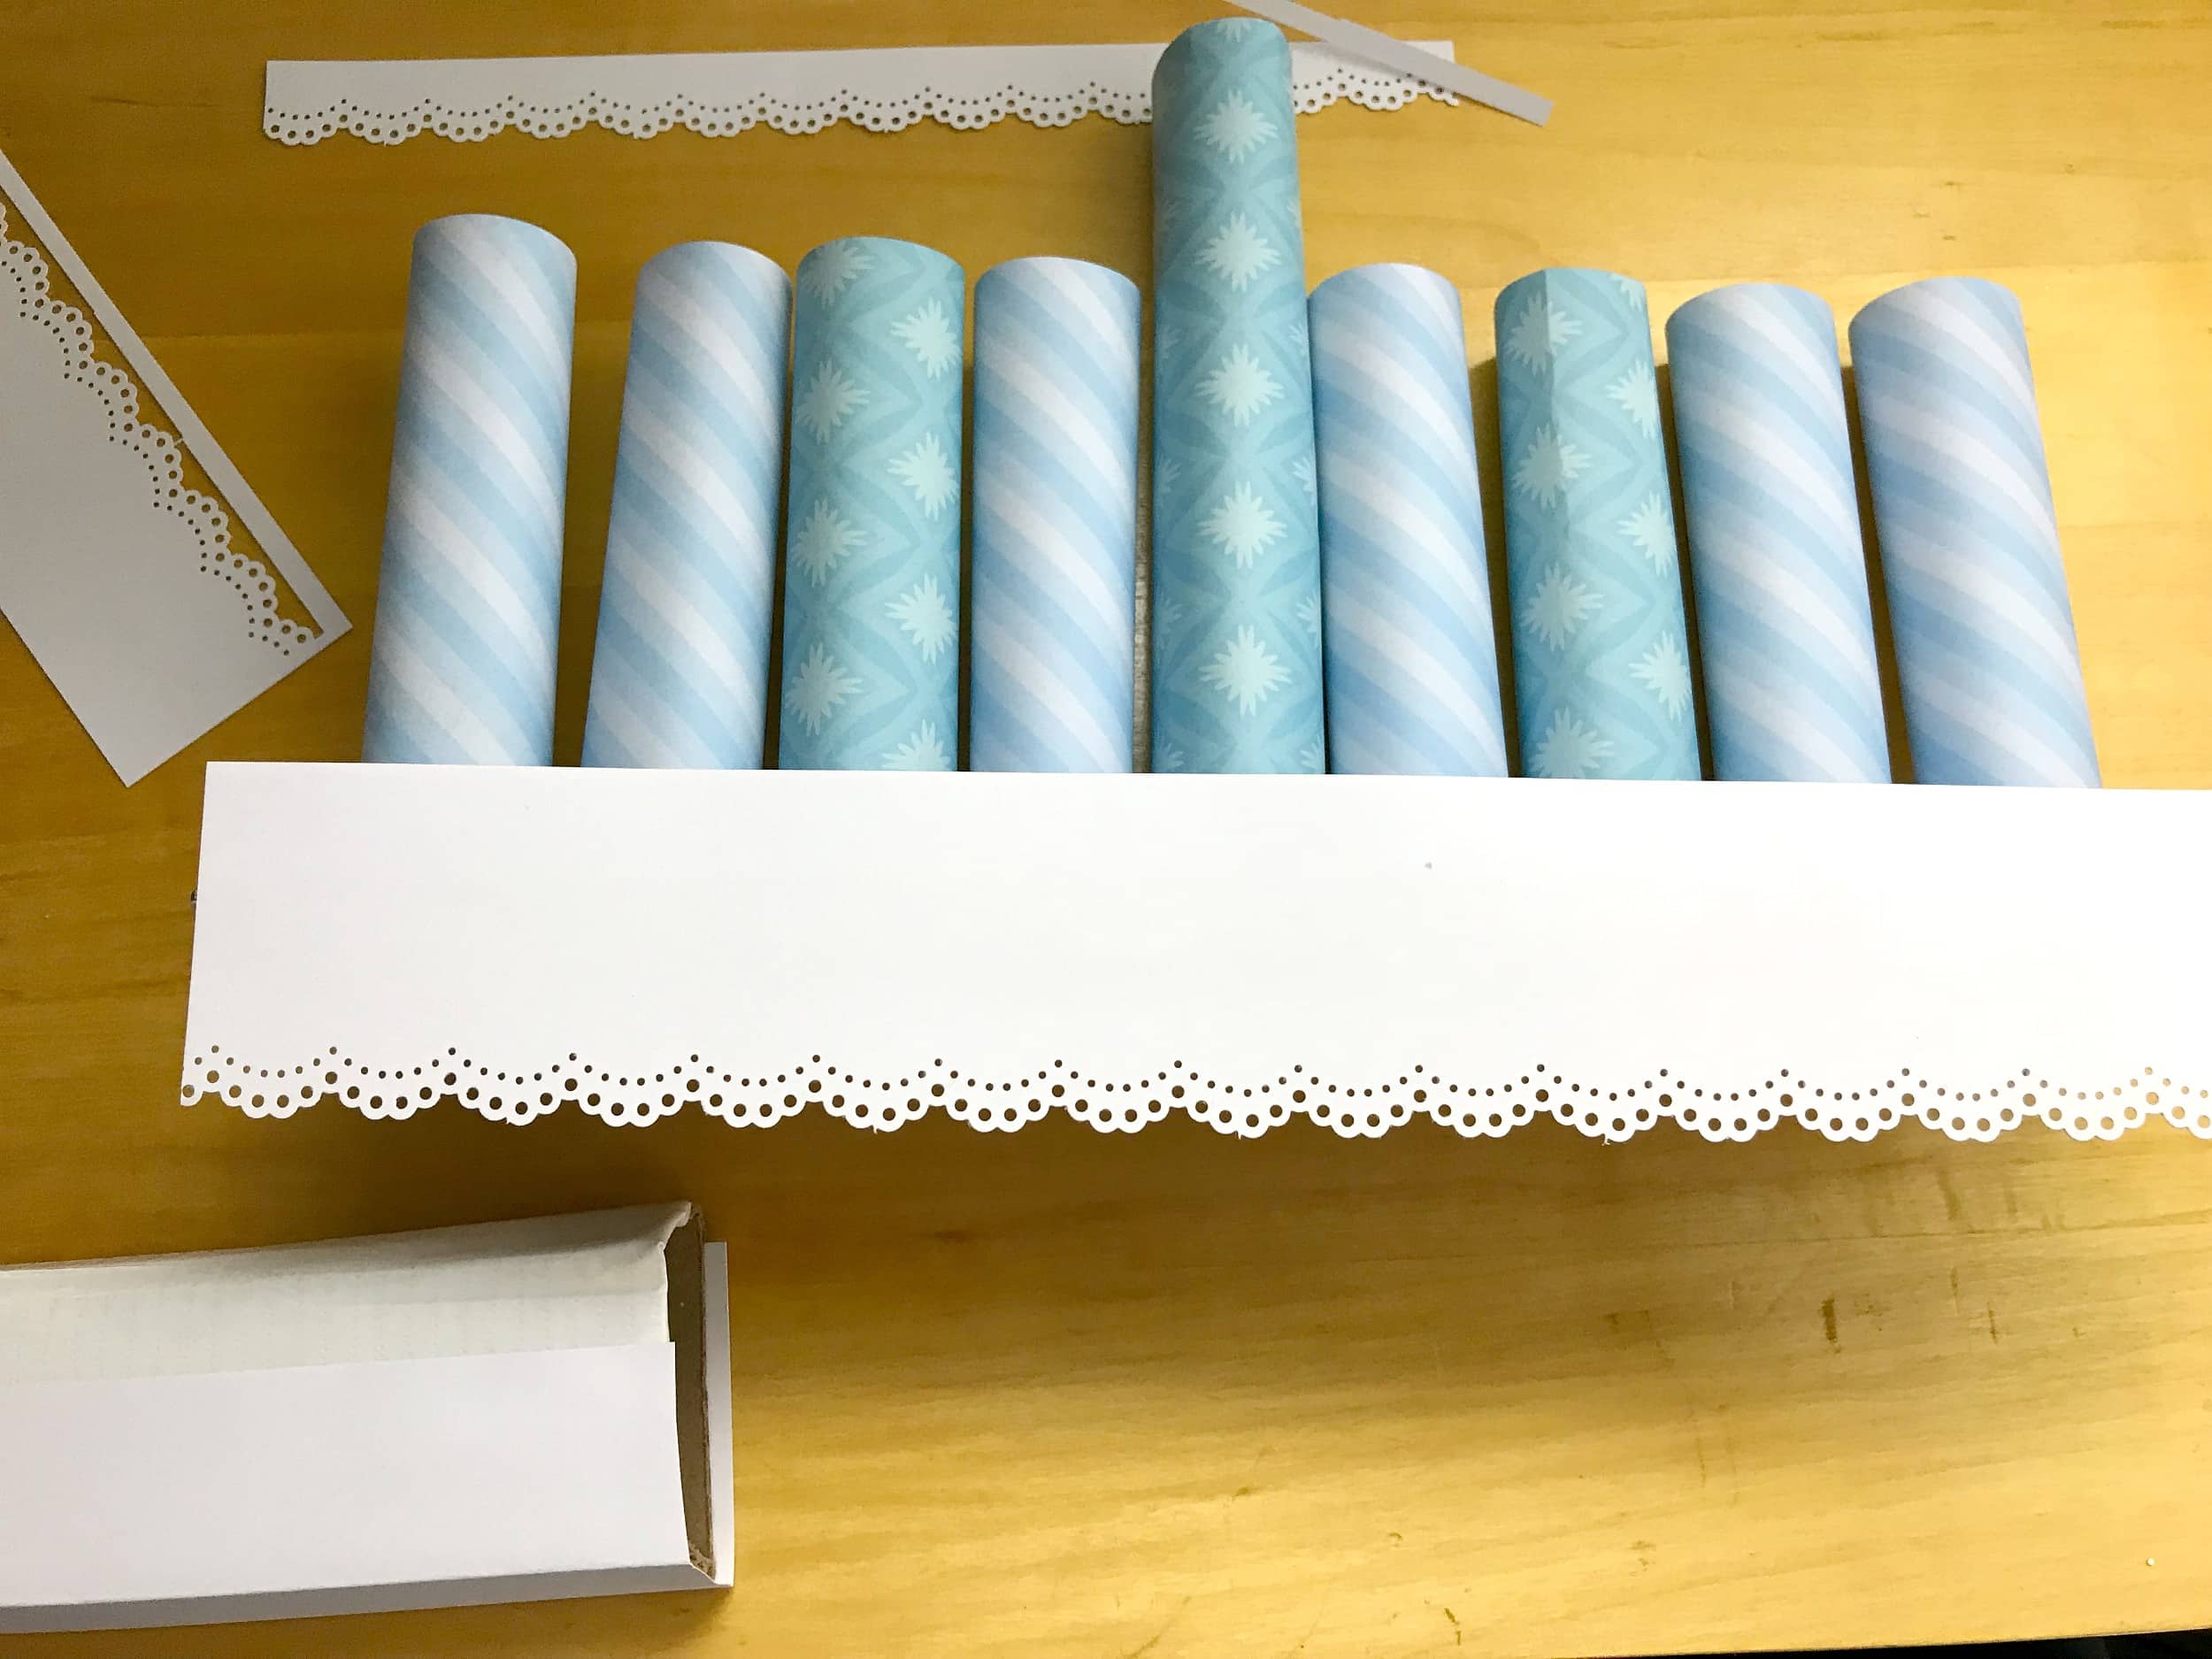
4. Press the sides of each cylinder together to attach the paper with the glue. Repeat on each piece of paper to create 9 cylinder tubes.

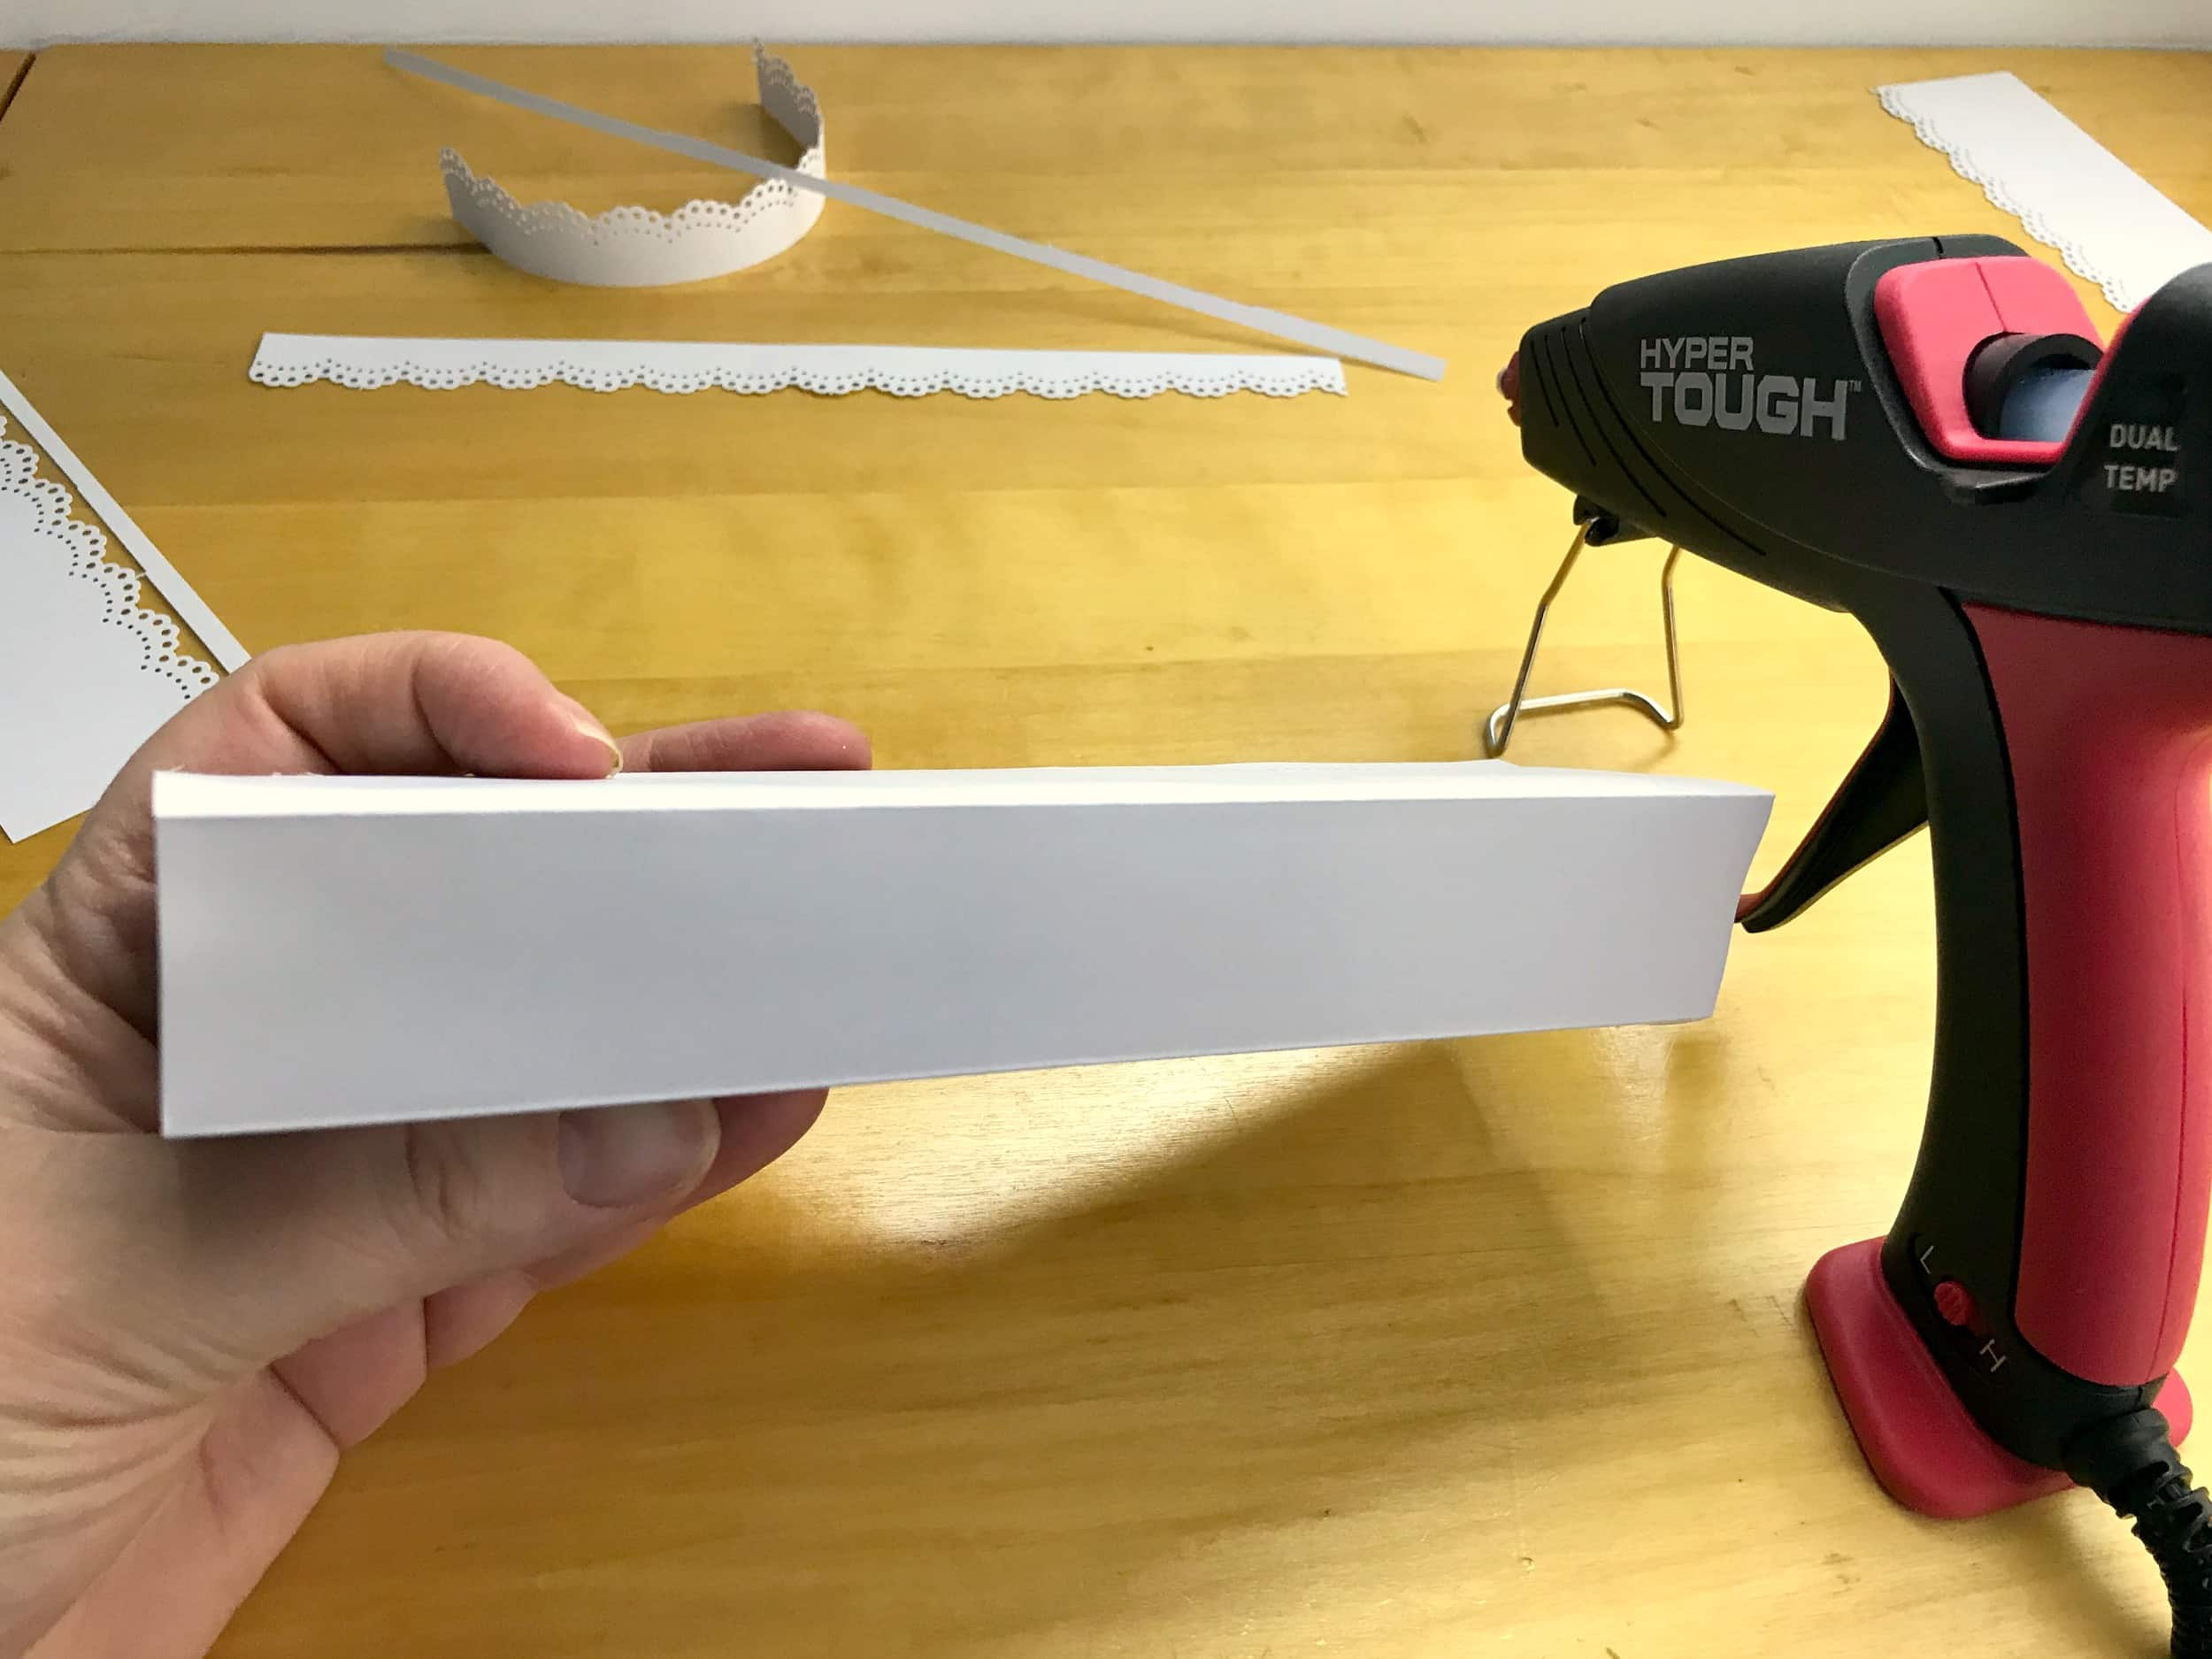
5. Cut a piece of scrapbook paper to 3″ X 12″. Use hot glue to attach this piece of scrapbook paper to the 3″ X 12″ piece of cardboard.
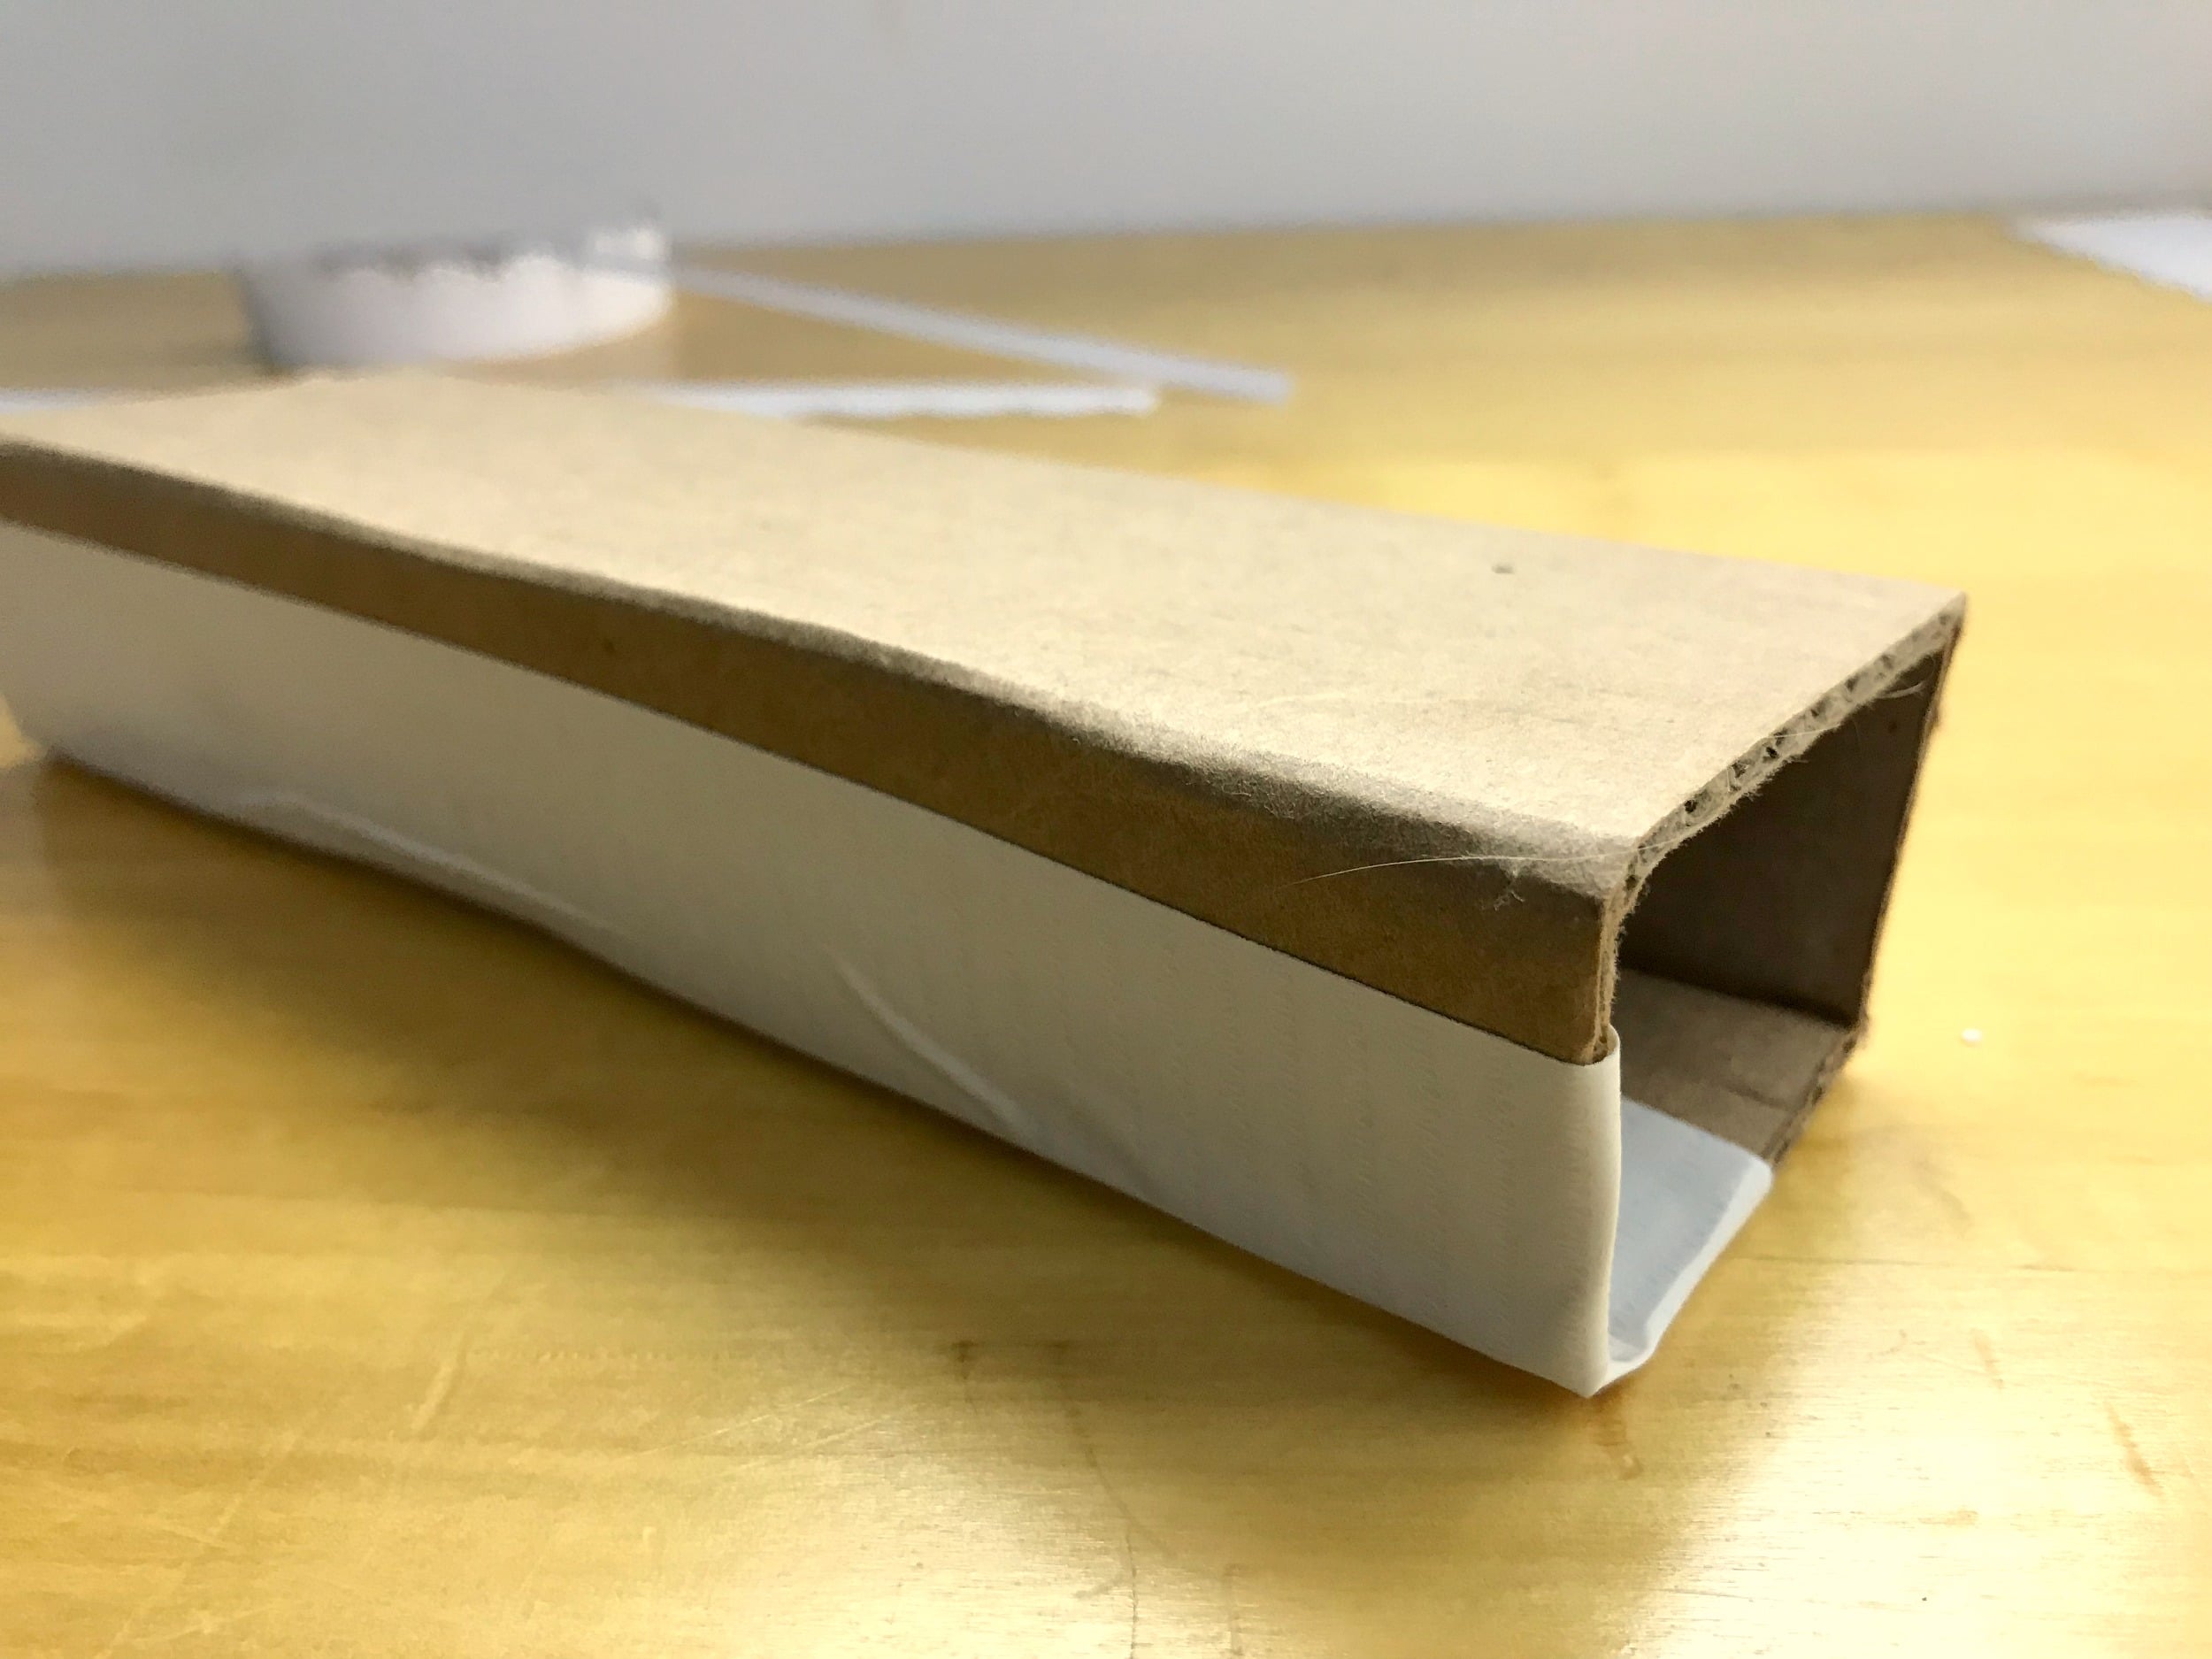
6. Also attach the rectangular box to the underside of the base to become a pedestal.
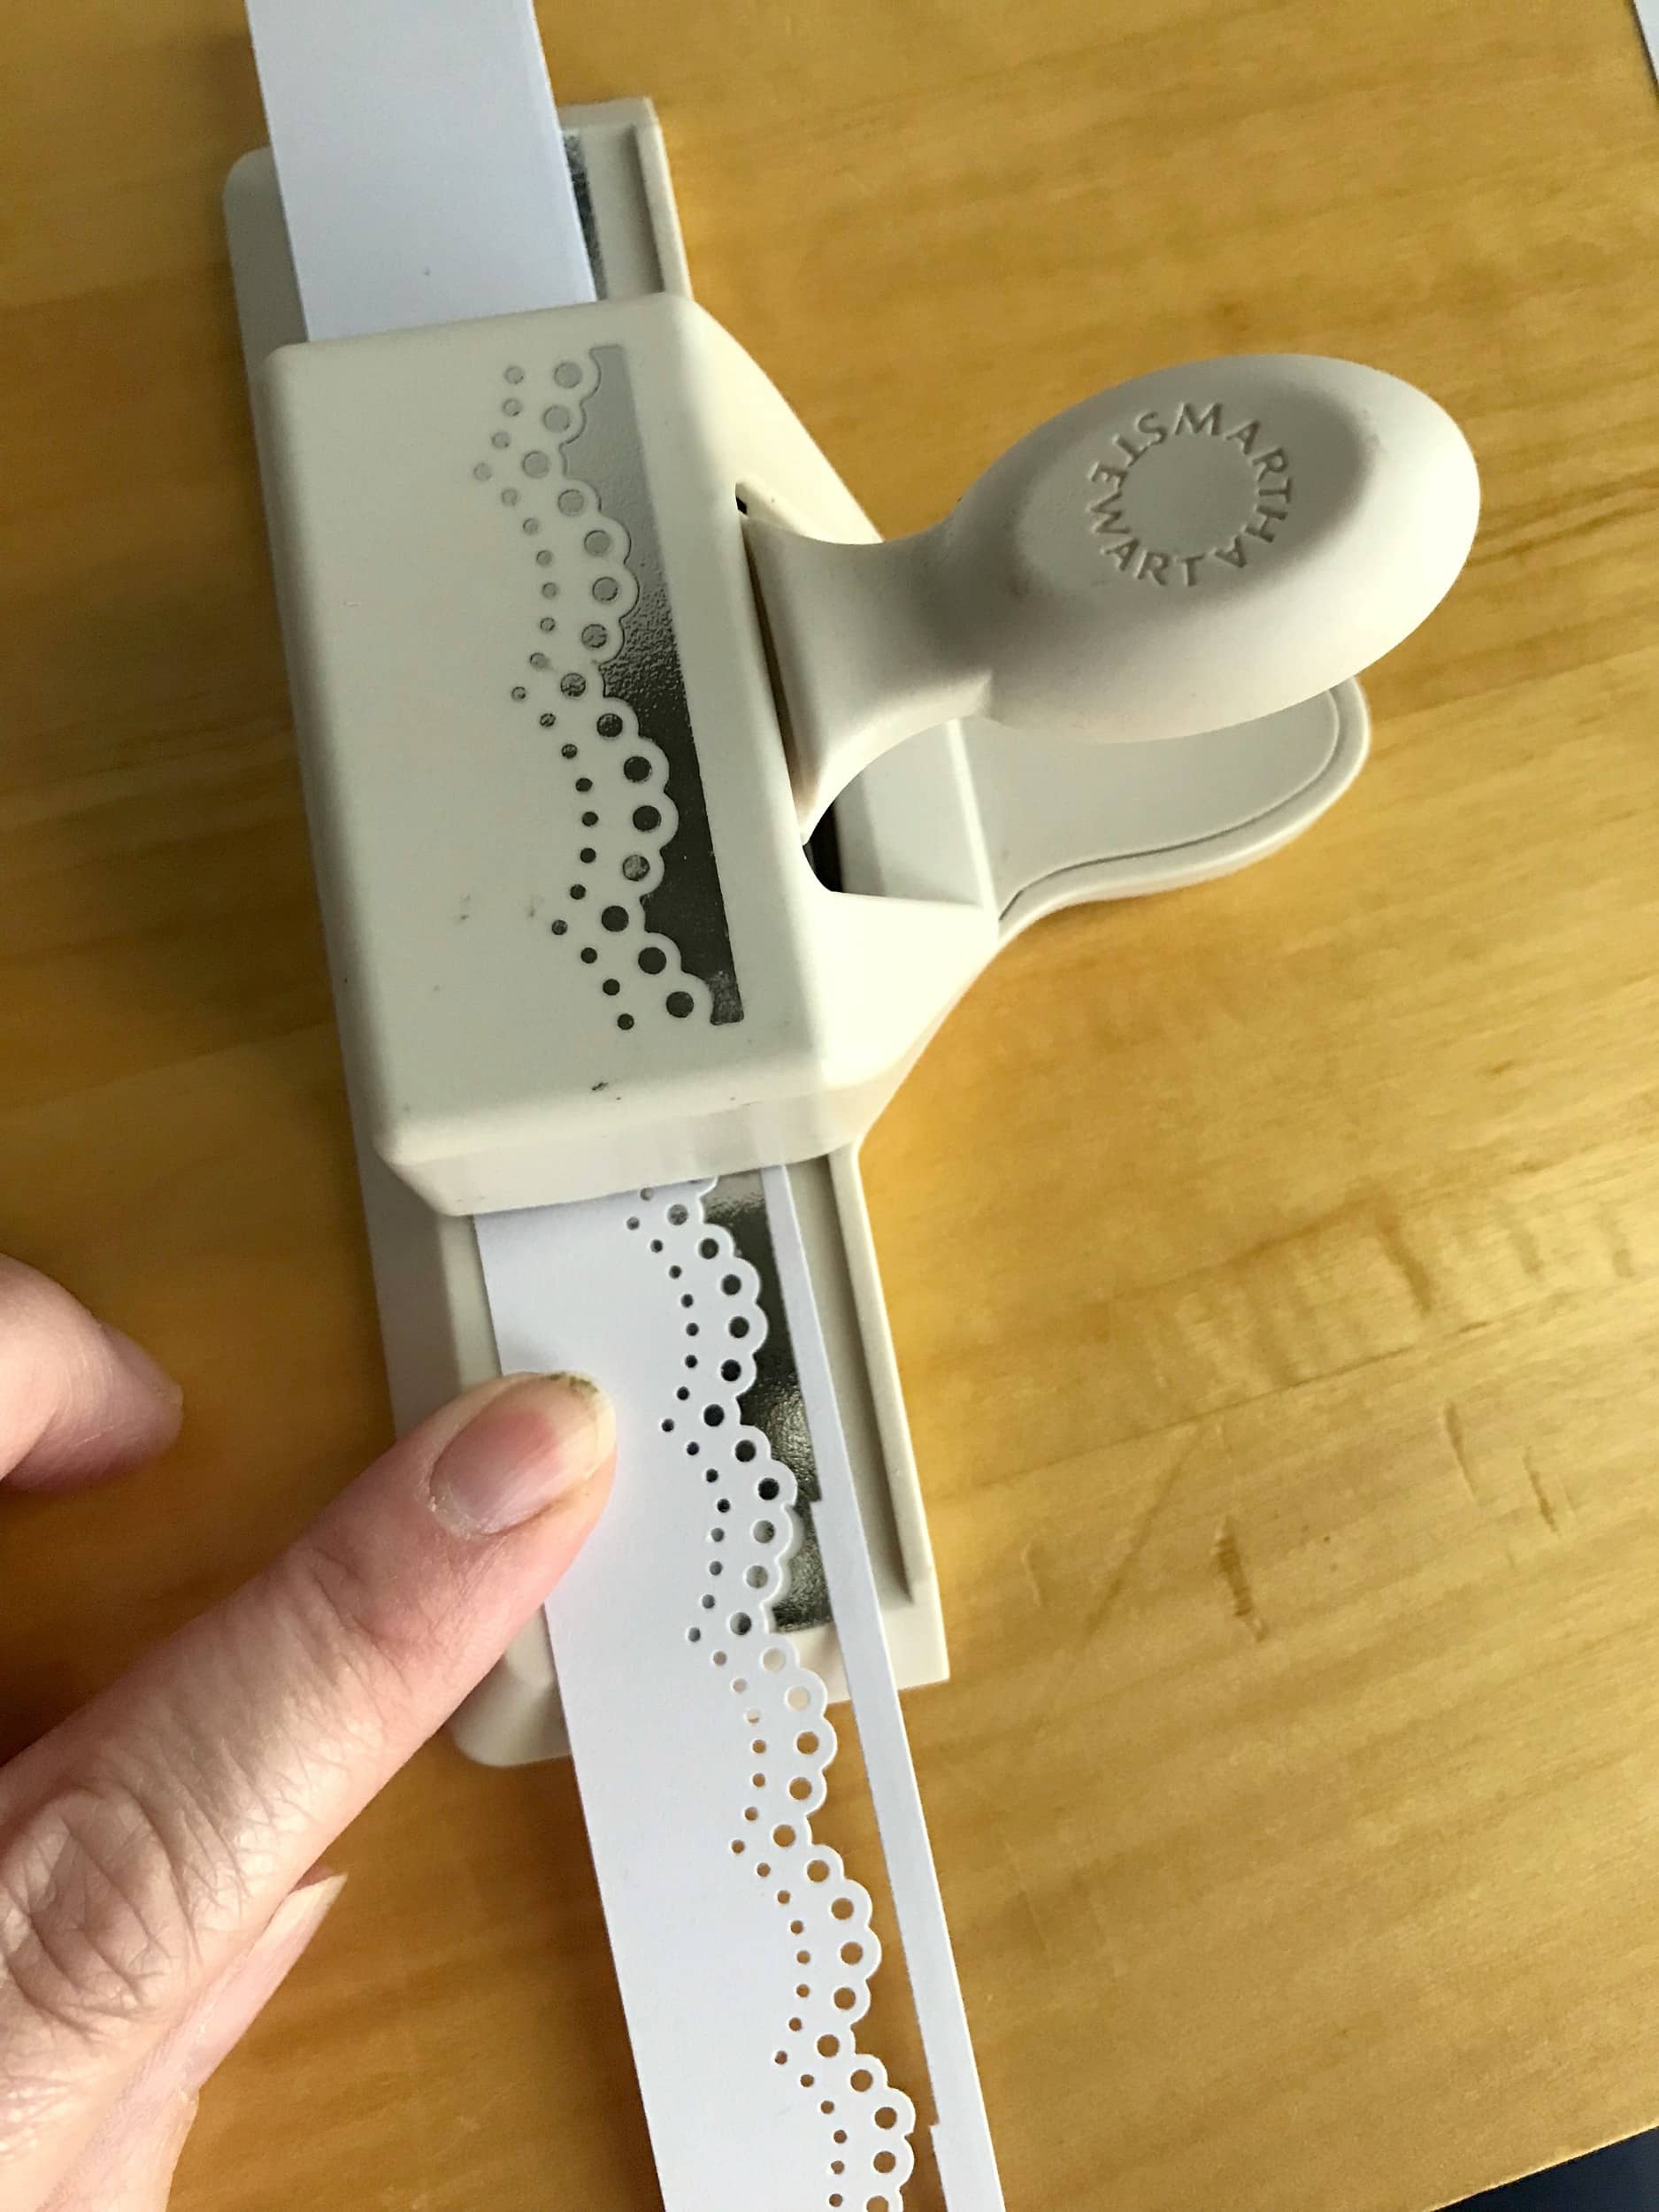
7. Cut white cardstock into nine 2″-wide strips and one 4″-wide strip. Use a decorative edge punch along one side of each strip. Cut the 2″-wide strips of the white cardstock into 4″-long pieces. Wrap one piece around the top of each cylinder and attach with hot glue.
8. Glue the 4″-wide strip along the edge of the base to hide the rectangular box underneath.
9. Apply hot glue around the opposite rim of each cylinder and press against the covered cardboard. Repeat with each cylinder, spacing the tubes evenly.

10. From each color tissue paper, cut 9 tear-drop shapes in small (red), medium (orange), and large (yellow).
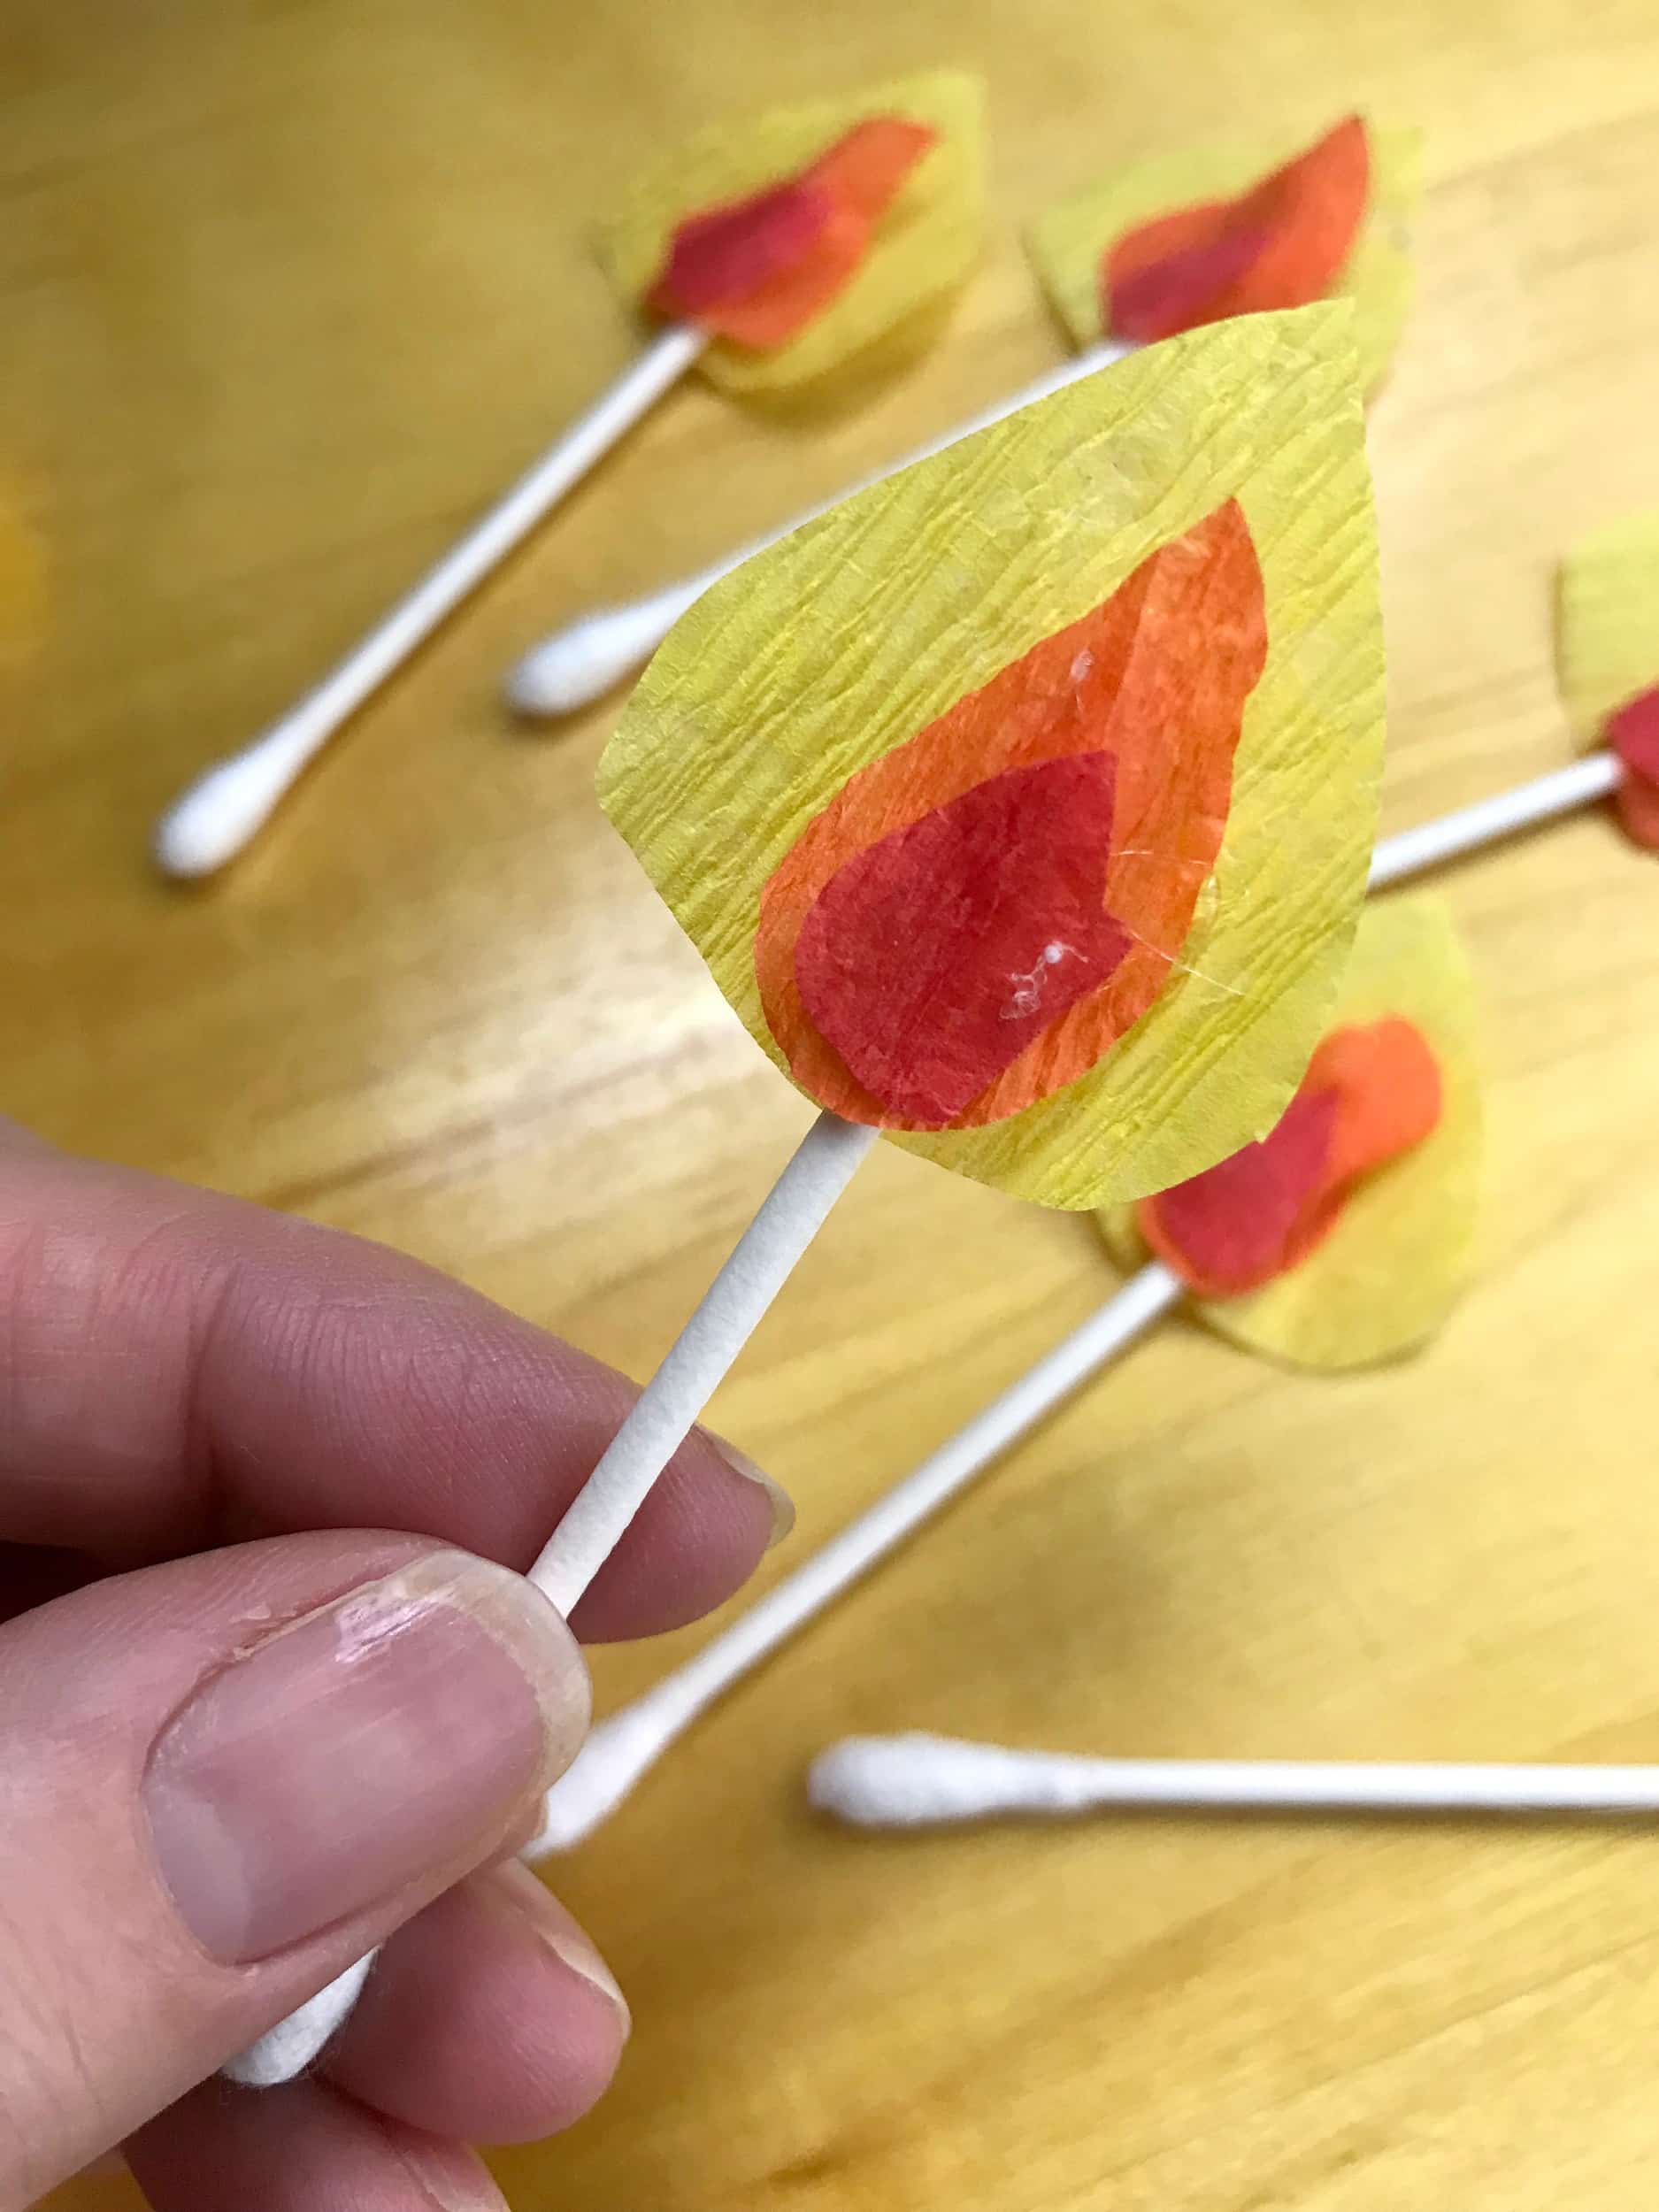
11. With hot glue, attach one yellow piece of tissue paper to each cotton swab. Again, using hot glue, attach one piece of orange tissue paper and one piece of red tissue paper to the opposite side from the yellow tissue so that the cotton swab tip is hidden. To keep the cotton swabs from sinking too far into the cylinders, place a cotton ball in each tube.

Click here to download the printable materials list and instructions.
Materials
For this project, you will need the following materials:
- 4 to 5 sheets (12″ x 12″) of coordinating scrapbook paper
- 2 sheets white cardstock
- cardboard, cut to 3″ X 12″
- cardboard taped to form a rectangle or small box
- guillotine paper trimmer or ruler and scissors
- 9 cotton swabs
- 1 sheet tissue paper in each color: yellow, orange, and red
- 9 cotton balls
- hot glue gun
Directions
- Cut your scrapbook paper into eight (4″ X 5″) rectangles one (4″ X 7″) rectangle. If the paper is thick, curling the paper into a cylinder (in the next step) can be difficult. Using your hands to run the paper over the edge of a table or desk (as seen in the photo above) will help shape a curl.
- Curl each rectangle into a cylinder.
- Run a line of hot glue down one long side of each cylinder.
- Press the sides of each cylinder together to attach the paper with the glue. Repeat on each piece of paper to create 9 cylinder tubes.
- Cut a piece of scrapbook paper to 3″ X 12″. Use hot glue to attach this piece of scrapbook paper to the 3″ X 12″ piece of cardboard.
- Also attach the rectangular box to the underside of the base to become a pedestal.
- Cut white cardstock into nine 2″-wide strips and one 4″-wide strip. Use a decorative edge punch along one side of each strip. Cut the 2″-wide strips of the white cardstock into 4″-long pieces. Wrap one piece around the top of each cylinder and attach with hot glue.
- Glue the 4″-wide strip along the edge of the base to hide the rectangular box underneath.
- Apply hot glue around the opposite rim of each cylinder and press against the covered cardboard. Repeat with each cylinder, spacing the tubes evenly.
- From each color tissue paper, cut 9 tear-drop shapes in small (red), medium (orange), and large (yellow).
- With hot glue, attach one yellow piece of tissue paper to each cotton swab. Again, using hot glue, attach one piece of orange tissue paper and one piece of red tissue paper to the opposite side from the yellow tissue so that the cotton swab tip is hidden. To keep the cotton swabs from sinking too far into the cylinders, place a cotton ball in each tube.
Did you know that Yeshua (Jesus’ Hebrew name) celebrated Hanukkah, also known as the ‘Feast of Dedication’? It’s true! So why was Hanukkah important to Yeshua? And what can we learn about Yeshua in the Hanukkah celebration? Ron Cantor takes us to Jerusalem for some exciting answers!


I made a simplified version of this with each of my kiddos last month, and their versions are cute. (We used eight toilet paper tubes and half of a paper towel tube as the shamash. I gave them markers, crayons, and construction paper to decorate their tubes/candles.) Now my kiddos have a safe way to keep Hanukkah candles in their bedrooms, and they were thrilled! Thanks for a great idea!!