
How to Make a Clay Cell Model

How to Make a Clay Cell Model
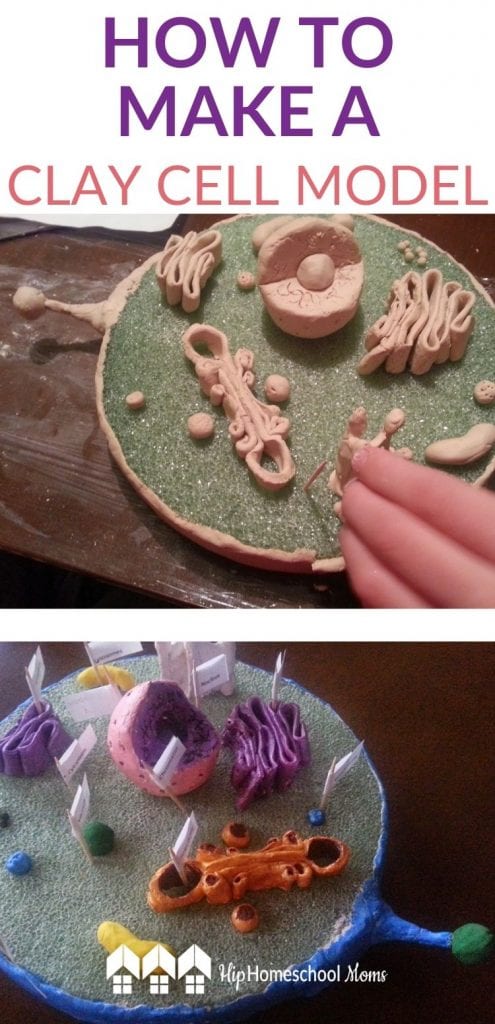
One of my son’s favorite homeschool memories was of creating his own clay cell model! For those of us who grew up in the days of read-about-a-cell-in-the-textbook-and-take-a-test-on-the-parts-of-the-cell, it can sometimes be difficult to remember that there are lots of fun ways to study all kinds of topics! We may sometimes shy away from doing more hands-on projects because we (mistakenly!) think hands-on projects necessarily take lots of time. While that can be the case, it definitely doesn’t have to be! Creating this clay cell model is just one example of a fun activity that can take as much or as little time as you’d like to devote to it. Give it a try!
NOTE: If you want to devote more time to this activity, you can always work on it for a certain amount of time each day instead of completing it all at once!
Materials You’ll Need
This clay cell project requires only a few simple items from beginning to end. The clay I prefer is an air-dry clay since this prevents the need for baking if you want to keep your cell for any period of time.
- FloraCraft Styrofoam (white or green)
- Crayola Air Dry Clay 2.5 Lb Bucket
 (white)
 - Plaid Acrylic Paint, 2-Ounce, Best Selling Colors I (or use paints you already have)
- Round toothpicks
How to Do It
- Look at a diagram showing the parts of the cell. Our article, Edible Cell Project: Chocolate Chip Cookie Science, includes pictures of both a plant cell and an animal cell that you can use as references.
- Make a list (or use the one below) of the parts of the cell you want to create and label. If you have younger children, you might only choose to include a few parts of the cell, For older students, you might do all of the ones listed.
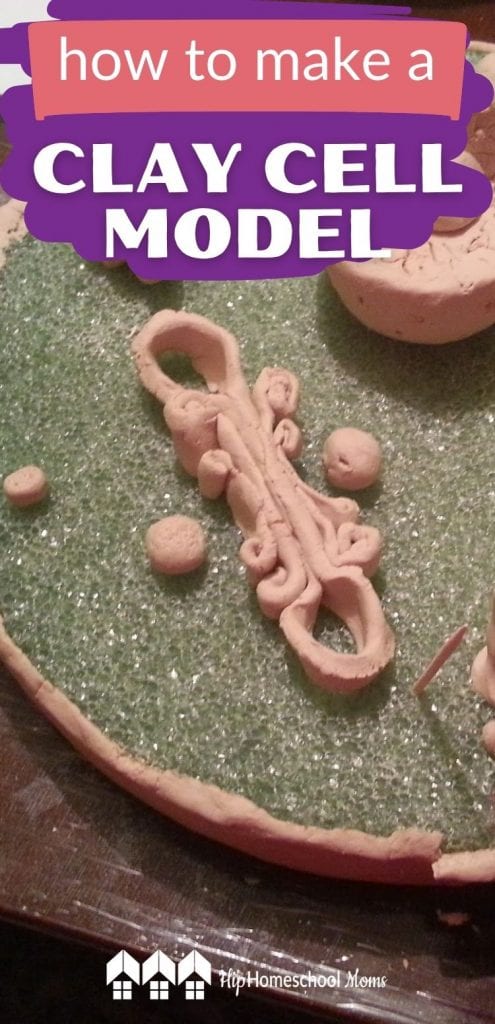
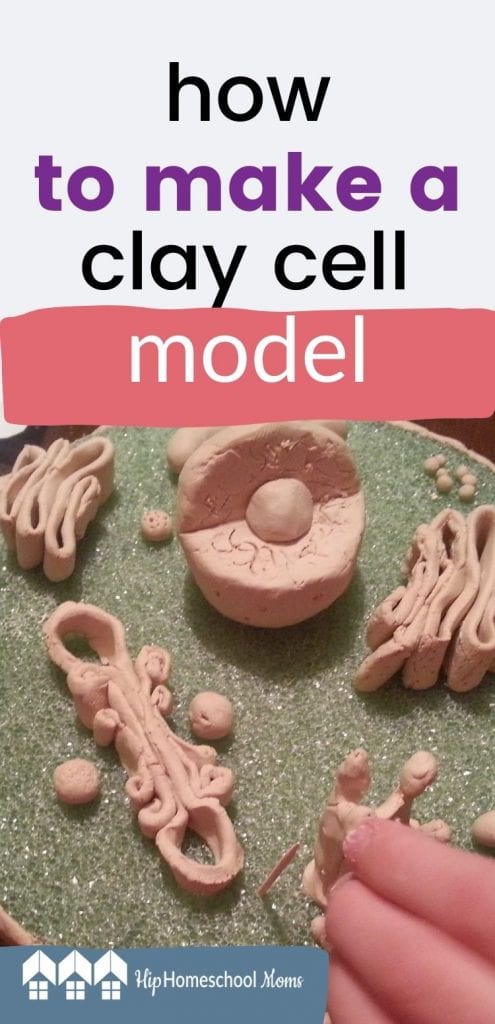
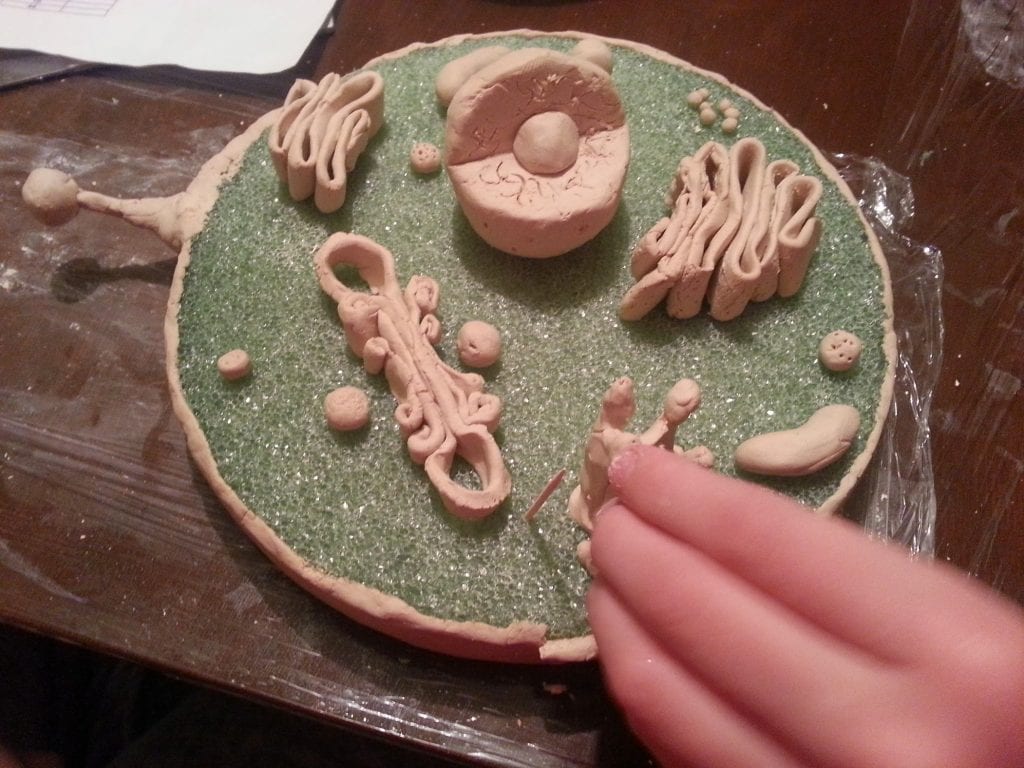
- Have your child create whichever parts of the cell you want to include in your cell model.
- While the clay is still wet, insert a toothpick halfway into each part of the cell. Larger pieces, such as the nucleus, may need two toothpicks.
- Then place each part onto the styrofoam “cell” and push the toothpick into the styrofoam to hold the part in place.
- After all the pieces are in place, roll out a strip of clay to serve as the cell membrane and press it around the edge of the styrofoam cell.
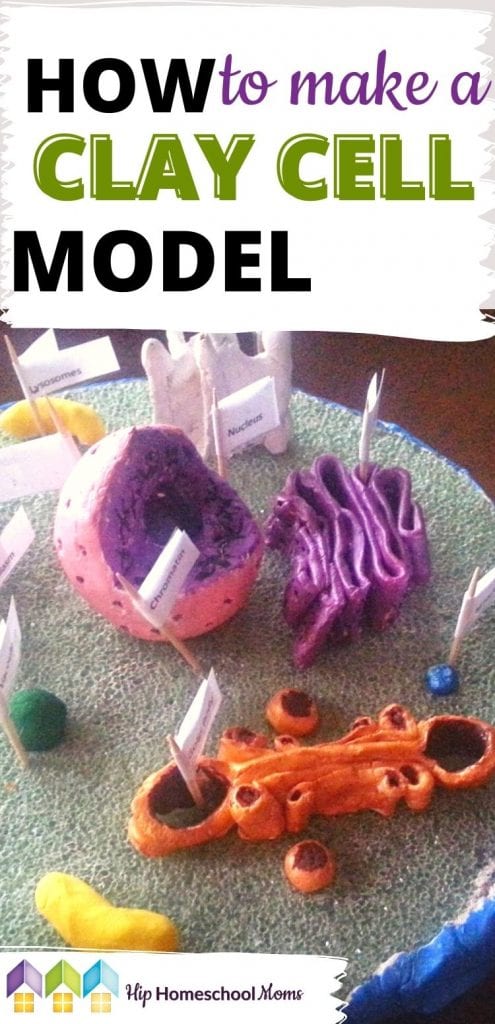
- After the pieces are dry, it’s time to paint your cell! Have fun!
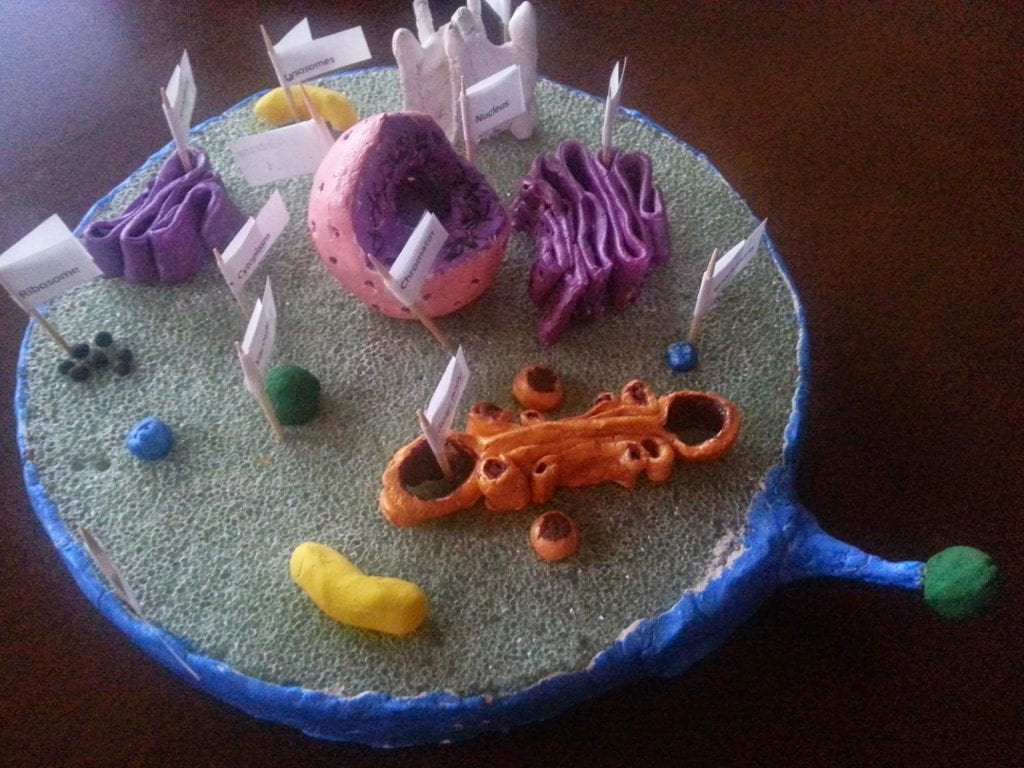
- After the cell is complete, you may want to have your child label the parts (as shown in the photo of the finished cell). Or you may choose not to label the parts so you can use your finished cell as a way of occasionally checking to be sure your child remembers them.
Items to Label in Your Animal or Plant Cell Model
Use the list below as suggestions for parts to include in your cell. CLICK HERE to download a printable version of this list.
- Nucleus
- Golgi body
- Mitochondria
- Ribosomes
- Rough ER ( Endoplasmic Reticulum )
- Smooth ER
- Chromatin
- Plasma Membrane
- Cytoplasm
- Lysosomes
- Centrioles
- Cell Wall ( if plant cell)
- Vacuole
- Nuclear Membrane
More Ways to Make Science Fun!
If you’re looking for more ways to study cells with your children, take a look at 10 Awesome Ways to Make a Cell Model! You’ll find suggestions for making cells from cake, Jello, cookies, and even Shrinky Dinks and Legos!

If you’d like more ideas for studying plant cells, this Plant Cells Printable Pack includes activities and worksheets for studying the parts of plant cells.
Or maybe you’re studying animal cells and would like this Animal Cells Printable Pack!


I am helping a bunch of kids finish this project for school. Your site will show them exactly how to do the models out of clay. Forever grateful, thank you.