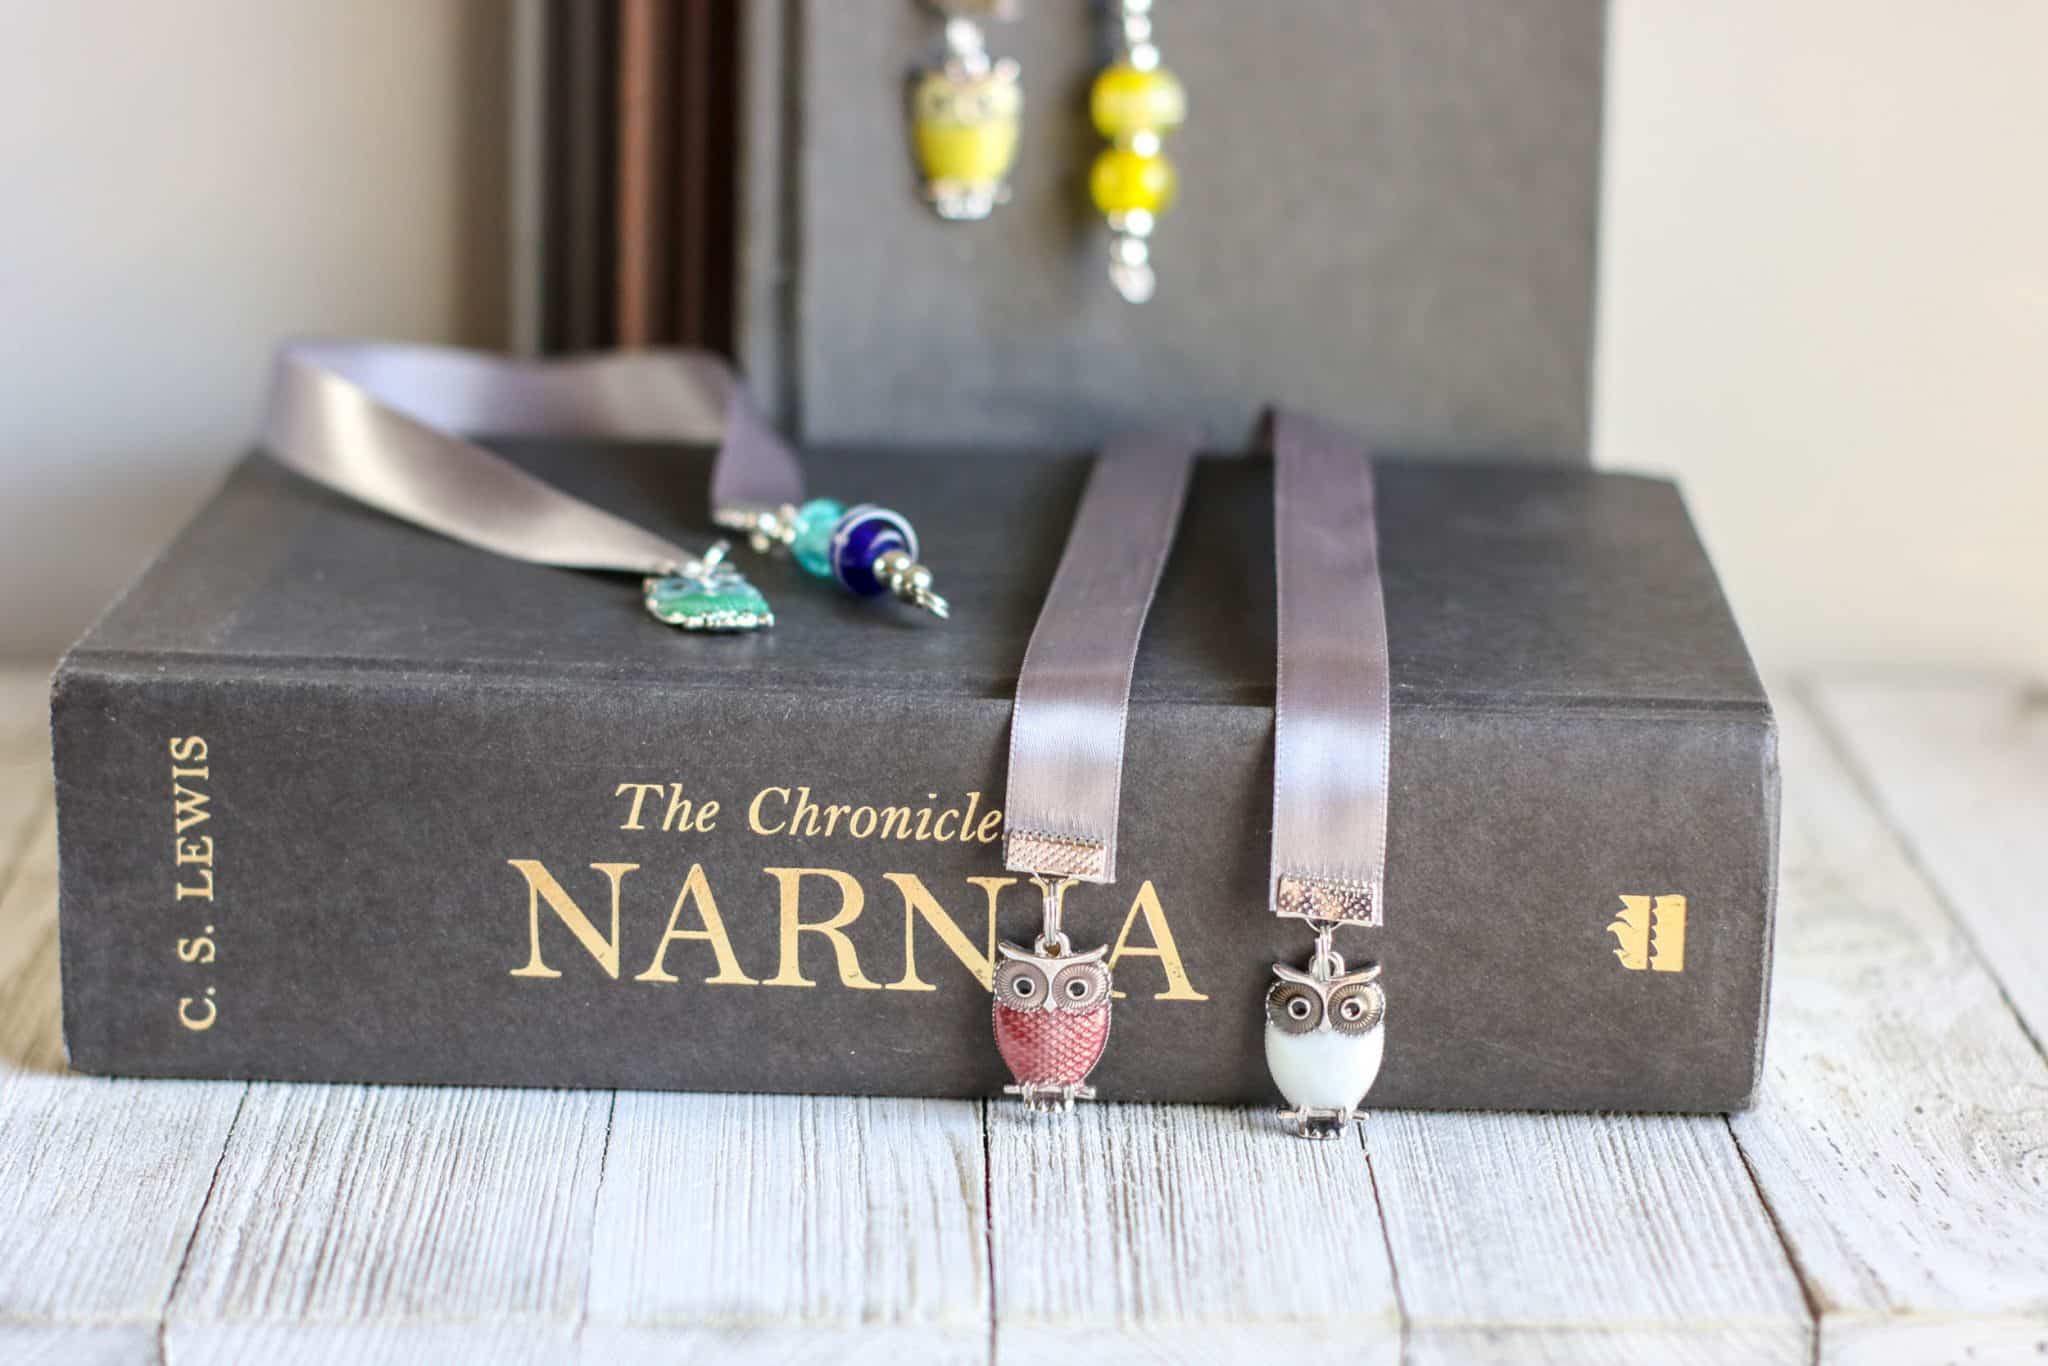
Beautiful DIY Ribbon Bookmark
Calling all readers! We know that many of our homeschooling mamas -and their children- love to settle in on a cold winter’s day with a good book. If that sounds like you, then you’ll love today’s craft for this Beautiful DIY Ribbon Bookmark that you can make (and later, enjoy) in your homeschool. This craft is also perfect if you are looking for a DIY gift to share with your friends and family during the holiday season–or any time of year! Whether you’re looking for a creative and thoughtful DIY gift idea, or just looking forward to cozy, winter reading-time, we hope you enjoy doing this craft, and we know you will love the beautiful finished product!
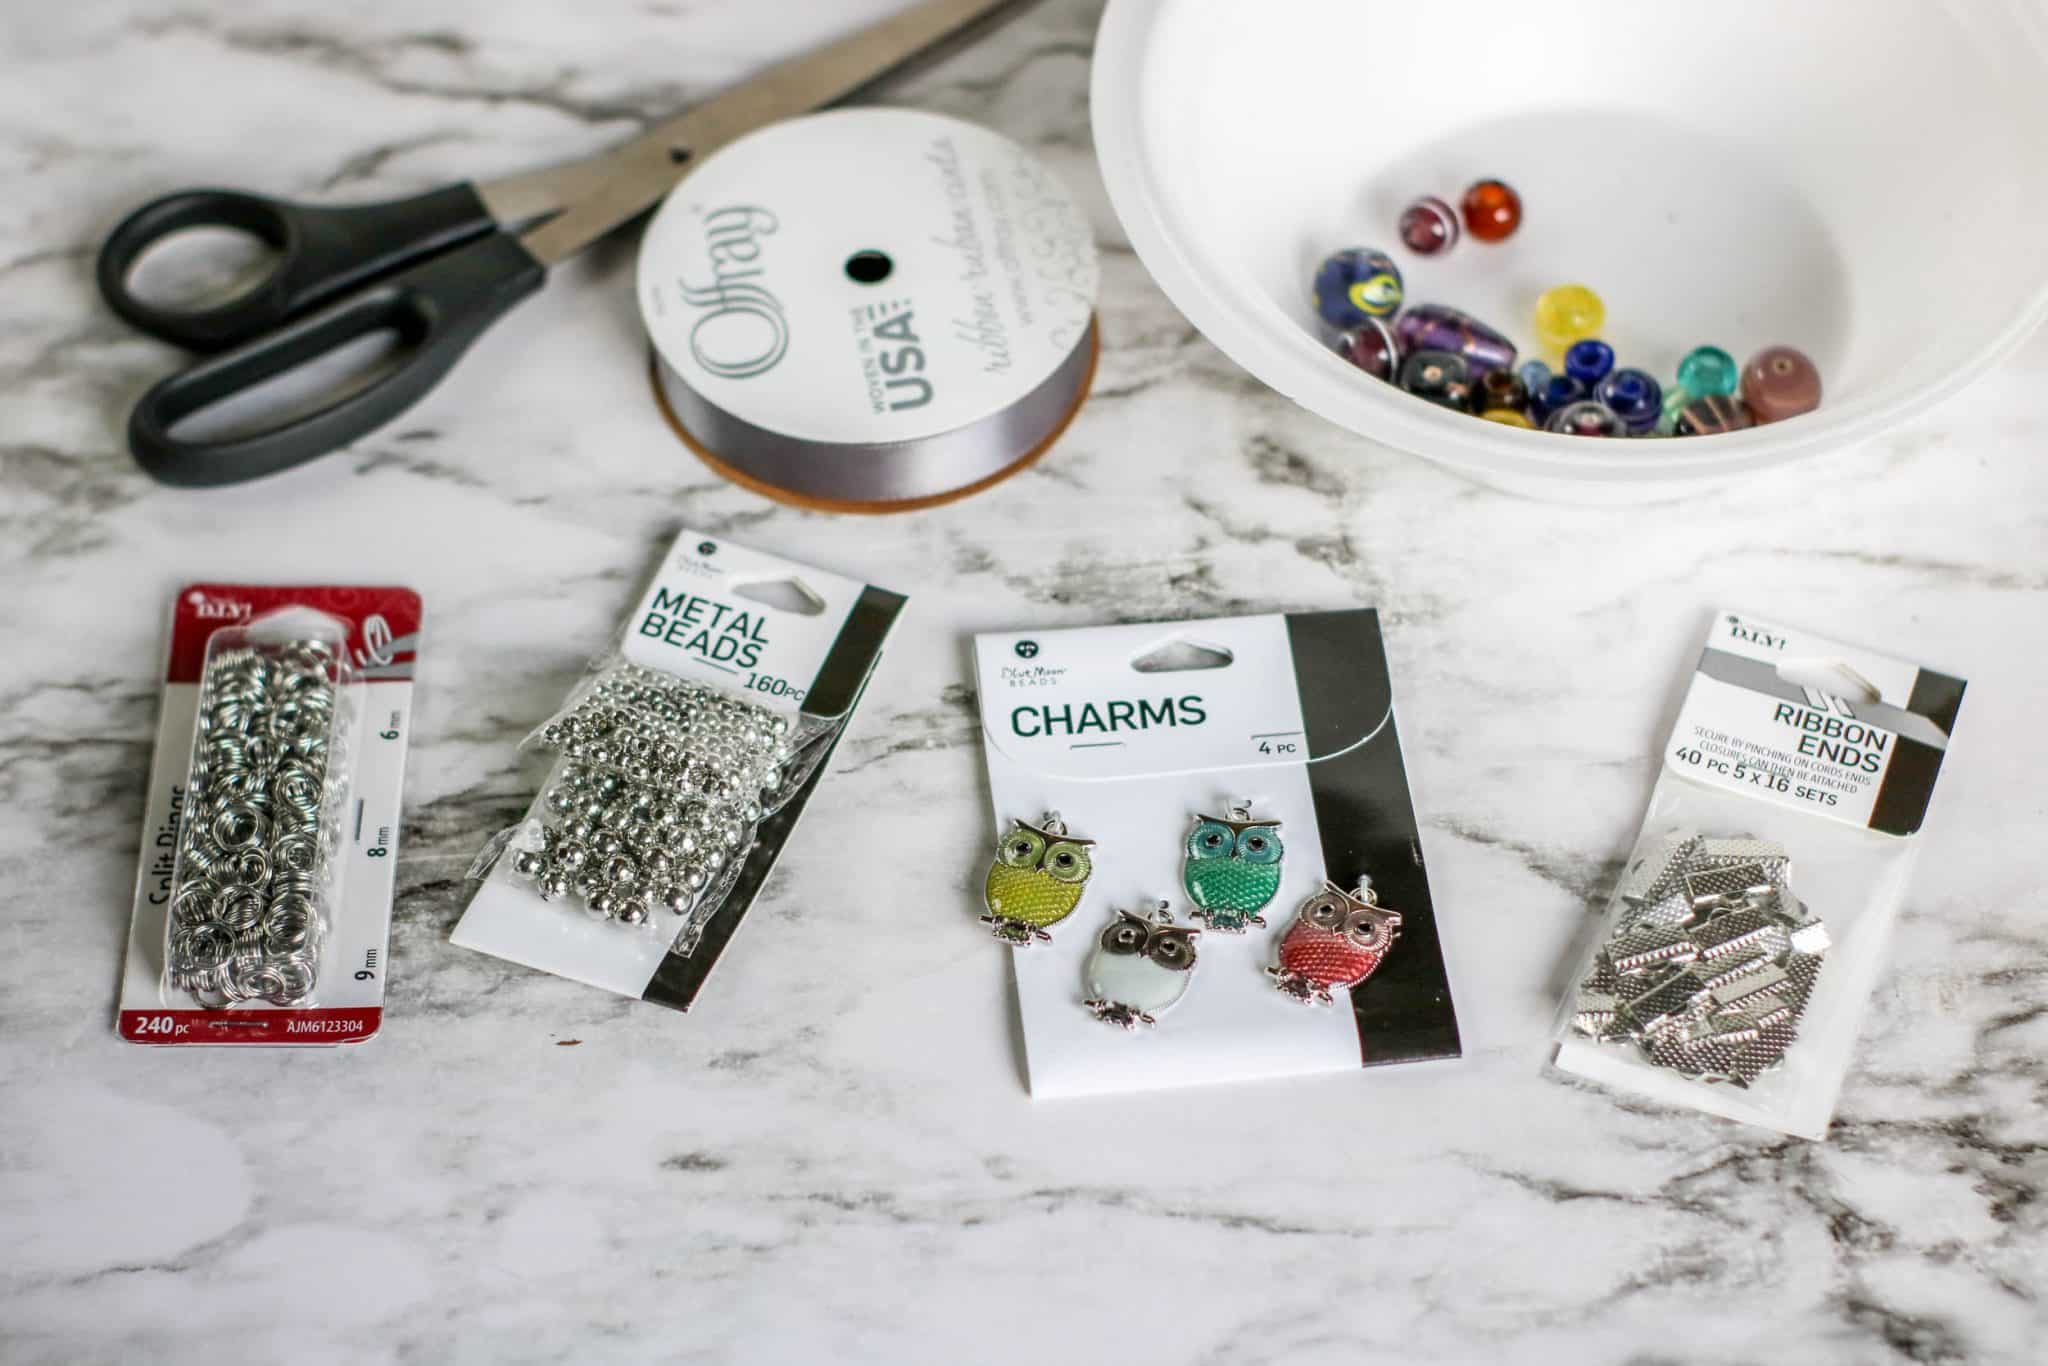
What You’ll Need:
- Metal Ribbon Ends
- Charms–We chose owl-themed charms, but you can use any type you like. This variety pack of charms could be fun!
- Beads
- Needle Nose Pliers
- Split Rings
- Jewelry Wire
- Ribbon
How to Make It
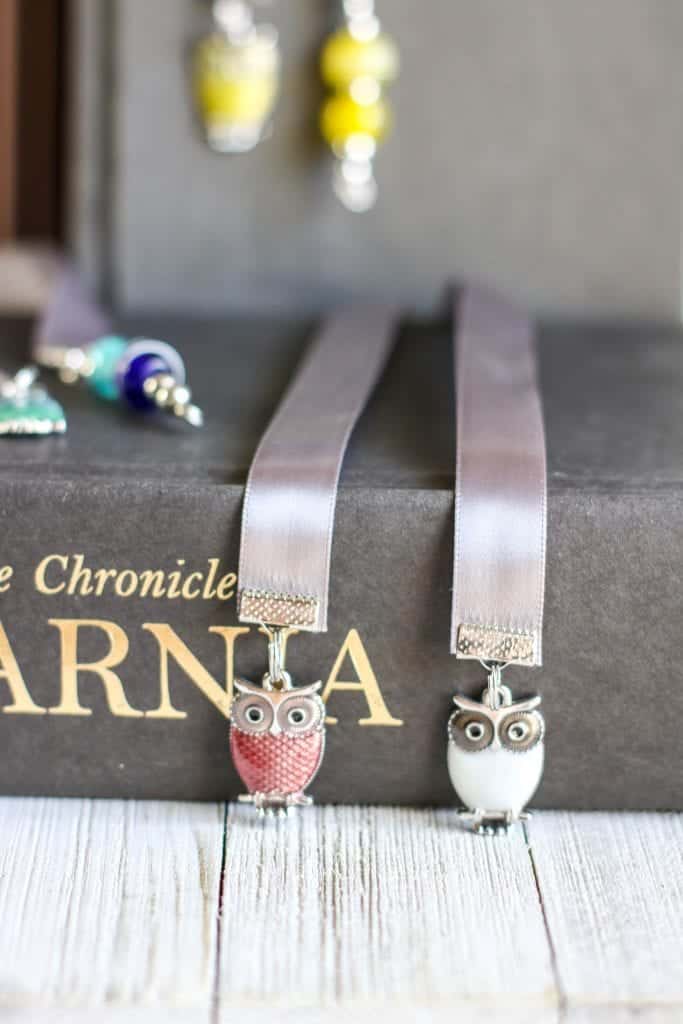
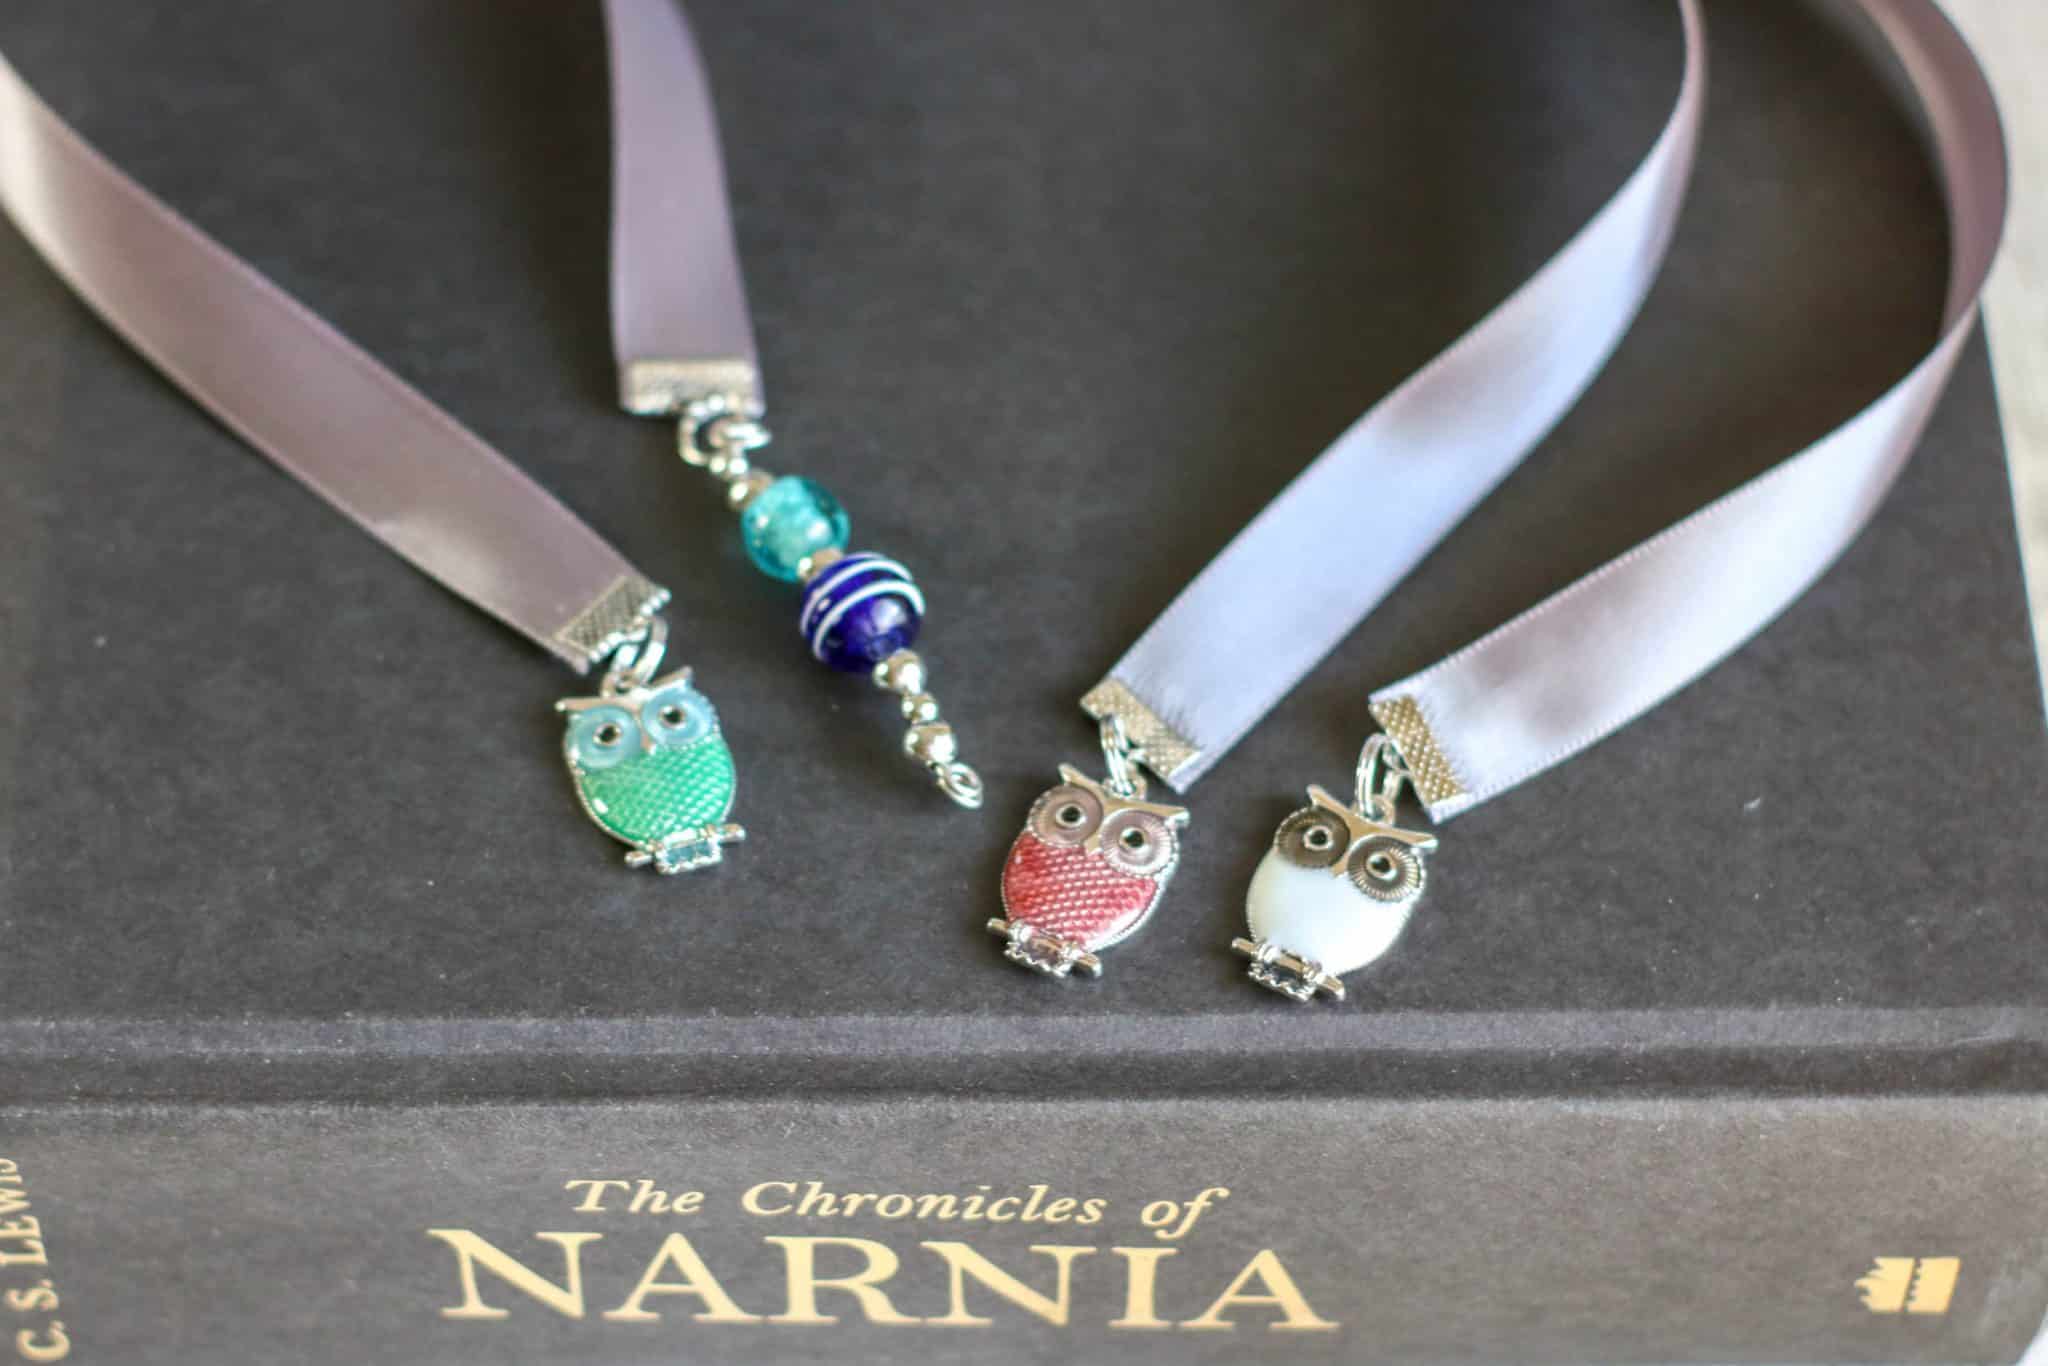
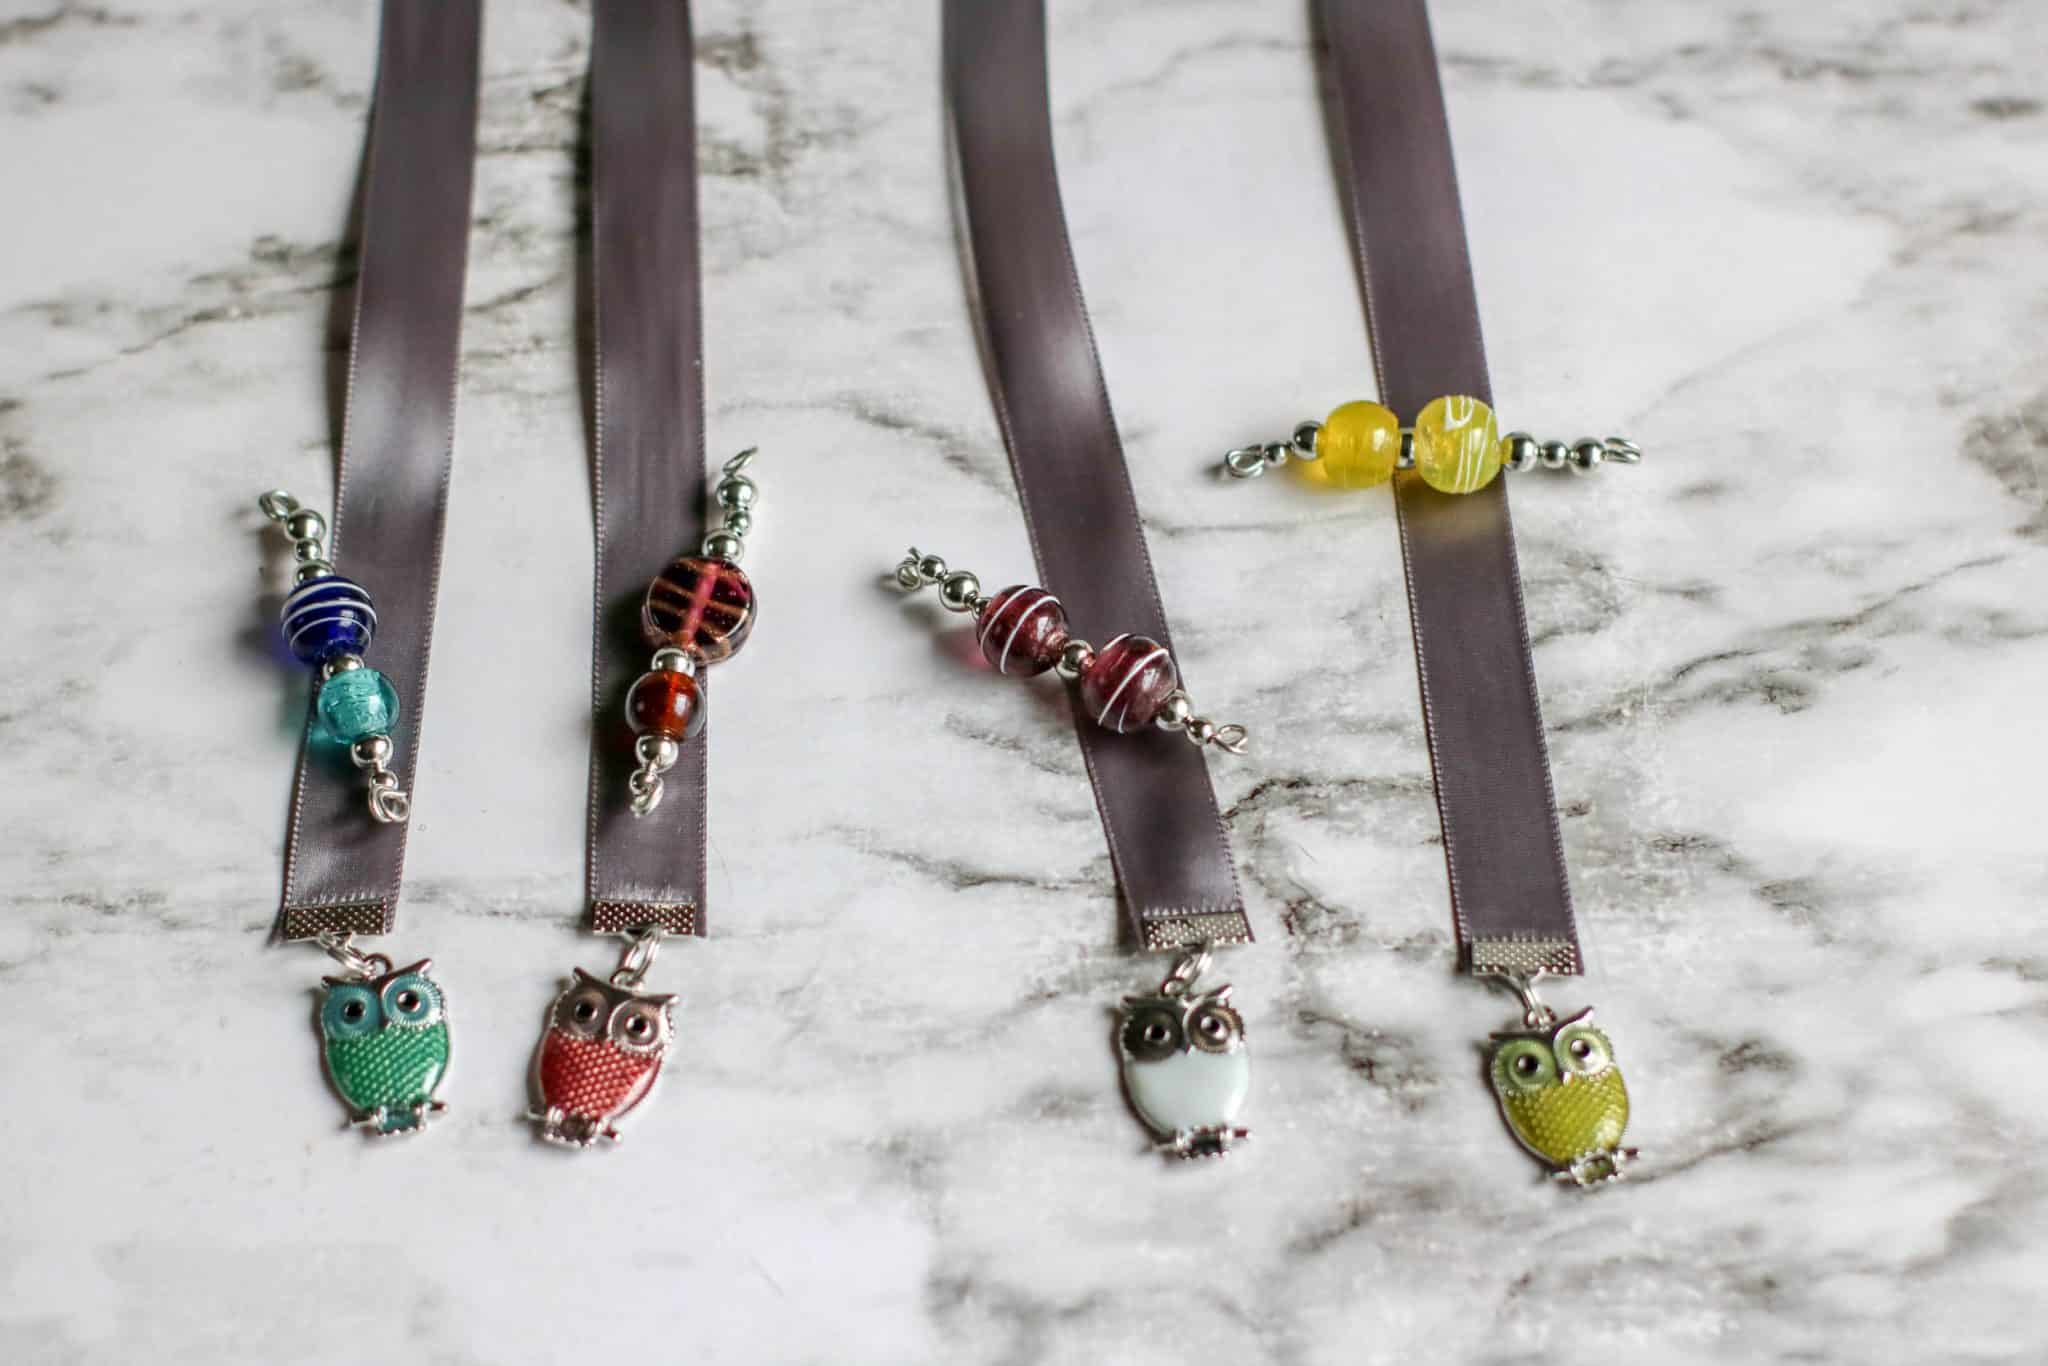
A really nice thing about this craft is that you can truly customize it. Through your choice of ribbons, beads, and charms, you can make this Beautiful DIY Ribbon Bookmark to fit any theme you like. For this tutorial, the theme was owls (Sidenote: how perfect would that be to make with a child who is reading Harry Potter?)
For your own ribbon bookmarks, you can feel free to be creative as you choose charms, colors and beads. If you want to make a variety of differently-themed of bookmarks, I suggest checking out this inexpensive, 100 piece assortment of charms on Amazon.
When you have all of your supplies and are ready to begin making your bookmarks, the first thing you’ll want to do is to uniformly cut your ribbons into the desired length.
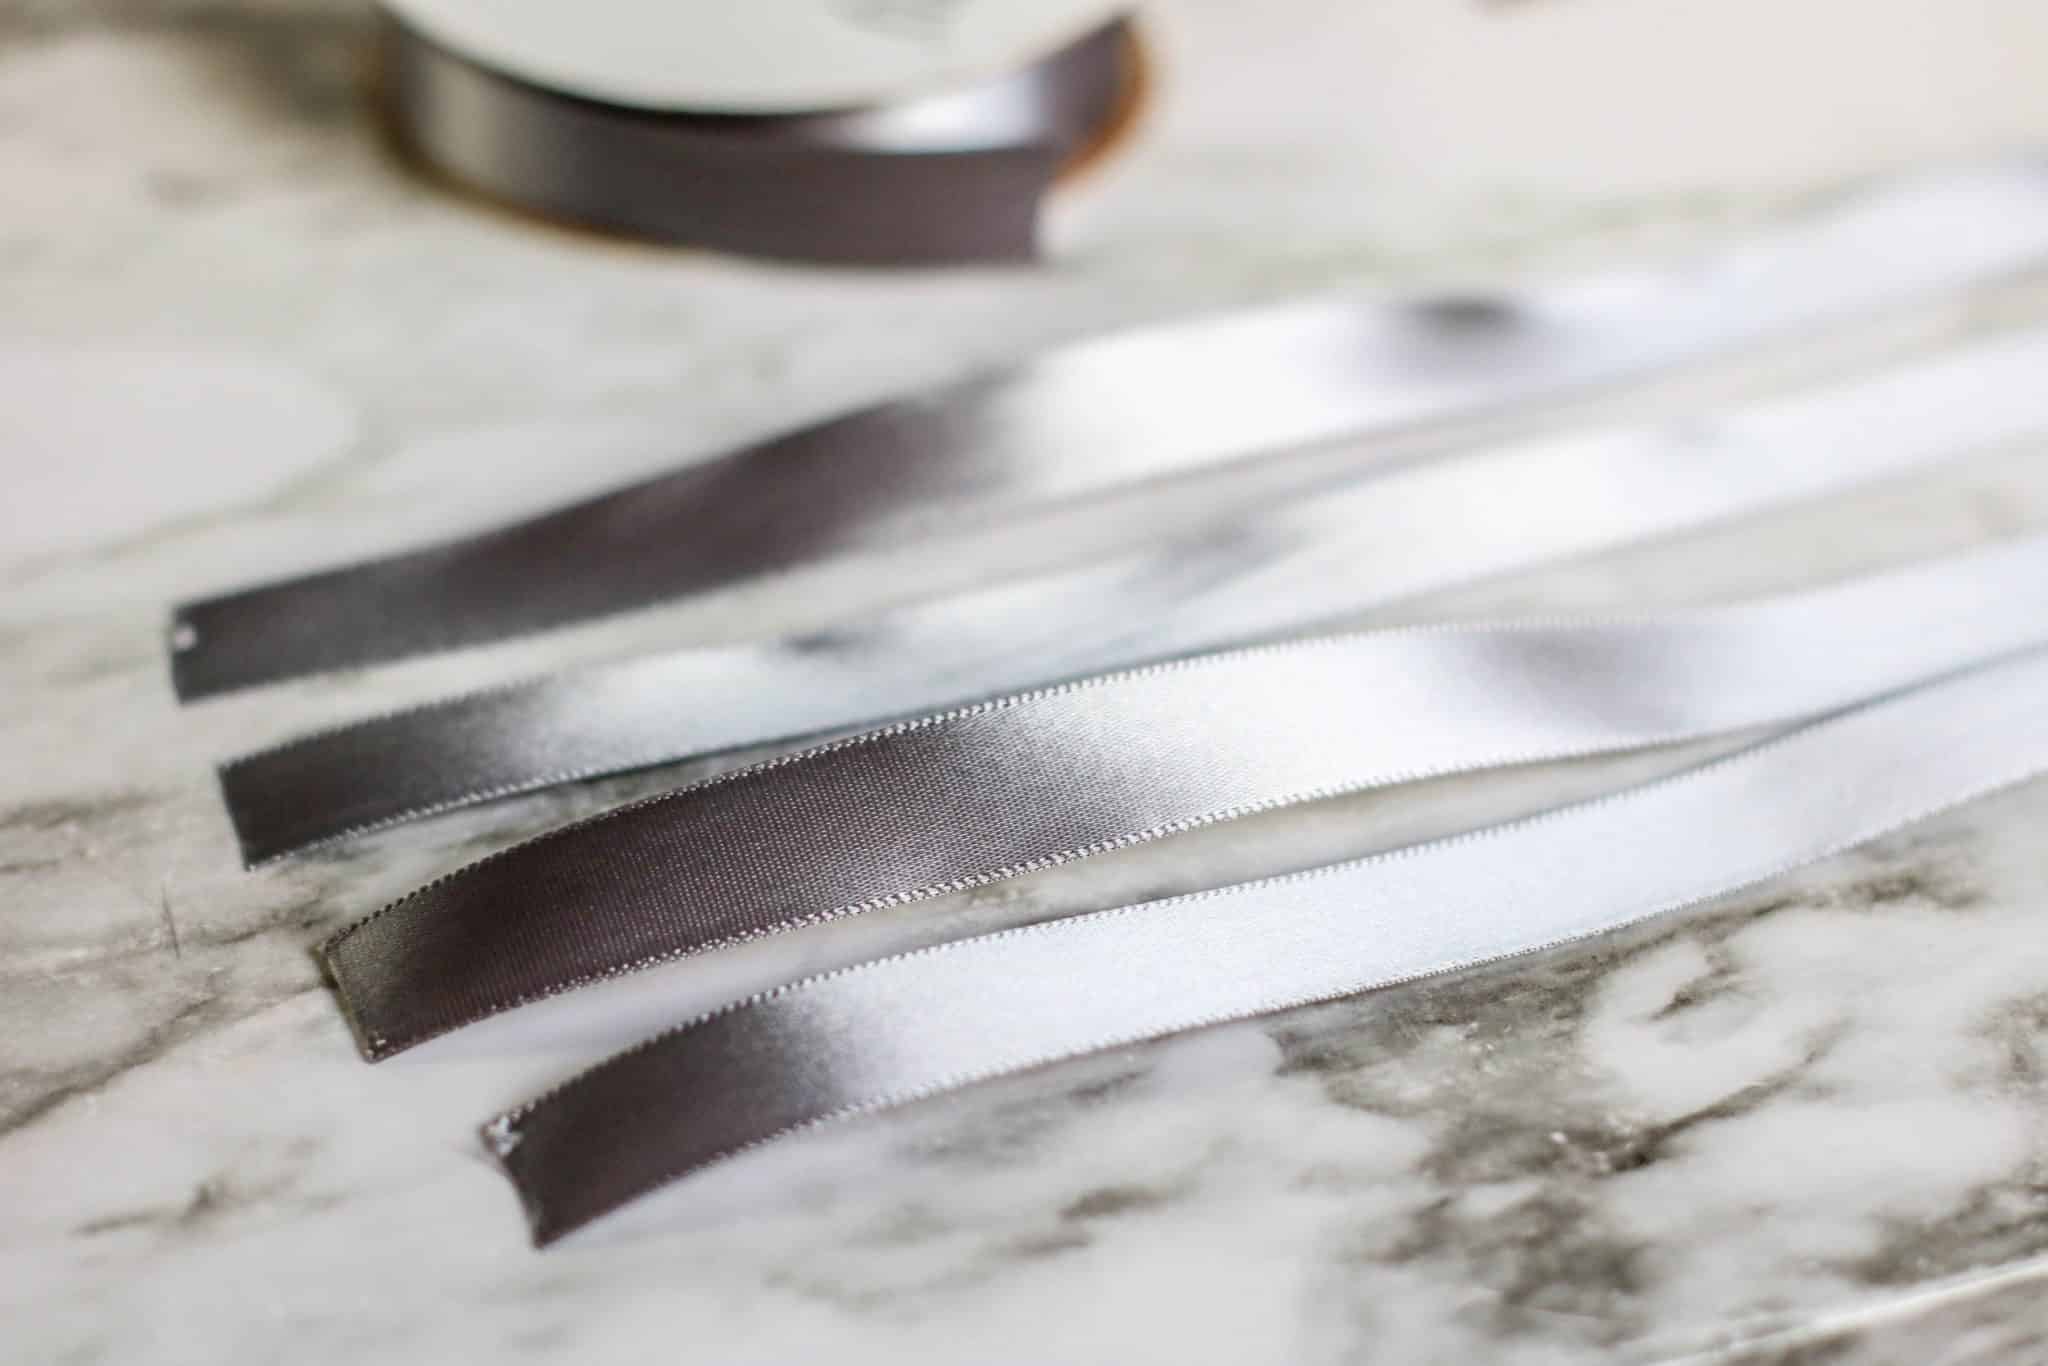

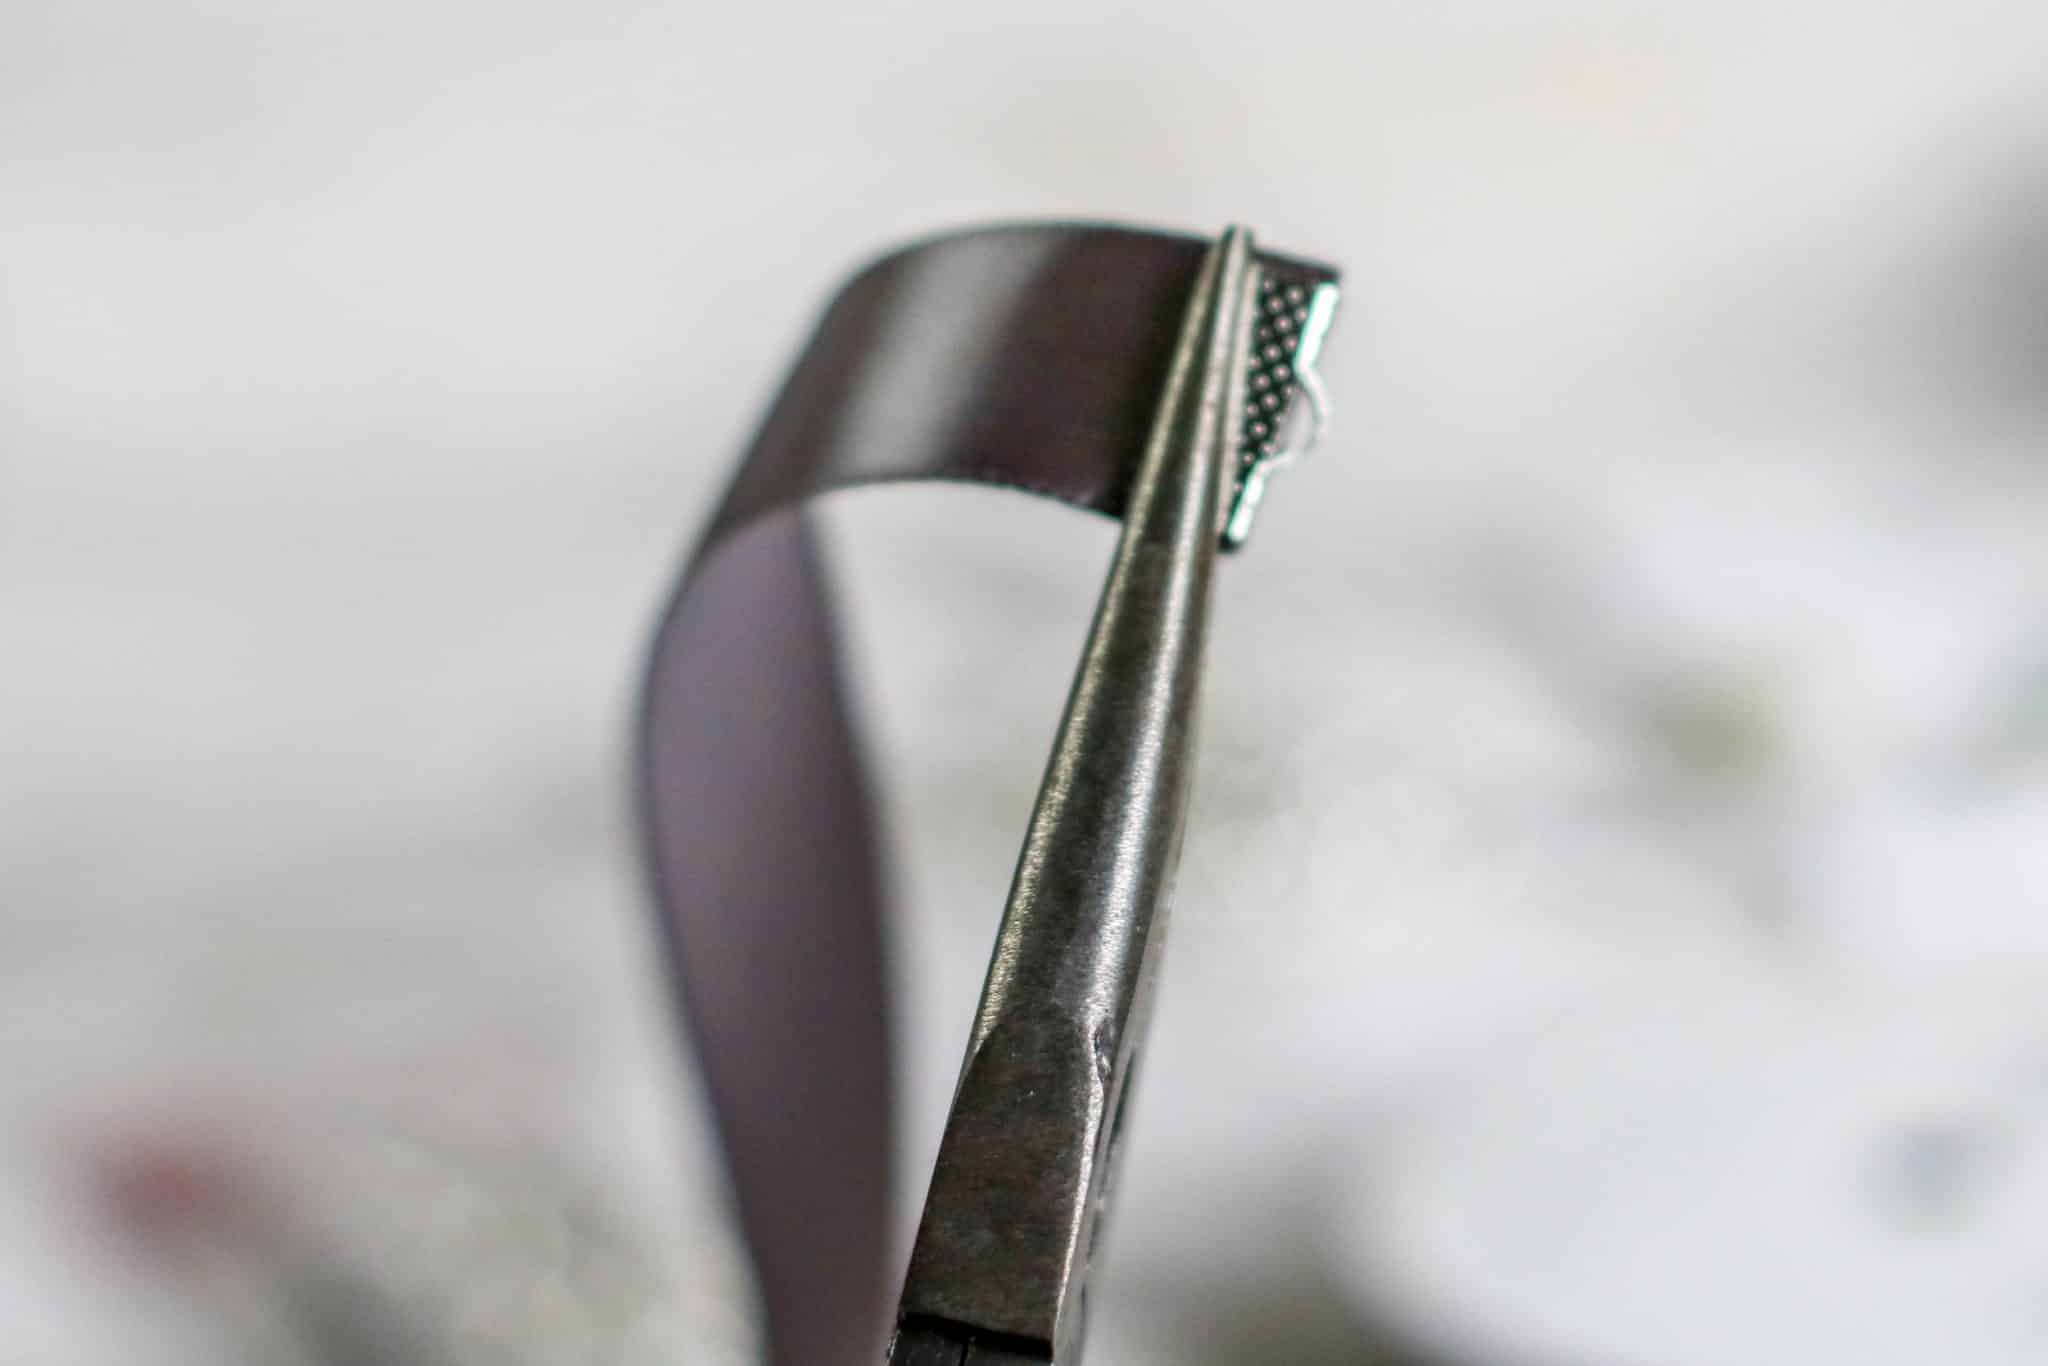
Use the pliers to clamp the ribbon ends onto each side of each piece of ribbon, as shown.

Use the pliers to open the wire of the split ring just enough so that you can slide your charm onto the ring.

Once your charm is securely attached, you’ll work on the beads for the other side of the bookmark. To do this, cut a piece of wire approximately 3 inches long. Twist one end of the wire around the pliers to create a tight curl, so that you can slide your beads onto the wire without them falling off.
Add your selection of beads to the wire, leaving a little bit of excess at the open end . When the beads cover almost (but not all) of the wire, use your pliers to twist the open end into a tight curl, closing it on the other side.
To finish your bookmark, use your pliers to attach a split ring to the side of the ribbon without the charm. Then attach the beaded wire to the split ring!
Your finished product will beautifully keep track of where you are in your latest reading adventures, with the beaded wire sticking out of the top of your current page, and your charm of choice hanging down below. We hope you enjoy making these Beautiful DIY Ribbon Booksmarks, using them and sharing them with others!
We love to know how you plan to use our crafts are part of your homeschool! Do you plan to make these booksmarks to go with a particular reading unit, as DIY gifts to give away, or just for fun? Let us know!