
Yard Sale Flip – Chick Brooder Cabinet
As a homeschool mom who fancies herself something of a ‘modern homesteader’, my project list is not ever empty and there is never enough time or money with which to work through those to-do’s. The project I’d like to share with you today my Yard Sale Flip – Chick Brooder Cabinet met a need here on our little farm without putting a dent in the family budget, my very favorite kind of project! 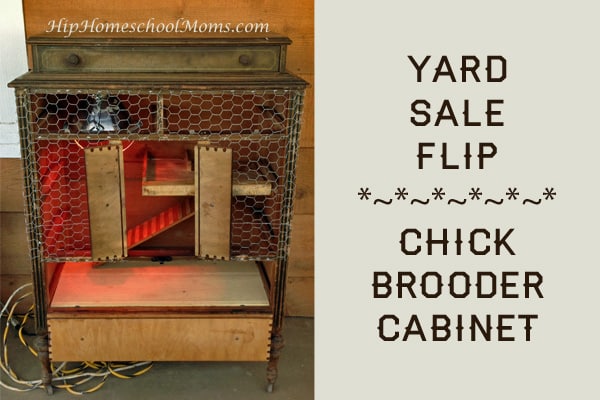

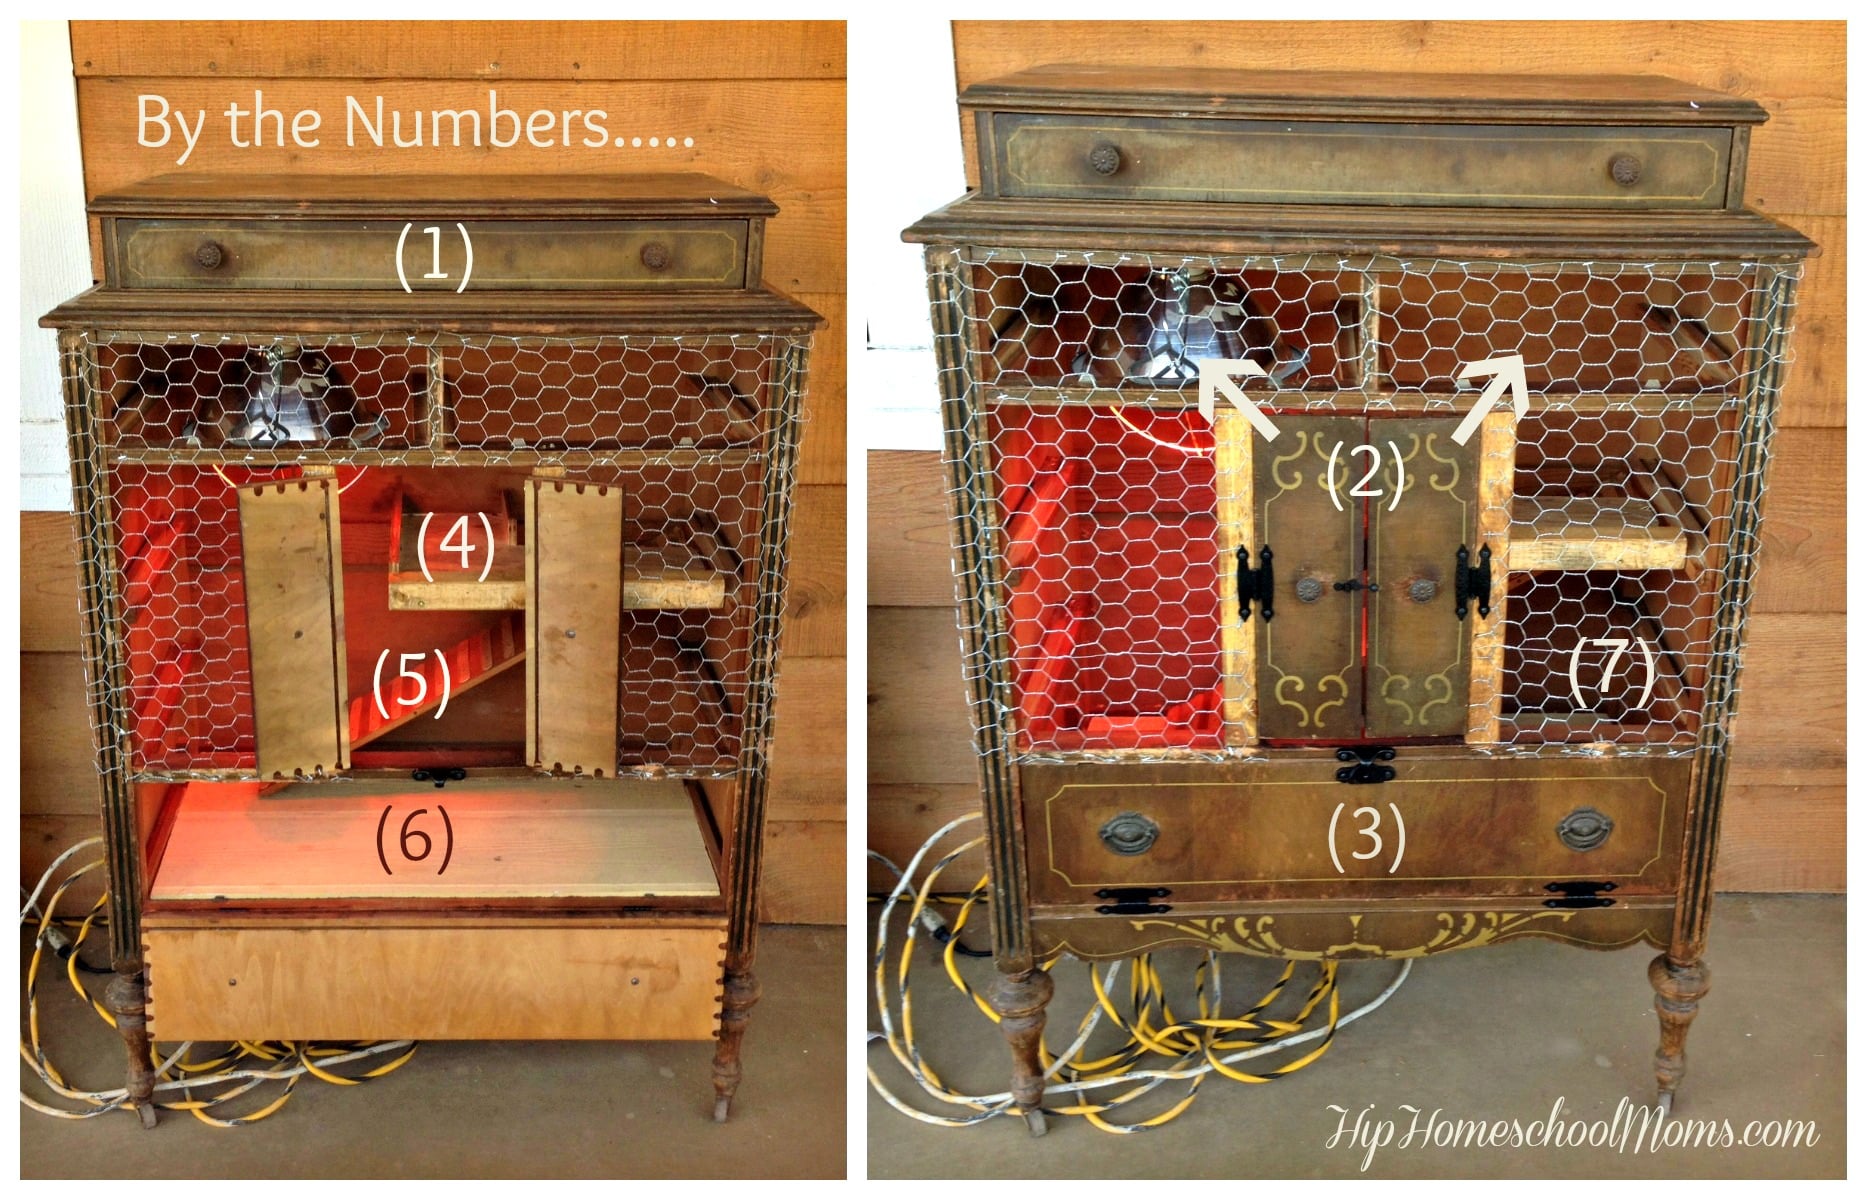
(1) I really liked this top section. It’s bottom is closed off from the rest (keeping it safe from the dreaded chick dust) so we kept this cute little drawer in tact to use as storage. I have a lot of hay bale string in there now because hay string has a billion uses around our little farm! 🙂 (2) My husband was oddly attached to the pattern found on all the original drawer faces. He wanted to salvage something of that pattern but the drawers themselves were dirty, rotten & covered in rodent poo. Thankfully the faces popped right off and he was able to keep a few. The two little panels we used for the doors came from the small drawers right below the top section. The drawer-face-turned-doors were attached to two 2×2’s we added to create a door opening. One set of decorative hinges and a small clasp finished up our doors. (3) Again, the face to this drawer was salvaged to make a flip-down bottom section. We did this to make the brooder easier to clean and access as needed. A small set of decorative hinges and matching clasp were added to complete this section. (4) This is a shelf we added to create something of a second story to give our couple dozen chicks room to spread out and an opportunity to roost at night. They really seemed to dig this! (5) The ramp to the second story was made out of a salvaged drawer side panel to which we nailed regular craft sticks. This was such a simple solution but worked so well I couldn’t help but be geekishly excited about it. (6) This is a removable piece of scrap siding we had leftover from another project and cut to fit the bottom. The siding is meant to repel water and withstand weather, a good choice for something we’ll need to clean and use for future chickies! (7) Stapled chicken wire keeps the chicks in, allows for good air flow and completes the brooder.
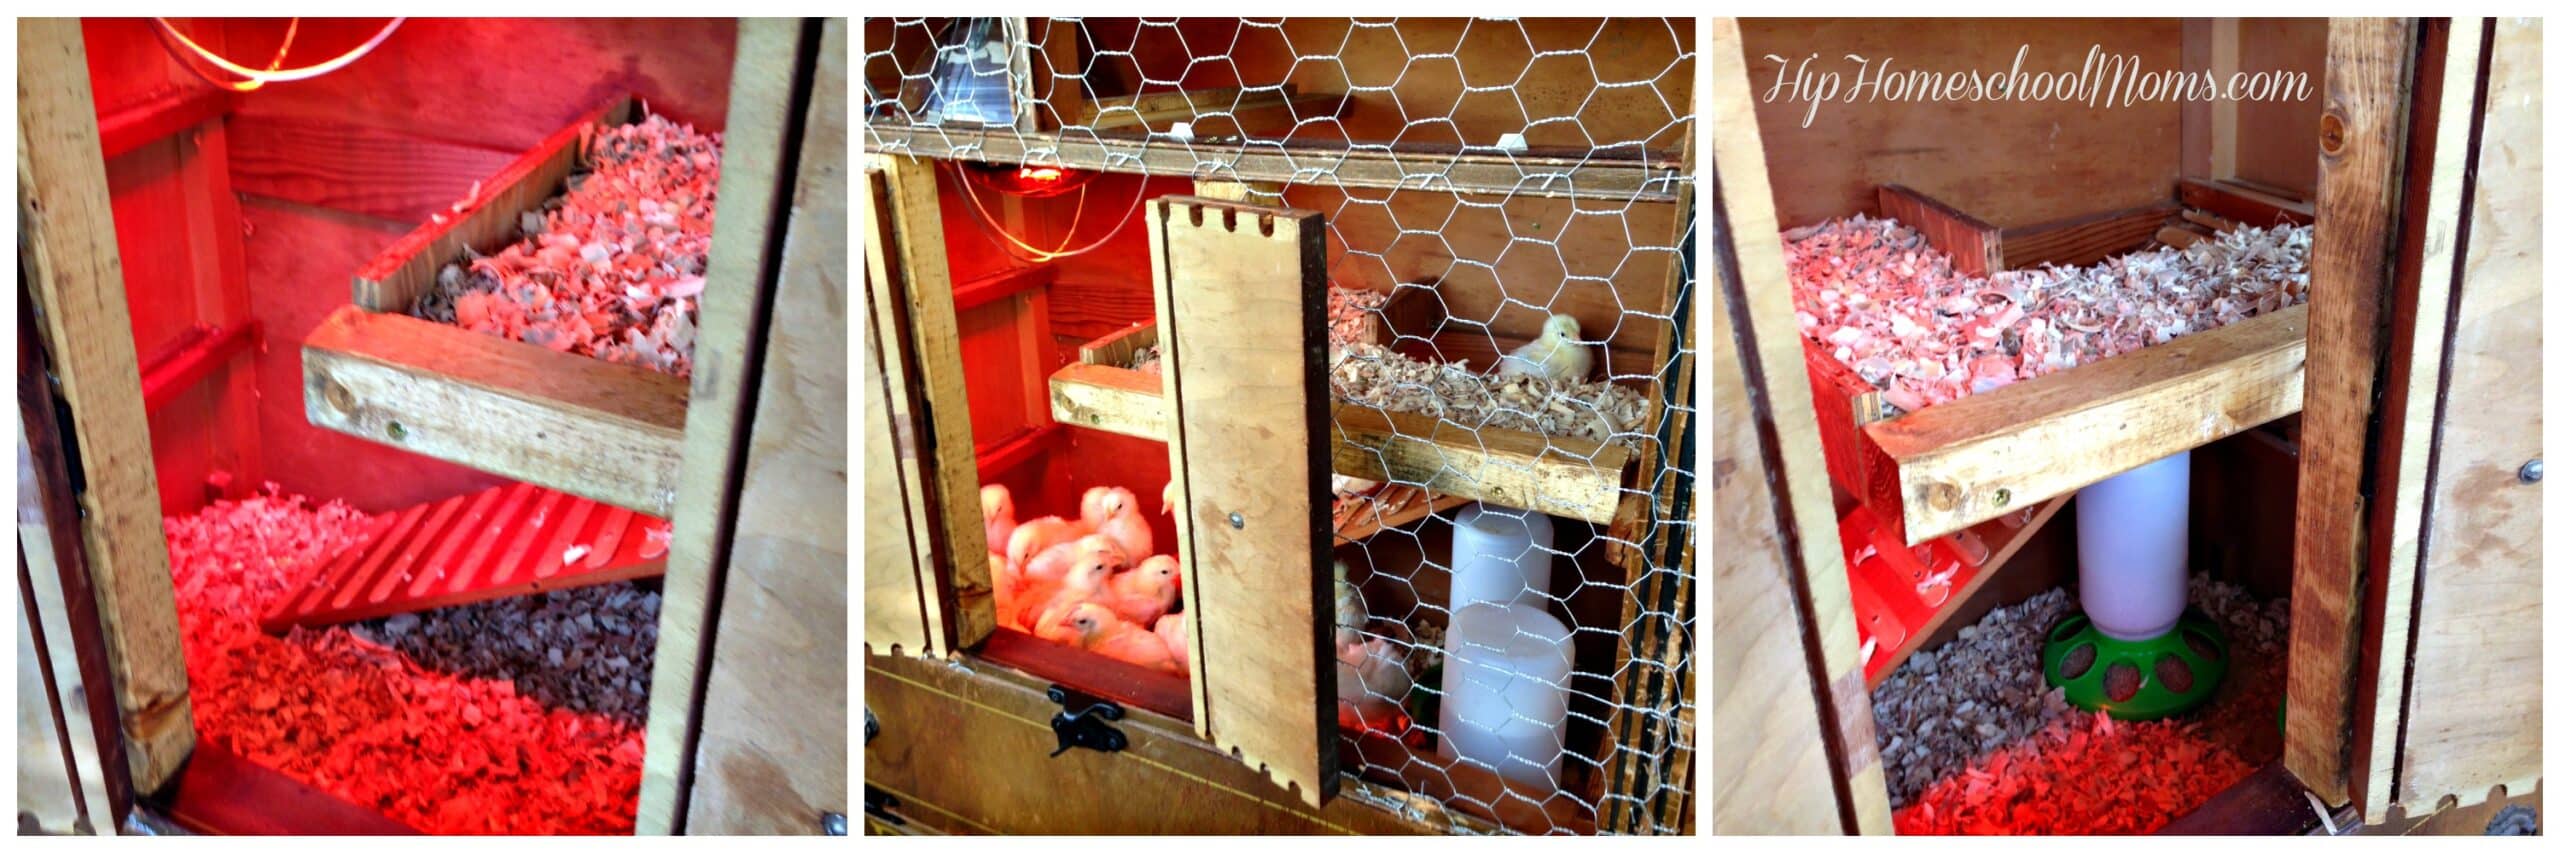
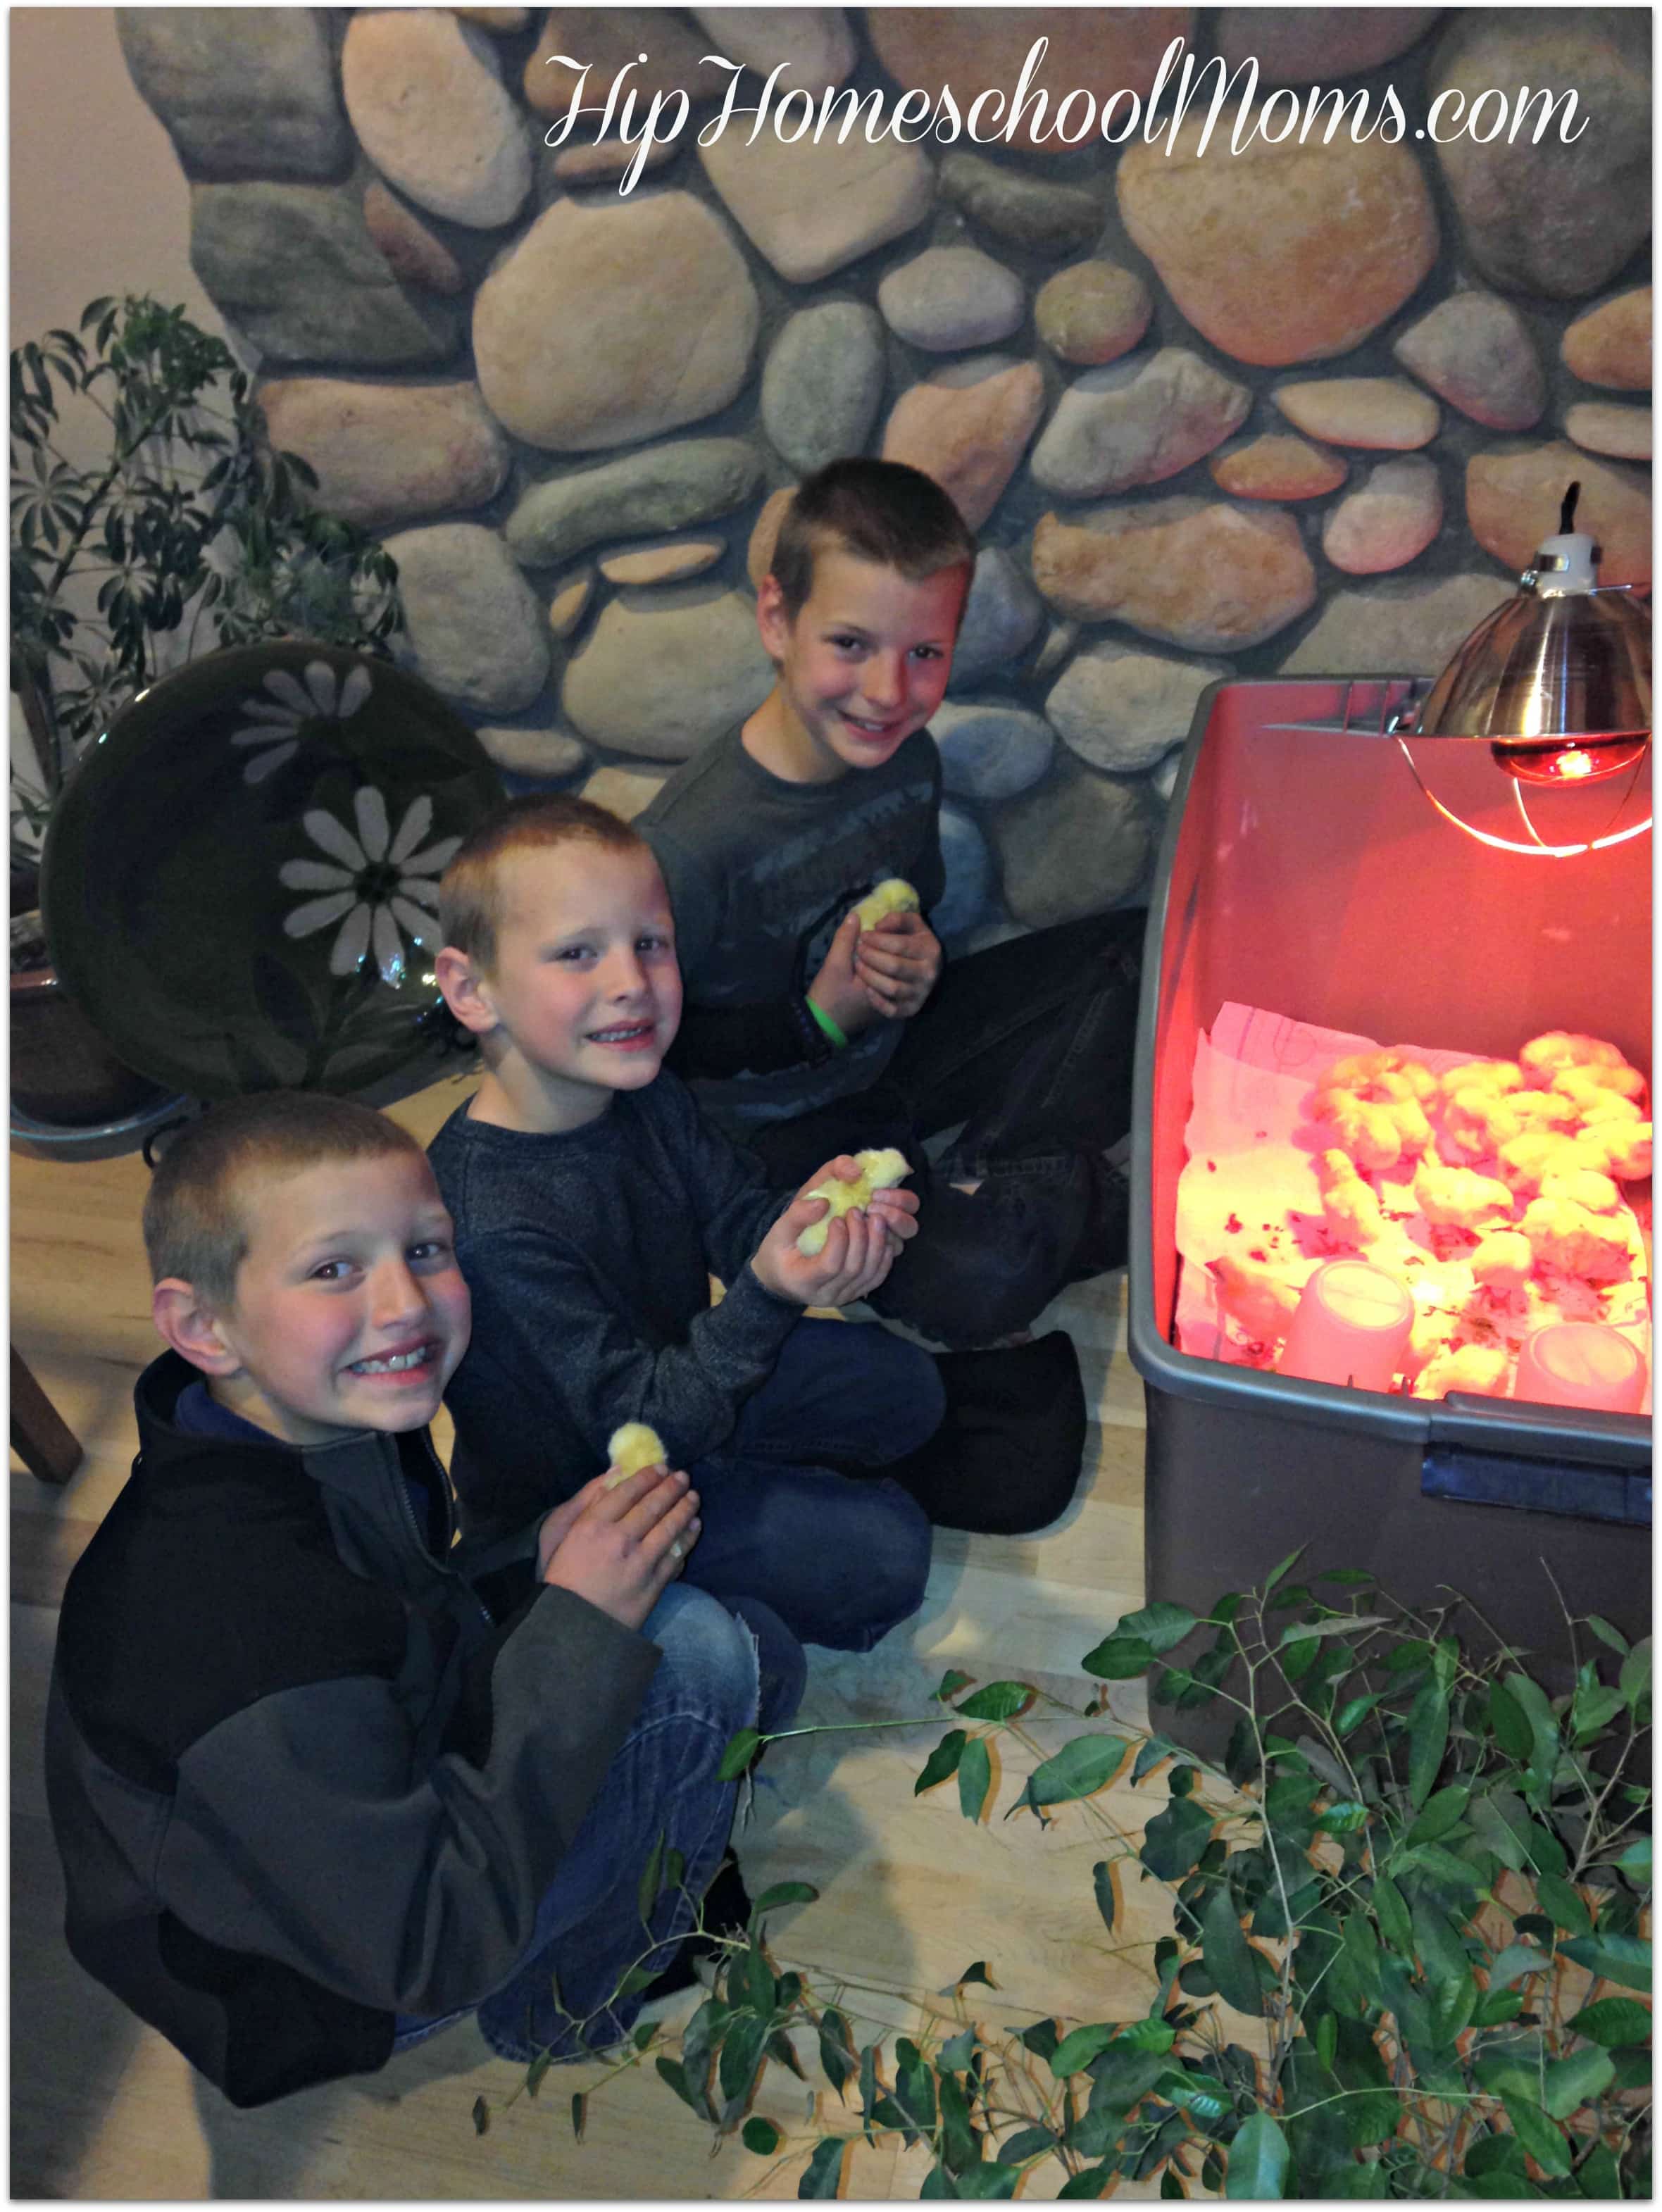
A hole drilled in the back panel allowed us to keep most of the cord for the heat lamp out of the brooder and lets us adjust the temperature by moving the lamp closer to the floor or towards the ceiling as needed. Aspen or pine shavings (never cedar as they’re toxic to chickens) gives the chicks some traction on the smooth surfaces and helps control the smell. These are some FAST growing, large, dual-purpose chickens and we had a whole heap of them for our first go-round. They outgrew this setup pretty quickly but I was beyond thrilled to have an OUTSIDE place to keep them safe and warm for a few weeks while we sorted out their more permanent housing. We will be hatching a smaller number of chicks on a continuous basis around here and this dresser conversion will serve as the first-step brooder for each new group. For less than $25, some scrap lumber and a few hours of work we were able to put together a cute, functional, creative and most importantly, outdoor place to raise chickens to our heart’s content. That’s a pretty good deal in my book!
What about you? Do you have a great yard sale flip or other re-purposing project you’ve completed? Leave the link here in the comments to share!


I.LOVE.THIS! Great job!!
🙂
Oh my goodness how cute is this!