
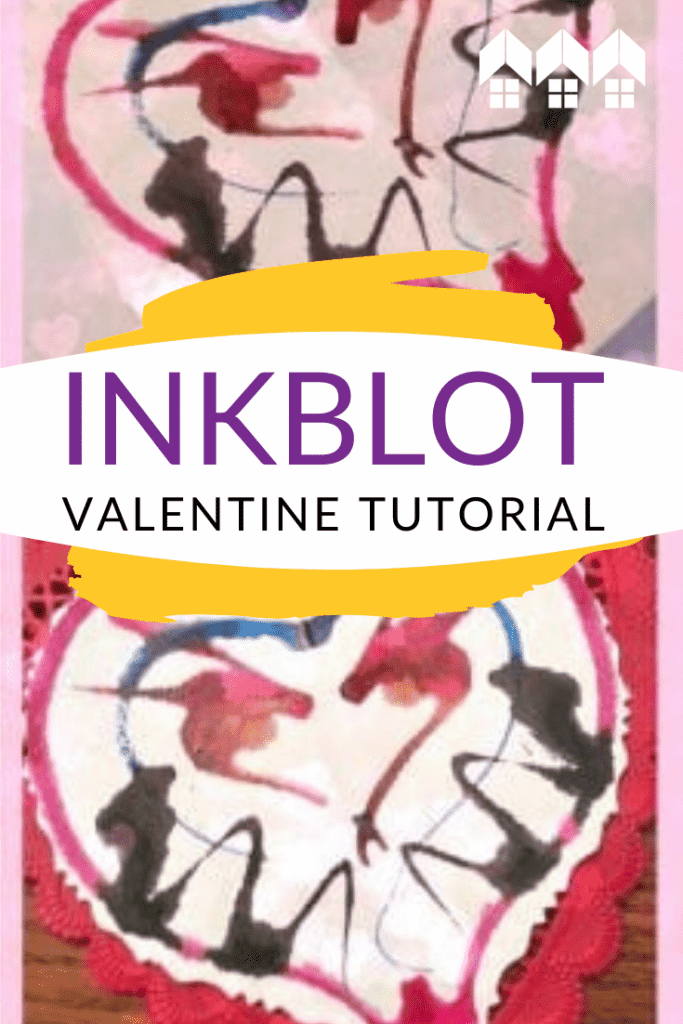
Inkblot Valentines
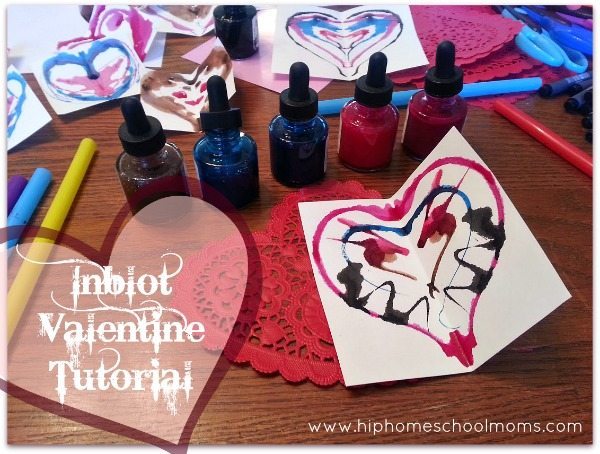
You will need the following to make inkblot valentines:
- paper cutter or regular scissors
- 5 1/2 inch ( for medium hearts) and or 3 1/4 inch ( for small hearts) white multimedia art paper
- optional: craft scissors with fancy edges
- glue
- red or pink valentine heart doilies- 20 to 28 ct. medium and/or small
- red, pink or purple India ink w/ dropper
- straw (optional) for making blown ink hearts
- markers, pens, or colored pencils in various shades (We use black art ink pens.)
- glitter and other embellishments
- valentine candies
- large colorful/decorative paperclips or clothespins
- wet wipes for cleaning or a wet rag that you don’t mind staining
- newspaper to cover table and under table
- apron or smock to protect clothing

Preparations for making Inkblot Valentines
First, get everything ready and gather all your supplies. Cutting paper ahead of time is a good idea. I used a paper cutter which really helped speed the process and allowed for quick and accurate measurements! Cover the area you will be working on with several layers of newspaper. The ink will stain so have wet wipes or a wet work cloth ready to go.
Mom advice for making these fun inkblot valentines.
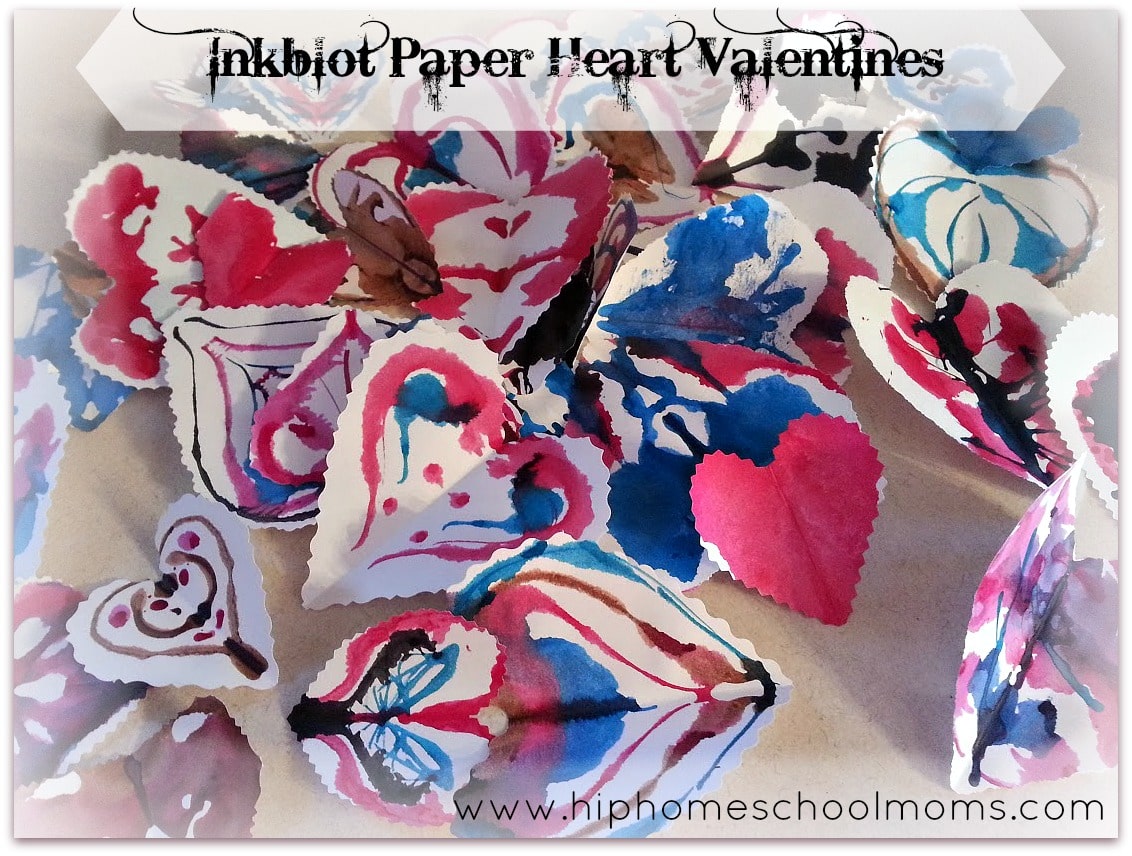
Realize that these can be very messy but are a very fun activity for you to do with your kids. This project is probably best for 7 and up, but if you think a younger child can join in with your help by all means include them. Don’t try to control the inkblots. Just let them happen. That’s the fun of inkblots; being inventive and seeing what you can create with them. They require practice and experimentation to get the effects you may be going for so take your time and enjoy making them. These valentines are fail proof because no matter what shapes you get from your inkblot valentines, they will always be perfect because you will cut them into hearts after they dry.
Inkblot Valentine Tutorial
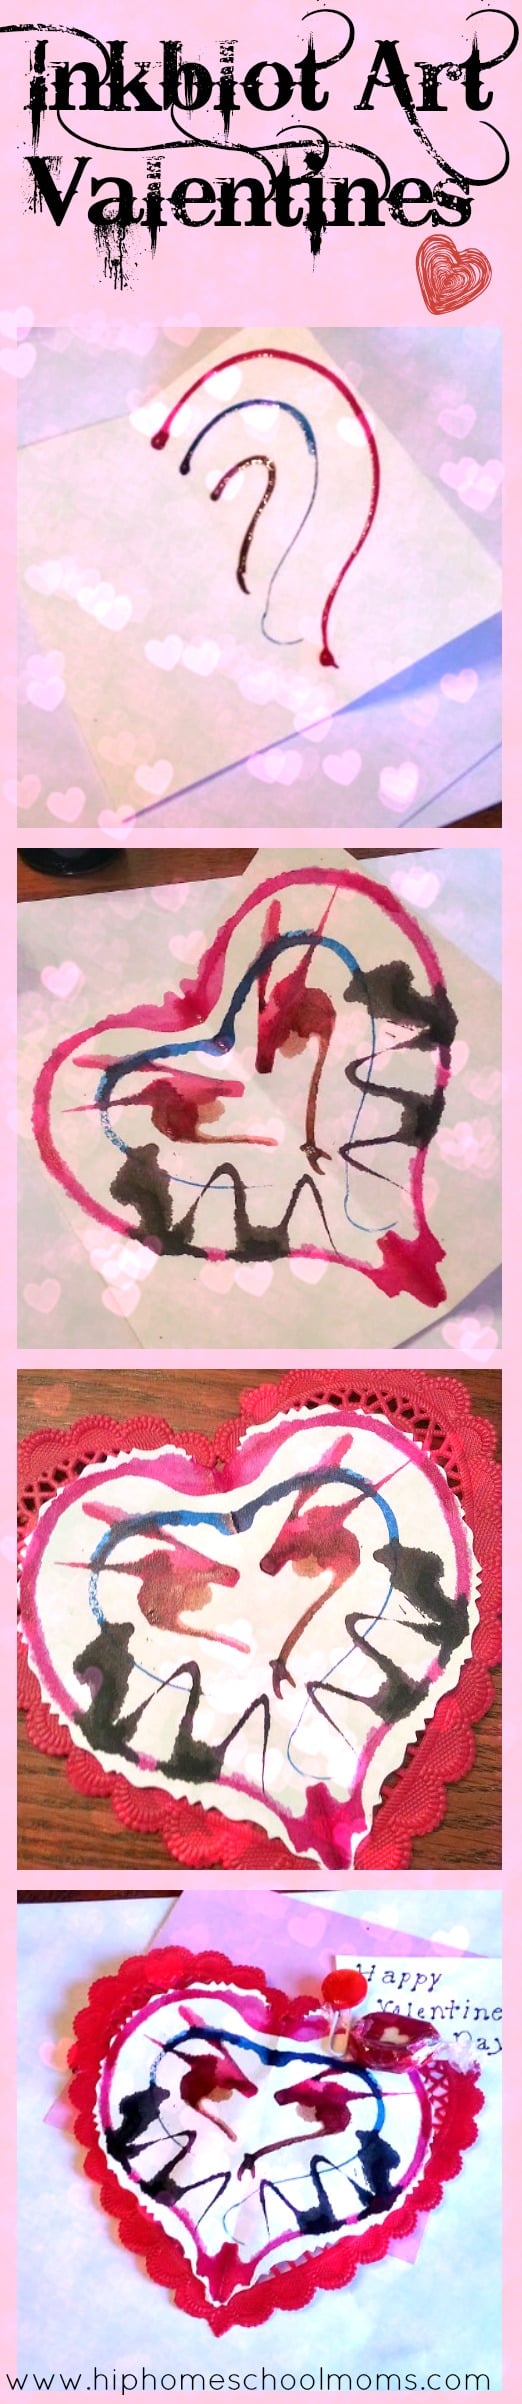
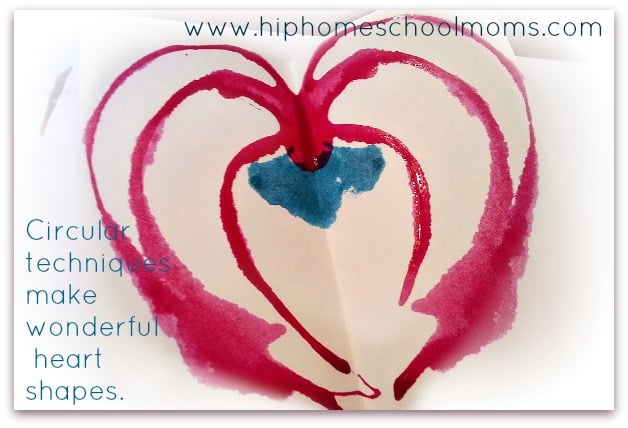
- Fold paper in half.
- Make small droplets or threads of red, or any valentine color, to make a curve for one side of the heart on your paper. Using less ink will work better. This becomes the outline of the heart when you fold. It’s the same idea as drawing a heart.
- Quickly fold the paper in half, rubbing well, so that the ink will come off on the opposite side resulting in a heart shape . *Warning: The ink is permanent and will stain clothing. Be prepared with a wet towel to clean drips as they happen and wear work clothes.*
- Open to a beautiful inkblot! Repeat adding more designs if desired. Generally less is more.
- Allow time for the ink “hearts” to dry while laying flat, about 20-30 minutes. You can speed the process by blotting excess ink and using a blow dryer.
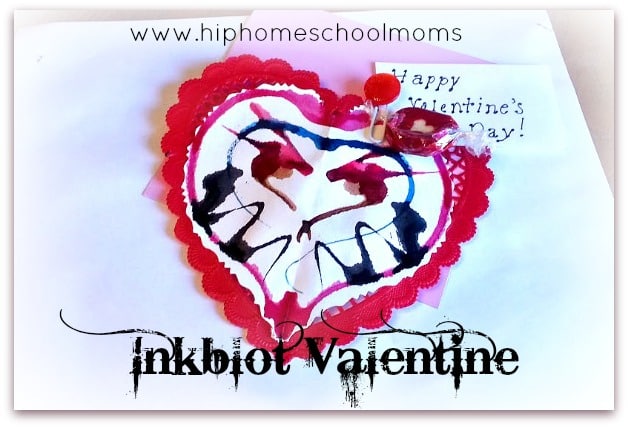
- If desired, with your art pens, markers and/or colored pencils, start adding lines and embellishments to your inkblot. If you think your heart is pretty enough by itself you can leave them plain as I did for this example. You can also add your valentine message right on the heart.
- Next, cut your inkblot into a heart shape. You can use pretty craft scissors to make a fancy edge if desired. Refold paper and then cut to make a paper heart that is symmetrical.
- Decorate your hearts as desired with paper cuts, glitter, ribbons, buttons, sequins, etc. You may need a glue gun for heavier items.
- Glue inkblot heart to a doily.
- Lastly, using a decorative paper clip or clothes pin, attach your message or candy to the valentine.
Techniques and things to try when making inkblot valentines.
Place a few dots inside the heart area. Blow through a straw forcing the ink toward the fold line, making finger like runs in the ink droplets to create and interesting design. When there is too much ink you can also try blotting with a paper towel or sponge to make a “textured ” blot. Letting ink run by tipping the paper can also make new designs.

Let’s create inkblot valentines together.
This style valentine is certainly just one way to make an inkblot valentine. There are many more creative inkblot valentine ideas. Share with me what kind of wishes or messages you would attach to these. I’d love to hear your thoughts and ideas.


Im inspired now!! This looks like a lot of fun, and exactly what my daughter will LOVE to do!! Thanks for the inspiration!!