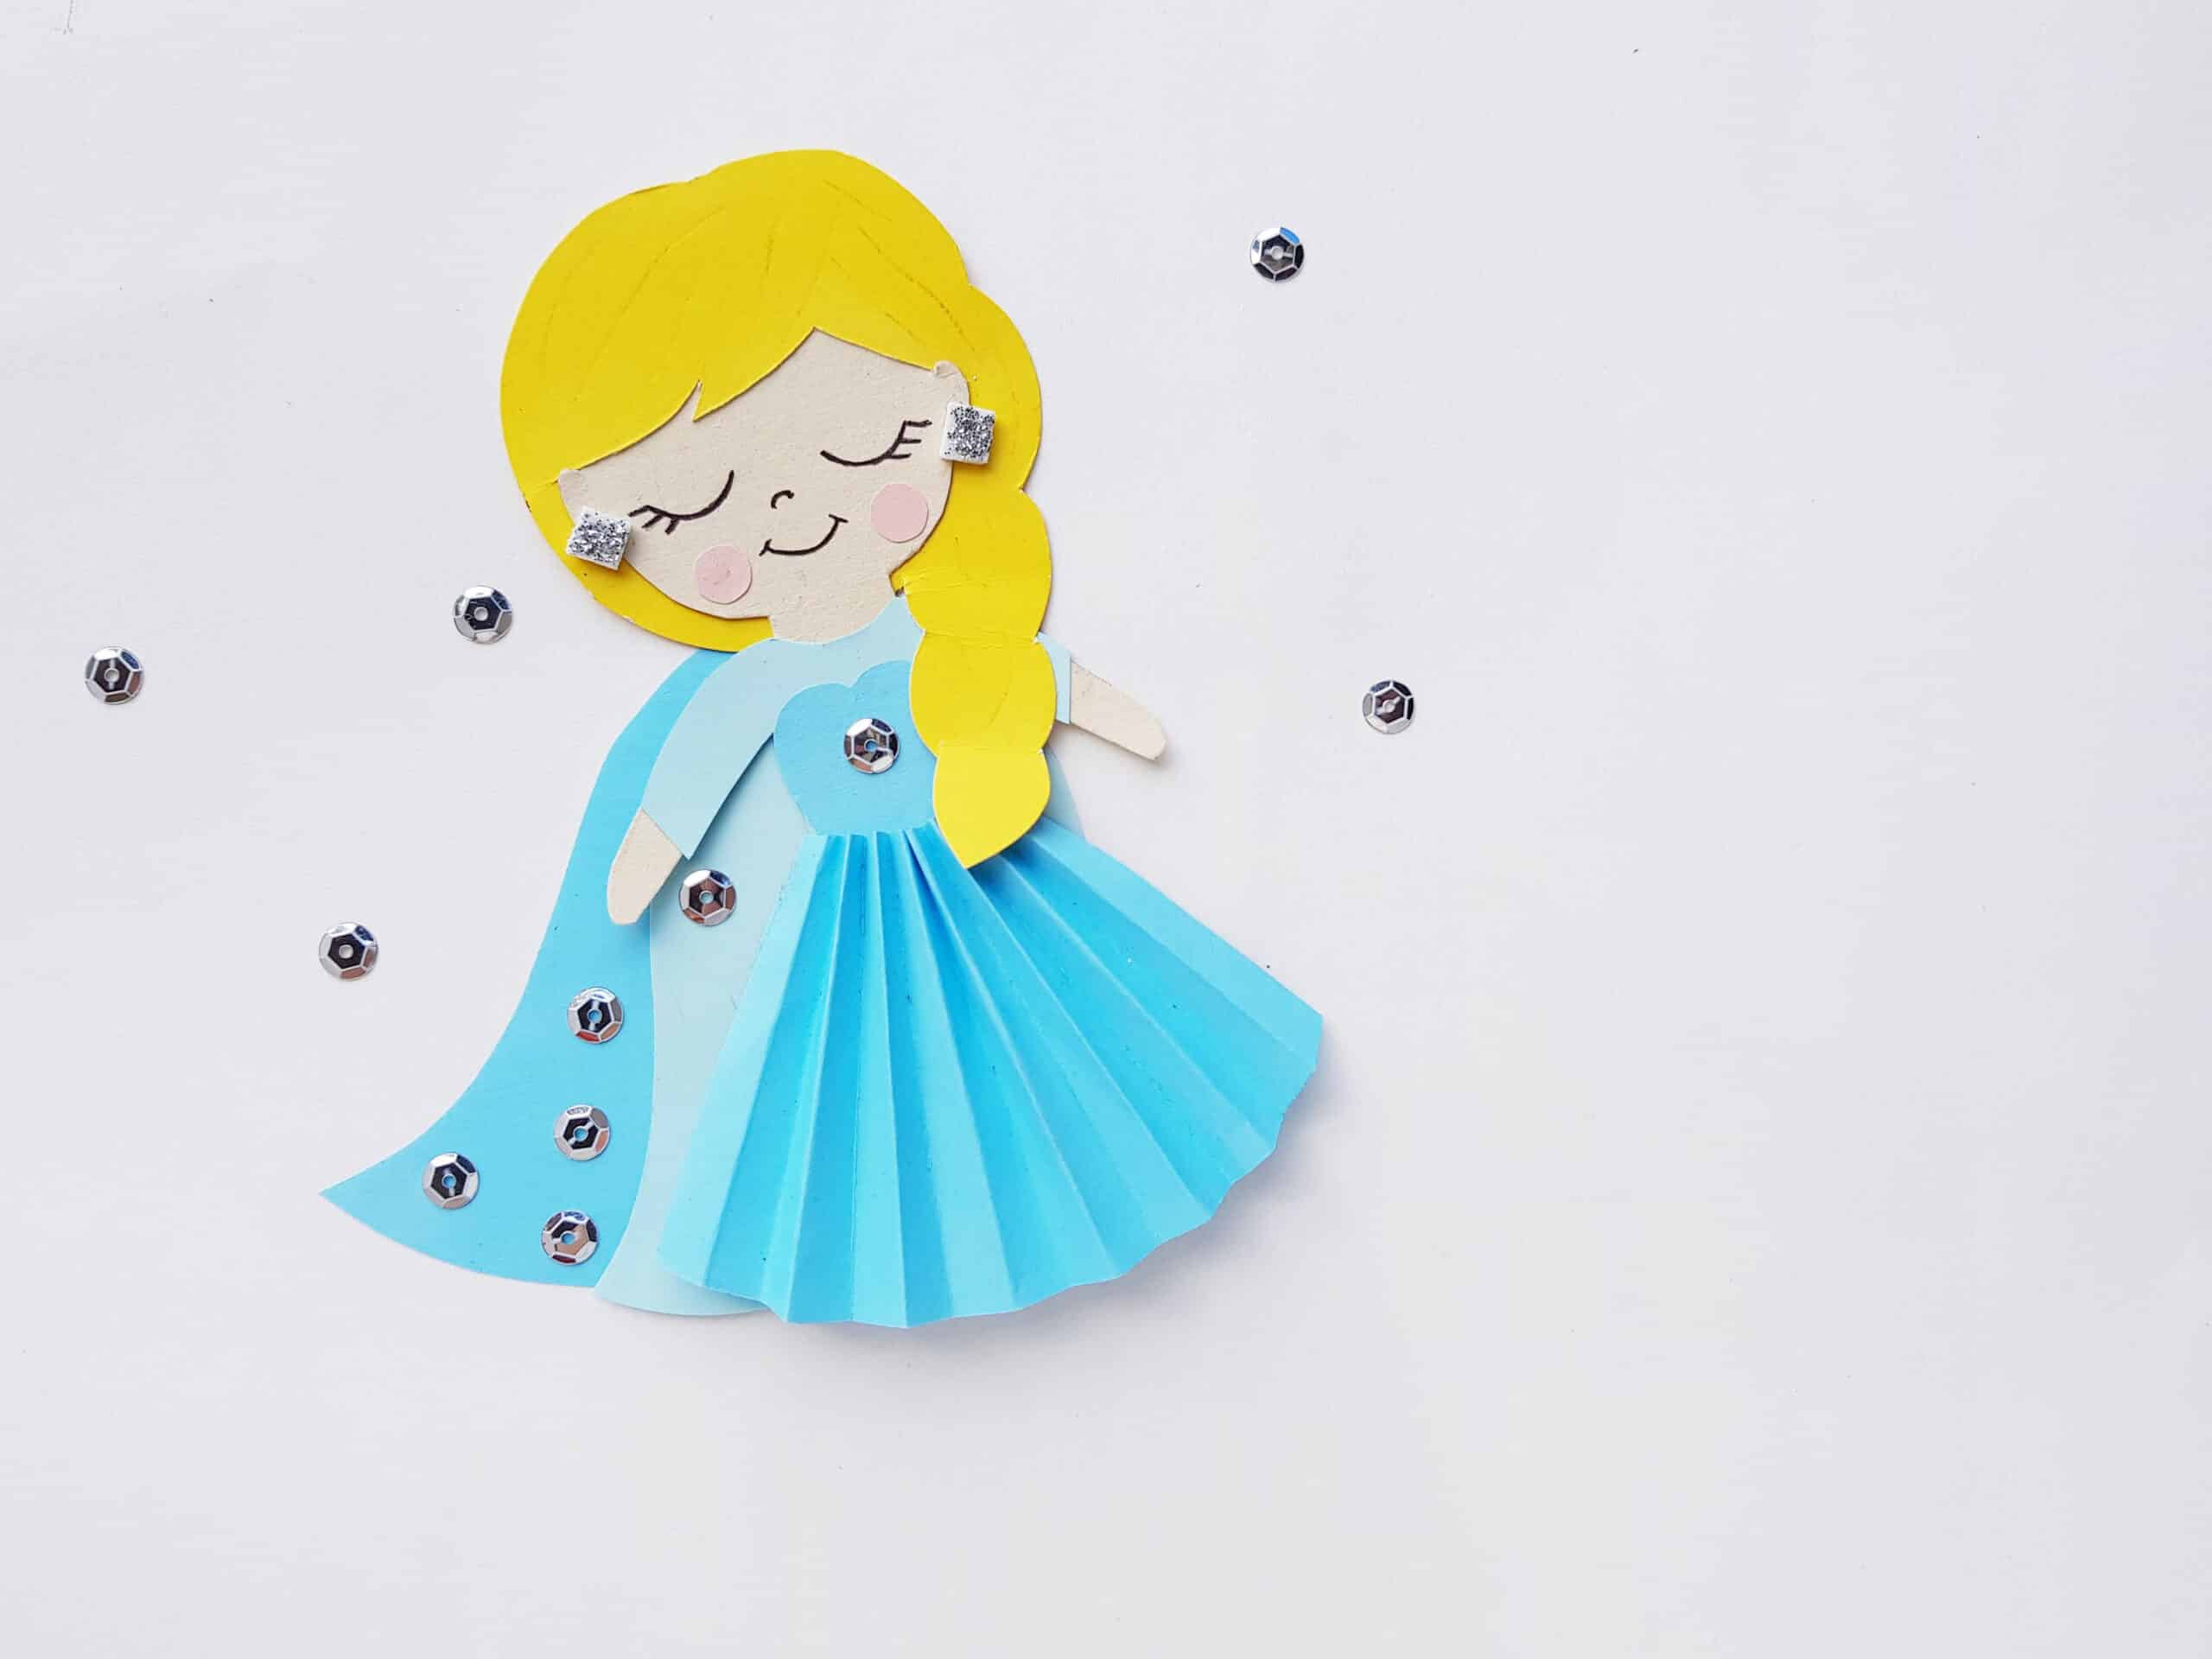
Elsa-Inspired Papercraft Doll Tutorial

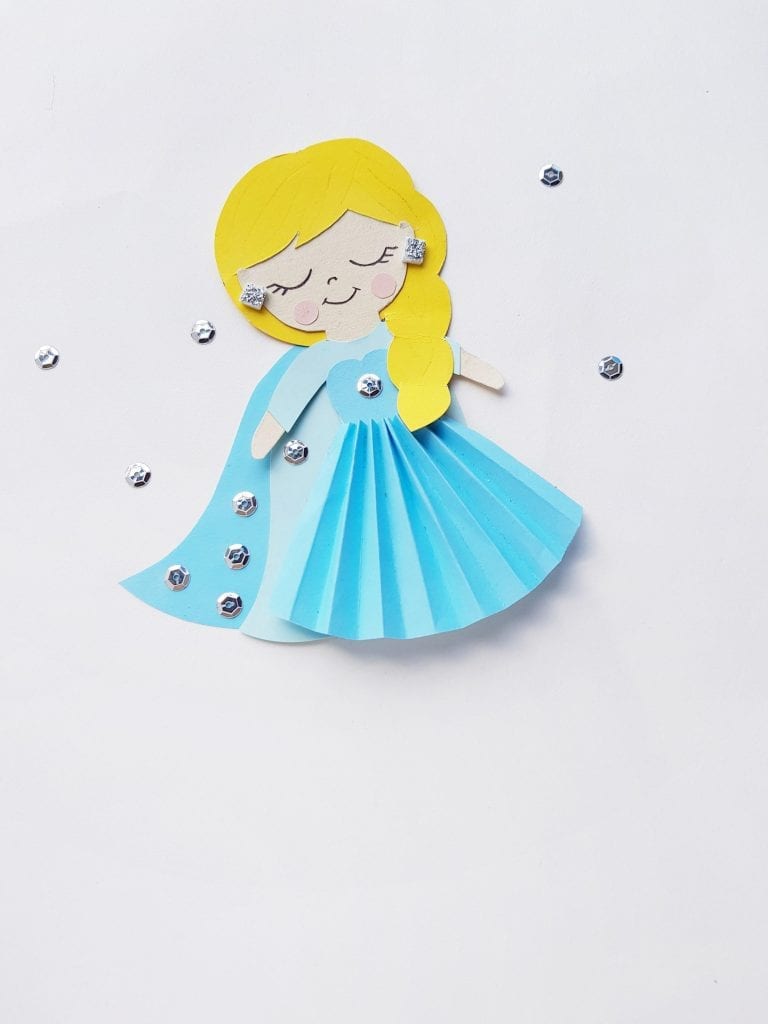
Everyone’s talking about Frozen 2! If you’re looking for some ways to bring a little bit of the Disney magic from this much-anticipated film into your homeschool, we have some great crafting ideas to help you do just that! Today’s craft is one that is sure to excite the little princesses in your life–a beautiful Elsa-Inspired Papercraft Doll!
What You’ll Need:
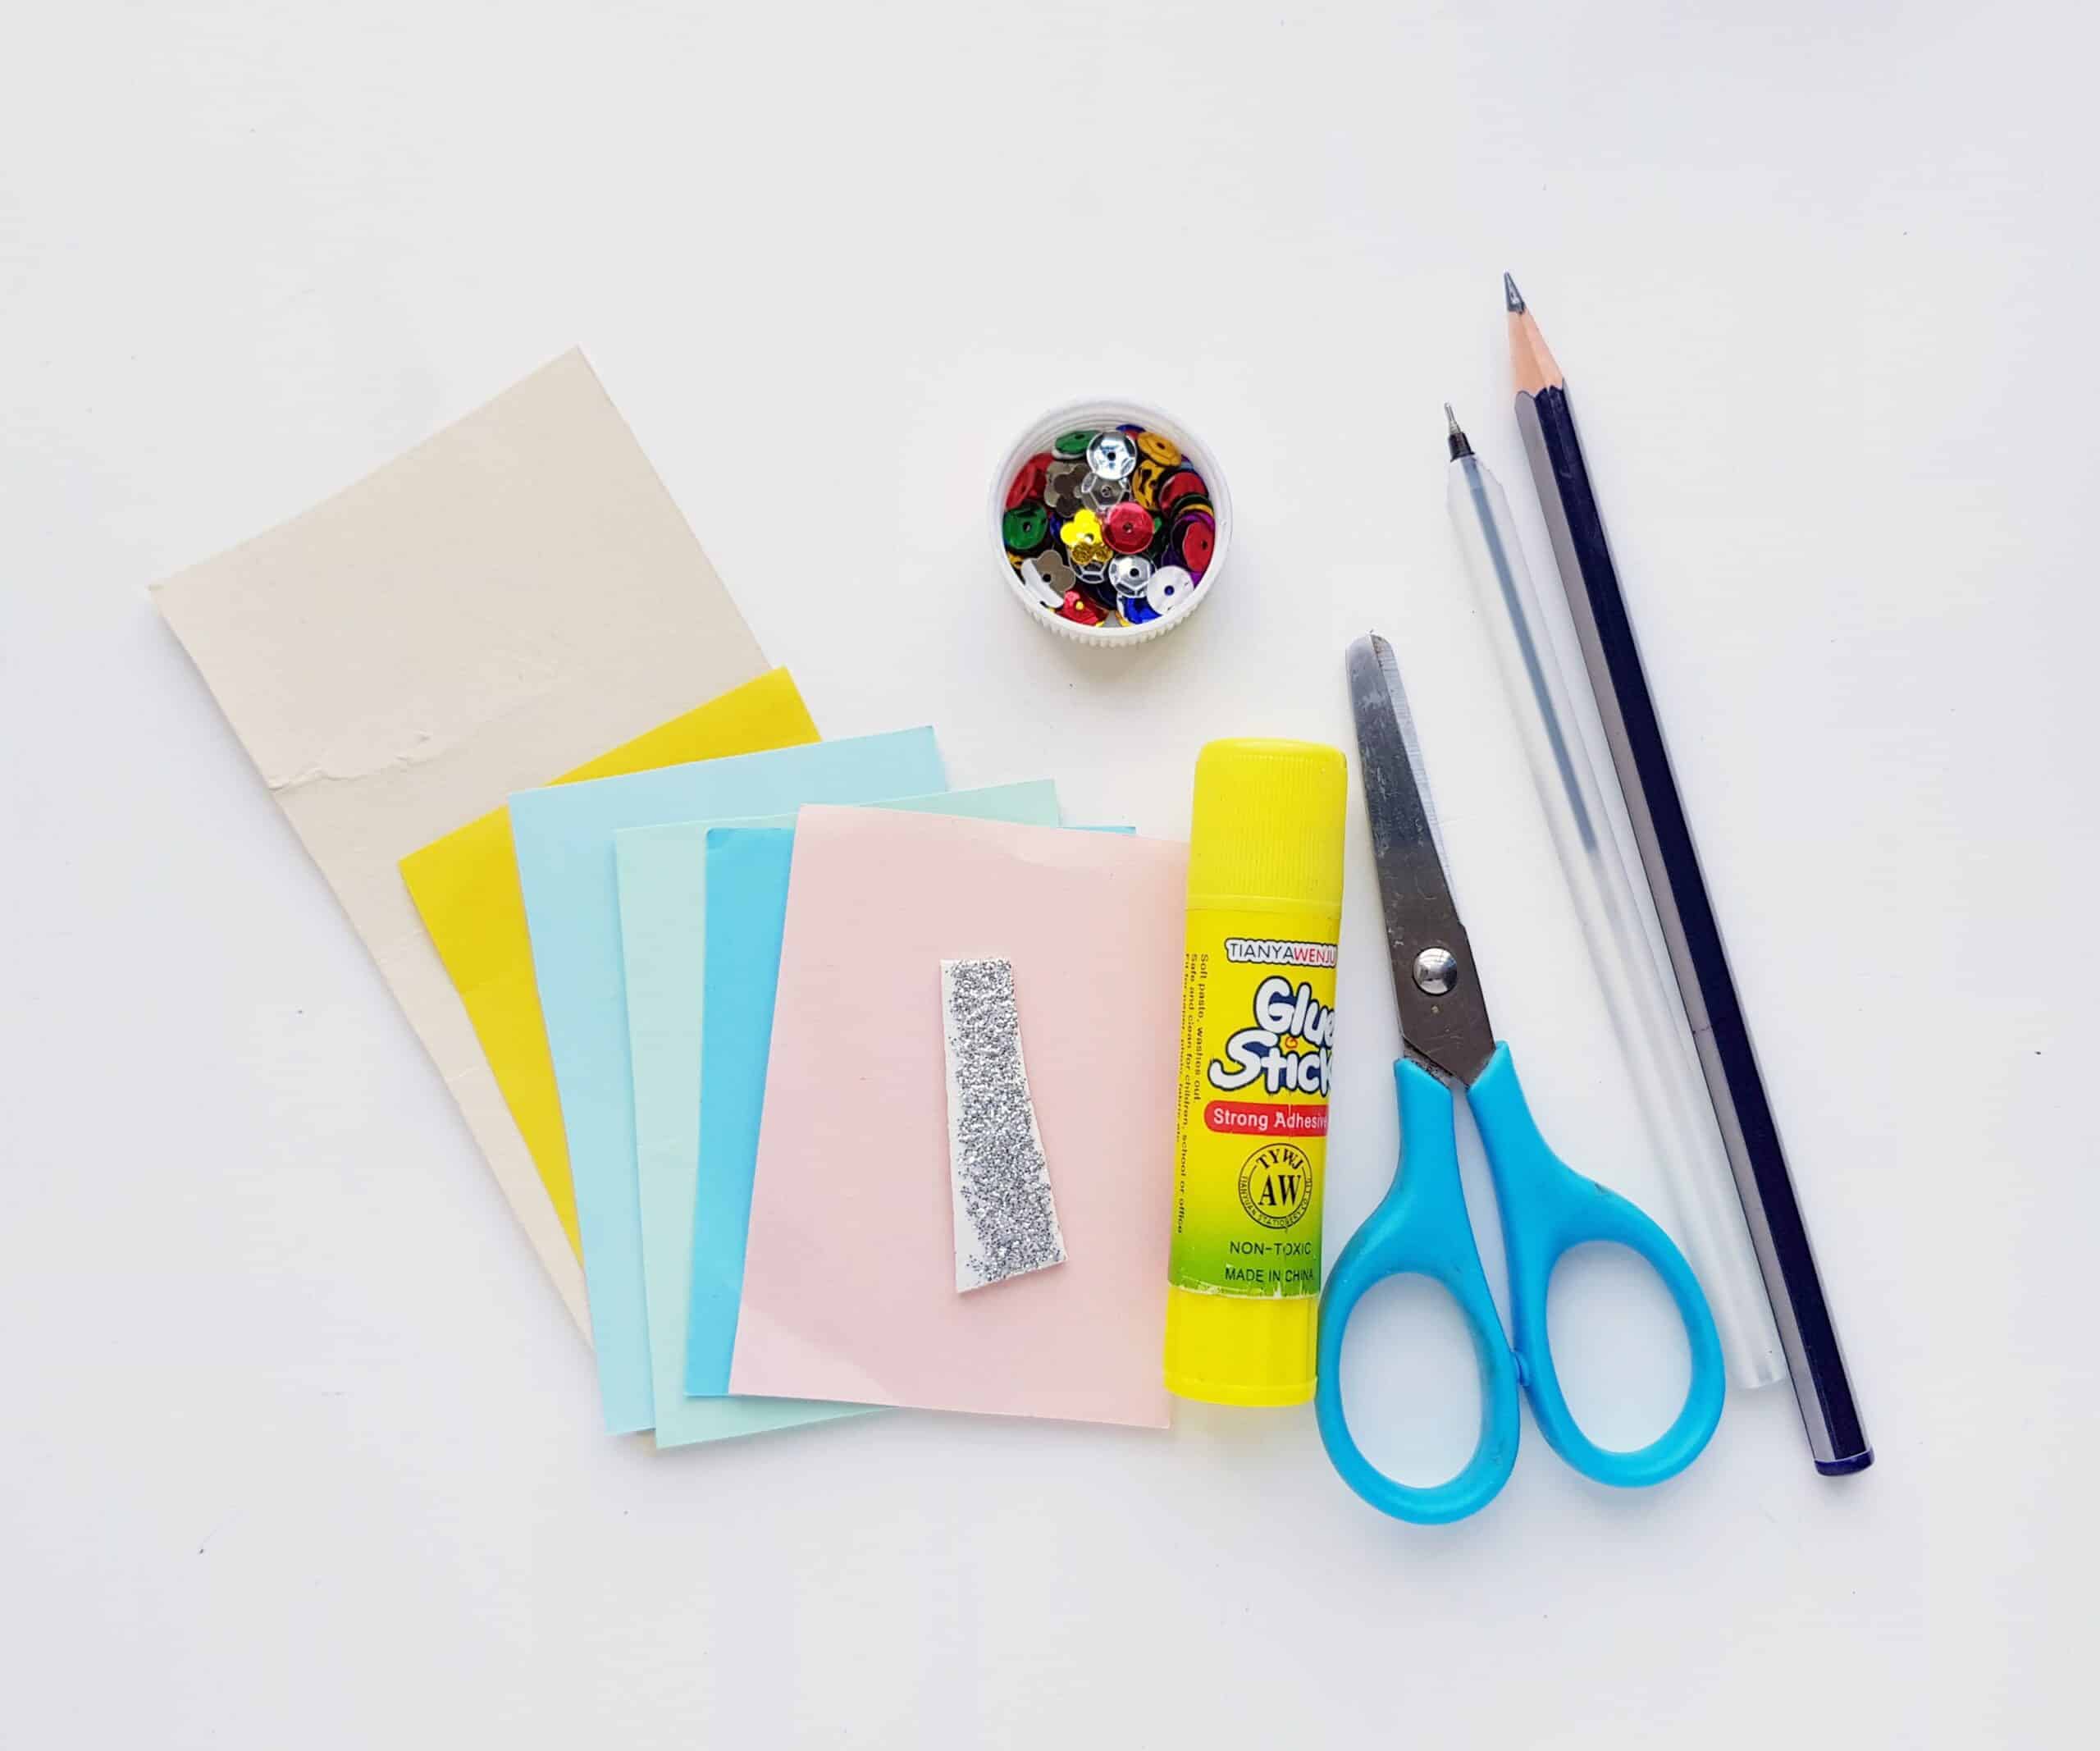
3. Sequins
4. Pencil
5. Pen
6. Scissors
7. Craft glue
8. Our free printable template (provided at the end of this craft tutorial)
How to Make It:
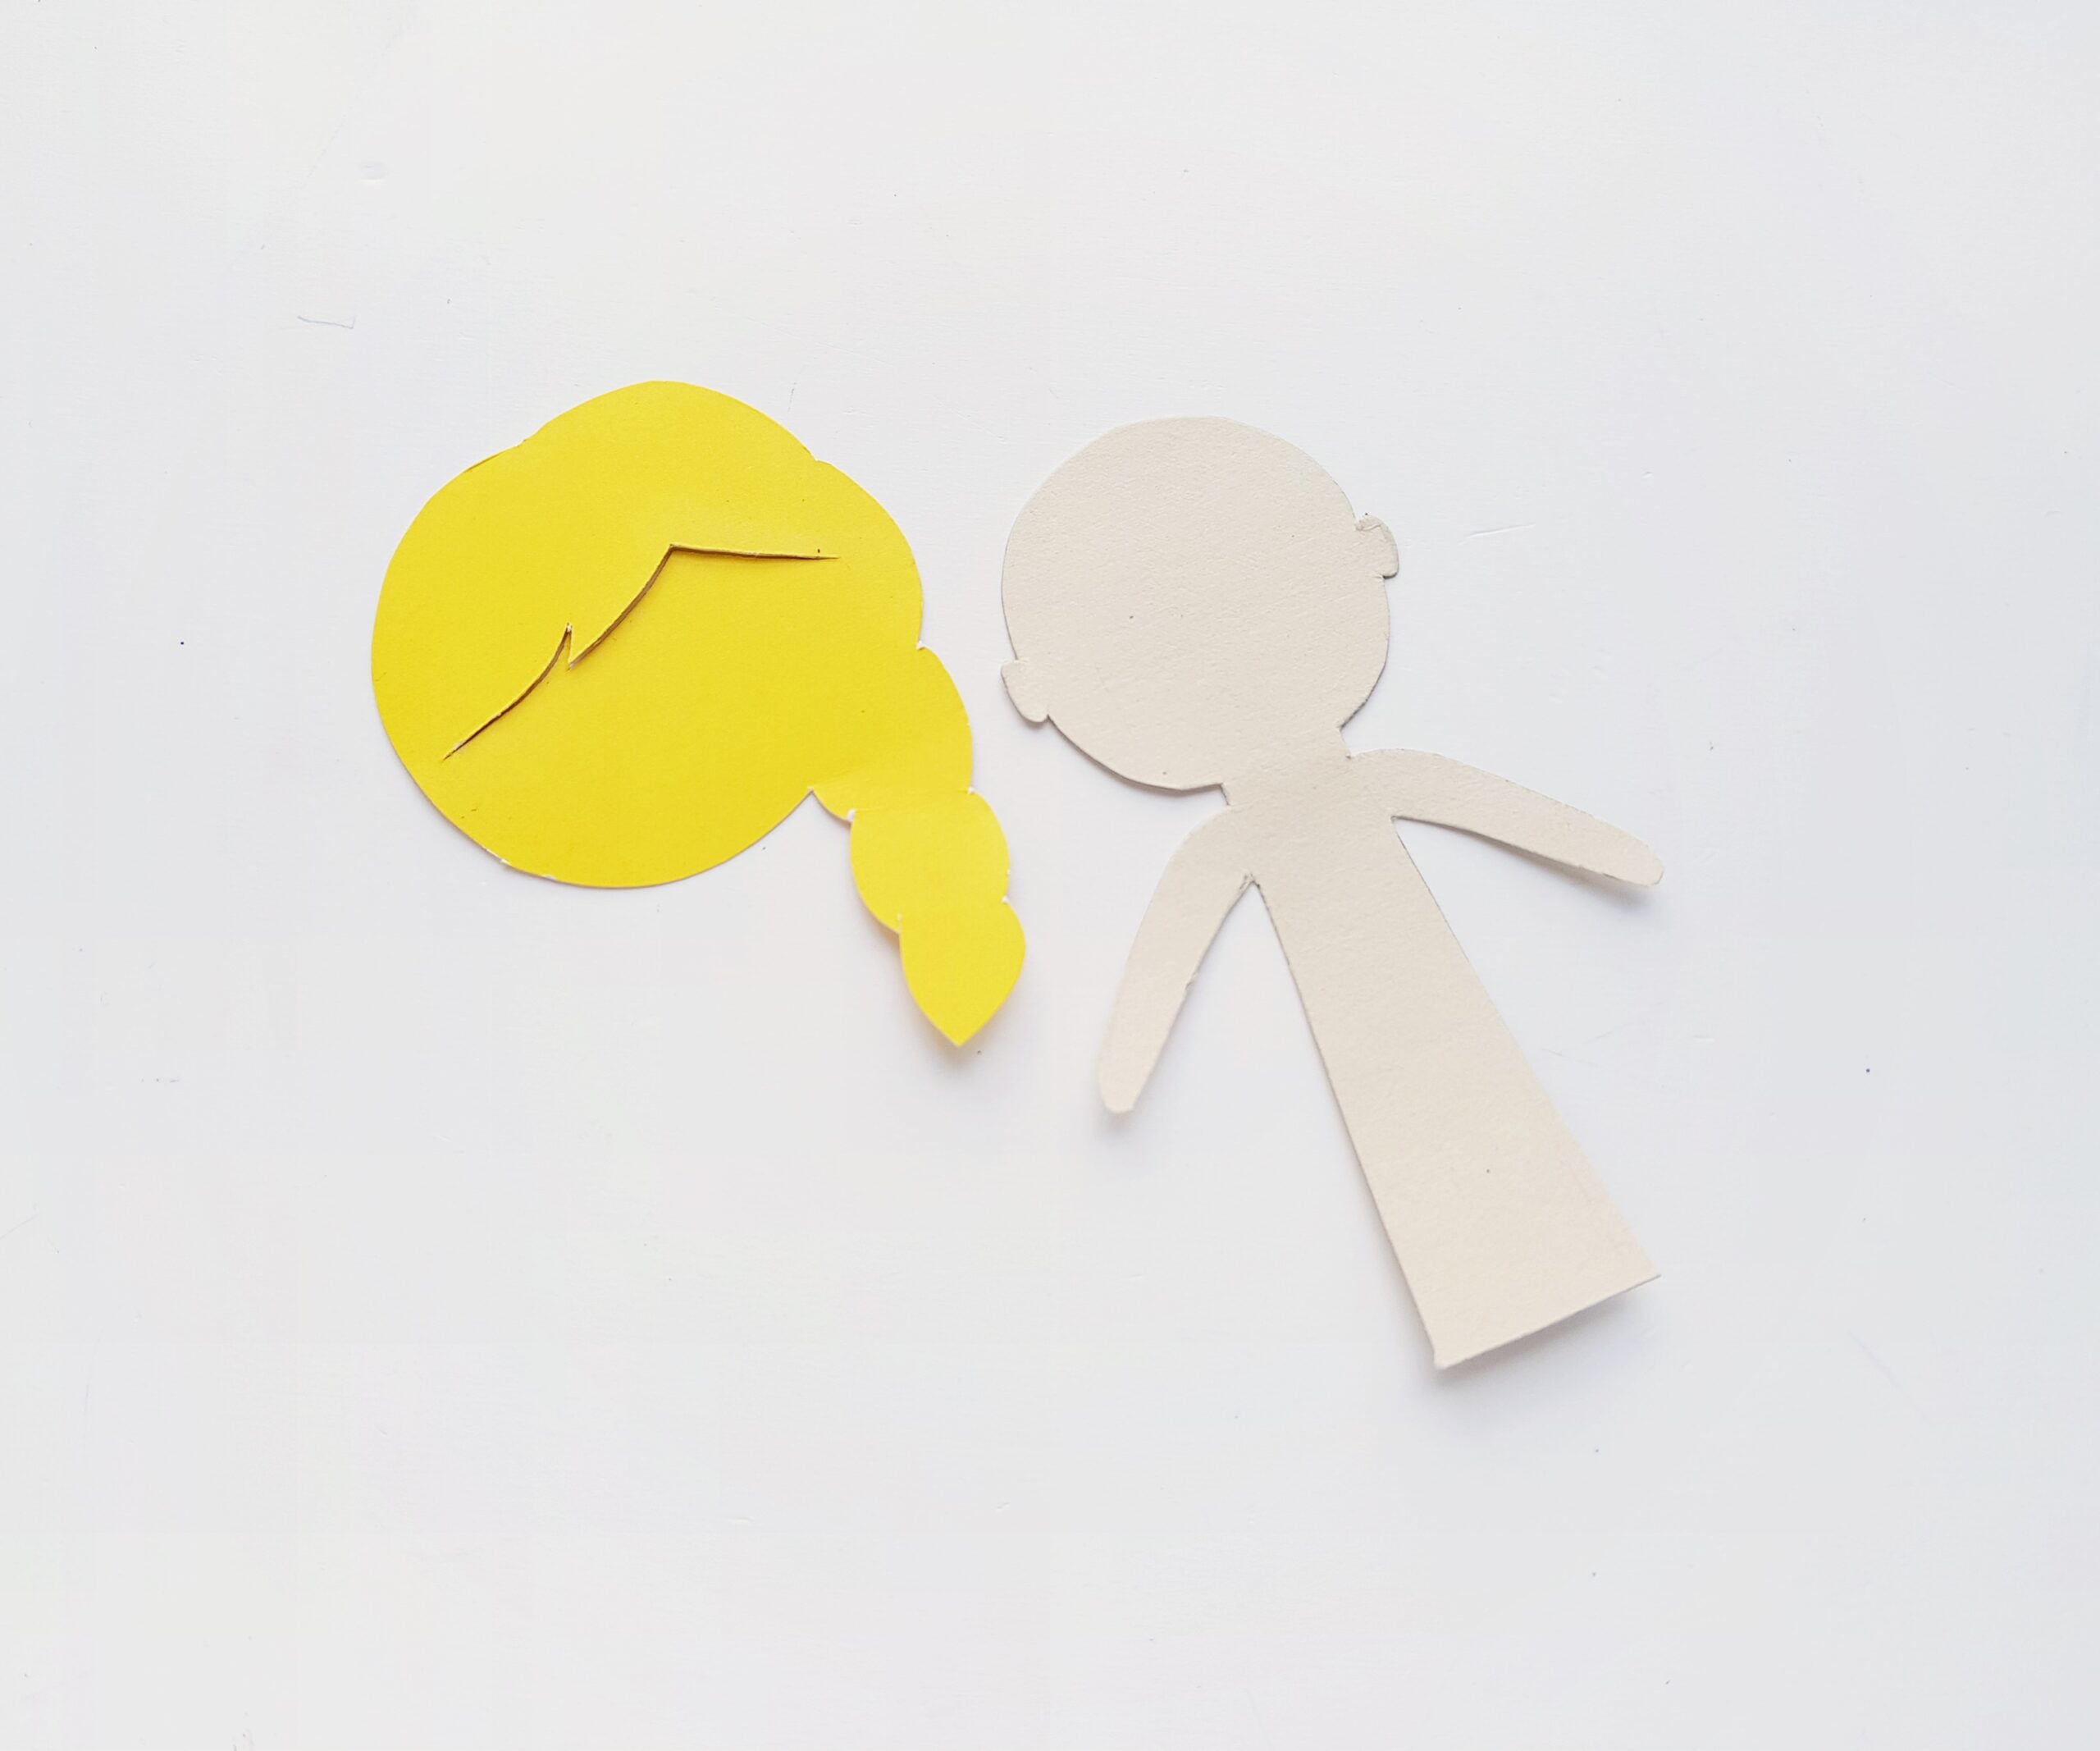
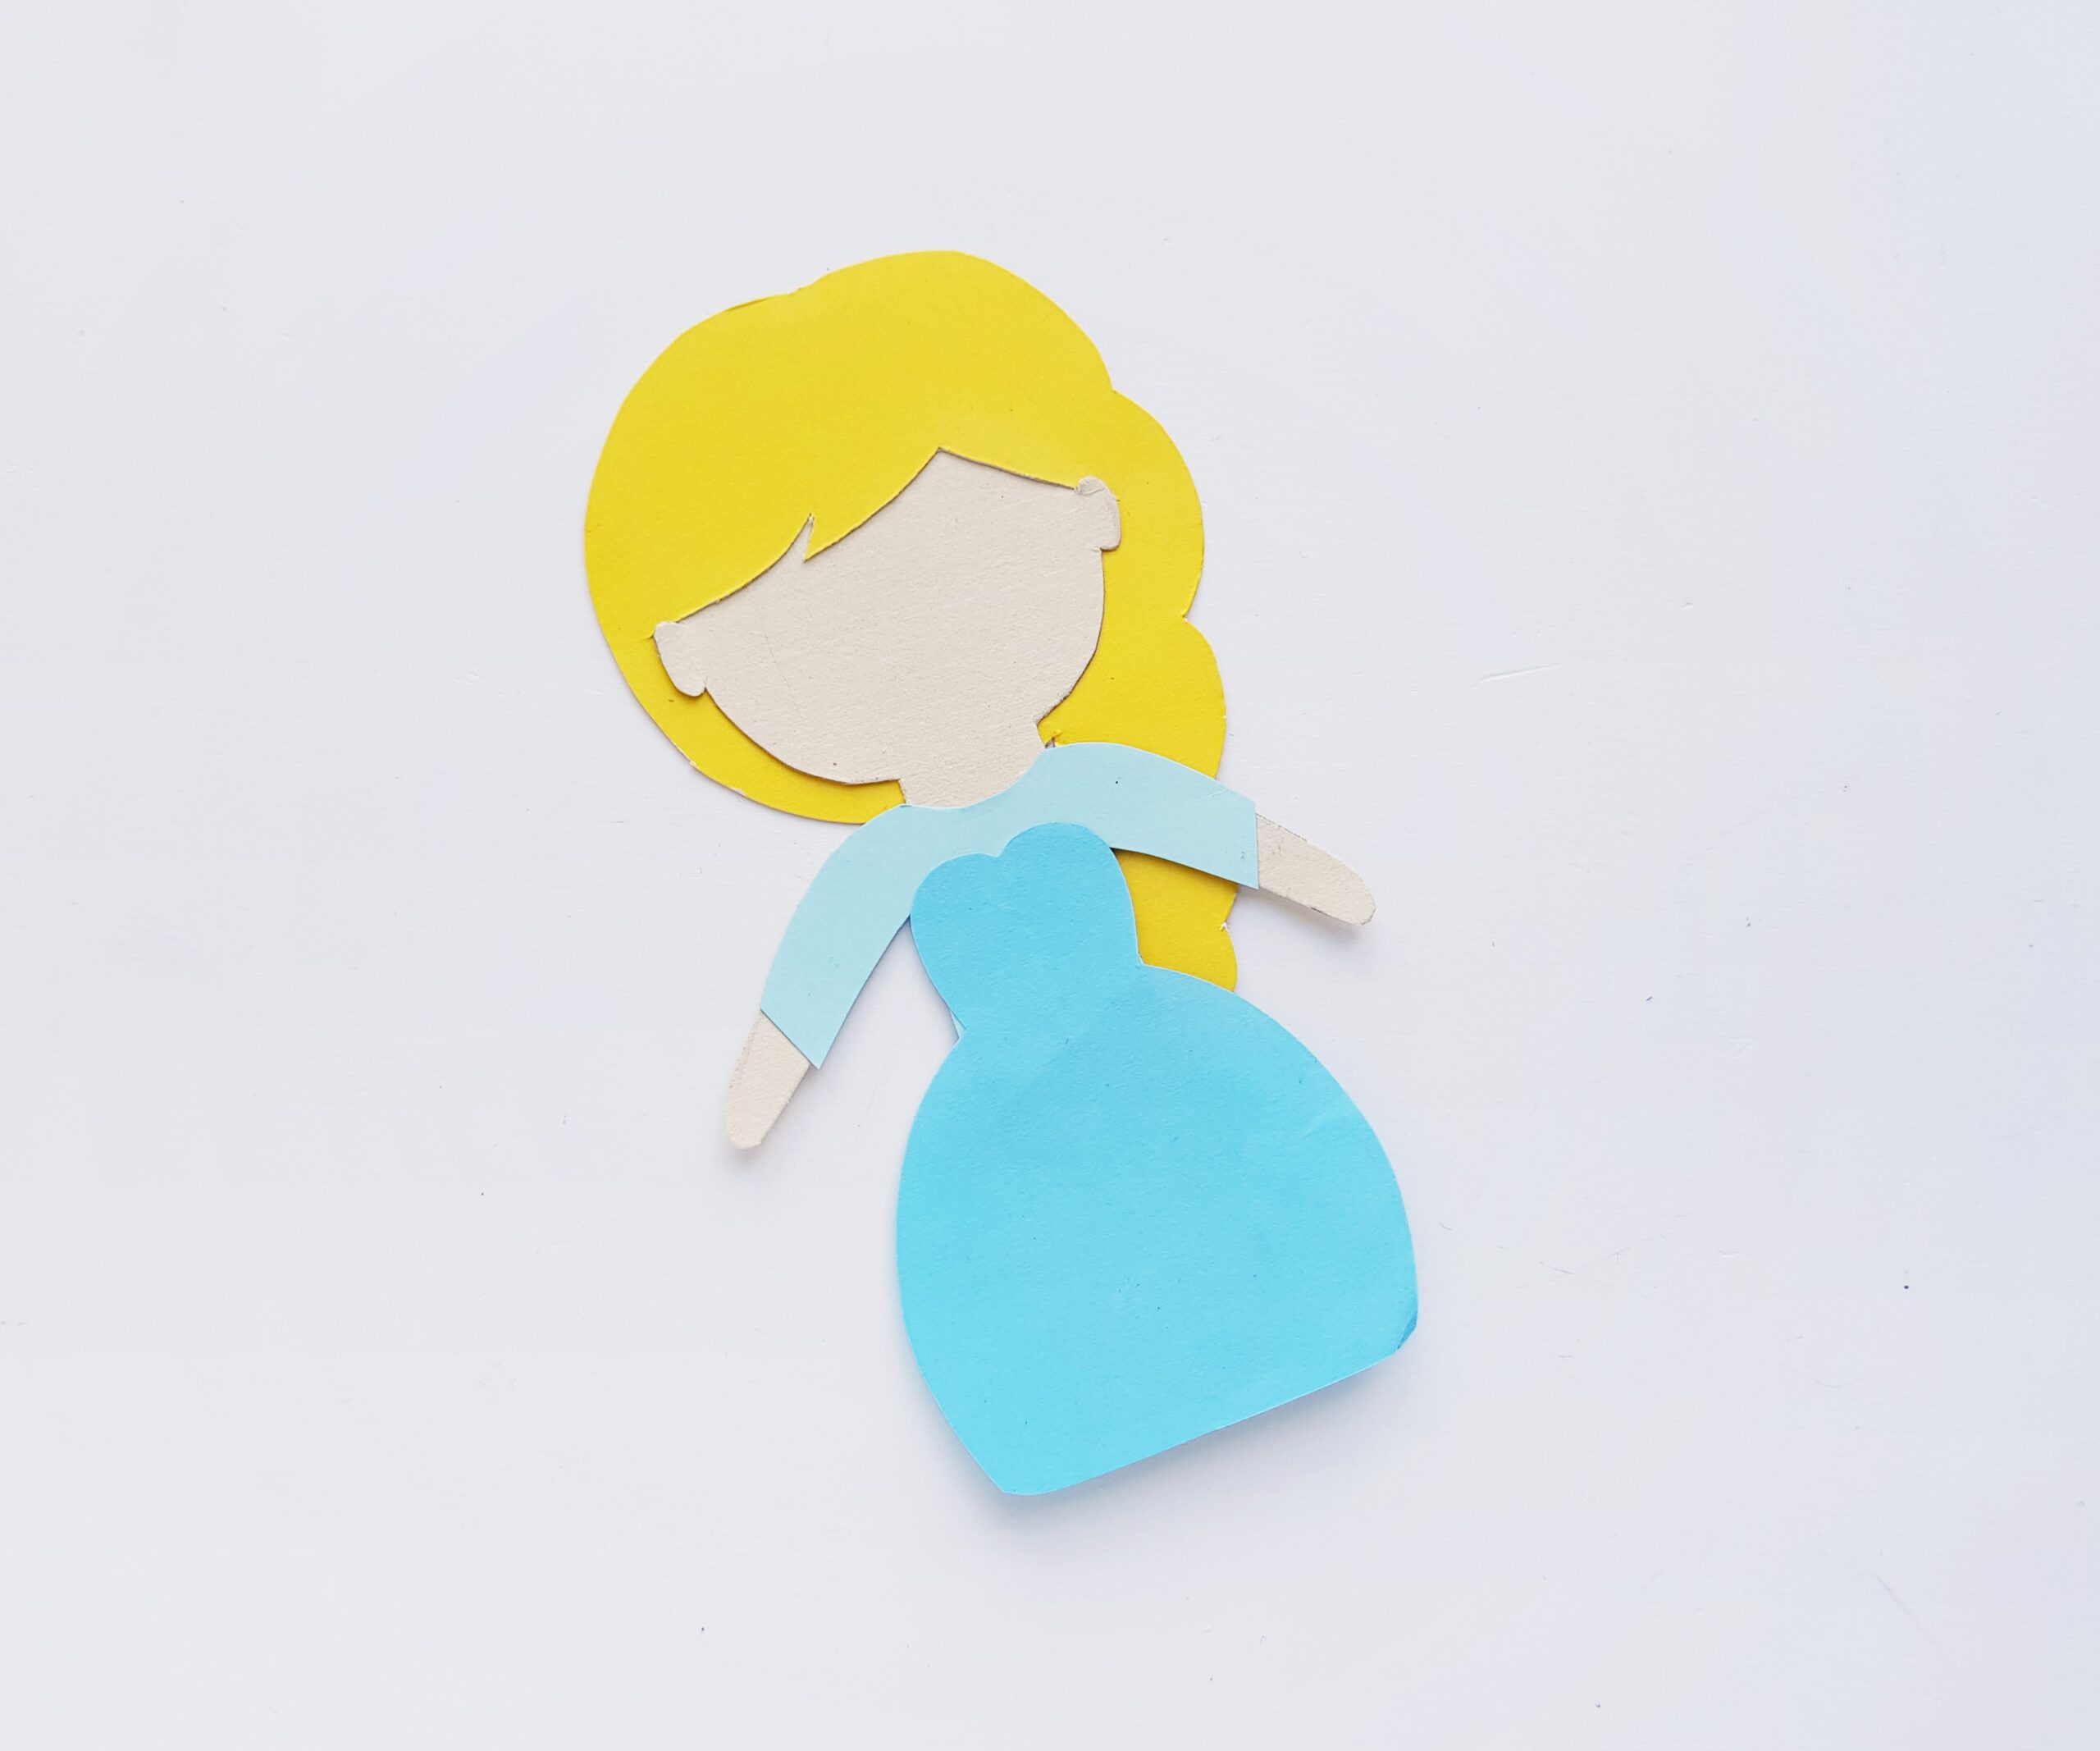
First, select the paper you’ll use. To make your Elsa paperdoll look like the one in our picture, you’ll want to pick out the following colors: yellow (for the hair), baby blue and a lighter shade of blue (for the different parts of the dress), cream (for the body.)
Once you’ve chosen your sheets of colored craft paper, you’ll want to use the printable template (at the bottom of this craft) and trace the patterns onto the correct color of paper. While very young children (4 and under) may need a little bit of help, tracing is a great motor skill activity for young kids! Once all the shapes have been traced, carefully cut them out.

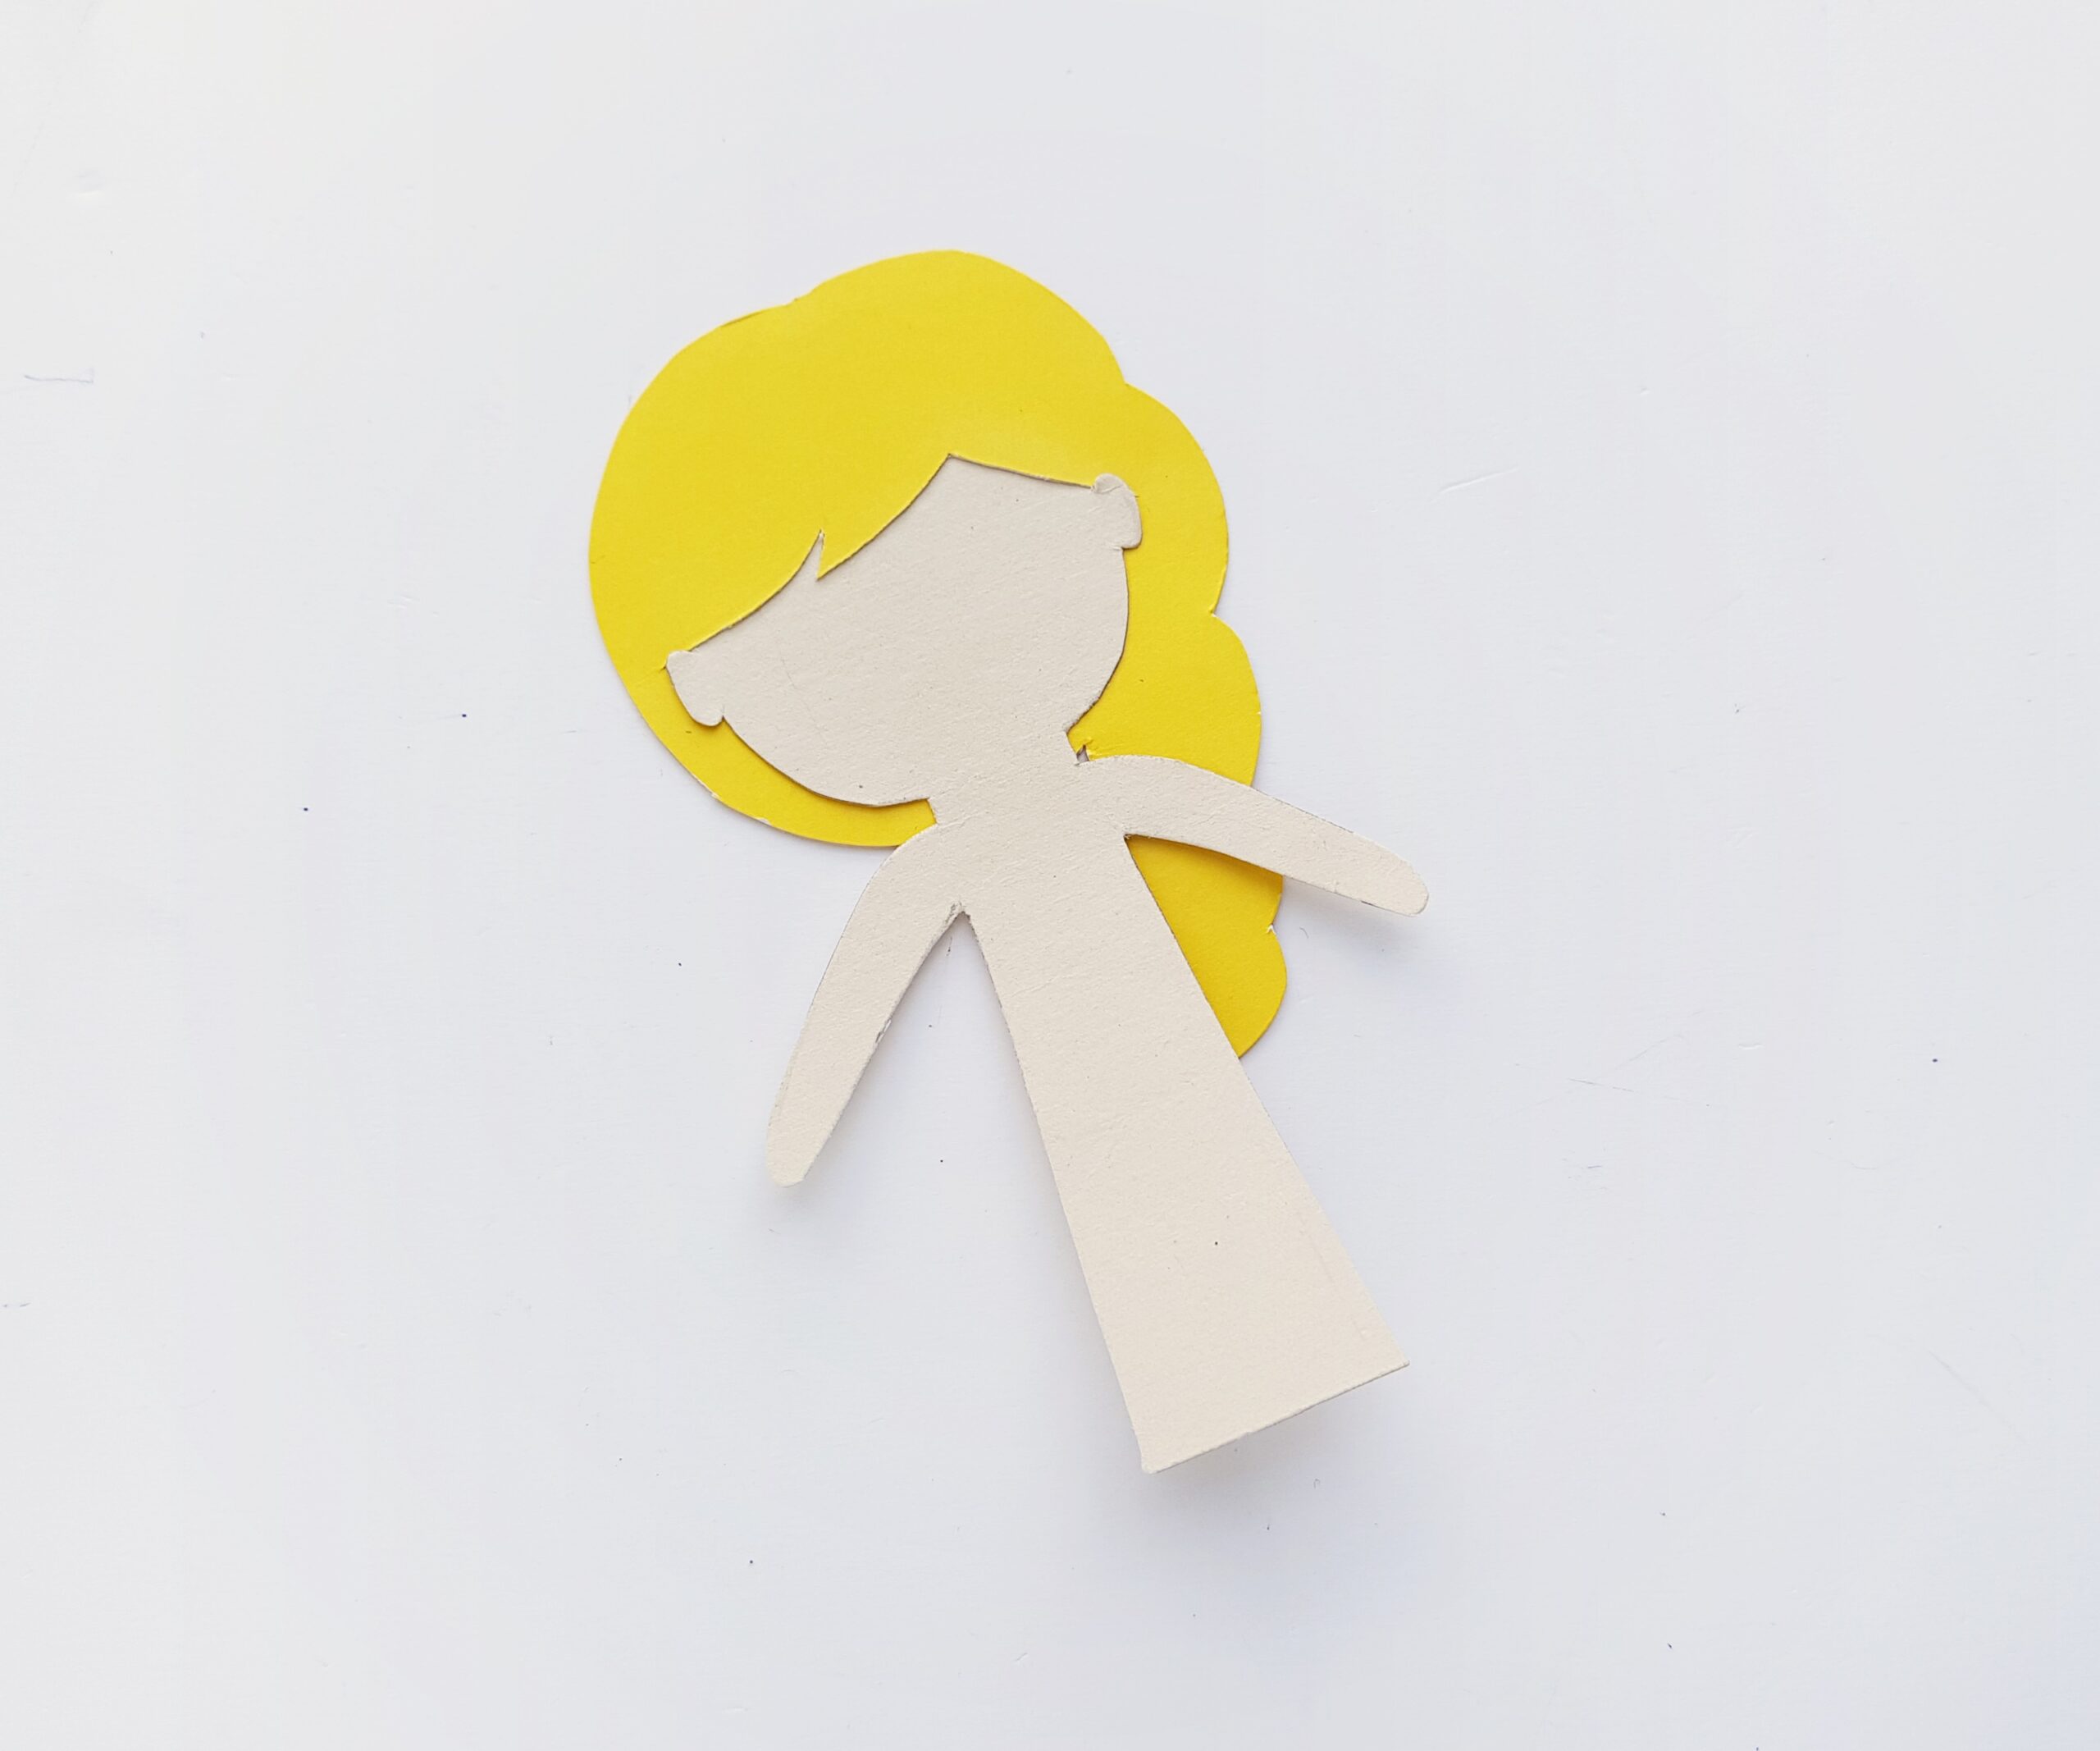
Next, take the yellow piece that you cut out for the hair and, looking at the template for this piece as the guide, cut a slit into the yellow pattern to match the red lines on the template. This will allow you to slide Elsa’s hair onto her body (think of it as making a “paper wig.”)
Now it’s time to create Elsa’s signature gown! Take the blue cut-out with the long sleeves and use the glue to attach this piece to Elsa’s torso, first.
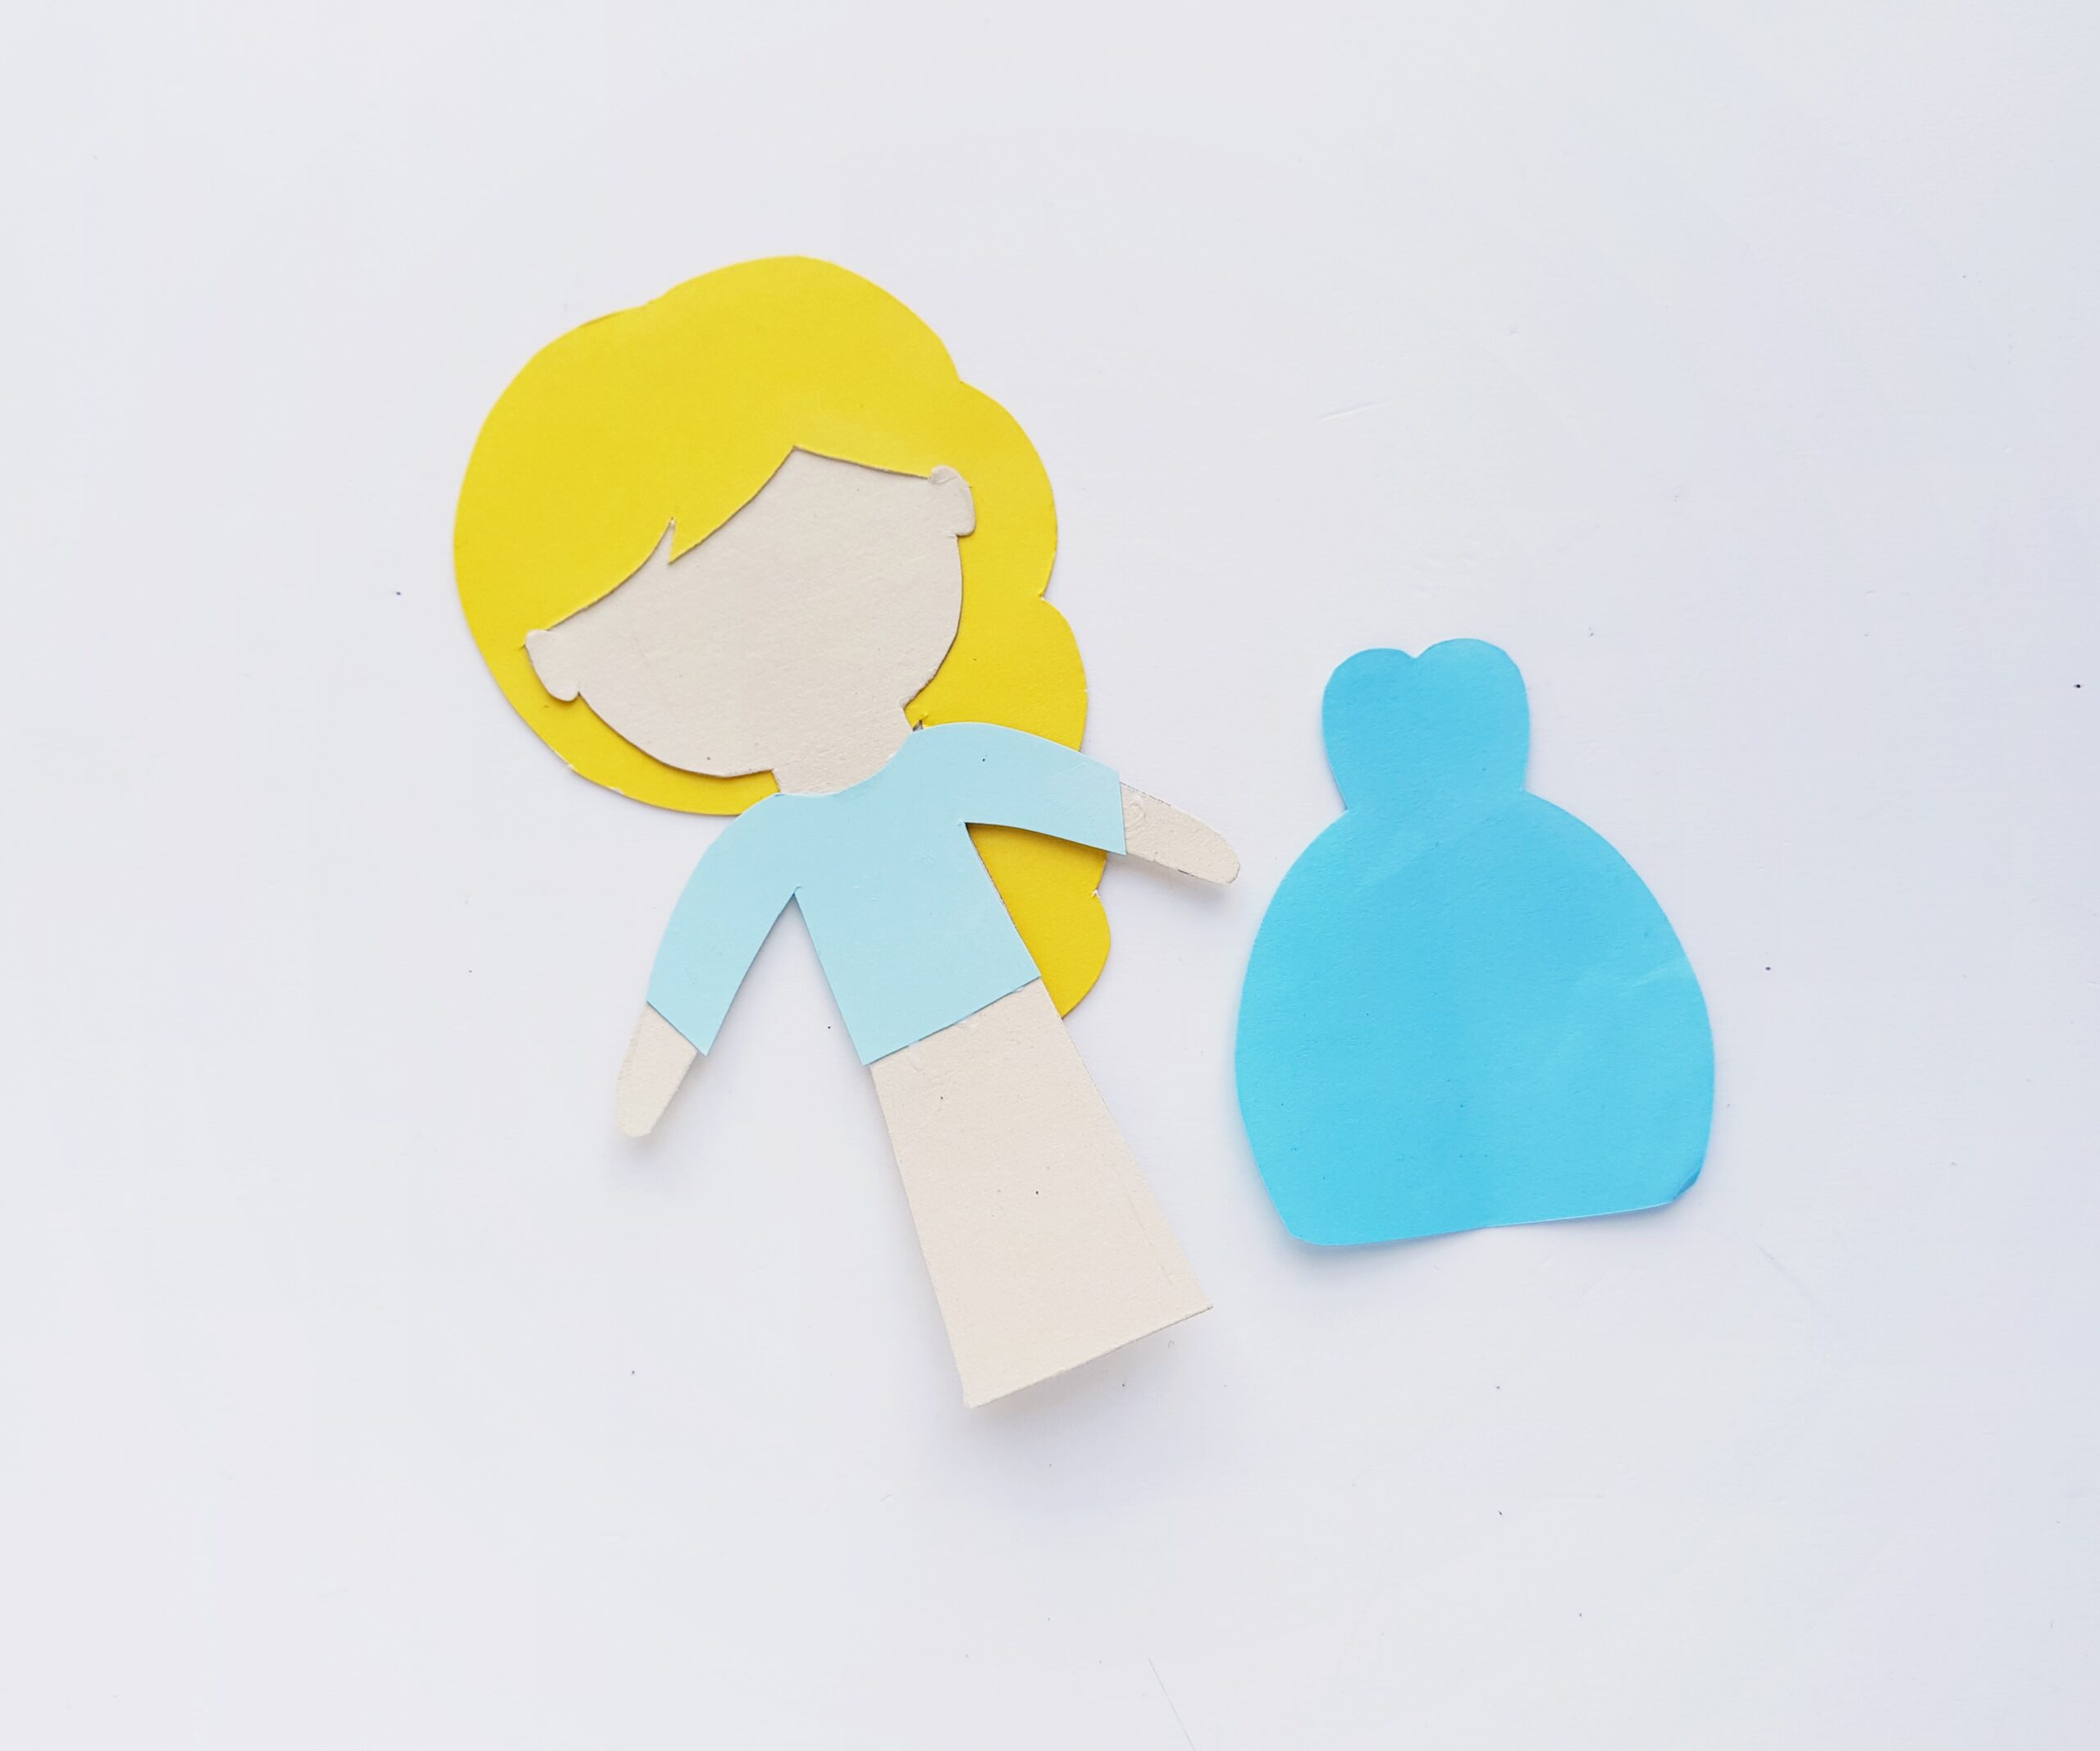
Next, take the sleeveless gown cut-out and glue this piece down over the sleeves.
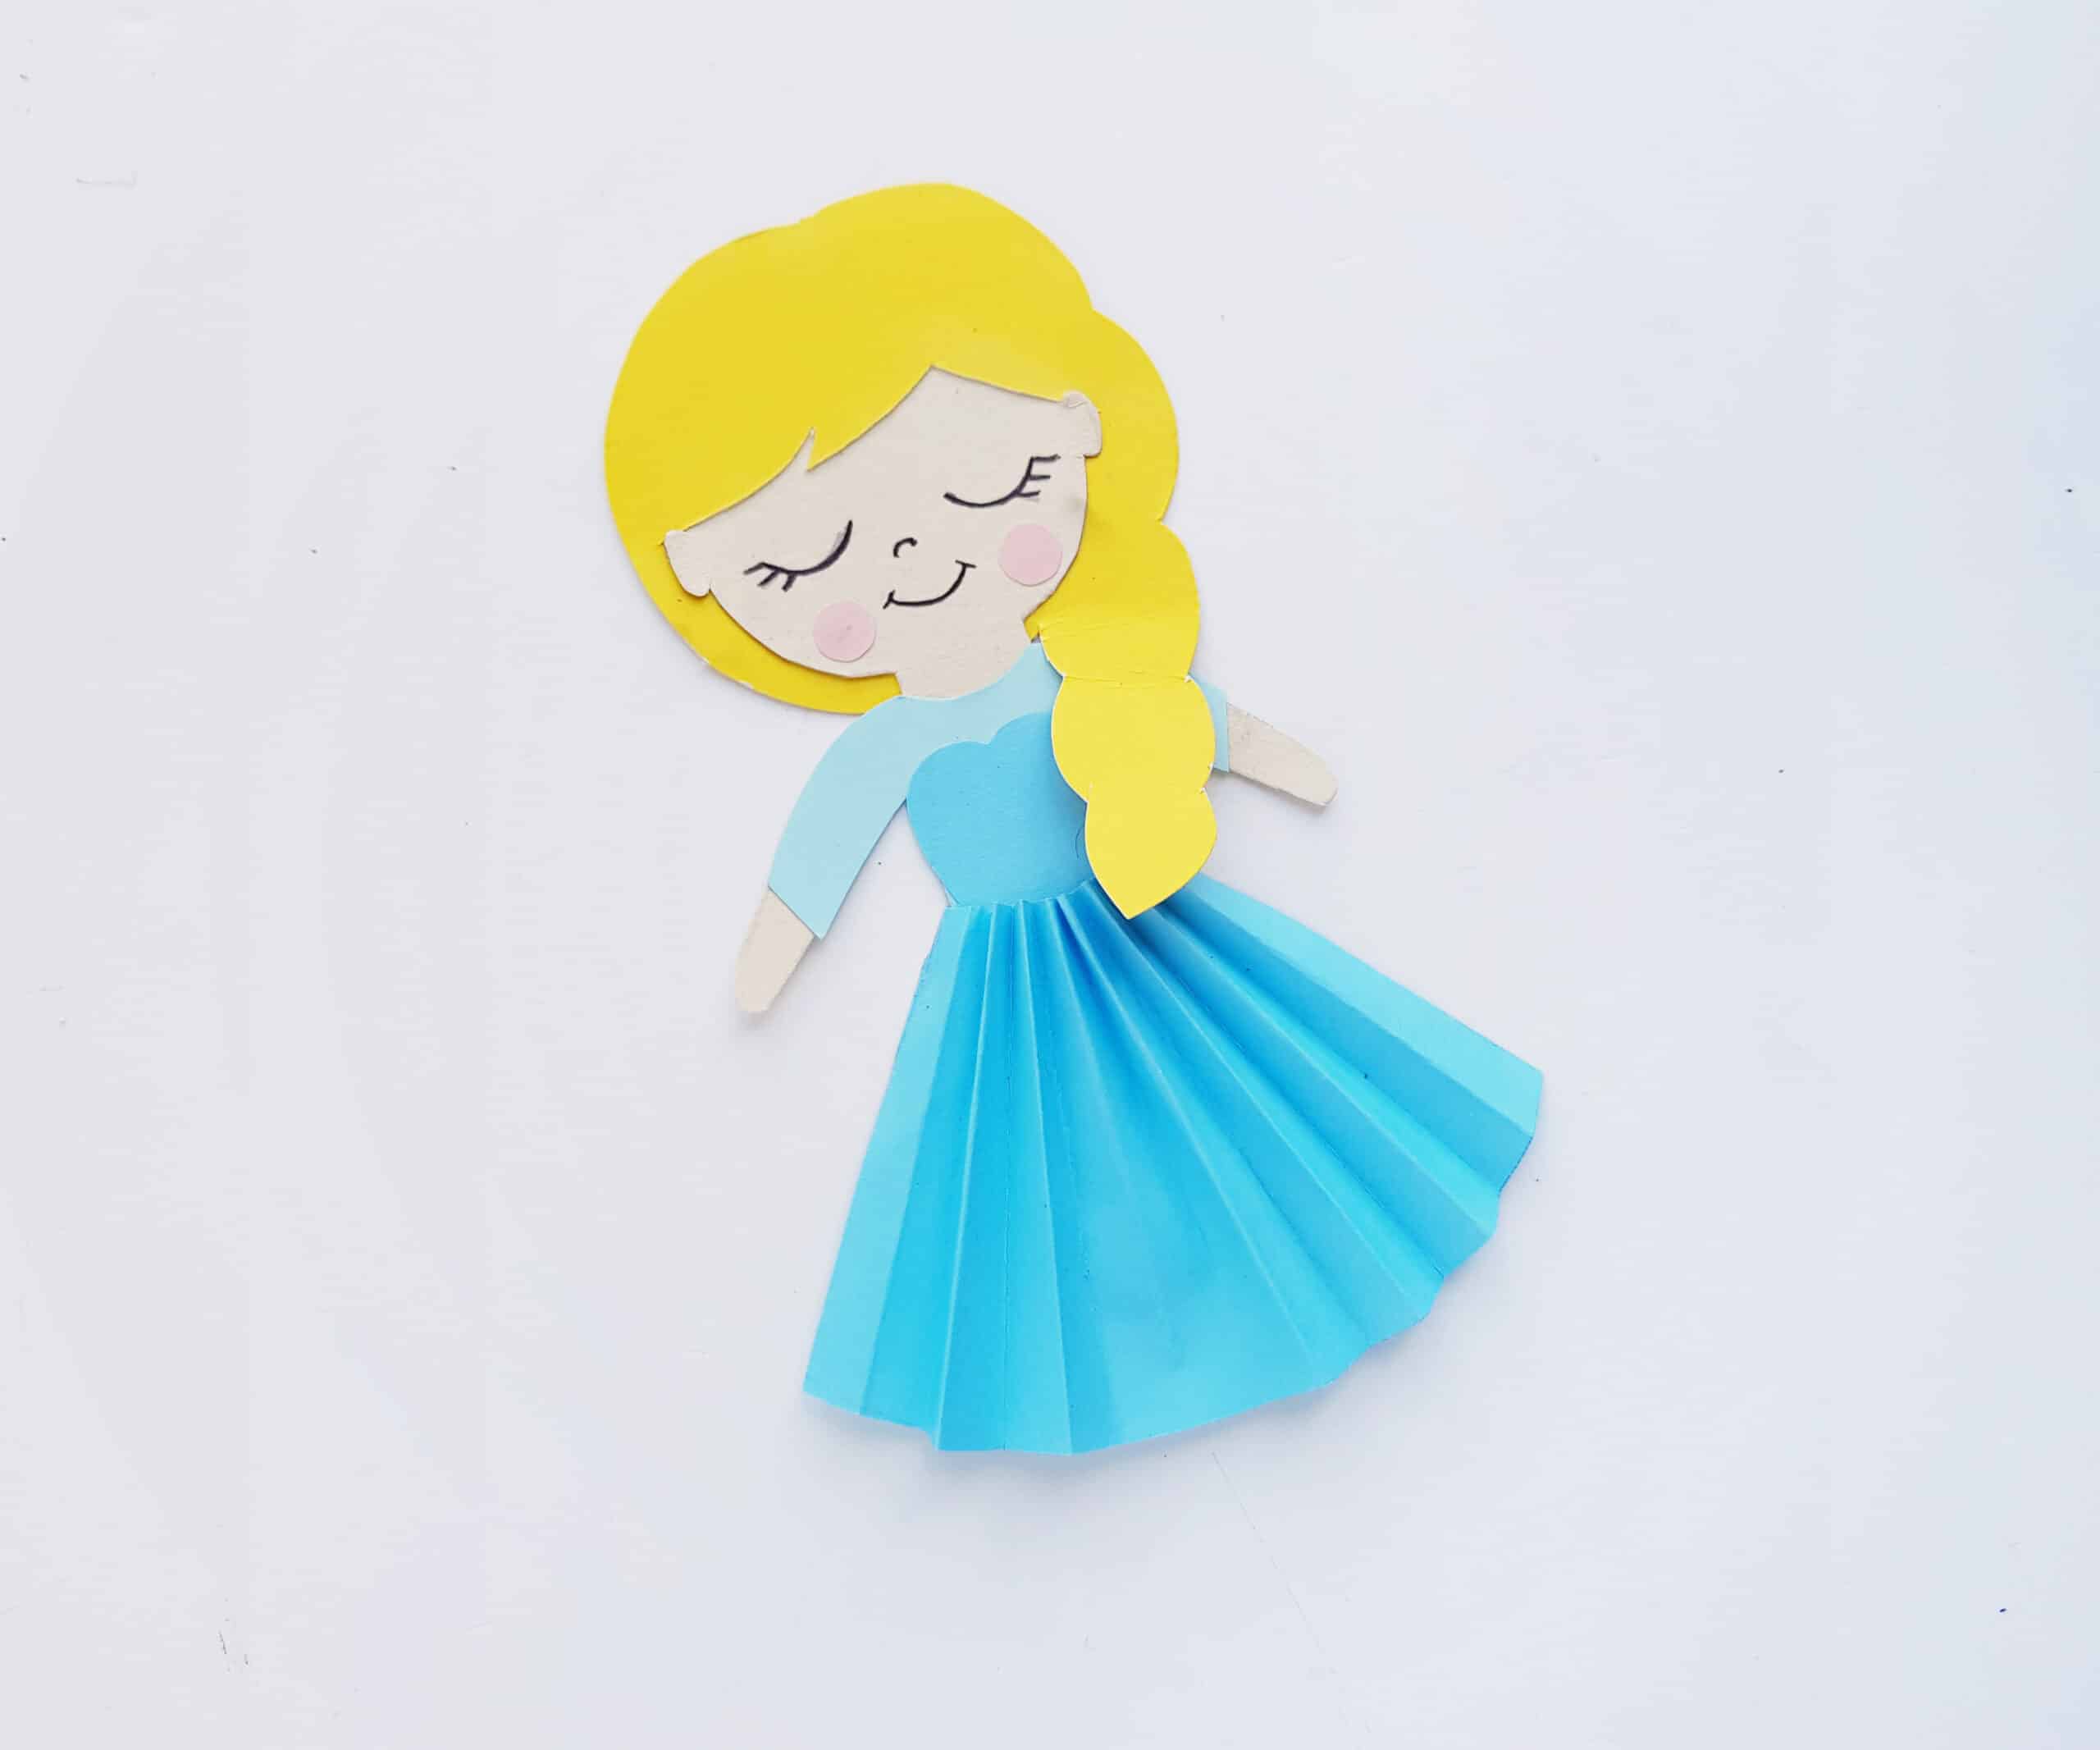
Next, take the skirt cut-out for the dress and fold it, accordion-style. If you’ve never taught your child how to make a paper fan, this would be a good time! Using this technique on Elsa’s skirt piece will make your paper doll look extra special and decorative.

Place the narrow end of the accordion-style skirt at Elsa’s waist and attach it with a bit of glue. If you like, you can go ahead and draw on Elsa’s face at this point, too! Feel free to replicate the simple style we used to create a cute and peaceful expression on Elsa’s face, or draw your own version of her features!
Elsa’s dress is almost finished. The last step is to use the tear-drop shaped cut outs, which you will use to create a flowing cape!
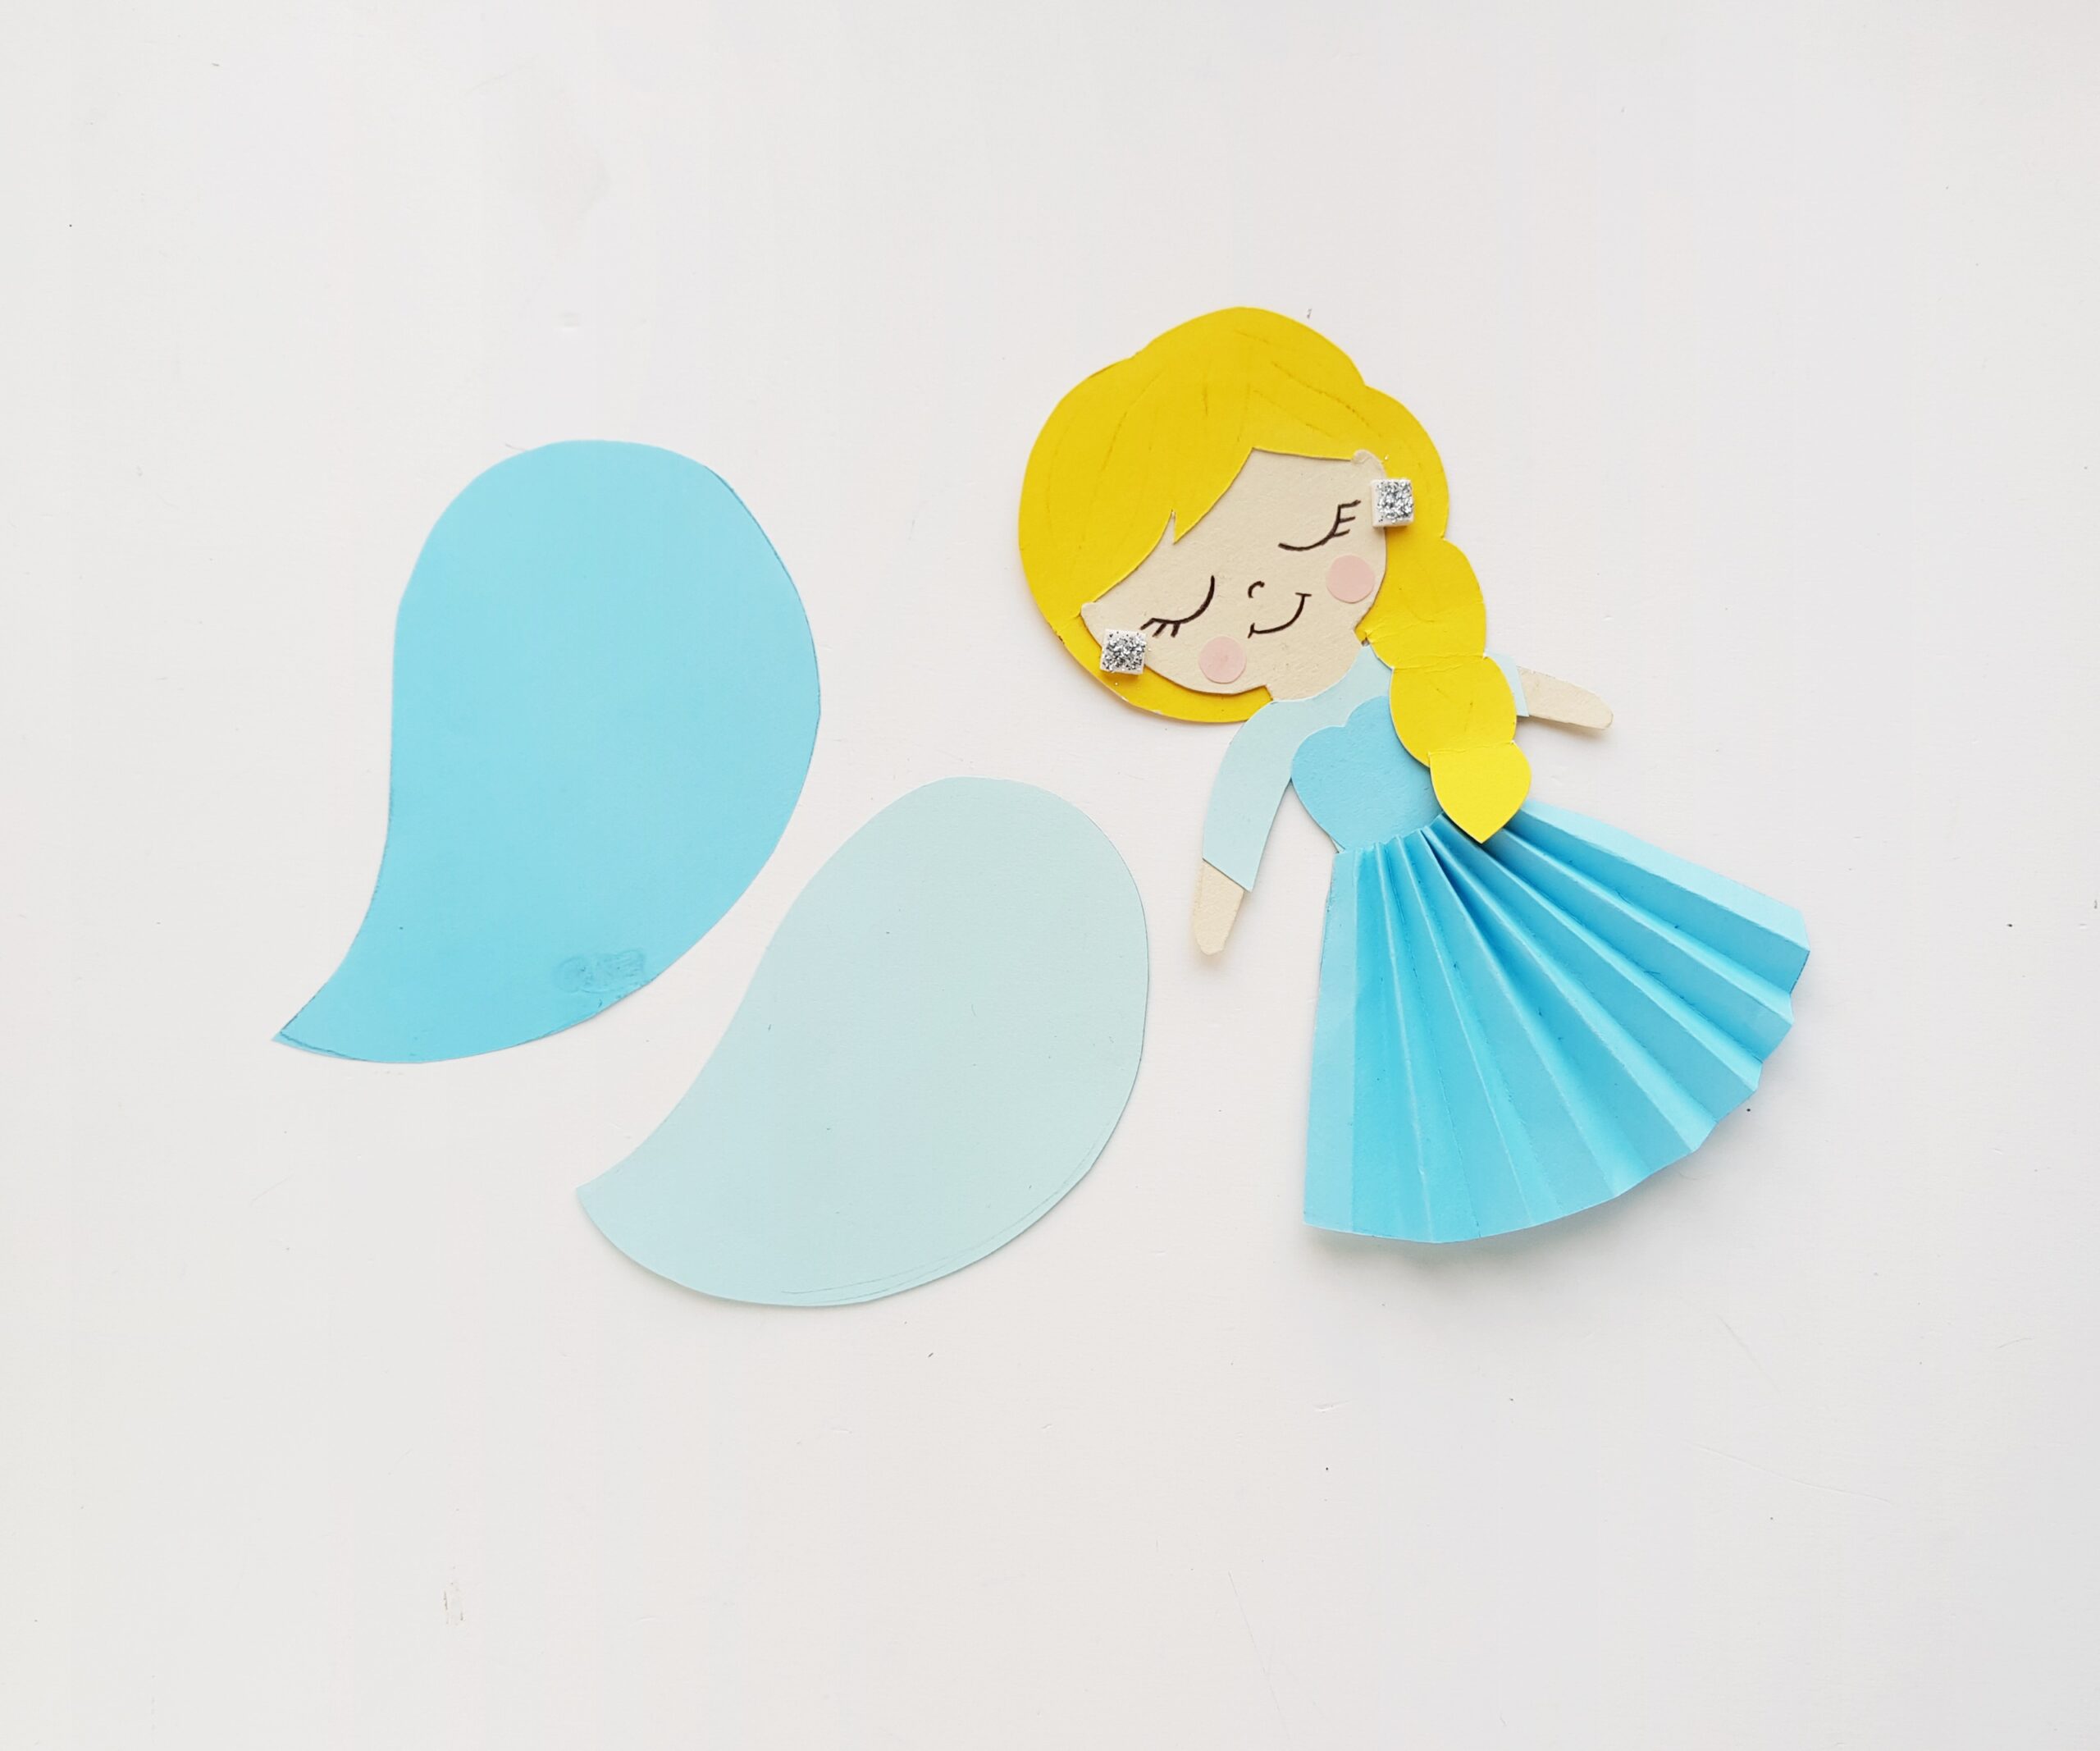
Using two different shades for the tear-drop shapes creates a really cool effect for the cape and covers the back of the doll. All you have to do is glue the smaller teardrop shape to the back of Elsa. Next, arrange and glue the slightly larger teardrop shape behind the first one, so that there is overlap to one side (as shown). This is also a good time to position Elsa’s braid over one shoulder.
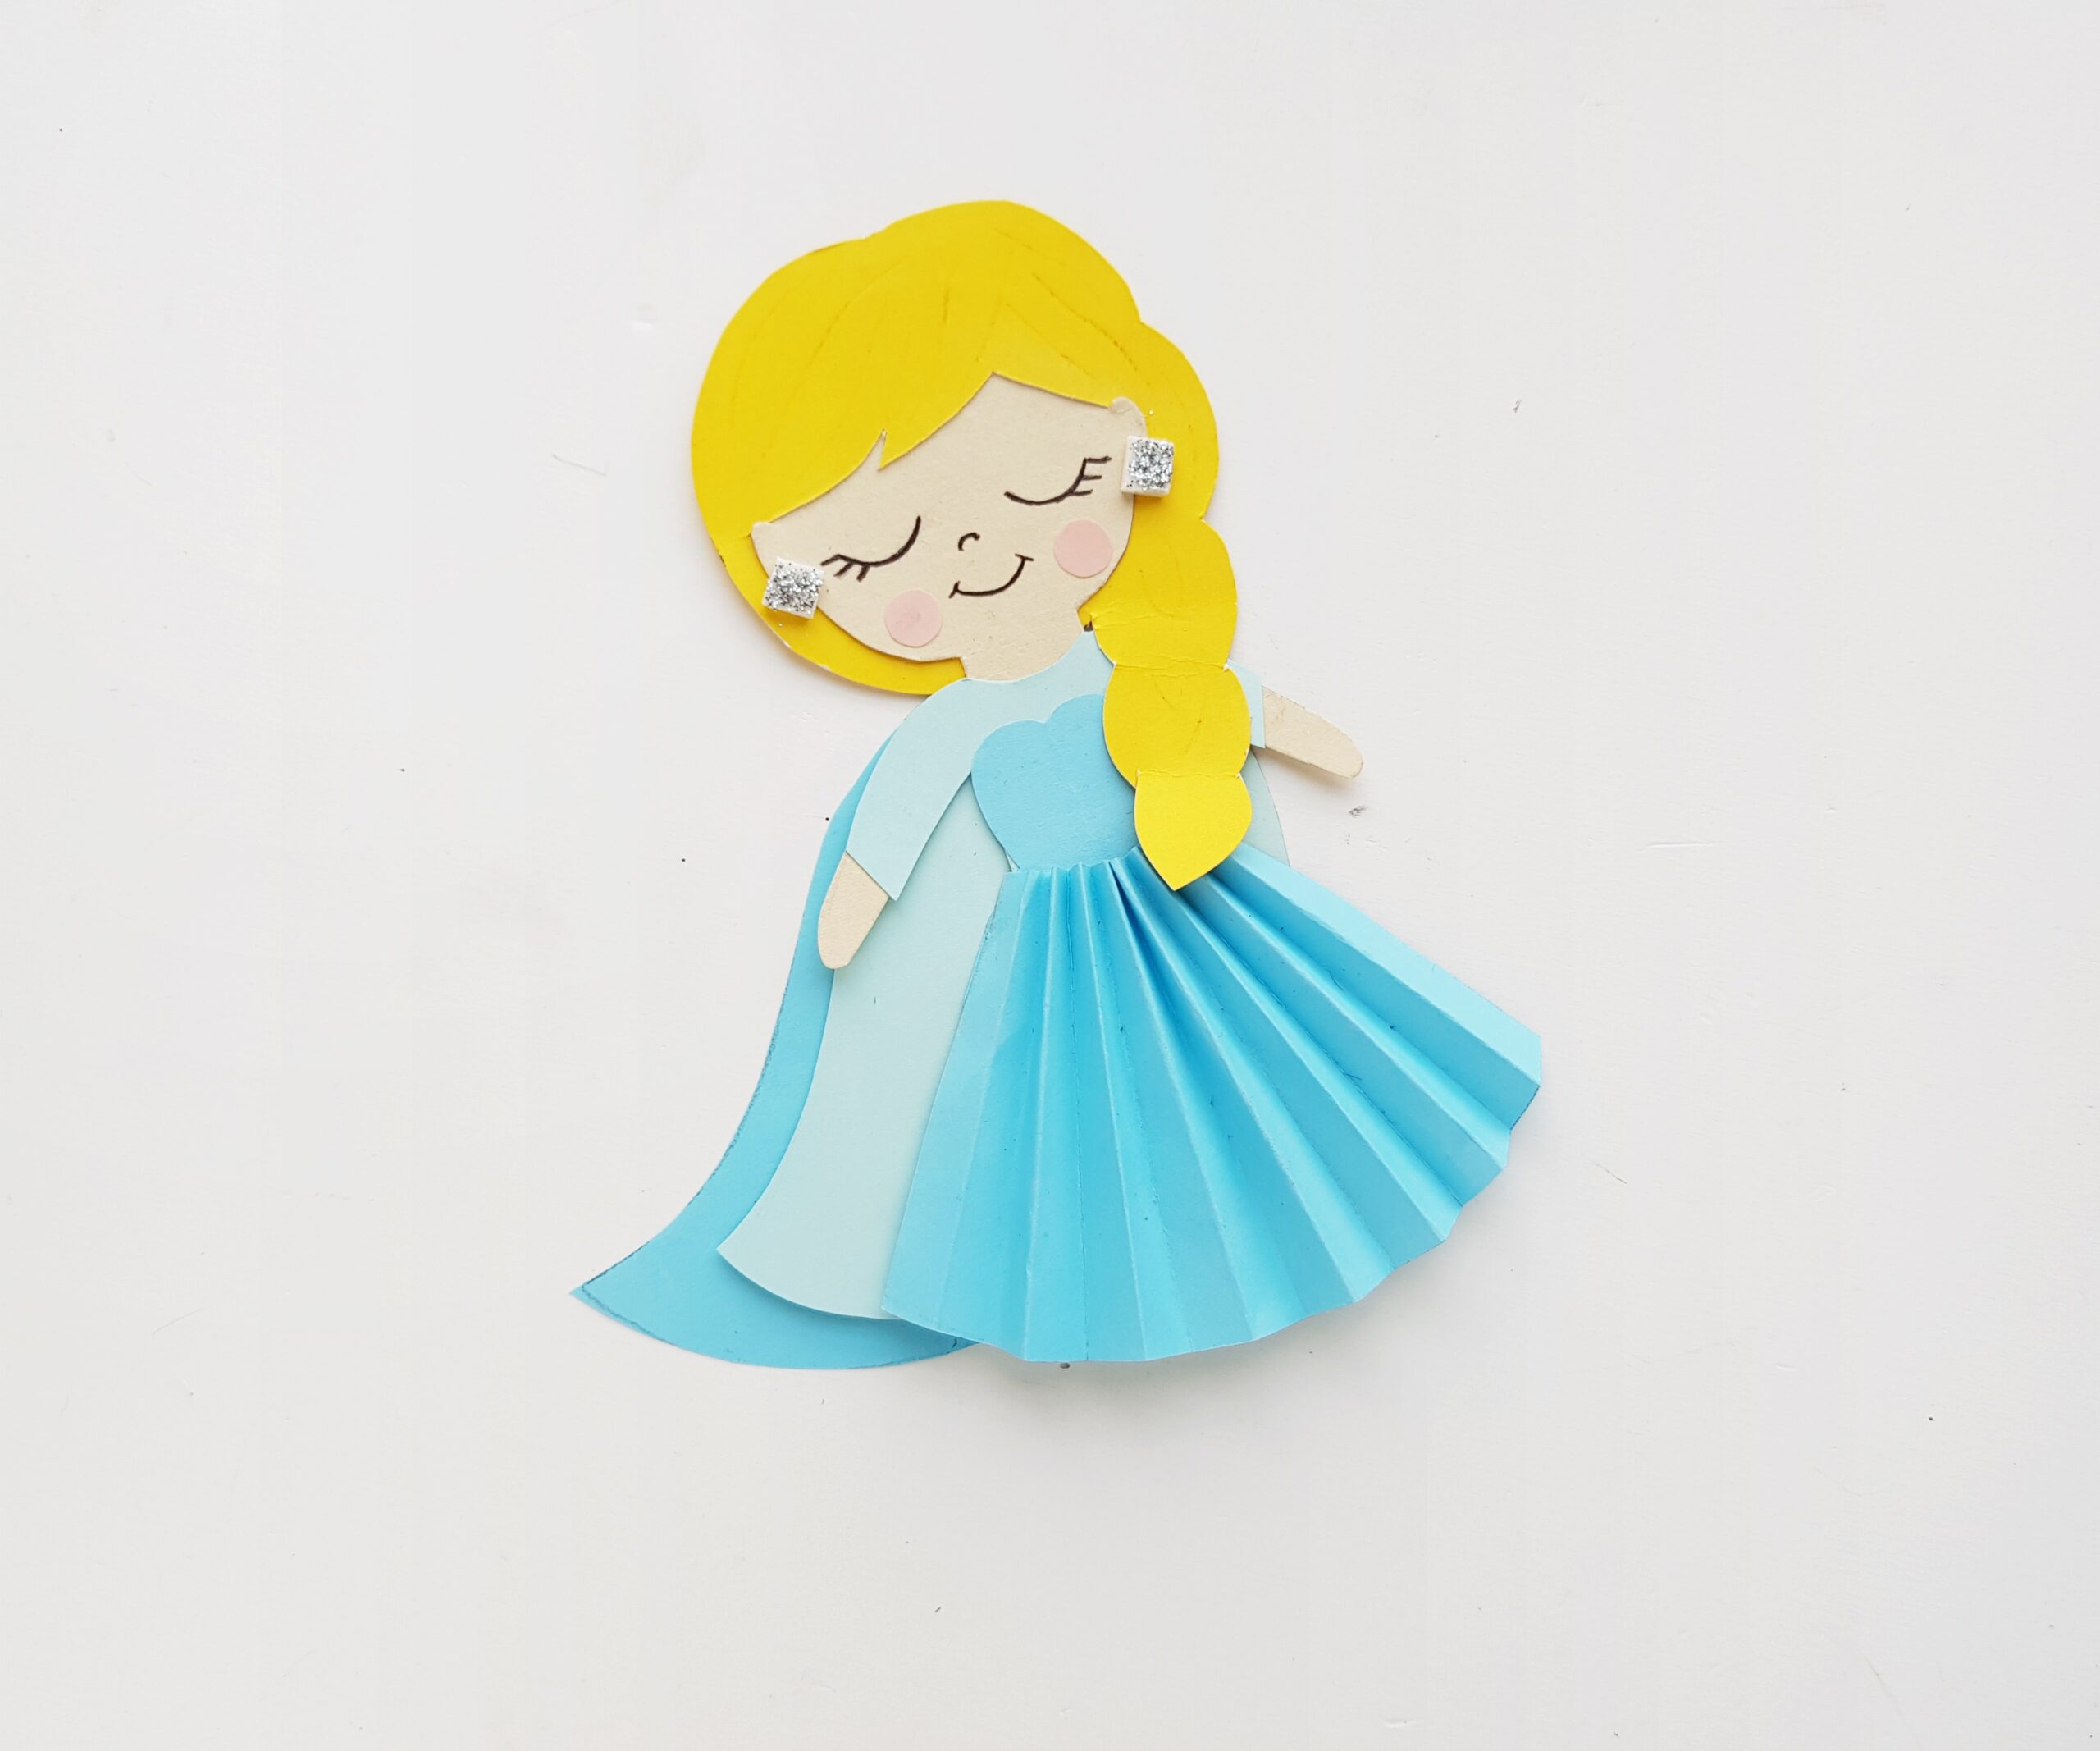
For a final touch (one that I’m sure your kiddos will love) decorate your papercraft doll with sequins, faux pearl beads, glitter…whatever you like! We hope you enjoy this Elsa-Inspired Papercraft Doll Craft! Don’t forget to grab the free printable template that you’ll need for this craft (below).
Click here for your Free Elsa Papercraft Doll Template.
Are you and your family looking forward to Frozen 2? Be sure to check out some of our other Frozen crafts on the site! We have a DIY Frozen Wand Tutorial as well as a Frozen Bookmark Tutorial! Let us know what you think!