
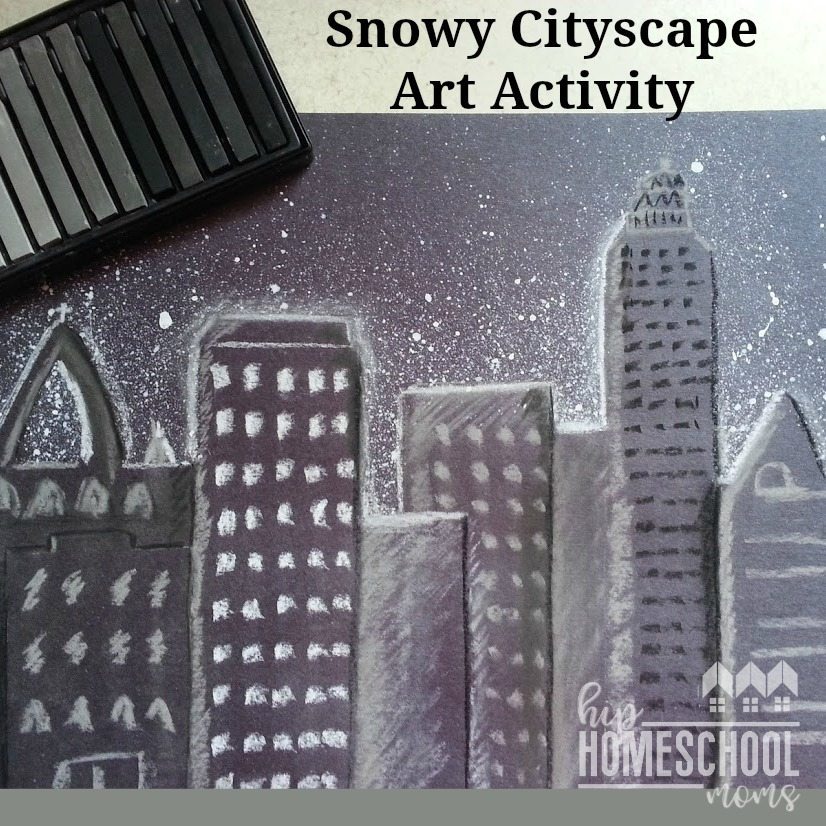
How to Make a Snowy Cityscape in 5 Easy Steps
This Snowy Cityscape is a fun activity to do in the wintertime! This art project is especially designed for middle or high school students, but it is easy to modify for younger children. This activity is so simple and fun and the end result is fantastic. You might help them start by googling night cityscapes and looking at real views of cities at night or find other artwork to inspire them before they start this project. If they fall in love with a famous city skyline let them start there but know that a make believe skyline is perfect to use as well. So let’s get started with teaching your child how to make a snowy cityscape in 5 easy steps!
Extensions
Each city has its own unique version of a cityscape. Even small country towns have them. So if you are studying a particular area in history or geography, this might be a fun project to try to do. Or for your children’s literature reading, they could draw the area they are reading about… even if it is imaginary.
Skills your child will be using or learning while creating snowy cityscape:
- cutting
- drawing (city)
- paint technique- create snow effect with toothbrush and paint
- shading with charcoals
How to Make a Snowy Cityscape in 5 Easy Steps
Materials Needed
- 9 x 12 Black construction paper
- chalk pastel charcoal set which includes gray and white charcoals
- white tempera paint
- 9 x 12 light colored paper for
- scissors
- toothbrush
Mom, you might want to put down a throw away table cloth so that the paint doesn’t get on your floor.
Easy instructions
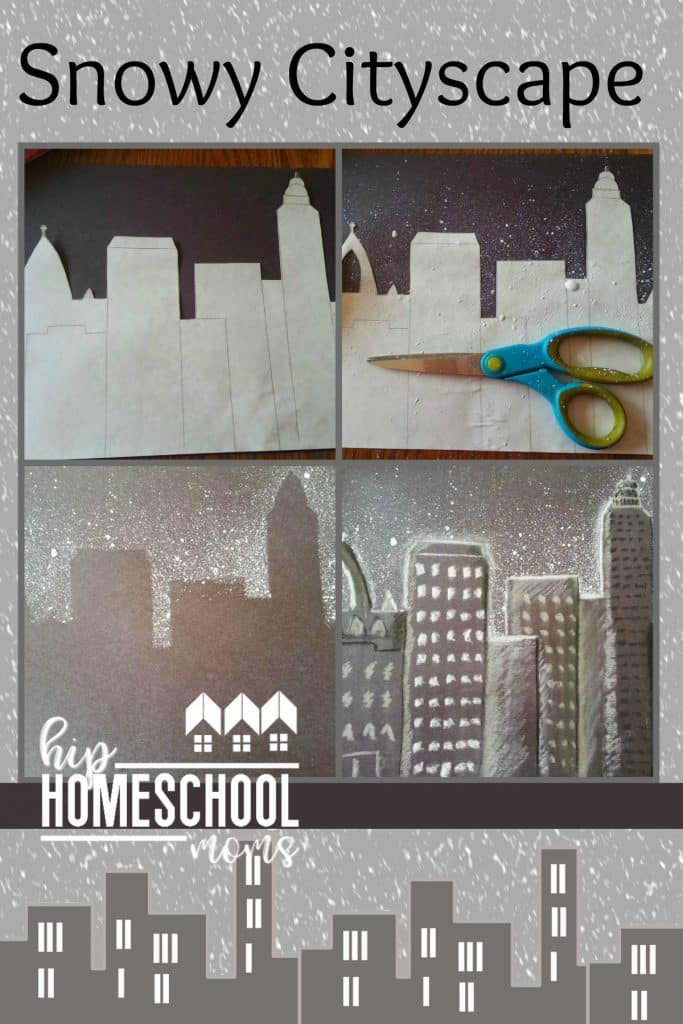
- Draw the city skyline on the light colored paper. Since this paper will be used as a stencil, you might want to use a heavier weight construction paper.
- Cut your skyline out. Cut only the outline of the top of the buildings of the cityscape. You can see an example in the image below.
- Lay it on top of your black construction paper. You might want to use paperclips to hold it in place.
- Water down the white tempera paint slightly. We will be using a toothbrush splatter technique to make a snowy sky. Splash the paint onto the background by just running your finger down the paint covered toothbrush to make speckles of “snow.” Continue to make splash and splatters until you get the desired amount of “snow.” Lift your cut out to reveal a city skyline.
- Now add the details such as outlines of the buildings. Outline one side with a darker shade and the opposite side with a lighter shade. Add windows, shadows between buildings and snowy roof tops with several charcoal values ranging from pure white to pure black. You can use a straight edge to keep your lines straight as needed. Be consistent with your shading. Notice all the buildings have shadows/shading from one side.
How do you display your children’s art? Share your pictures of this project and how you display it on our Facebook page or in our group. Be sure to type this hashtag #hiphomeschoolmoms so we can find you!


I am bookmarking this one! I really want to try with m y kids!