
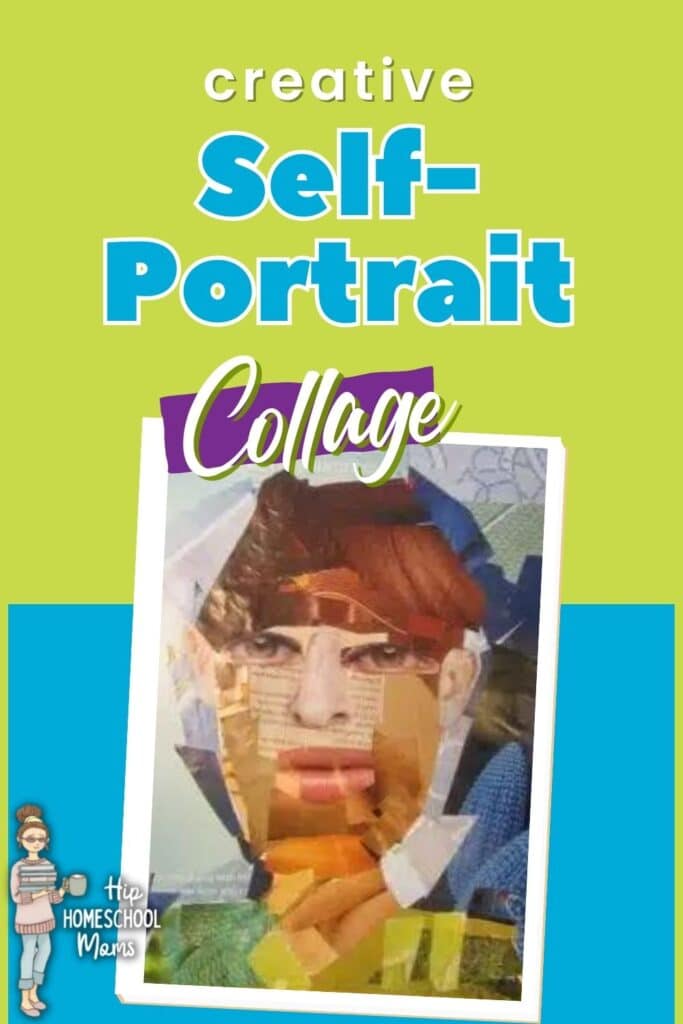
Creative Homeschool Art Project – Self-Portrait Collage


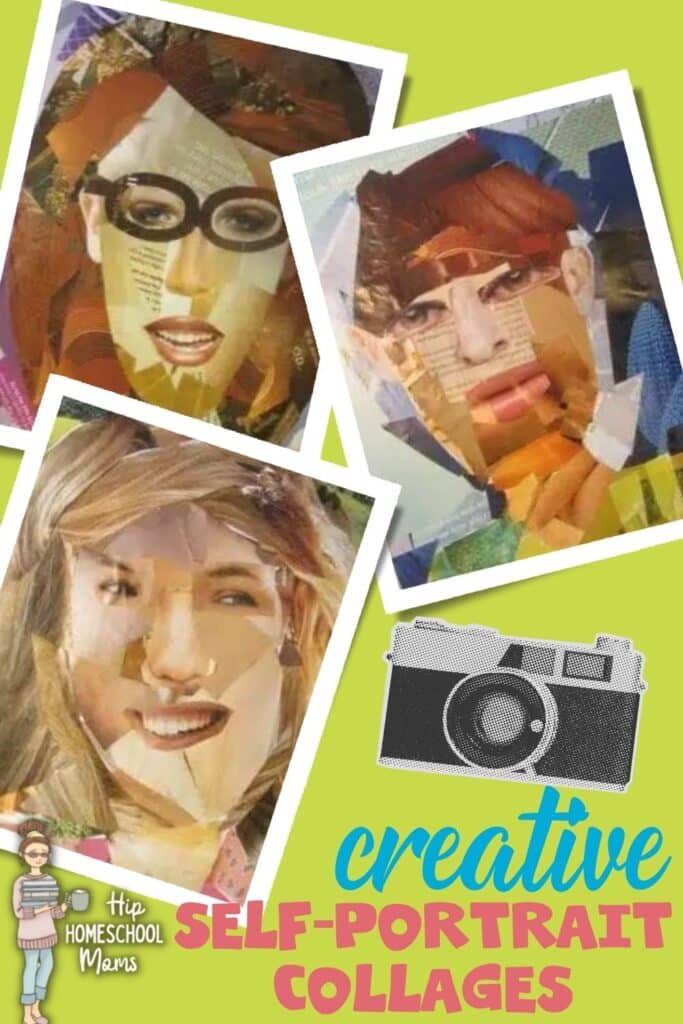


A few days ago, when we all gathered around the art table to create an abstract self-portrait collage. Although most of the process-oriented art lessons I introduce to my Littles are the “from start to finish in thirty minutes” kind, every now and then, I like to weave in an art project that requires endurance…one that will have to be completed in several steps over time. Such was the case with this self-portrait collage project were we each created an abstract self-portrait collage. With a stack of discarded magazines in hand, we squared our jaws and set to work.
Although these multi-step collages took us two afternoon art sessions to complete due to drying and cutting time, they were actually quite simple to create.
You will need for your self-portrait collage:
- discarded magazines- I find these in the FREE bin at my local library.
- scissors
- pencil
- piece of art paper
Directions for a Self-Portrait Collage:
Step 1 & 2: After gathering all the necessary supplies, begin by sketching a basic outline of your face and facial features. For this project, keep to simple lines, no shading or colors. (To make a simple sketch of a face, draw an oval. Mentally cut the oval in half, horizontally. At the half way point, draw two eyes.
Then, mentally cut the space from the eyes to the chin in half. At THAT halfway point, draw a nose. Then, mentally cut the space from the nose to the chin in half and draw a mouth. Remembering this simple “half” rule will ensure that your self-portrait collage has the correct proportions. Still need some help? Check out this quick video for making a simple self-portrait.) Complete the picture by drawing a neck and perhaps a shoulder line.
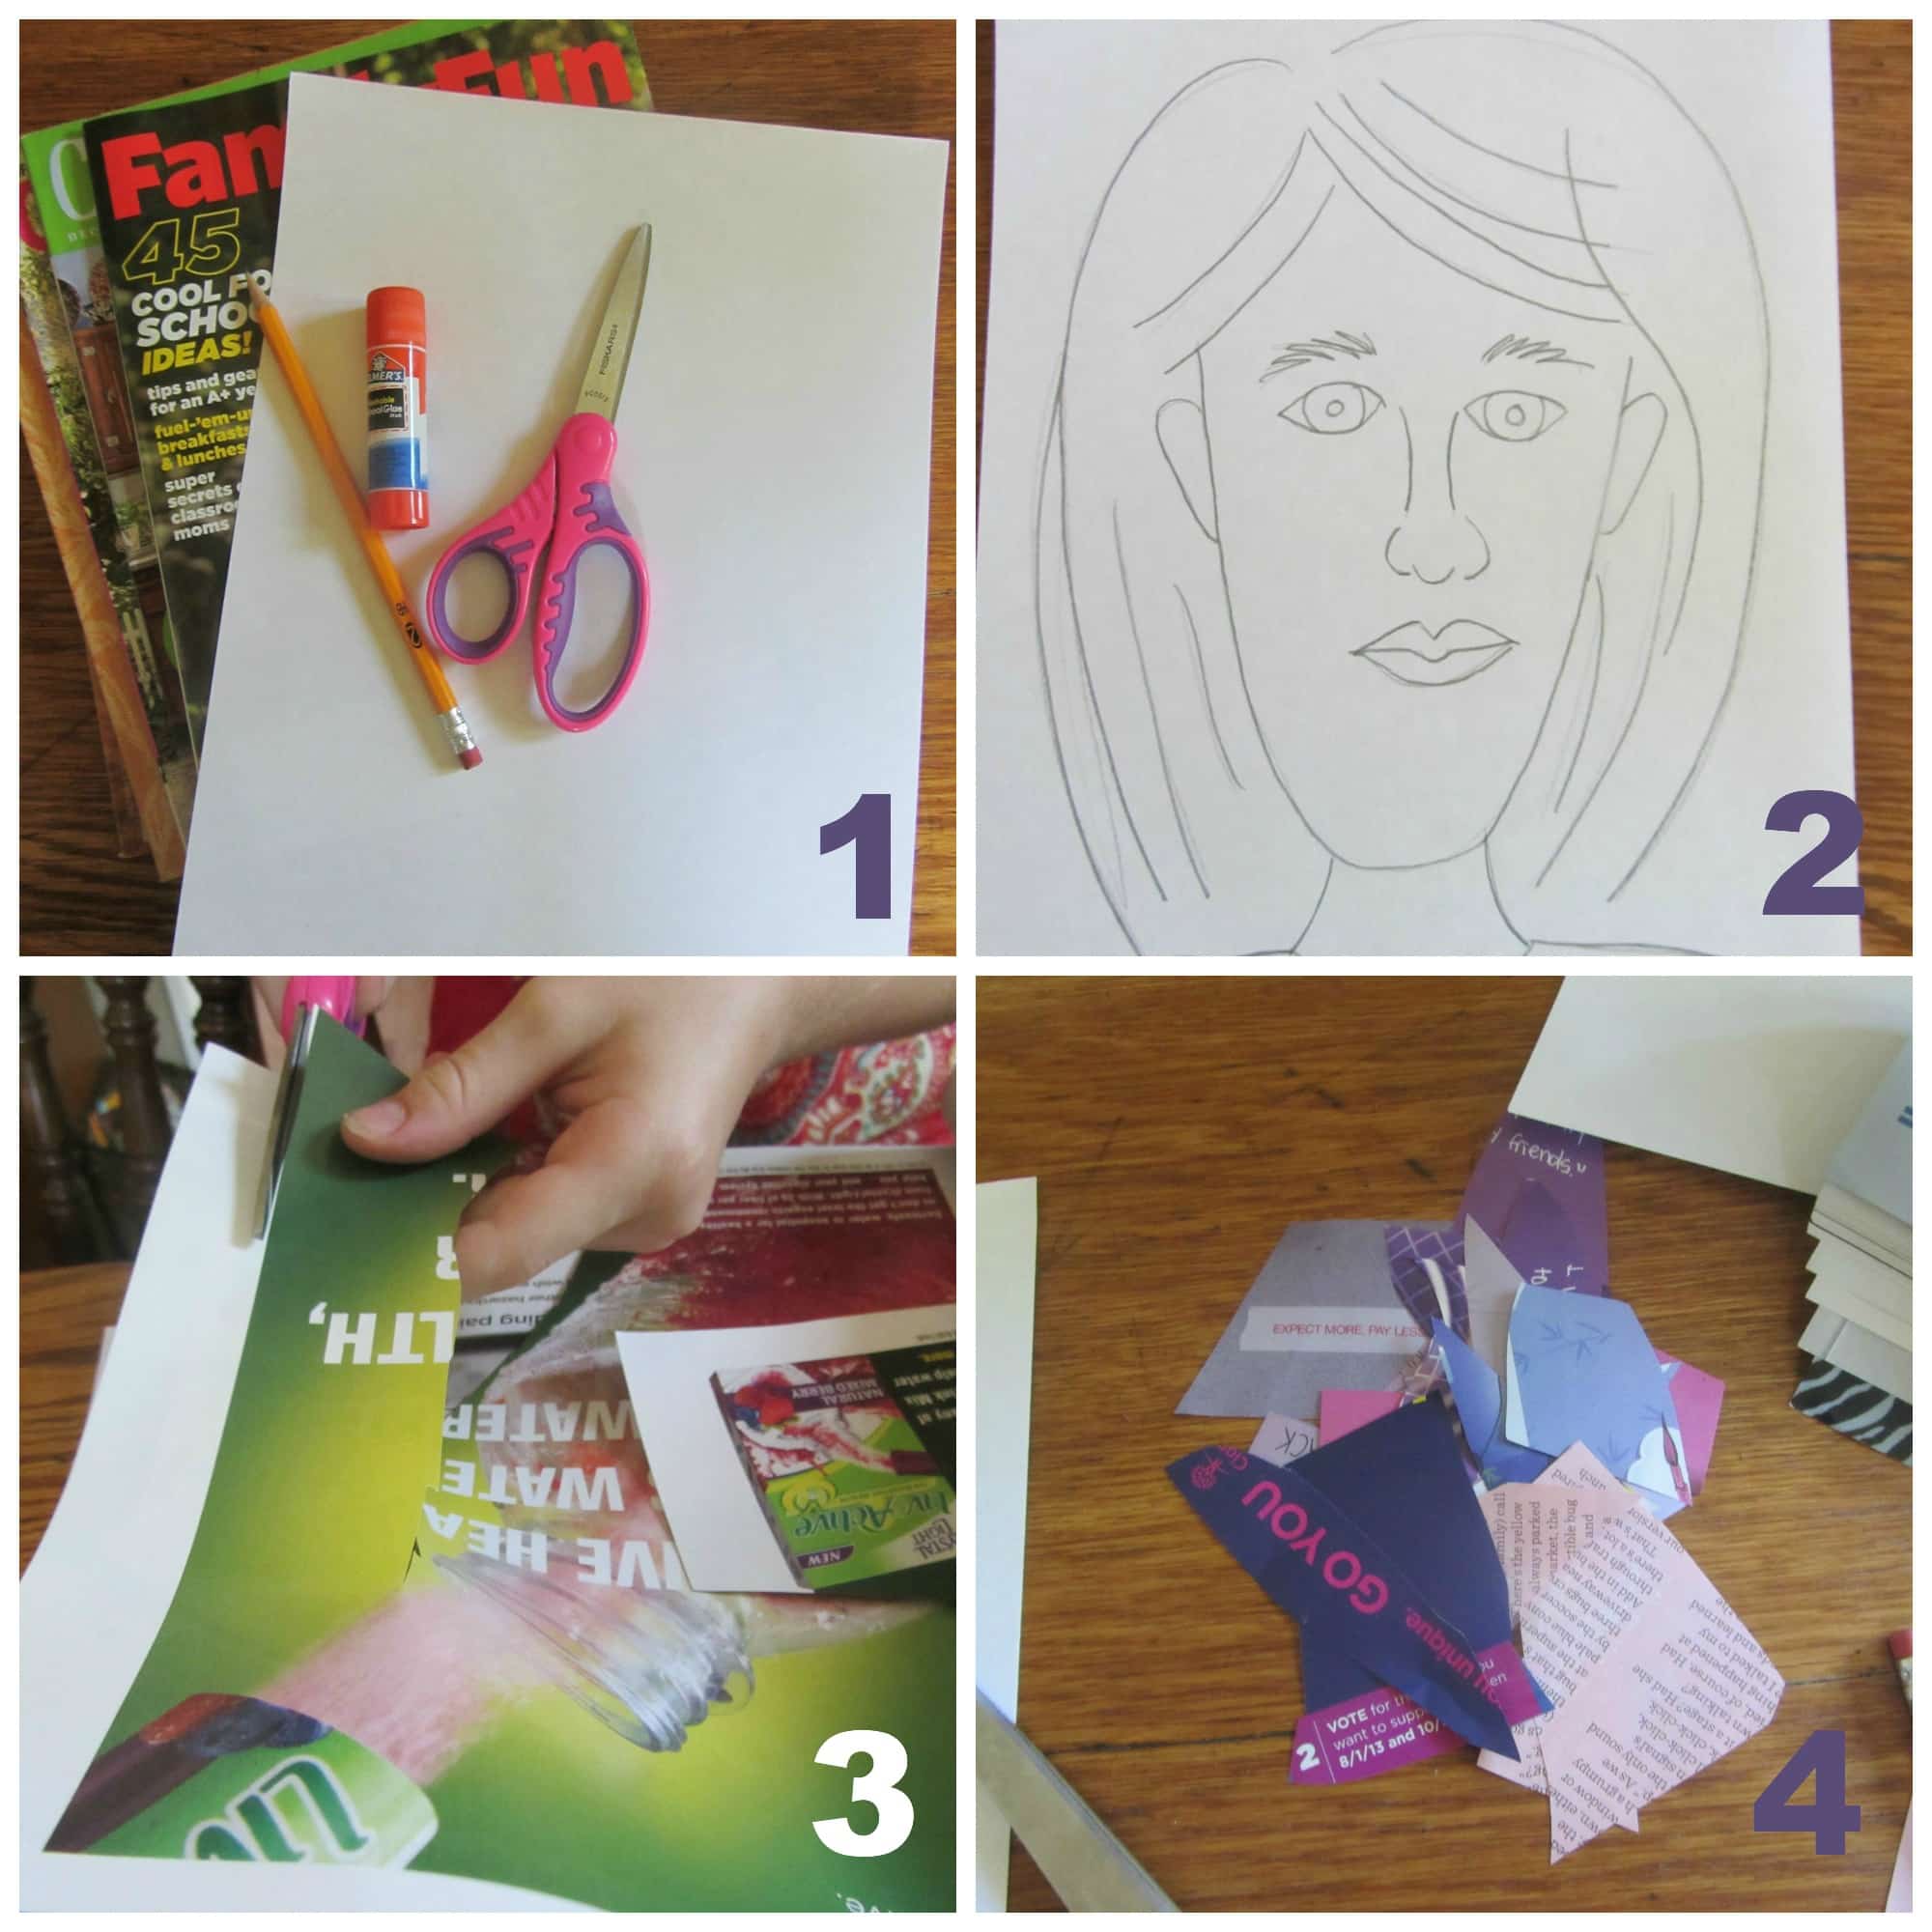
Step 3 & 4: Decide what color you would like to use for a background and begin cutting out swatches of THAT color from the magazines. Any size or shape of swatch will do. Be sure to keep your pieces monochromatic. Don’t worry if some of your swatches have writing or additional colors on them. Variety will help give the picture more dimension and personality! Pile all these swatches together.
Step 5 & 6: Beginning with the largest swatch pieces, glue the patches of color in random places on the background portion of the self-portrait collage. Be sure to go all the way OFF the edge of the page with the outer swatches so that the entire background is covered. The “excess” can all be cut off at the end of the project. Then, fill in any white space with smaller swatches until there is no white space peaking through the color.
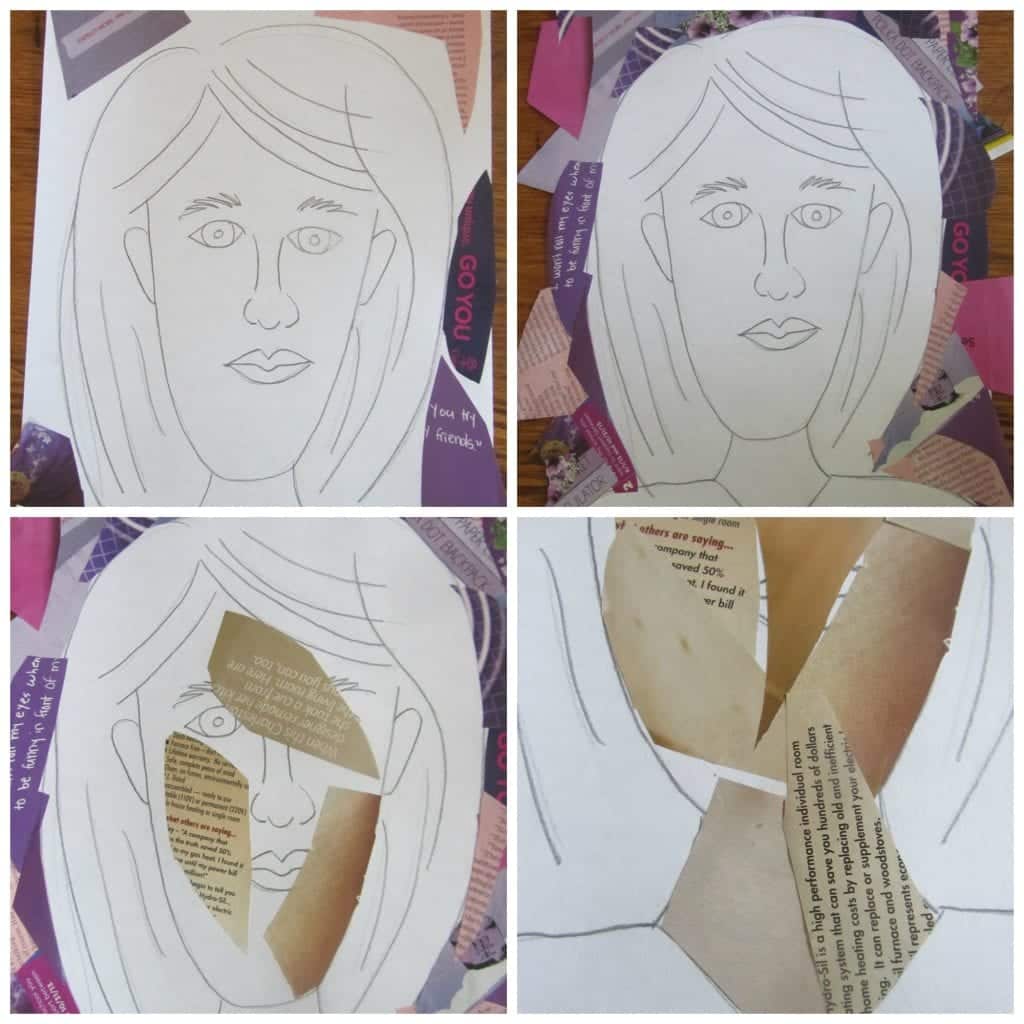
Step 7 & 8: Using flesh tones, repeat STEPS 3 & 4. Begin gluing these swatches to the face. You will need to cover up any details such as eyes, nose, and mouth that you had sketched. (The sketching was done in order to give you correct proportion.) Before completing the face, choose a few really dark or really light flesh pieces to complete the neck. It needs to be in a slightly different shade in order to appear separate from the rest of the face.
Step 9: Use smaller flesh colored scraps to fill in the white space of the face and the neck. Some pieces may need to be trimmed and rounded in order to create a crisp oval shape. Do not fill in the “ear” section with a swatch.
Step 10: Repeat STEPS 3-6 using a color pallet that matches that of your natural hair color. Some people prefer to use swatches of ACTUAL hair, while others opt for random clippings of color. When gluing these hair sections onto the portrait, follow the natural flow of your hair. This will help to create the correct movement.
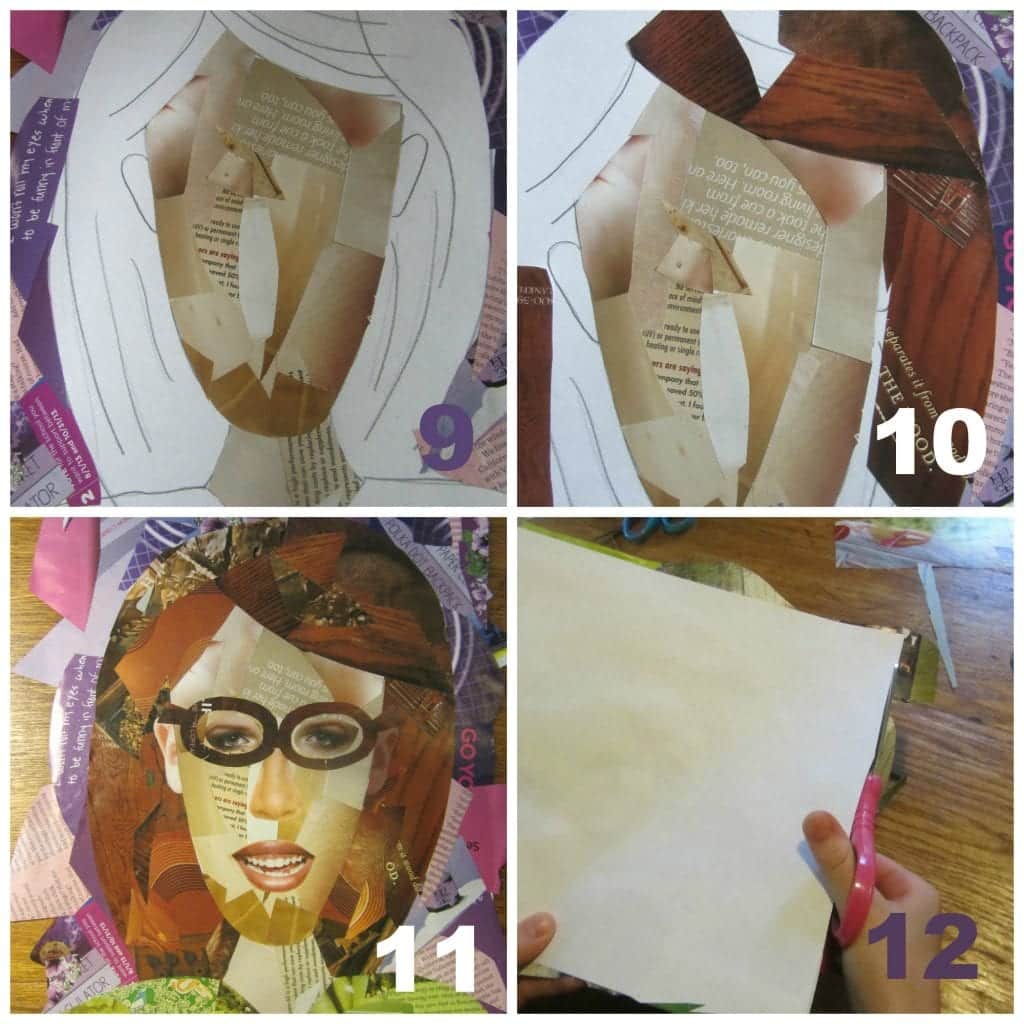
Step 11: Search the discarded magazines for large facial features that are similar to yours. If you have green eyes, look for green eyes. If you wear braces, look for a smile with braces. It will create a more interesting, abstract look if each of these facial features are cut from different magazine pages. Glue these pieces in the correct positions on your portrait remembering the “half” rule.
Step 12: At this point, you can decide to leave the protruding background swatches on the picture OR cut them off. If you choose to cut them off, turn your portrait over and use your scissors to cut around the page. Be careful to ONLY cut off the excess, NOT the portrait.
Ta-dah! You have just created an abstract self-portrait collage!

(This self-portrait collage project was completed in two hour-long art lessons. I would recommend it for children in middle elementary through high school.)
Need some more art time inspiration?
Be sure to check out these wonderfully inspiring Pinterest boards.
Art Ideas by Jamie of The Unlikely Homeschool
Art Ideas by Barb of Harmony Art Mom
Free Art Tutorials by Tricia of Hodge Podge
Work of Art by Stephanie of Harrington Harmonies


wow – Jamie, this is awesome! What a great idea. 🙂