
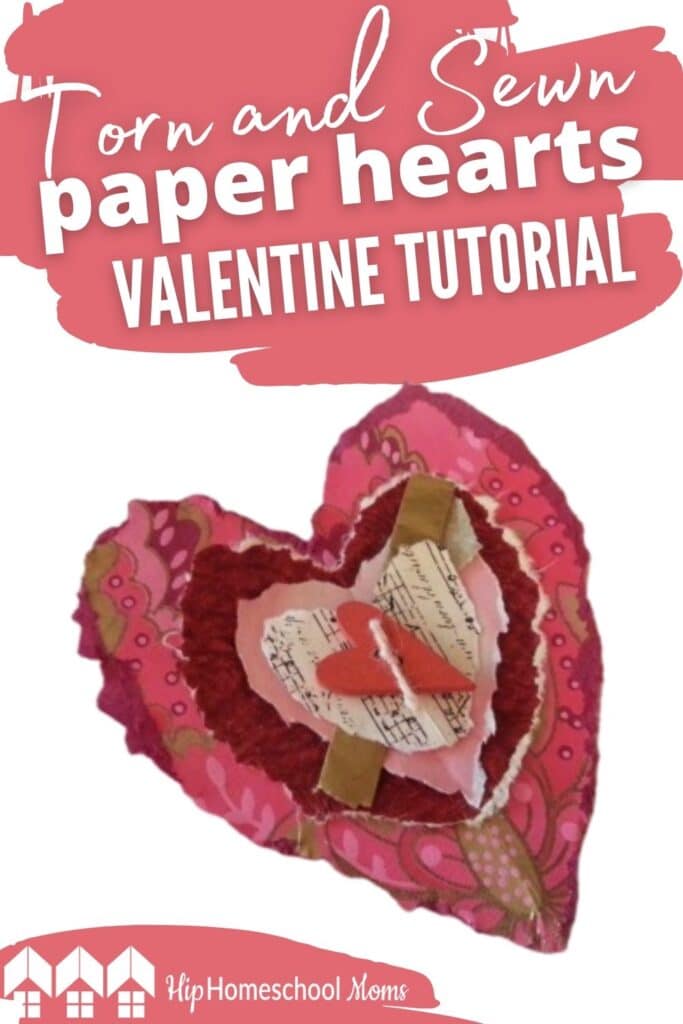
Torn & Sewn Paper Hearts Valentine Tutorial
It’s very easy to make these beautiful Torn & Sewn Paper Heart Valentines. Even better, this craft requires very few materials, so it’s quite cost effective. They’re simple enough that children of different ages can make them! In fact, they are the perfect project to introduce sewing stitches; just be prepared to adapt the idea! For example, when making these with children, have them use round embroidery needles instead of sharp ones, and pre-make the holes for them to loop the stitches through (sometimes you have to push hard when sewing through paper). For kids ages 7-10, have them make these Torn Paper Valentine Hearts with only two layers.
What you will need for this Sewn Paper Hearts Valentine Project:
- 5 x 5 in. patterned and textured paper (largest heart)
- 3.5 x 3.5 in. patterned and textured paper (second largest heart)
- 2.5 x 2.5 in patterned or valentine color paper (second smallest heart)
- 2 x 2 in. patterned or valentine colored paper ( smallest heart)
- Tissue paper in desired color or colors
- Glue
- Embellishments to be added such as a buttons, sequins, beads, or other item to be sewn
- Embroidery floss / thread in desired colors
- Embroidery needle- size 22, sharp end preferred (round for kids)
Torn & Sewn Paper Hearts Valentine Tutorial

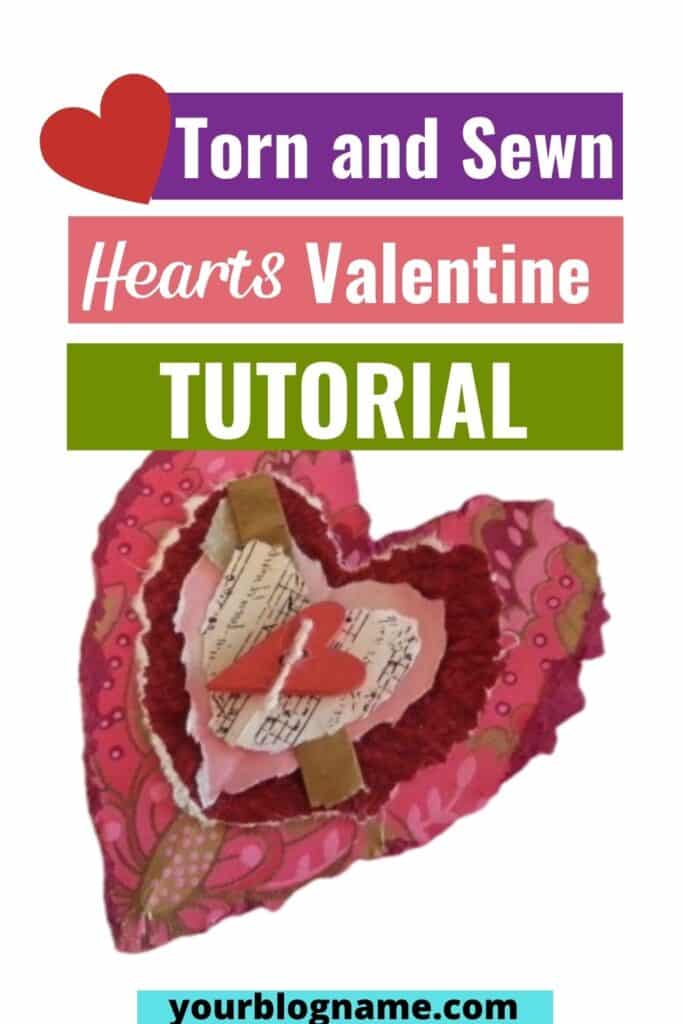
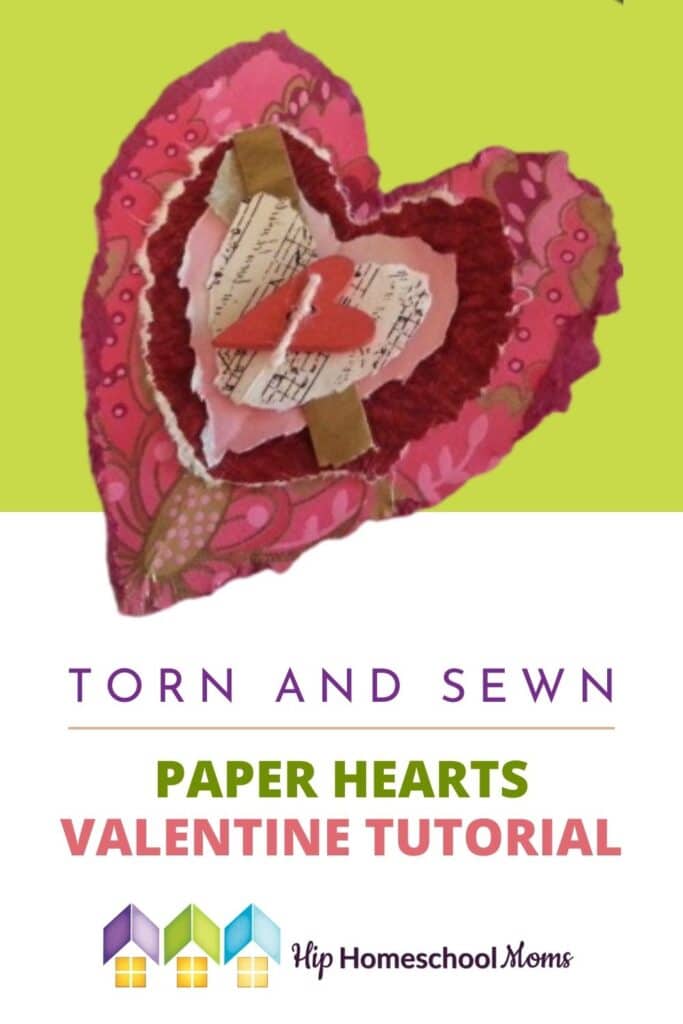
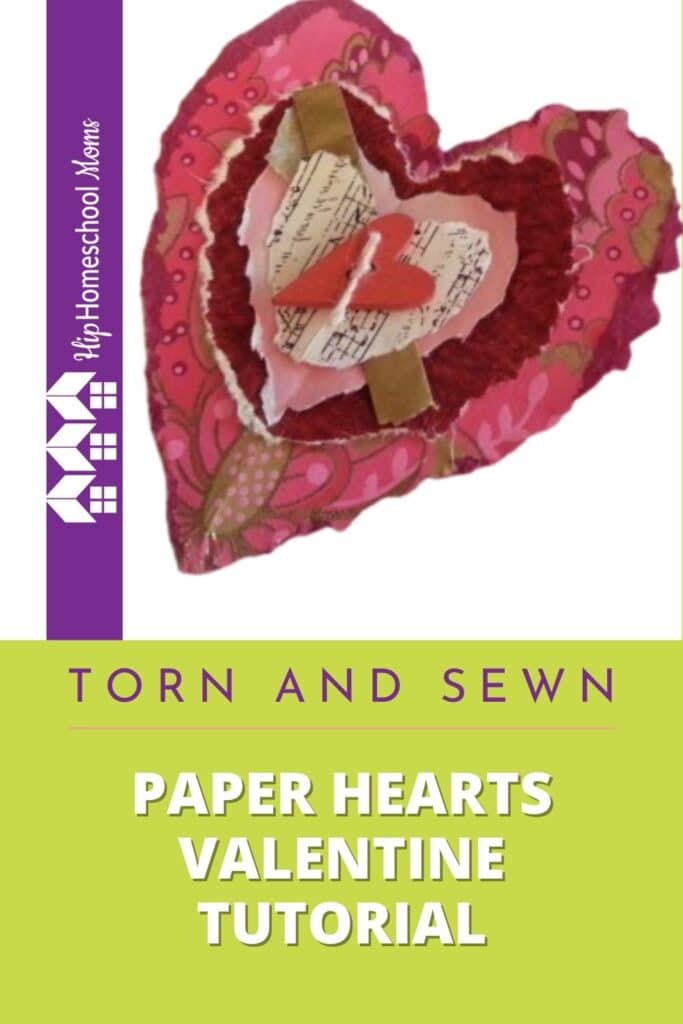
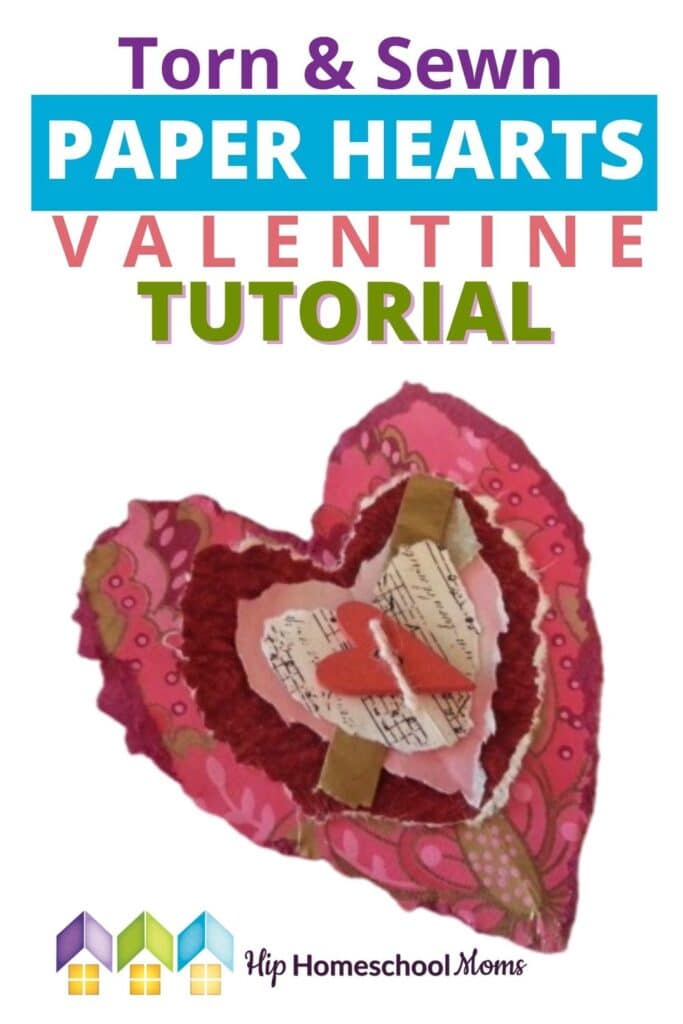
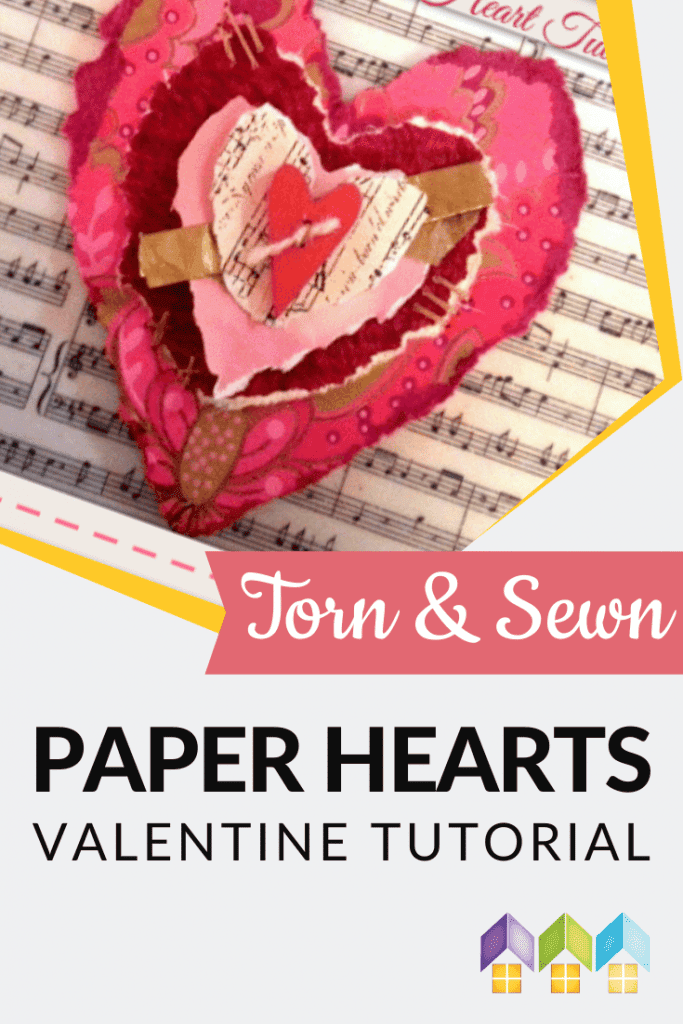
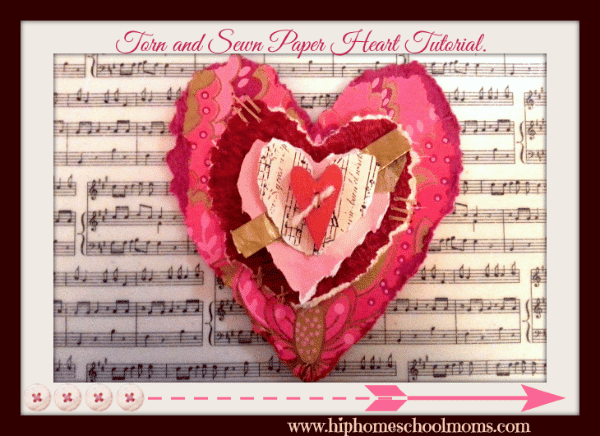
1. Begin by tearing 4 paper hearts from different papers.
Tear them the same way you would cut a heart out of paper, by folding the paper in the middle and gently tearing out half a heart. You can draw the line in pencil if it helps. If the textured paper is too heavy to tear both sides together, tear only one side and then tear the second (using the first as a guide.)This will ensure both sides are approximately the same. But don’t worry if they’re not exactly the same–the idea isn’t for them to be exact because- after all- they are torn hearts, right?
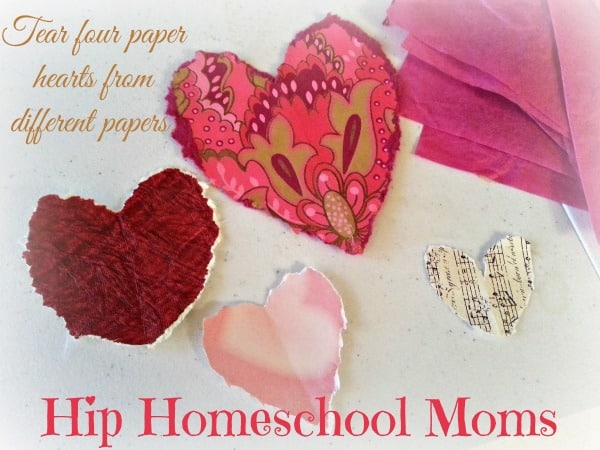
Make the largest heart out of the 5×5 in. paper and using the heaviest weight paper. This heart will also support the rest that will go on top. Repeat the same method with each heart, decreasing in size till you have four different colored and patterned hearts. If you have favorite hymns or bible verses, you might print those out on pretty heavyweight paper to get an old page feel.
2. Plan out your torn heart design before you begin to glue and sew.
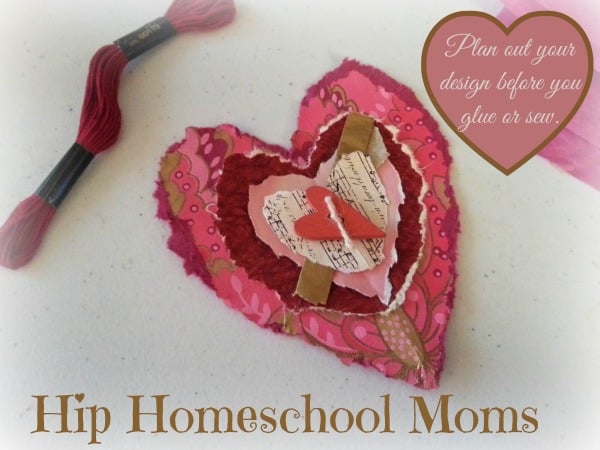
It helps me a great deal to first plan out my design. You should have already decided which paper will be used for which hearts. Next, place them in front of you in order- the largest one on the bottom and the smallest on top. Lay out your tissue paper, buttons, sequins, beads, etc. and lay them next to your paper hearts, looking at where to add them. Try a few ideas and see which you like best. In my example, I used gold tissue paper and rolled it up. Be creative here. Less is usually more; so I recommend choosing only two or three embellishments, at the most.
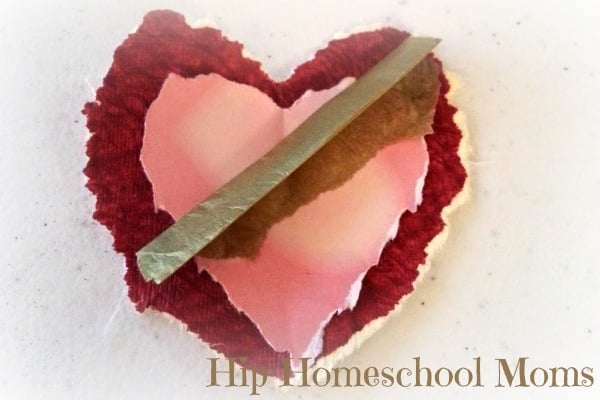
3. Glue tissue paper and let dry.
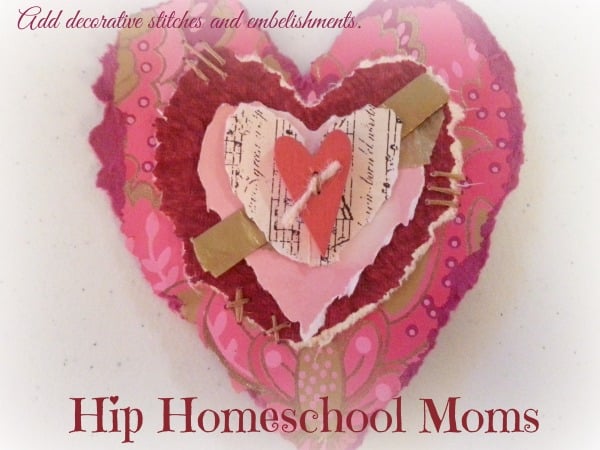
4. Once dry, sew the hearts together and add buttons or other ornaments and decorative stitches.

*Note: Thickness of paper may make paper sewing difficult. Be prepared (using a thimble if needed) to press hard so you can get through several layers. For kids, adapt this project and have them make only two layers of paper hearts. In addition, I recommend you make the holes ahead of time and have them use round embroidery needles.
Ways to use Sewn Paper Hearts:
When you’re done with your torn and sewn paper hearts, there are several different ways you can use them!
- As Valentines.
- Gift tags for presents.
- Add them to cards and letters.
- Frame them and give them as personalized wall art.
- Add them to art journals.
- Personalize them with themed ideas. For example, if the person they’re for loves fishing, be creative and choose your papers and embellishments accordingly.
- Mount them on boxes or gift bags.
- Add ribbon and tie around a bouquet of flowers or other gift.
- Turn them into hanging ornaments.
- Tape to a favorite pen or straw for fun.
- Add to a skewer and use a a plant stake in place of gift card.
I love to be creative with Valentines cards and gifts! If you like this tutorial, you’ll also want to check out Inkblot Valentines.
In what ways would you use these Sewn Paper Hearts? Any fun ideas for making your own?


These are gorgeous! I love anything with music notes. Thank you so much for sharing at A Little Bird Told Me Link Party. I am pinning them now.
Thank you!
LOVE these valentines, Stephanie! So adorable!