Easy and Fun Electricity Science Experiment


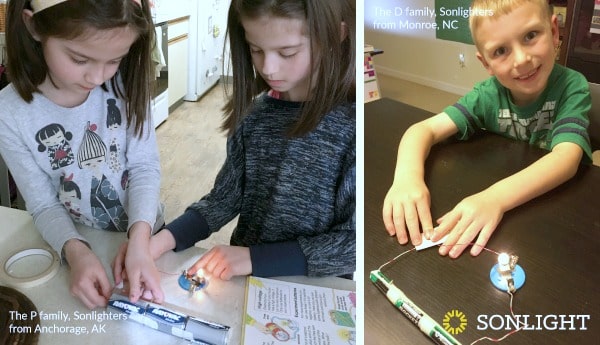
Do you have children who love science? Or would you like to have children who love science? A great way to help them develop a love for this subject is by doing science experiments like this easy and fun electricity science experiment.

Building a Simple Electrical Circuit
Before we can test whether or not various substances conduct electricity, we first have to create a working circuit.
You can collect the supplies yourself or pull them from two different Sonlight products:
- the full homeschool curriculum Science C
- the simpler Explorations in Science C kit
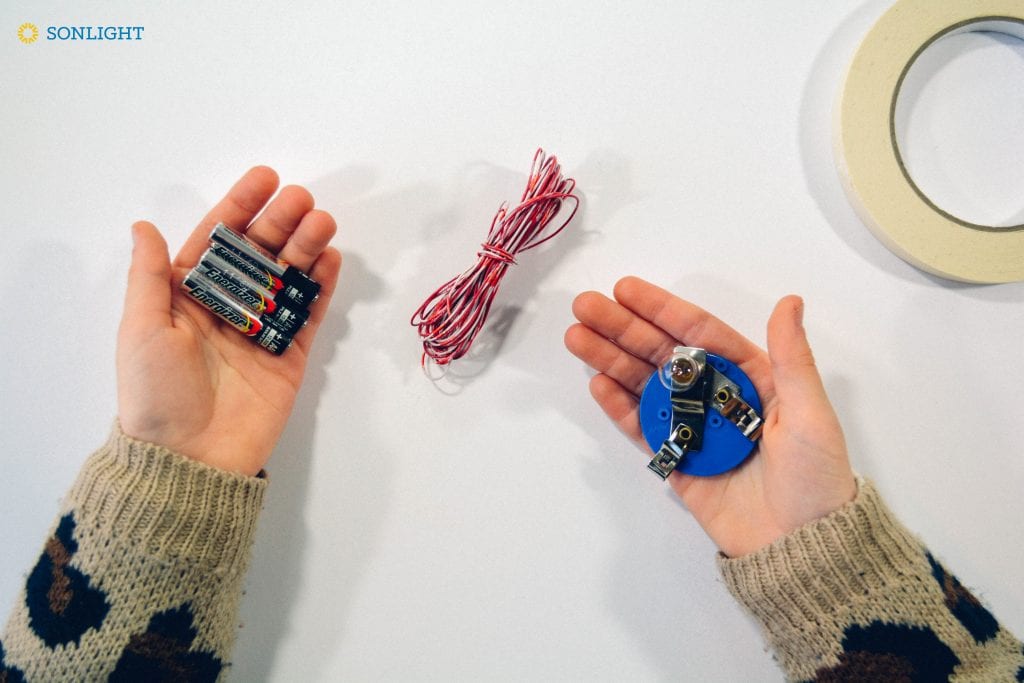
Materials Needed:
- Thin plastic-coated copper wire
- Small bulb
- Bulb holder
- Three 1.5V batteries (such as AA or AAA)
- A quarter
- A penny
- A galvanized nail
- Tinfoil
- Salt
- A small jar
- Water
- Other household materials as desired, to test their conductivity
Instructions:
Cut three sections of wire, each approximately nine inches long. Strip the plastic coating off the ends, exposing about an inch of copper wire on the end of each.

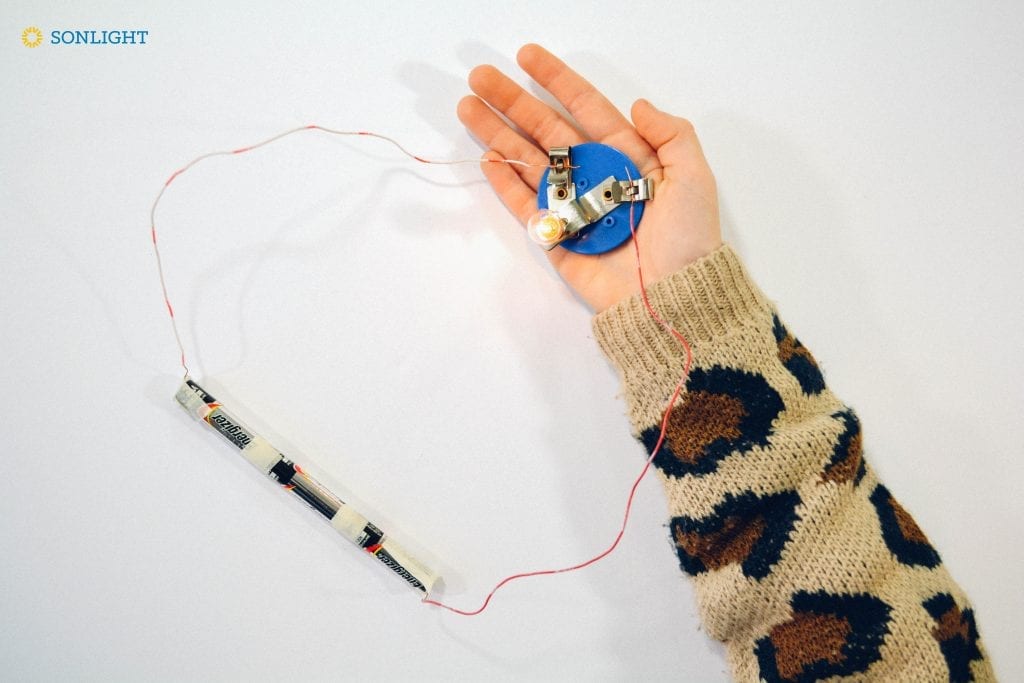
Clip two wires securely into bulb holder, as shown. You’ll use the third wire in a moment, but for now, set it aside.

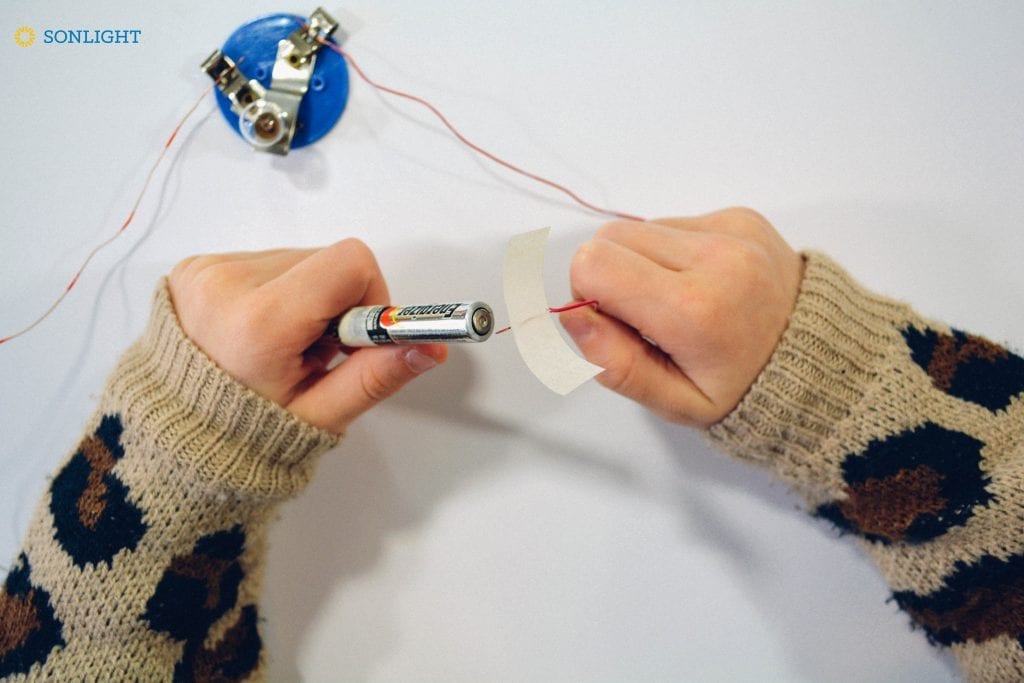
Pick up one of the wires that’s clipped to the bulb holder and place the exposed end flat against the end of a battery. Tape it down securely with masking tape.
Tape two more batteries end to end, creating one long battery. (Make sure there are no gaps, or you’ll break the circuit.) Pick up the remaining wire that’s clipped into the other side of the bulb holder, and tape the end securely to the remaining end of the long column of batteries.
If everything’s touching properly, the bulb will now illuminate.
If not, stop and check all your connections. Are the wires clipped into the battery holder properly? Are the batteries lined up end to end, + to -?
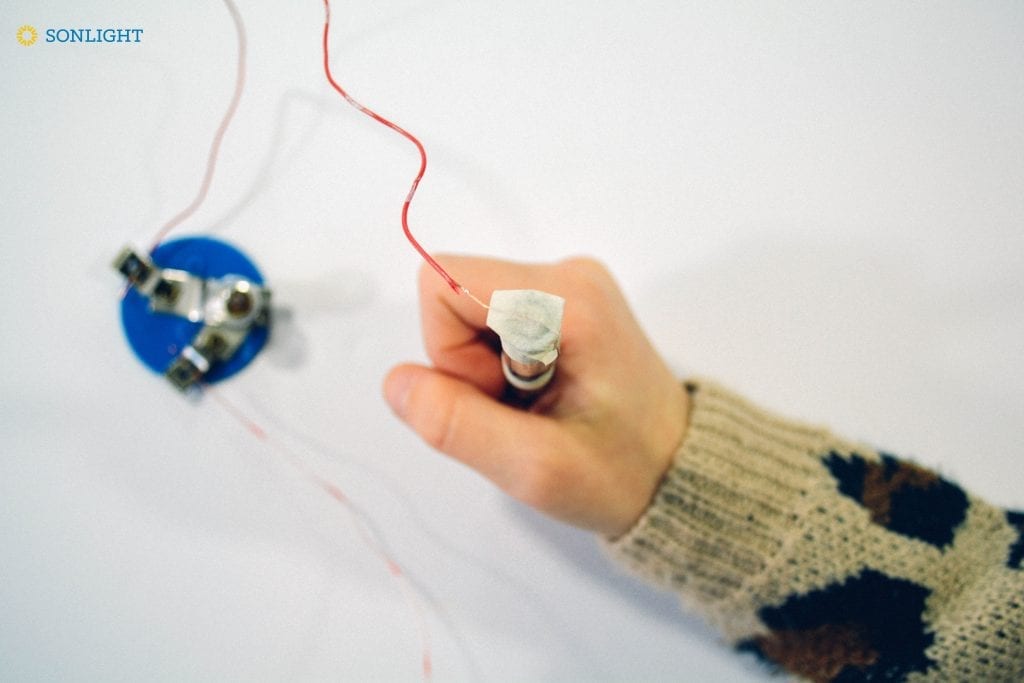
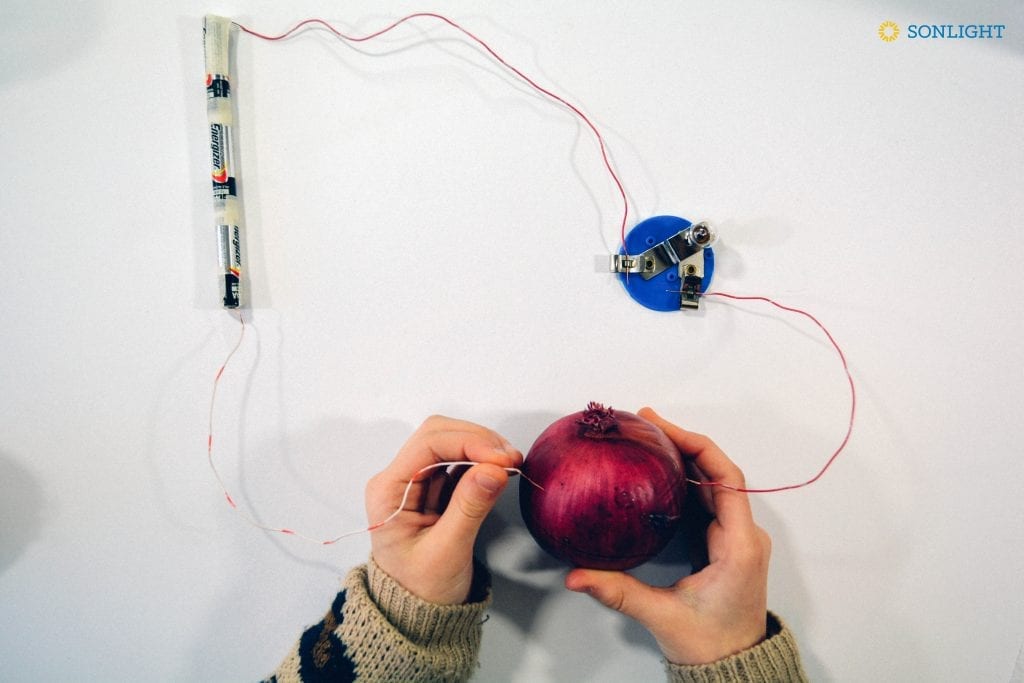
Now that you have confirmed the circuit is working, unclip the wire from the left side of the bulb holder. In its place, clip in the third wire you set aside earlier. (In the photo, the wire which was in the bulb holder is now in the student’s right hand. The new wire which is now in the bulb holder is in the student’s left hand.)
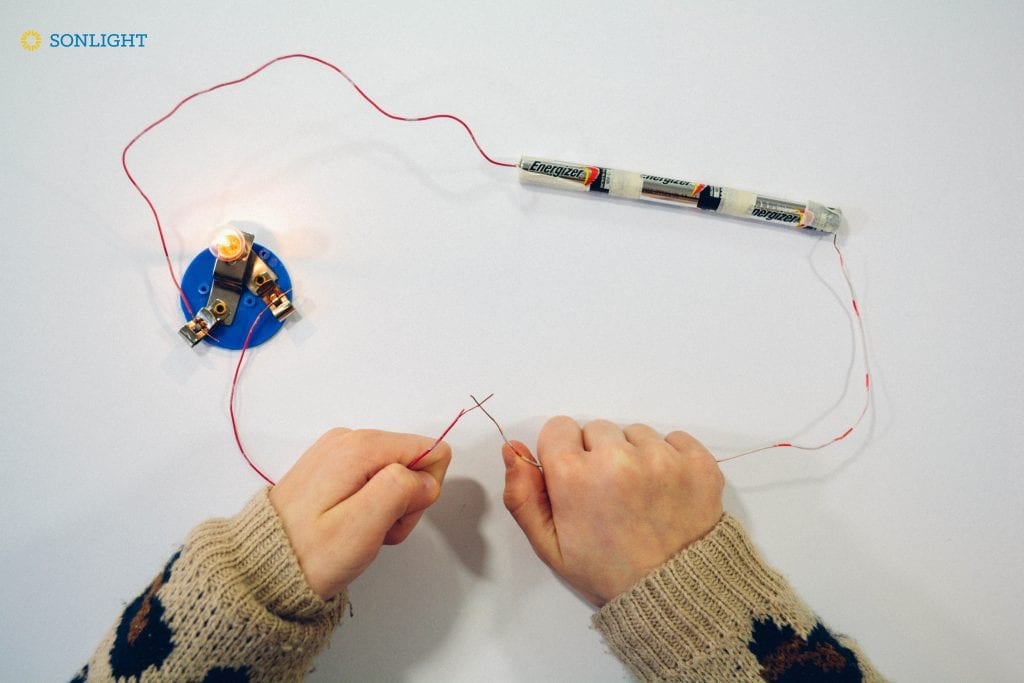
To check this new circuit, touch the wires together. If the bulb lights up, you’re ready for the next step.
Testing the Electrical Conductivity of Household Items
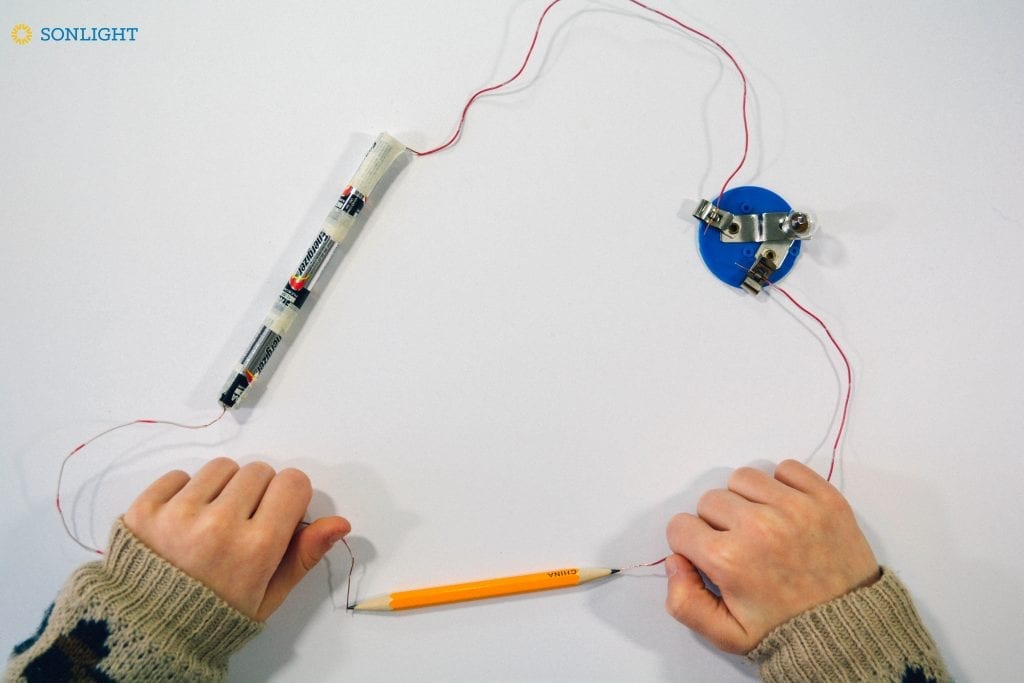
It’s time to put the scientific method to work and make predictions about electrical conductivity! Take a moment to download the accompanying lab chart. First list the substances you plan to test. Then make predictions about whether or not they’ll work to complete the circuit. Will the materials you selected cause the light bulb to glow?
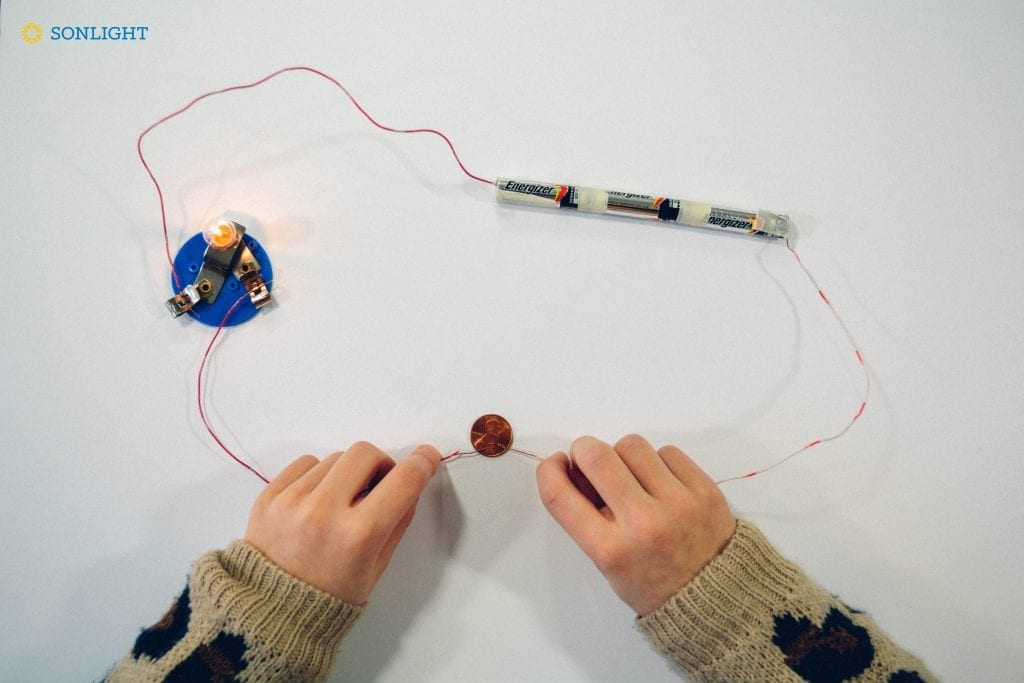
Now, get started testing! Simply touch both exposed wire ends to the material you have chosen, and watch to see what happens to the bulb. Record the results on your printable.
Select from:

Hint: Since your power source relies on the ability of the masking tape adhesive to keep the batteries touching each other—and to keep the wire touching the batteries—it’s a good idea to periodically check the condition of circuit by touching the exposed wires together. You wouldn’t want to accidentally conclude a substance was non-conductive when the real problem was just a loose bit of tape!
Why Do Some Materials Conduct Electricity Better than Others?
In order for electricity to travel from the power source to the light bulb, it must not be stopped by the test material—it has to be able to pass through and continue through the wire on the other side. A successful circuit is dependent on a fairly unrestricted flow of electrons. If the electrons can find a path through relatively easily, then the material is considered a good conductor.
Did any if your test materials work to illuminate the bulb, but only result in a very dim light? In these cases, the material did allow electrons to navigate through, but not very easily. Material like this doesn’t make a very good conductor.
And if the bulb didn’t light up at all? The electrons couldn’t find a way through!

What Impact Do Variables Have on Results?
Remember, with any scientific experiment, there are always a multitude of variables to consider. As you might have experienced, several things can go awry while testing conductivity. For example, even though a penny does indeed conduct electricity, you might not have been able to illuminate the bulb for several reasons:
- The penny might not have been clean and shiny, so the electricity couldn’t travel through the dirt and residue.
- The wire sections which touch the penny might have been dirty, sticky, or corroded.
- The batteries might not have all been touching each other.
- The wire sections attaching to the bulb holder might have become disconnected.
- The bulb might have been loose, or maybe the filament itself even burned out.
That’s a lot of different variables to troubleshoot, isn’t it? Because there are so many different factors at play, you might get different results than a sibling or friend—and you might even get different results on a different day. This, of course, doesn’t change the science of electrical conductivity, but it does go to show you how precise and exact experiments need to be, doesn’t it? Scientists know they need to make sure their results are repeatable and reproducible, and much of that often comes down to identifying variables.
You can discover more exciting experiments like this circuit activity in Sonlight Science C full curriculum or in Explorations in Science C, both delightful introductions to hands-on exploration and the scientific method.

Sonlight marries the joy of reading with the excitement of hands-on projects to bring you the most complete Science program. Programs are available from kindergarten to college-level lab sciences. Click the image above or click this link to learn more!
To learn more about Sonlight, click here!
[mks_pullquote align=”left” width=”800″ size=”18″ bg_color=”#6e597a” txt_color=”#ffffff”]
![]()
Gina Munsey is a Mexico-born, Eastern Europe-raised missionary kid who ended up in Nashville, Tennessee. A blogger for 16+ years, editor, magazine contributor, co-op teacher, and writer who has only completed four chapters of her languishing memoir, Gina spends her days full of coffee and adventures while helping her asynchronous daughter with Chinese homework. You can find Gina at oaxacaborn.com, or in the middle of [home]school surrounded by stacks and stacks of books.[/mks_pullquote]


This looks interesting. I know my son will love trying it!!
Looks like fun, thank you for sharing
Yay! Can’t wait to try this!!!
We love building circuits!!!!
This looks awesome!!!! ?
My son loves stuff like this! We will definitely give it a try. Thanks for the information.
How fun! What a great way to introduce circuits! 🙂
I remember doing something similar to this in school when I was small.
How fun! My son loves science, and we love Usbourne books. I’ll have to look into this one!
What a cool experiment! Can’t wait to give it a try!
Looks like fun!
The kids will have fun doing this.
What great ideas to use with my 6 year old grandson! My father-in-law was an electrician and we have lots of supplies in his workshop!
One of my grandsons is really interested in science. I will have to try out the project with him.
Fun activity that teaches basics of electrical circuits. Our homeschool lesson included setting up both series and parallel circuits. I found that mounting the circuits on a pegboard avoided the tricky handling of the wires by little fingers. We even made a matching game by adding a buzzer and LED light. A correct match with metal probe lit the green LED and a wrong answer activated the buzzer. We used this board for years of science lessons.
Looks like so much fun. This would make a good summer project.
Lots of great ideas!
I bet the kids would have a blast doing this
This looks like a fun diy project for the summer break. Thanks for the great idea!
I can’t wait to try some of these ideas with my 6 year old grandson!