
Montessori Math: Four Operations (Addition) with Free Printable
Montessori can be a daunting method to many homeschooling moms, especially because there is a misconception that all of the materials need to be purchased and the cost can really add up.
But in reality, The Montessori Method couldn’t be easier to do at home nowadays.
In this post, I will show you a sample lesson (addition) and give you a free printable, as well as show you how easy it is to bring Montessori to your home. We have been using The Montessori Method in our homeschool for years now, and I would love to share with you this information.
The lesson below is for ages 3-6, and there are extensions available to make this material more challenging.
Let’s get started.
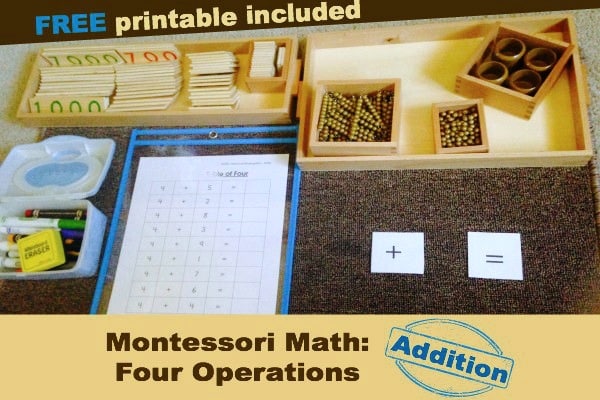
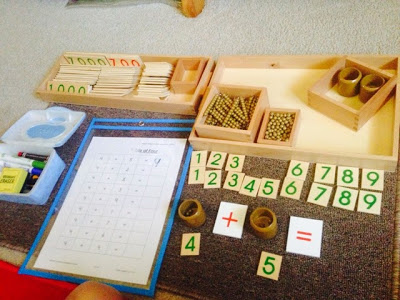
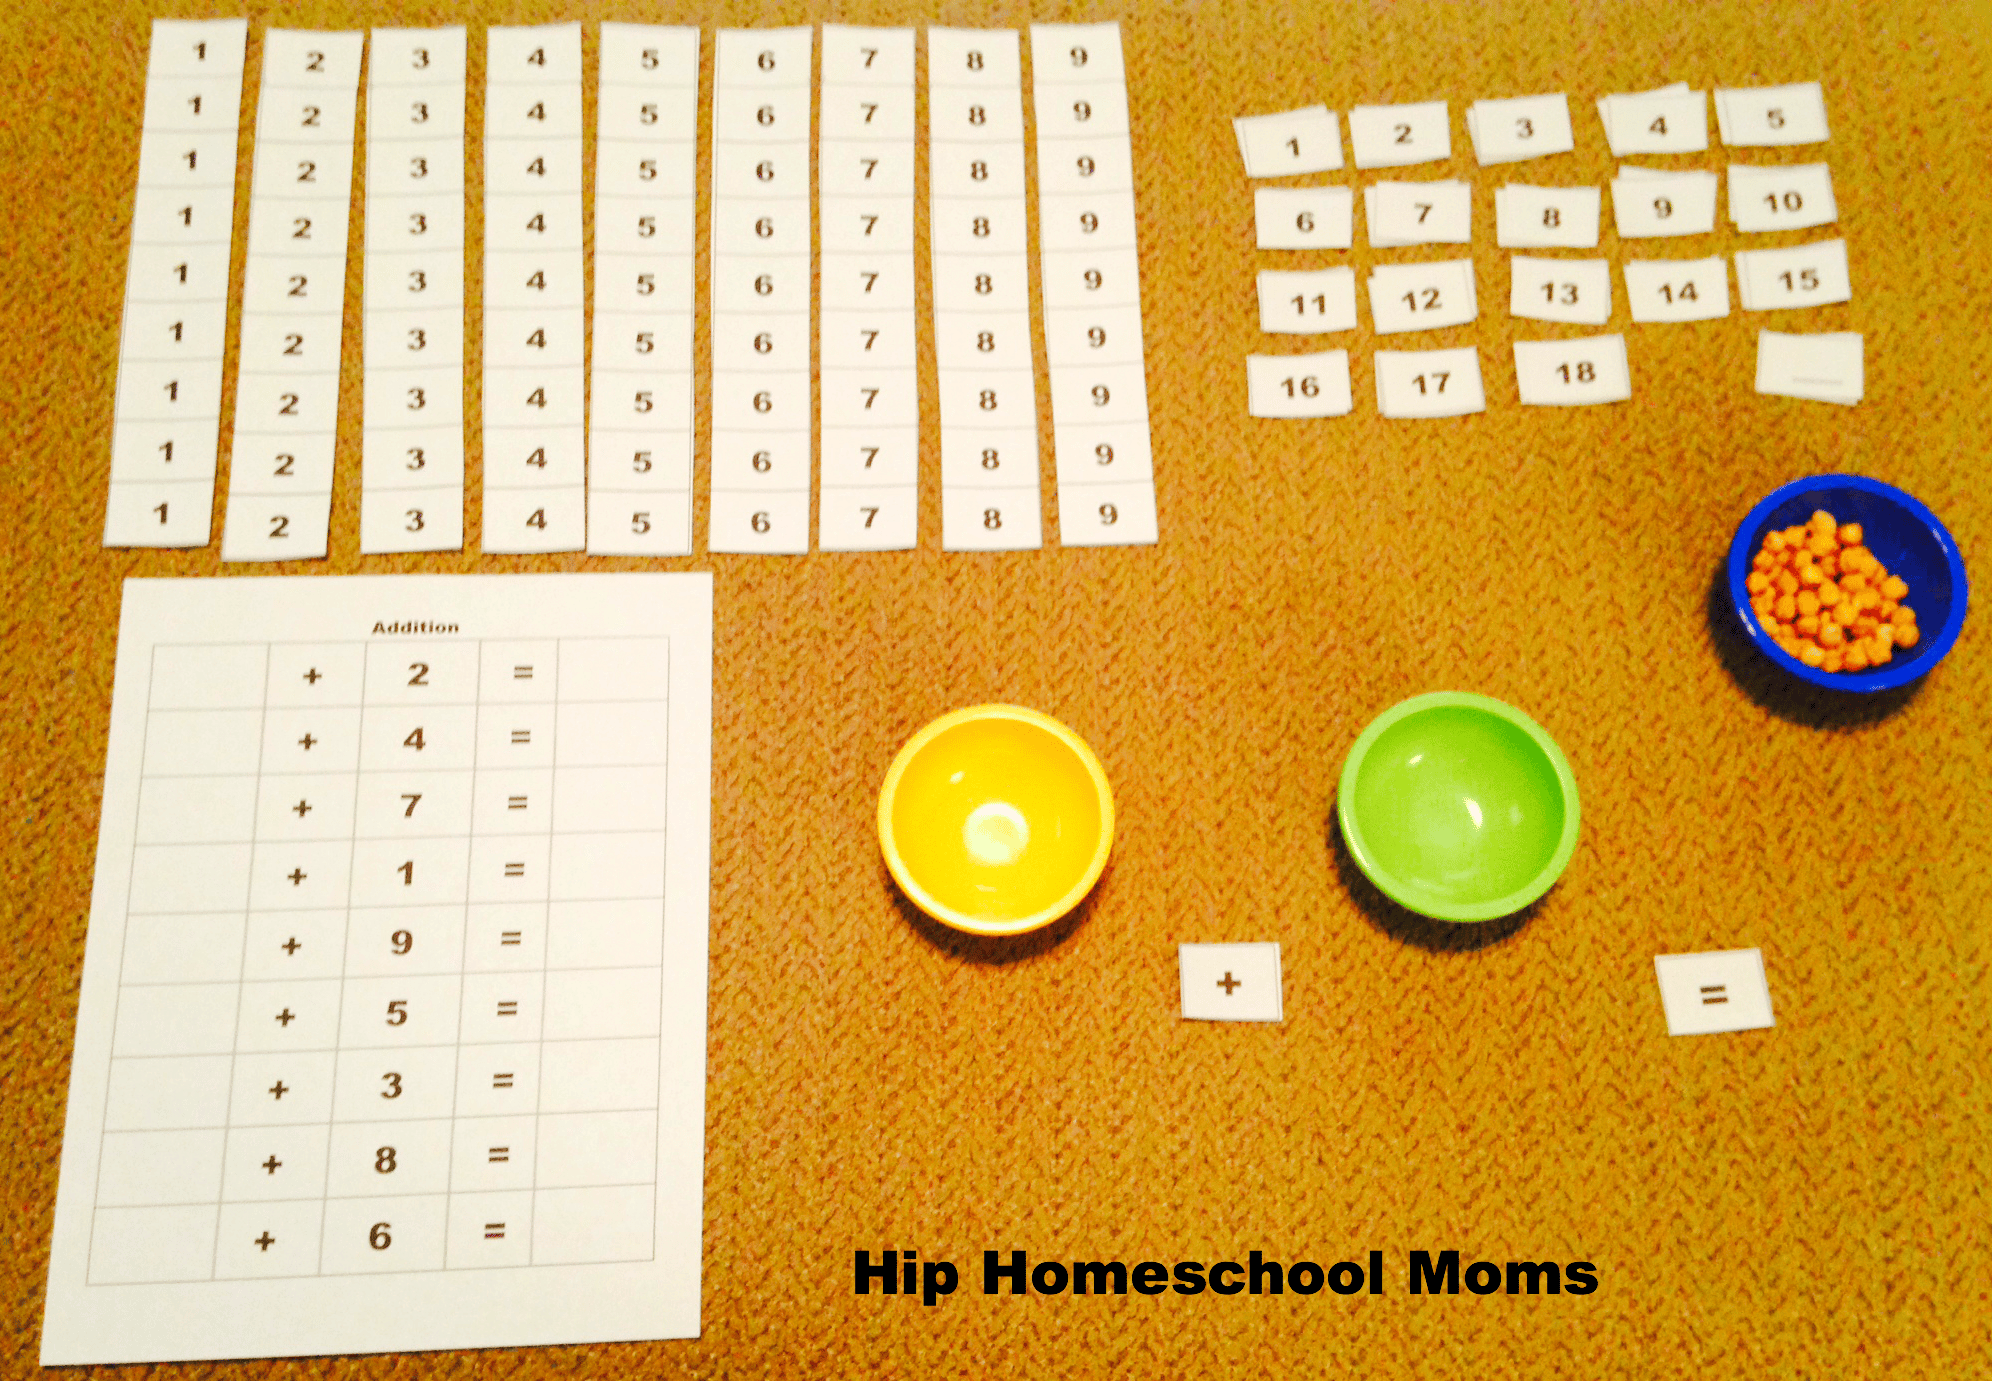
Materials needed (the first three are provided in the free printable):
1. Addition facts sheet
3. Plus (+) and Equal (=) signs
4. Beads (about 20) and 2 small containers to hold beads
6. Dry erase markers or dry erase crayons
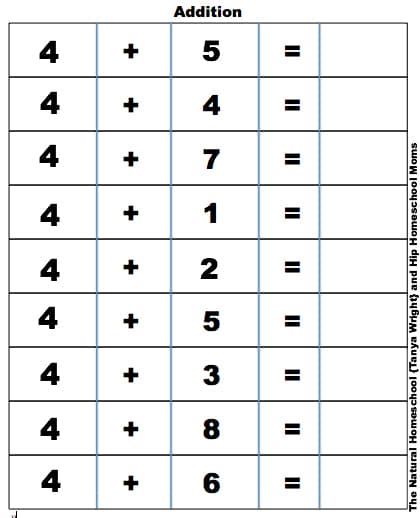
For this lesson, we are using the addition facts using the numeral four.
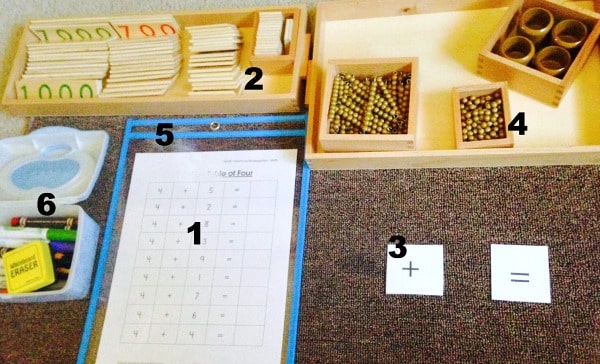
 This is the setup.
– We take the numeral four and the numeral five and place them by the plus and equal signs.
– The bead containers are placed above the numerals.
– Next, we count the correct number of beads and place inside each container (four beads in the first container and five in the second container).
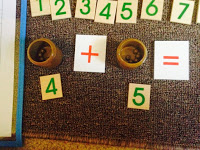
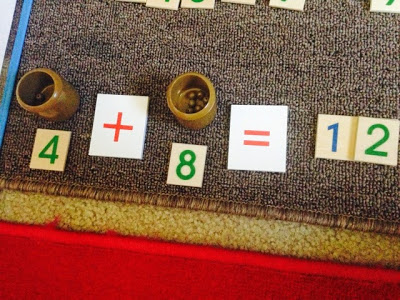
– We add the beads from both containers and place the correct answer to complete the addition fact (see picture below).
– Finally, we write the answer on the addition facts sheet using a dry erase marker or dry erase crayon.
Here is another example. This time, we are using 4+8=12.
– Put the numerals and beads back and start over with the next addition fact.
– Continue until the entire addition facts sheet is filled out.
I helped my son with the first two addition problems and then just sat nearby and let him finish up on his own. When he was done, we went over the answers together.
If your children can write numbers well, then they can use the sheet protector and the dry erase markers (or dry erase crayons).
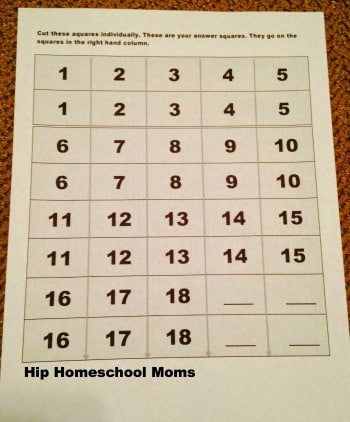
If they can’t write numbers well yet, then they can use the numbers included in the printable below. Take a look. I have included instructions to help you make your own version of The Montessori Method Addition Facts (1-9) at home.
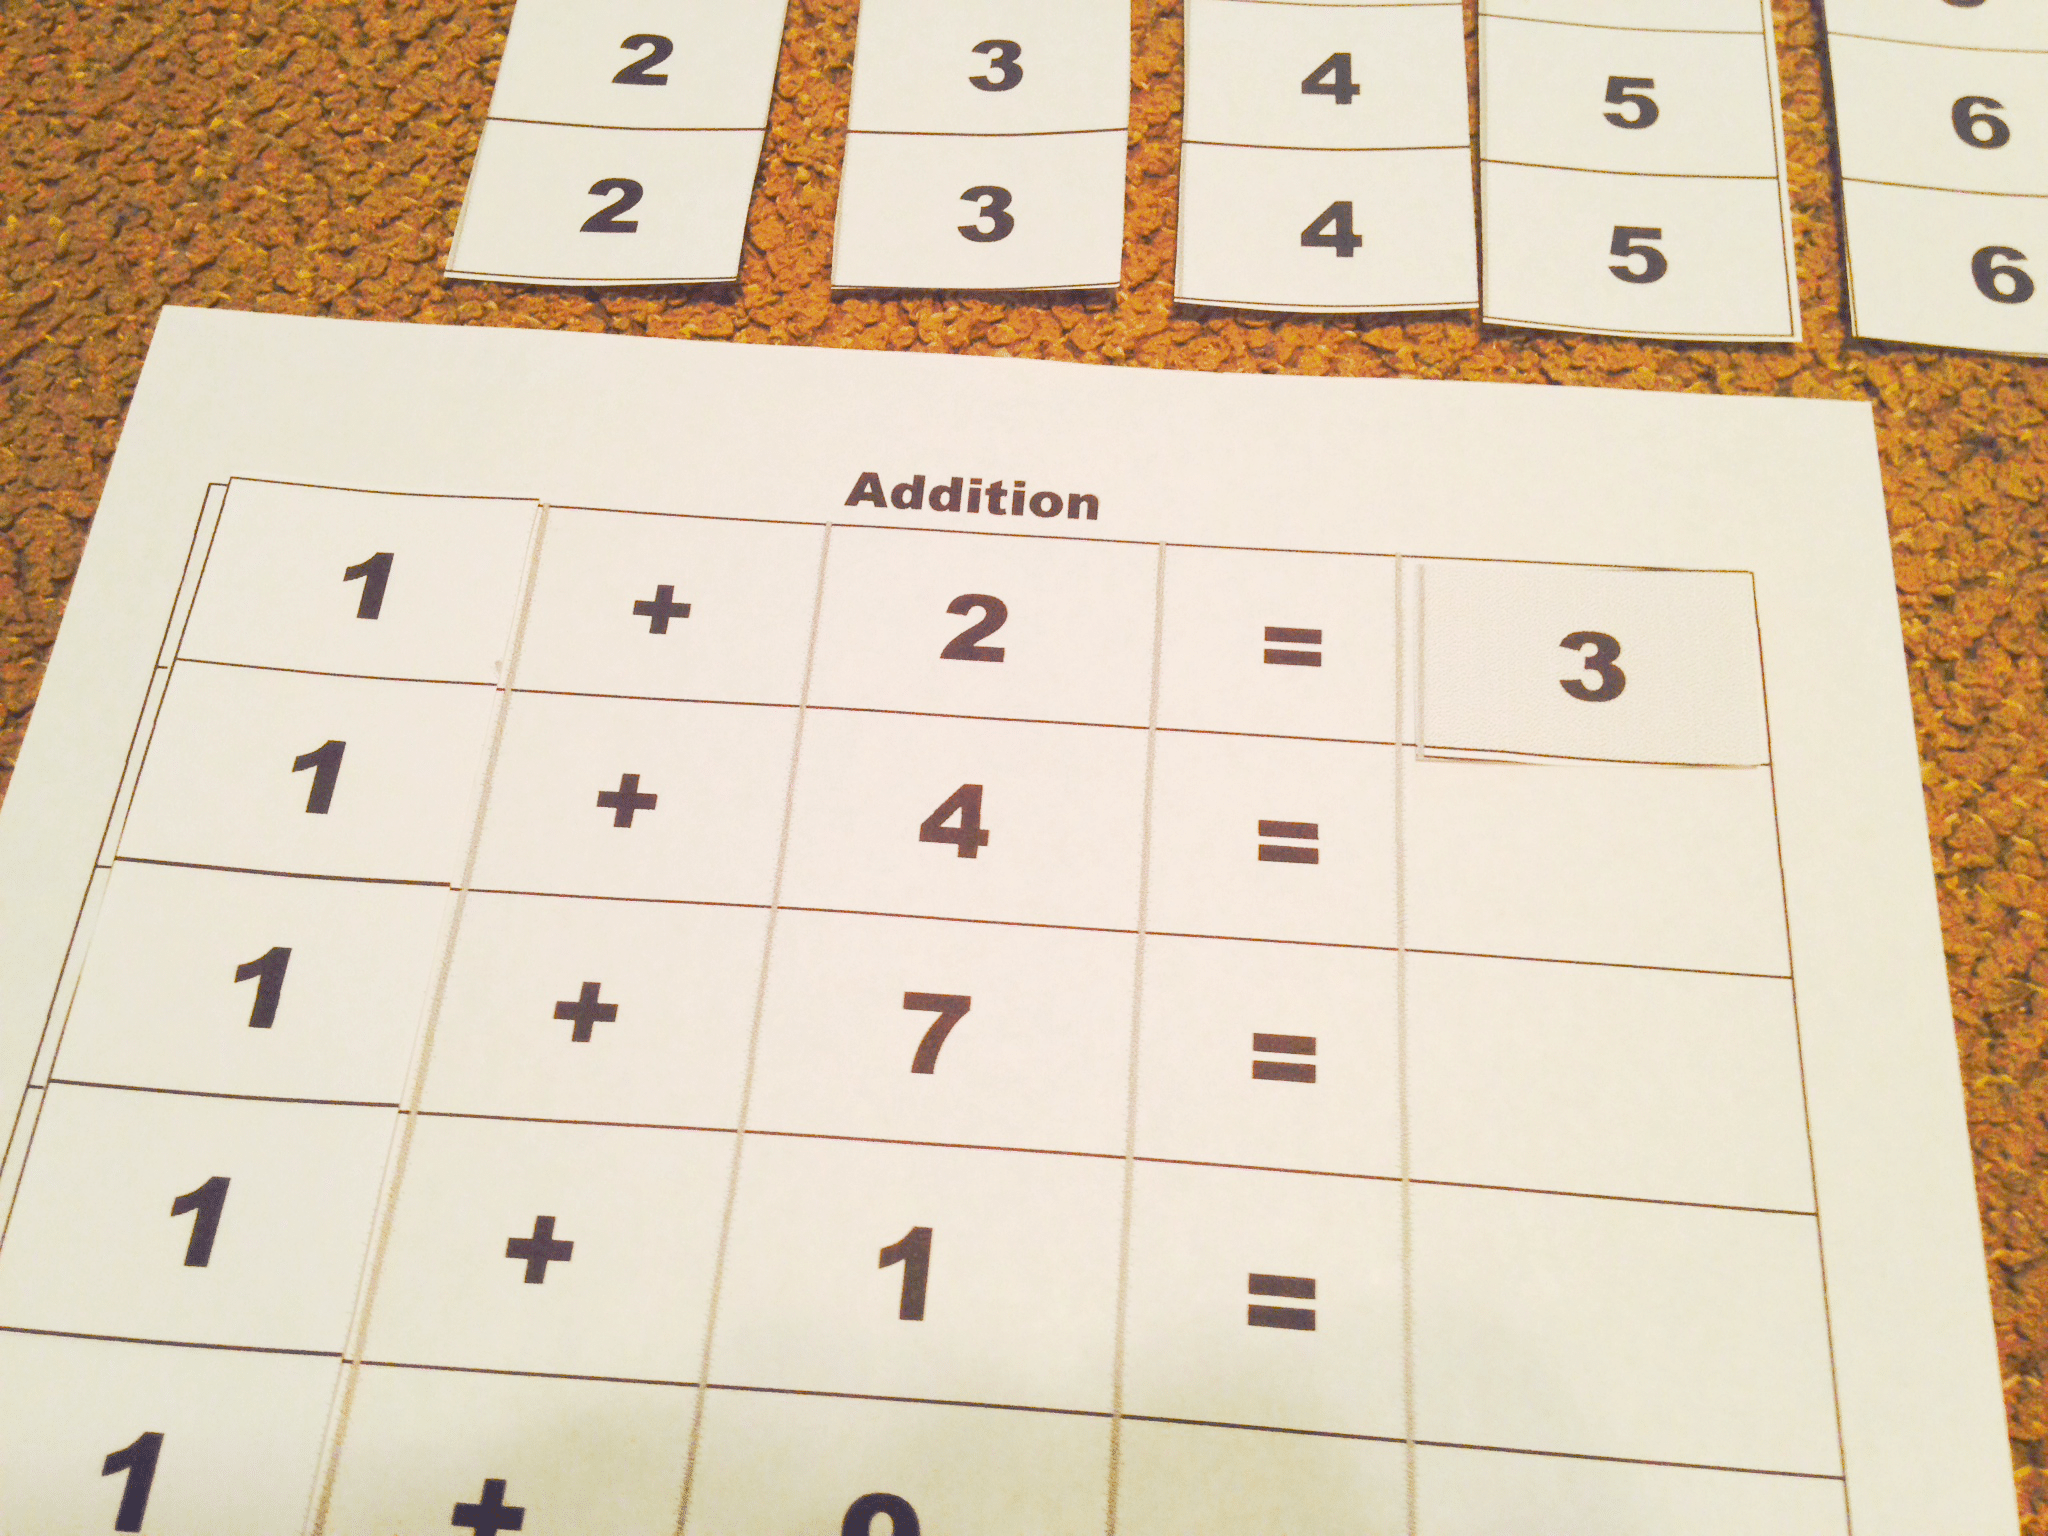
 This is the sheet with the answers.
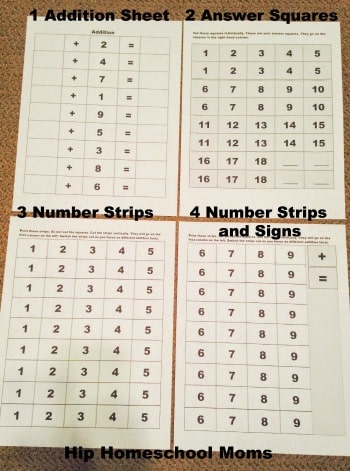
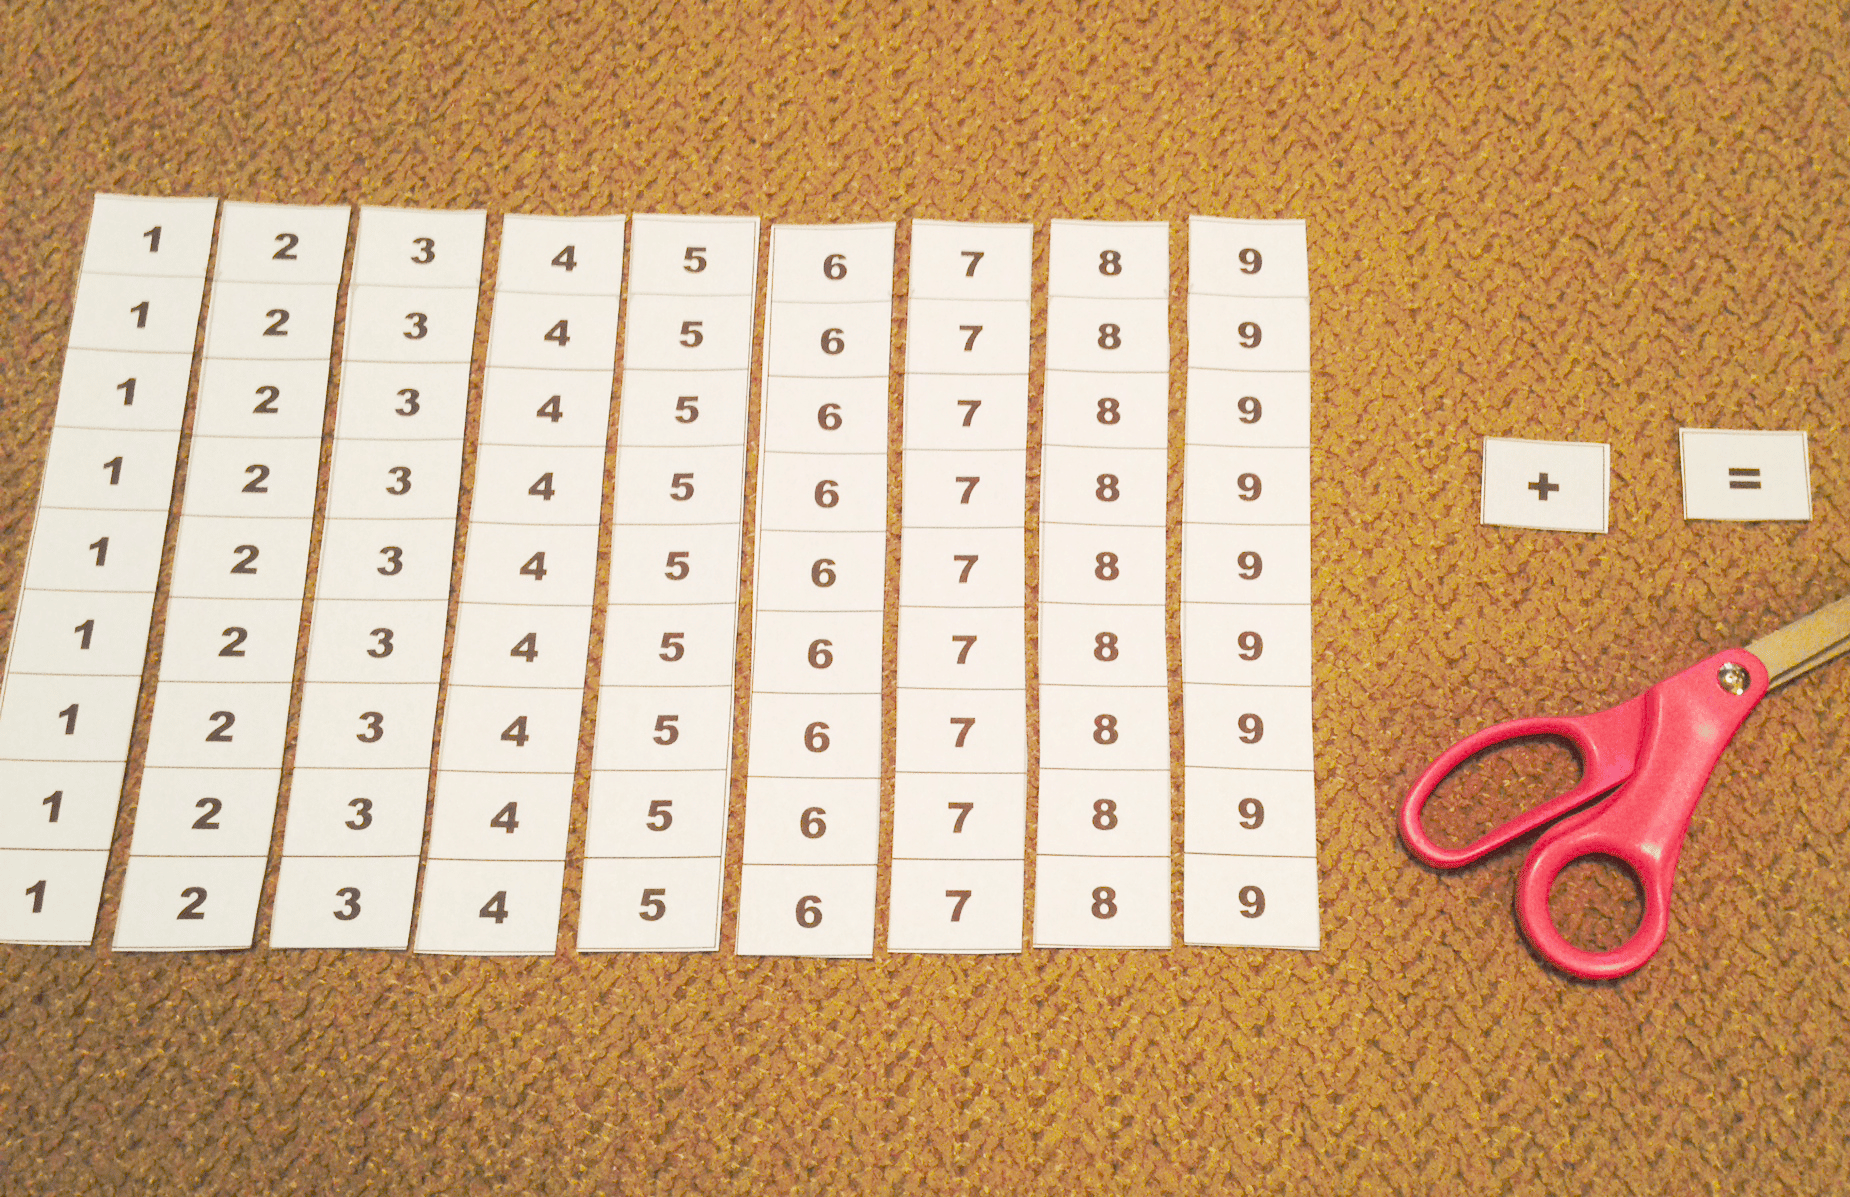
They are shaded in a light gray (to distinguish them easily, but it won’t deplete your ink cartridge because the shade is light). Cut all these squares individually. They will look like the picture below.

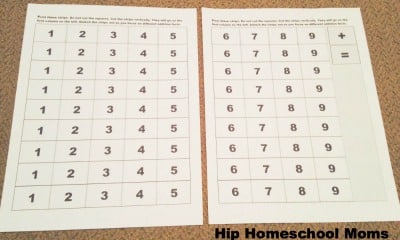
These are the two strip sheets. Please be careful with these.
DO NOT cut each square individually.
You will see arrows running down each column. You cut down each column so you have strips with the same digit running down it. Look at the two pictures below before you start cutting so you see what they are supposed to look like.

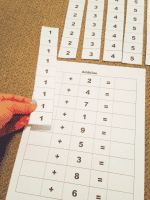
This (see below) is how the strips will be placed over the Addition Facts Sheet. Pick one set that you want to work on and place it over the Addition Facts Sheet.
That was easy and quick. Now we are ready to begin.
This is the setup for the activity. Beautiful.
I decided to use chickpeas instead of beads. If you don’t have beads, you can use chickpeas, marbles, beans, Cheerios, blueberries, buttons, you name it. Just be sure and keep an alert eye on your children as they work on this as these tiny items can be choking hazards.
Steps after setup:
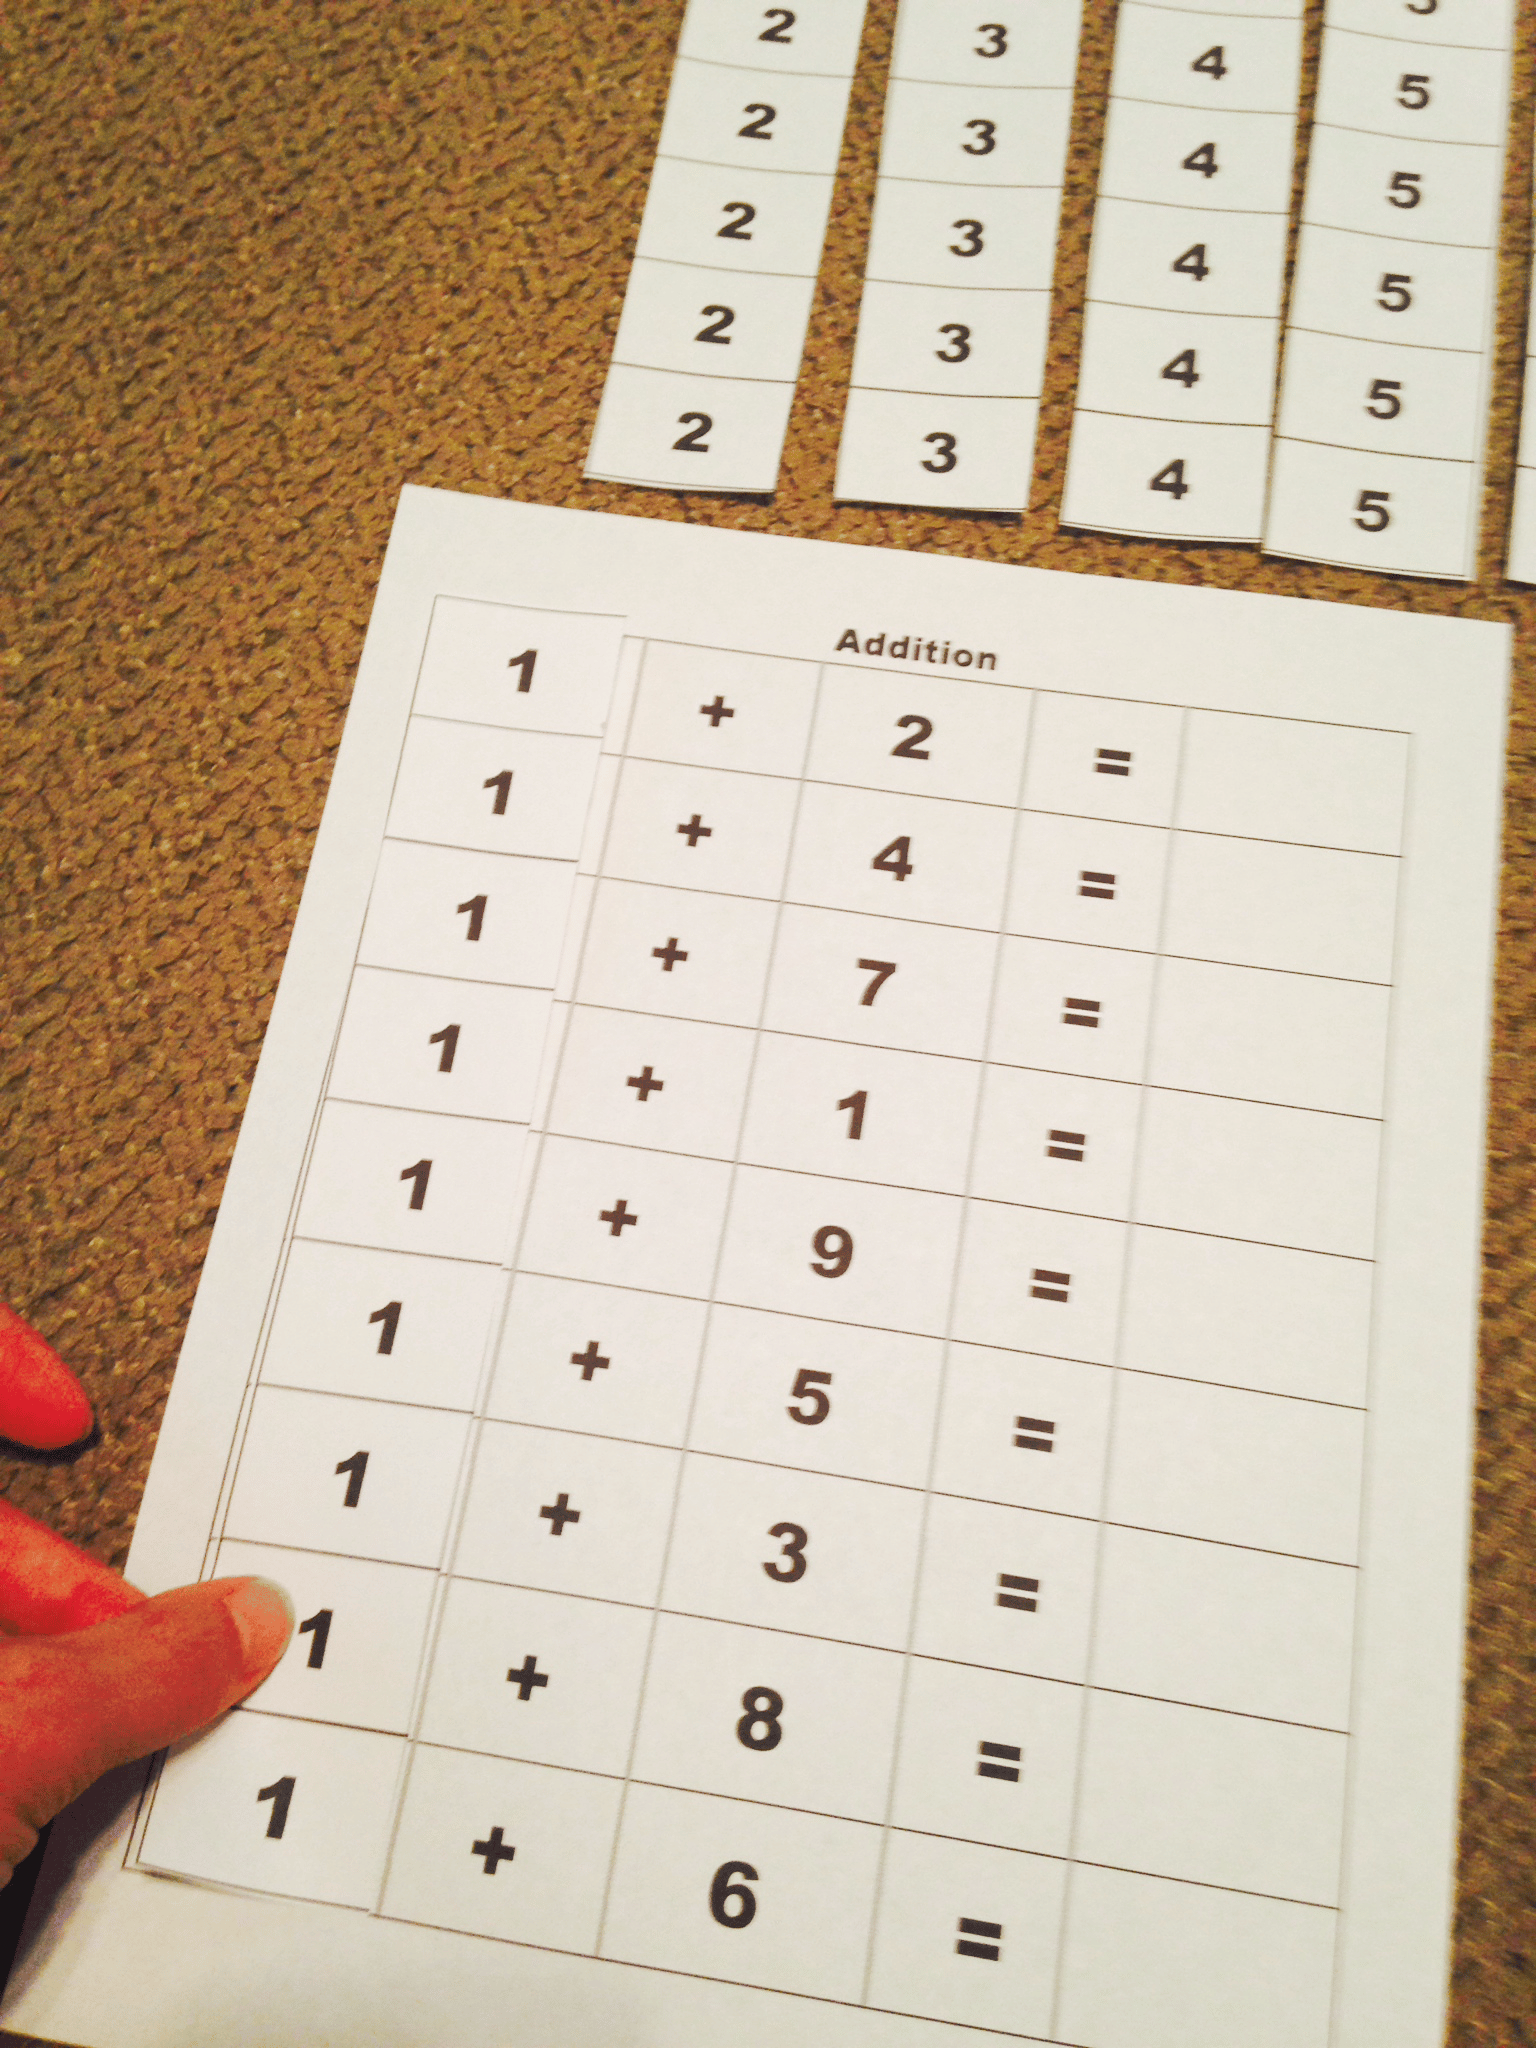
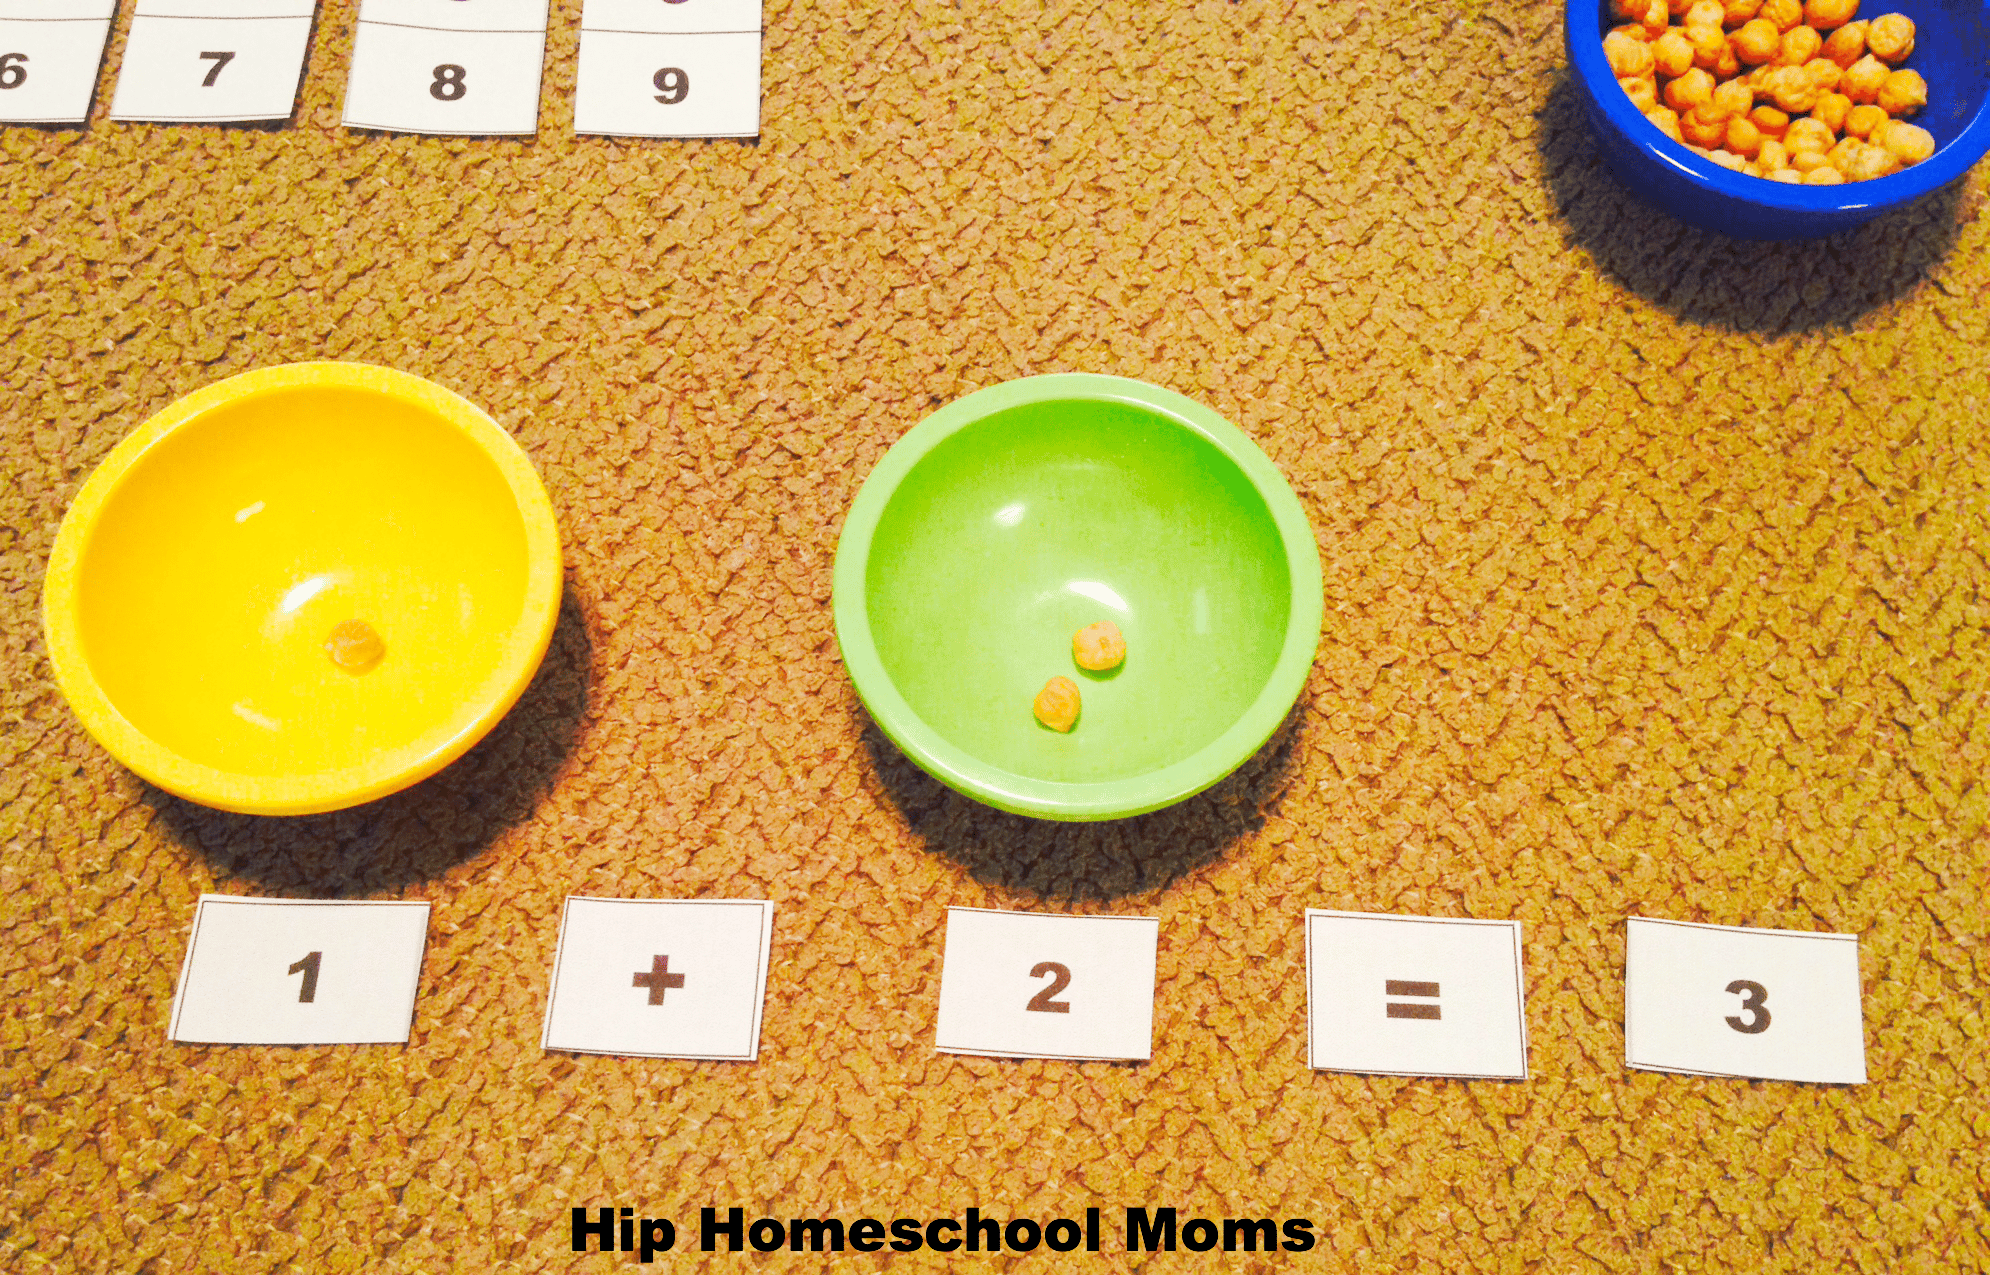
1. Place a strip over the far left column over the Addition Facts Sheet.
2. Point out what the first addition problems that you will be working on. In this case, it is 1+2= ____.
3. Place a 1 below the first bowl and a 2 below the second bowl to match the addition problem on the Addition Facts Sheet.
4. Count the right number of beads and place in first bowl. In this case, 1.
5. Count the right number of beads and place in second bowl. In this case, 2.
6. Count all beads together (add) and place an answer square next to the equal sign. In this case, the answer is 3.
7. Place another answer square (3) on the last space on the Addition Facts Sheet. It will look like the picture below.
To get these FREE printables in PDF form, Montessori Printable.
Thank you for viewing this lesson. I hope you find it helpful!


Love this idea! Pinning this for later!
Thank you so much! 🙂
Thanks so much!
I love it!!! That looks so fun!
Thanks so much for sharing your activity and free printable, Tanya! I featured your post as a Free Printable of the Day at the Living Montessori Now Facebook page and on Pinterest. 🙂
That is awesome! Thank you! 😉
Thank you for sharing.
I did something like this today with hi ho cherry o cherries and buckets.
I like the printables I will use them as well.